
How Do You Generate Unreal-Ready 3D Models From Images With Correct Scale And Materials?
To generate Unreal-Ready 3D models from images with correct scale and materials, you capture high-quality reference photographs, process them through photogrammetry software, establish real-world dimensional accuracy using physical reference objects, optimize mesh topology for real-time rendering, generate UV coordinates and bake texture maps, configure PBR materials for Unreal Engine, export assets with proper format settings, import and validate scale accuracy in Unreal Engine, and refine materials while configuring collision geometry. This comprehensive workflow ensures digital artists receive photogrammetry assets that integrate seamlessly with Unreal Engine’s deferred rendering pipeline while maintaining accurate real-world proportions and physically-based material properties.
Capture High-Quality Reference Photographs
3D artists and photogrammetry technicians capture overlapping photographs of the physical subject with 70-80% overlap ratio between consecutive images to achieve accurate point triangulation during photogrammetric reconstruction processing.
Photogrammetry practitioners position the capture camera to cover all visible surfaces from multiple viewing angles, maintaining consistent lighting conditions throughout the photographic capture session to prevent:
- Shadow artifacts
- Color variations that degrade photogrammetric reconstruction accuracy
Photogrammetry practitioners use DSLR (Digital Single-Lens Reflex) cameras or smartphone cameras equipped with fixed exposure settings to maintain brightness uniformity across the complete photographic image dataset.
Threedium’s artificial intelligence-powered 3D generation platform simplifies this initial photogrammetry capture stage by accepting single reference images and automatically generating multi-angle geometry data, eliminating the need for 3D artists to conduct extensive photo capture sessions while preserving photogrammetric reconstruction quality standards.
Process Images Through Photogrammetry Software
3D artists import the captured photographic dataset into photogrammetry applications such as:
- RealityCapture (commercial software by Capturing Reality)
- Agisoft Metashape (professional software by Agisoft LLC)
- Meshroom (open-source AliceVision-based application)
These applications analyze common feature points across multiple images and triangulate the feature points’ spatial positions to generate dense point clouds representing three-dimensional surface geometry.
| Software | Processing Capability | Key Features |
|---|---|---|
| RealityCapture | Thousands of images in several hours | Workstation hardware optimization |
| Agisoft Metashape | High-volume production | Batch processing automation |
| Meshroom | Open-source solution | AliceVision-based processing |
Photogrammetry software applications construct high-polygon count meshes from the generated dense point clouds, capturing surface texture variations and physical material imperfections at sub-millimeter precision levels (less than 1 millimeter geometric accuracy).
Establish Real-World Dimensional Accuracy
3D artists include physical reference objects with known dimensions in the photographic capture setup, such as:
- Calibration targets (standardized reference markers)
- Measuring scales (rulers and tape measures)
Artists input the actual physical measurements into photogrammetry software applications to calibrate spatial data to accurate real-world proportions. This dimensional calibration method prevents arbitrary scaling errors that create size discrepancies when 3D artists import photogrammetry assets into Unreal Engine game development environments.
For character model photogrammetry, 3D artists place a 30-centimeter ruler (12-inch reference scale) within the photographic capture frame and specify this physical measurement during the photogrammetry alignment process to ensure the final reconstructed mesh matches realistic human body proportions.
Architectural photogrammetry subjects benefit from including geodetic survey markers with GPS coordinates (Global Positioning System geographic data) that establish:
- Absolute spatial scale
- Geographic orientation for building and structure reconstruction
Optimize Mesh Topology For Real-Time Rendering
3D artists convert high-polygon photogrammetry output meshes into low-polygon optimized versions suitable for real-time game engine rendering by performing retopology (polygon mesh reconstruction) in 3D modeling applications:
- Blender (open-source software by Blender Foundation)
- ZBrush (digital sculpting software by Pixologic)
- Autodesk Maya (professional 3D software by Autodesk Inc.)
3D modeling artists create clean quad-based polygon topology (four-sided polygon mesh structure) that follows the 3D object’s natural edge flow patterns while maintaining visual silhouette accuracy and preserving primary surface features from the original high-resolution mesh.
Target polygon counts:
| Asset Type | Polygon Count Range | Use Case |
|---|---|---|
| Hero assets | 20,000-50,000 triangles | Primary featured models |
| Background props | 5,000-20,000 triangles | Secondary environmental objects |
| Standard assets | 10,000-30,000 triangles | General purpose models |
Auto-rigging (automated skeletal rigging) of humanoid character models requires proper edge loop placement around:
- Skeletal joint areas
- Mesh deformation zones to enable smooth character animation deformation
Generate UV Coordinates And Bake Texture Maps
3D artists create UV coordinates (2D texture mapping coordinates) for the optimized mesh by unwrapping the three-dimensional surface geometry into two-dimensional texture space, reducing texture stretching distortion and maximizing texel density (texture pixel distribution) across visually important surface areas.
3D artists bake texture data from the high-polygon source mesh onto the low-polygon target mesh, transferring geometric surface detail into:
- Normal map textures (surface normal direction data)
- Albedo maps (diffuse color textures) containing base surface color information without baked lighting data
- Roughness maps defining surface microsurface smoothness properties
- Metallic maps specifying electrically conductive material regions
- Ambient occlusion maps capturing indirect light accessibility in surface crevices and recessed areas
Texture Resolution Standards:
- 4096×4096 pixel resolution (4K textures) for hero assets
- 2048×2048 pixel resolution (2K textures) for secondary objects
Threedium’s material and texture refinement tools (automated PBR texture generation system) automatically generate complete PBR texture sets from source photographic images, ensuring 3D artists receive proper texture channel separation and correct value ranges for Unreal Engine rendering compatibility.
Configure PBR Materials For Unreal Engine
3D material artists develop Physically Based Rendering (PBR) materials that separate surface physical characteristics into distinct texture channels matching Unreal Engine’s material system requirements and shader graph framework specifications.
Material Configuration Guidelines:
| Property | Value Range | Material Examples |
|---|---|---|
| Albedo | 50-240 sRGB range | Energy conservation principles |
| Roughness | 0.0 (mirror-smooth) to 1.0 (matte) | Polished metal: 0.2, Concrete: 0.9 |
| Metallic | 0.0 (dielectric) or 1.0 (conductor) | Plastic/wood: 0.0, Metal: 1.0 |
Material artists connect normal map textures (surface direction data) to the material shader’s normal input node with proper tangent space orientation (surface-aligned coordinate system) to ensure accurate surface normal direction for lighting calculations.
Unreal Engine game engine uses these PBR texture inputs to calculate realistic light interaction physics through its deferred rendering pipeline (multi-pass rendering architecture), producing physically accurate reflections, refractions, and subsurface scattering effects.
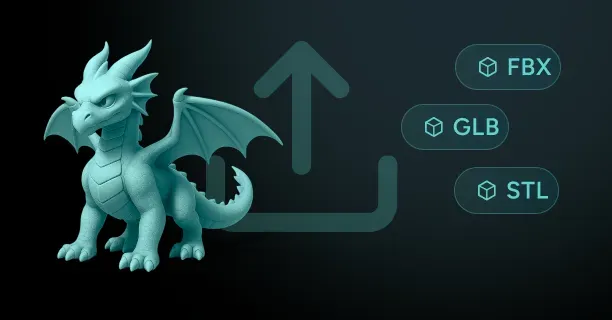
Export Assets With Proper Format Settings
3D artists export the finalized 3D model as FBX files (Filmbox interchange format by Autodesk) using version 2020 or newer specifications to ensure compatibility with Unreal Engine’s asset import pipeline system.
Export Configuration Requirements:
- Coordinate system: Z-up orientation (vertical axis configuration)
- Polygon conversion: Enable automatic triangulation (quad-to-triangle)
- Texture embedding: Embed files within FBX or maintain consistent relative file paths
- Scale factors: - 1.0 for centimeter scale models - 100.0 for meter scale models
- Collision meshes: Include with ‘UCX_’ naming prefix
Import And Validate Scale Accuracy In Unreal Engine
3D artists import the FBX asset into Unreal Engine game editor and verify dimensional accuracy by comparing imported mesh measurements against original reference values using Unreal Editor’s built-in measurement tools.
Validation Process:
- Open Static Mesh Editor (mesh inspection interface)
- Examine bounding box dimensions in Details panel
- Compare against default mannequin character model (190 centimeters tall)
- Adjust import scale settings if discrepancies detected
- Verify texture assignment accuracy in material slots
- Test under various lighting scenarios
Refine Materials And Configure Collision Geometry
Material artists fine-tune PBR material parameters in Unreal Engine’s Material Editor (node-based shader programming interface) by adjusting:
- Texture tiling (UV repetition)
- Normal map intensity (surface detail strength)
- Roughness multipliers (surface smoothness scaling)
Special Material Configurations:
| Material Type | Configuration | Purpose |
|---|---|---|
| Thin geometry | Two-sided rendering mode | Foliage, fabric visibility |
| Translucent materials | Specular intensity, subsurface color | Skin, wax light behavior |
| Physics objects | Simplified collision geometry | Reduced computational overhead |
Technical artists create simplified collision geometry using primitive shapes:
- Box colliders (rectangular volumes)
- Sphere colliders (spherical volumes)
- Convex hull shapes (simplified wrapping geometry)
Technical artists test collision geometry accuracy by enabling collision visualization mode (physics boundary display) in the Unreal Editor and simulating physics interactions with other scene objects to verify collision response behavior accuracy.
Material artists verify material rendering quality under dynamic lighting conditions by placing the imported asset in test level environments with varying:
- Light temperatures (color warmth measured in Kelvin)
- Intensities (brightness strength)
- Angles (directional orientation)
This ensures PBR texture maps produce consistent and believable photorealistic results across different environmental lighting scenarios.
Which Unreal Engine Export And Material Settings Reduce Rework After Generating A 3D Model From Images?
Unreal Engine export and material settings that reduce rework after generating a 3D model from images include:
- Optimizing the export format to FBX (Filmbox format by Autodesk) or glTF 2.0 (GL Transmission Format)
- Applying automated retopology algorithms to optimize mesh topology structure
- Implementing PBR (Physically Based Rendering) texture maps with proper channel packing configuration
- Validating coordinate system alignment to Unreal Engine’s Z-up standard coordinate convention before the import process
These optimized export settings and material configurations prevent common integration issues during Unreal Engine import, including:
- Incorrect model orientation (misaligned coordinate systems)
- Excessive polygon counts that negatively affect real-time rendering performance
- Texture display errors caused by color space mismatches
All of which would otherwise require time-consuming manual corrections in Unreal Engine’s editor interface.
The AI-powered 3D generation platform automatically produces photogrammetry models with pre-configured export settings that precisely match Unreal Engine’s technical requirements (including coordinate system conventions, texture format specifications, and polygon optimization standards), thereby minimizing the production time spent on post-generation cleanup tasks and manual asset correction.
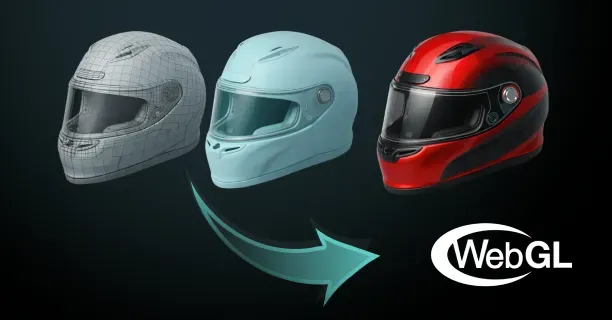
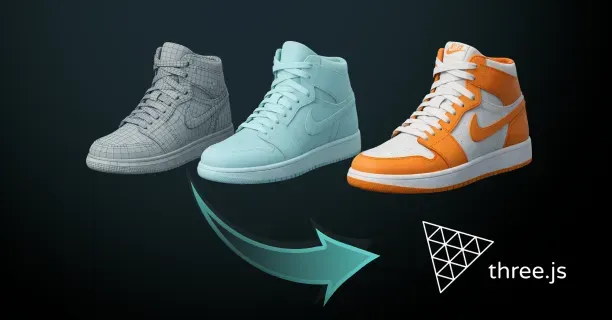
Choosing the Right Export File Format
FBX Format Benefits
The 3D artist should select the FBX (Filmbox) format when the image-to-3D photogrammetry workflow generates complex character models or game assets with multiple material assignments, because the FBX format preserves critical data including:
- Material slot assignments
- Multi-channel UV coordinate data
- Data that Unreal Engine’s import system reads natively without requiring format conversion
| Feature | Benefit |
|---|---|
| Skeletal hierarchies | Bone structures for character rigging |
| Keyframe animations | Motion data |
| Blend shapes | Morph targets for facial animation |
| Embedded texture files | Complete export-import pipeline support |
The binary encoding method in the FBX specification significantly reduces file sizes by approximately 50-70% compared to ASCII text-based formats, while simultaneously ensuring lossless data transfer for:
- Mesh geometry (vertex positions and polygon connectivity)
- Vertex attributes (normals, tangents, vertex colors, and UV coordinates)
glTF 2.0 Format Advantages
The 3D artist should utilize the glTF 2.0 (GL Transmission Format version 2.0) export format when working with PBR (Physically Based Rendering) materials, because the glTF 2.0 specification natively implements the metallic-roughness material workflow that maps directly to Unreal Engine’s PBR material system without requiring texture conversion or shader translation.
Key benefits of glTF format:
- Modern, royalty-free alternative for web-based 3D visualization
- Cross-platform asset compatibility across multiple rendering engines
- Real-time interactive preview capabilities in web browsers
The GLB (binary glTF) format variant consolidates all texture images and mesh geometry data into a single self-contained binary file, significantly streamlining asset management and reducing file transfer complexity.
OBJ Format Limitations
3D artists should not utilize the OBJ (Wavefront Object) format as the final export format for Unreal Engine integration because the OBJ specification fails to preserve vertex color data (per-vertex RGB information) or multiple UV coordinate channels.
The OBJ (Wavefront Object) format serves as a reliable fallback option when the production workflow requires maximum cross-application compatibility across diverse 3D software packages, although the OBJ specification inherently lacks support for:
- Skeletal animation data (bone hierarchies and skin weights)
- Necessitates separate MTL (Material Template Library) files for defining surface material properties
Optimizing Polygon Count Through Decimation
The 3D artist should implement decimation algorithms to reduce the polygon count from the extremely dense meshes (typically 5-50 million polygons) produced by photogrammetry reconstruction or NeRF-based (Neural Radiance Fields) AI generation.
Target Polygon Ranges
| Asset Type | Polygon Count | Purpose |
|---|---|---|
| Standard real-time game assets | 50,000-200,000 triangles | Balanced performance and quality |
| Hero assets (Nanite enabled) | Up to 1 million triangles | Close-up viewing with LOD management |
| Background environmental props | 10,000-30,000 polygons | Performance optimization |
Excessive polygon counts (meshes exceeding 1-2 million triangles) severely degrade real-time rendering performance in Unreal Engine, particularly when the game scene incorporates multiple photogrammetry-generated assets.
Professional Retopology Tools
Professional photogrammetry software tools such as:
- RealityCapture (by Capturing Reality/Epic Games)
- Agisoft Metashape
These tools implement sophisticated built-in decimation algorithms that intelligently evaluate:
- Surface curvature (geometric bending)
- Edge prominence (feature sharpness)
- Strategic vertex collapsing in flatter, low-detail surface regions
Automated retopology algorithms generate optimized mesh topology by systematically reconstructing the irregular triangulated AI-generated topology into clean quad-based polygon flows (four-sided polygon arrangements) that:
- Deform correctly during character animation and skeletal rigging
- Render significantly more efficiently in real-time game engines
- Improve vertex cache coherency and reduce overdraw
UV Seam Protection
The 3D artist must protect UV seam edges by configuring edge-lock settings in the decimation software’s parameters before executing the polygon reduction algorithm.
This ensures that the simplification process preserves critical UV boundary edges and prevents visible texture seams (mapping discontinuities) from appearing in the optimized mesh.
Preparing Clean UV Unwrapping for High-Quality Texturing
The 3D artist must verify that the image-to-3D generation service produces automatic UV unwrapping as part of its standard output, systematically identifying common quality issues including:
- Overlapping UV islands (texture coordinate conflicts)
- Uneven texel density distribution across different surface areas
- Insufficient padding between UV islands (less than 4-8 pixels)
Texel Density Standards
Target texel density for consistent texture resolution:
- 512 pixels per meter for background assets
- 1024 pixels per meter for mid-ground interactive objects
- 2048 pixels per meter for hero assets
Clean UV unwrapping determines how 2D texture images map onto the 3D model’s surface without distortion, stretching, or visible seams that break visual continuity.
UV Island Consolidation
Consolidate UV islands in Substance Painter or Blender’s UV editor by identifying logical seam placement along:
- Hard edges
- Occluded areas
- Natural material boundaries
Where texture discontinuities will be less visible to the end user viewing the asset in Unreal Engine.
Implementing PBR Workflow for Material Surface Properties
Structure your material setup in Unreal Engine using PBR textures that include:
| Texture Type | Purpose |
|---|---|
| Albedo | Base color information without lighting |
| Normal maps | Surface detail and micro-geometry simulation |
| Roughness maps | Microsurface smoothness variation |
| Metallic maps | Conductive material designation |
| Ambient Occlusion | Contact shadows and crevice darkening |
PBR workflow defines material surface properties through physically accurate texture inputs that simulate how light interacts with different material types, replacing legacy workflows that relied on artistic approximation.
Albedo Map Requirements
The Albedo texture must contain only color information stripped of lighting data, as Unreal Engine’s renderer calculates all lighting dynamically based on:
- Scene’s light sources
- Material’s physical properties
Verify that your image-to-3D generation process produces delighted Albedo maps by checking for the absence of:
- Baked shadows
- Highlights
- Directional lighting cues
Normal Map Configuration
Normal maps encode surface detail as directional vectors in RGB channels:
- Red channel: X-axis deviation
- Green channel: Y-axis deviation
- Blue channel: Z-axis depth
Configure your export settings to produce OpenGL-format Normal maps with a green channel pointing upward (+Y) when working with Blender or most photogrammetry software, then invert the green channel during Unreal Engine import when the software uses DirectX convention.
Optimizing Texture Memory Through Channel Packing
Create ORM textures that combine:
- Occlusion data in the red channel
- Roughness in the green channel
- Metallic in the blue channel
This is a standard packing scheme that Unreal Engine’s PBR material system reads natively when you connect the texture to the appropriate material input pins.
Memory Optimization Benefits
Channel packing optimizes texture memory usage by:
- Combining multiple grayscale texture maps into separate RGB channels
- Reducing the number of texture samplers required
- Decreasing video memory consumption by approximately 66%
- Maintaining full 8-bit precision for each property
Compression Settings
Configure your texture export settings to:
- Disable compression on the ORM texture
- Use BC5 compression for the Normal map
- Use BC7 for the ORM to preserve data fidelity
Lossy JPG compression introduces artifacts in data-based textures that manifest as incorrect material behavior in the rendered output.
Resolution Guidelines
| Asset Type | Resolution | Application |
|---|---|---|
| Standard game assets | 2K textures (2048x2048 pixels) | Most common use case |
| Hero assets and close-up elements | 4K textures (4096x4096 pixels) | Architectural details |
| Cinematic/VR applications | 8K textures (8192x8192 pixels) | Extreme close-up inspection |
Higher resolutions increase memory requirements quadratically, so balance visual fidelity against performance budgets by using Unreal Engine’s texture streaming system.
Correcting Coordinate System Mismatches
Apply a -90 degrees rotation to the X-axis during the FBX export process in your 3D software, pre-rotating the model so it appears upright when Unreal Engine interprets it through its Z-up coordinate framework.
Coordinate System Differences
Unreal Engine coordinate system:
- Z-axis: Points upward
- X-axis: Points forward
- Y-axis: Points right
- Convention: Left-handed coordinate system
Many 3D applications use a Y-up coordinate system where the Y-axis points upward, creating orientation mismatches that cause models to import:
- Lying on their side
- Facing the wrong direction
Establishing Consistent Orientation
Establish a consistent world-space orientation by manually aligning your model to:
- A ground plane
- Forward direction in Blender before export
This ensures the model’s local transform matrix matches Unreal Engine’s expectations and eliminates the need for rotation offsets in the engine’s import settings.
Configuring Proper Color Space for Texture Types
sRGB Settings for Color Textures
Enable the sRGB checkbox in Unreal Engine’s texture import settings for:
- All Base Color textures
- Emissive textures
- Any texture that represents visible color information
sRGB color space encodes pixel values in a gamma-corrected format that matches how displays present color information to human viewers.
Linear Color Space for Data Textures
Disable the sRGB setting for data-based textures:
- Normal maps
- Roughness maps
- ORM packed textures
- Height maps
These textures store numerical values that the material shader performs calculations on rather than displaying directly as colors.
Color Space Verification
Verify color space settings by inspecting the texture’s properties panel in Unreal Engine after import, checking that the “sRGB” property matches the texture’s content type and re-importing with corrected settings when visual artifacts appear:
- Overly bright roughness
- Inverted normal directions
Leveraging Nanite for High-Polygon Geometry
Enable Nanite on meshes imported from image-to-3D generation that exceed 1 million polygons, allowing you to skip the decimation step entirely for static meshes and preserve the full geometric detail captured during photogrammetry or NeRF reconstruction.
Nanite Benefits
Nanite enables real-time rendering of high-poly geometry by:
- Virtualizing micropolygon detail
- Streaming only the triangles visible to the camera at each frame
- Eliminating the traditional performance penalty of using film-quality assets
Configuration Process
Configure Nanite settings during mesh import by checking the “Enable Nanite Support” option in Unreal Engine’s Static Mesh editor, which processes the mesh into a hierarchical cluster structure that the renderer can traverse at varying levels of detail based on screen coverage.
This system automatically generates internal LODs (Levels of Detail) from the source geometry, replacing the manual LOD creation workflow that traditionally required three to five progressively simplified mesh versions for each asset.
Performance Optimization
Optimize Nanite performance by:
- Keeping individual mesh sections under 50 million triangles
- Ensuring meshes have clean, manifold geometry
- Avoiding non-manifold edges or overlapping faces that disrupt cluster generation
Building Master Materials for Streamlined Adjustments
Create a Master Material for your image-to-3D assets that defines:
- Core PBR shading logic
- Texture coordinate scaling
- Normal map intensity control
- Color tinting parameters
Then instantiate this material for each unique asset by connecting its specific texture maps to the instance’s texture parameter slots.
Master Material Benefits
Master Materials streamline asset-wide material adjustments by:
- Establishing a parent material with exposed parameters
- Allowing child material instances to override without duplicating the entire material graph
- Reducing shader compilation time
- Ensuring consistent material behavior across multiple assets
Parameter Organization
Structure your Master Material with parameter groups for:
- “Base Textures”
- “Detail Textures”
- “Color Adjustments”
- “Surface Properties”
Organizing the exposed parameters into logical categories that artists can navigate efficiently when creating material instances for new photogrammetry assets.
Advanced Material Functions
Implement material functions within your Master Material for common operations like triplanar projection mapping, which:
- Eliminates UV distortion on organic or irregular surfaces
- Projects textures from three orthogonal directions
- Blends based on surface normals
This technique proves particularly valuable for anime image-to-3D assets where automatic UV unwrapping produces suboptimal layouts.
Version Control and Library Management
Version-control your Master Materials separately from texture assets, maintaining a library of tested material templates for different asset categories:
- Organic materials
- Hard-surface materials
- Transparent materials
- Emissive materials
This approach accelerates the material setup phase of your pipeline and ensures technical consistency across your entire asset library.


