How Do You Preserve Outfit Layers And Accessories When Creating An Anime Action-RPG 3D Character From An Image?
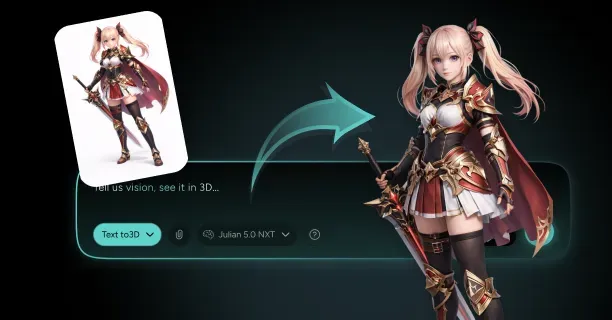
To preserve outfit layers and accessories when creating an anime action-RPG 3D character from an image, separate each clothing piece into its own mesh, assign each layer an independent UV texture coordinate map, and implement retopology workflow to ensure everything animates smoothly. This mesh separation approach maintains visual quality while enabling independent animation control for each piece of clothing during combat encounters and in-game action sequences.
This mesh separation technique preserves character aesthetics and enables natural movement physics for independent clothing meshes, enhancing player immersion during real-time rendering of combat attack animations and melee action sequences.
Mesh Separation Workflow
Character artists analyze the reference image to identify distinct garment components, breaking down each clothing piece into separate 3D meshes. Employ Blender 3.x, ZBrush 2023, or Autodesk Maya 2024 to isolate garment geometries through polygon selection in Blender’s Edit Mode or mesh editing workspace.
Key Steps for Separation:
- Select the polygons that comprise one piece of clothing like a jacket mesh geometry
- Extract the selected polygons into a new mesh using Blender’s Separate by Selection function (keyboard shortcut: P)
- Apply this separation technique for every layer visible in the reference image: - Character underwear layer - Shirt garment meshes - Outer jacket models - Equipment accessories including belts, jewelry items, and equipment holsters for anime RPG weapons
When 3D artists implement this mesh separation workflow, they can assign PBR textures (Physically Based Rendering textures) and configure cloth physics simulation properties to specific clothing meshes.
Reconstructing Hidden Geometry
Character artists will reconstruct hidden geometry manually since image-to-3D AI conversion tools lack capability to predict occluded surfaces underneath garment layers.
Important: Duplicate the character model’s base body mesh, offset the mesh outward by 0.02 to 0.05 Blender units or Maya scene units (depending on how thick the clothing should be), then apply digital sculpting in ZBrush or Blender Sculpt Mode or extrude geometry to achieve realistic garment appearance.
For a shirt garment layer: - Clone the torso base geometry - Apply 102% uniform scaling (1.02x uniform scale transformation) - Sculpt fabric wrinkle details where the shirt would naturally bunch at the waist area or shoulder region
This mesh offset technique ensures collision-free animation for each layer during in-game real-time animation without mesh clipping or geometry penetration artifacts.
Retopology Optimization
Optimize the clothing meshes and garment geometries with retopology workflow by transferring new, organized edge flow onto the original sculpted high-resolution ZBrush meshes. Ensure the mesh topology aligns with natural deformation points where fabric deformation stress points or cloth stretching regions occur during character animation.
Edge Loop Placement Guidelines:
| Garment Area | Edge Loop Position | Purpose |
|---|---|---|
| Jacket Shoulder | Around shoulder region | Natural deformation during arm movement |
| Elbow Area | Around elbow joint | Prevents distortion during arm bending |
| Waist Section | Around waist line | Enables natural torso movement |
Position edge loops around a jacket garment mesh’s shoulder region, elbow area, and waist section so the jacket mesh deforms without distortion when the player character or anime character model executes sword swinging animation or dodge roll mechanic actions. Target 5,000 to 15,000 triangulated polygon count per individual clothing layer to maintain 60 FPS rendering performance while preserving aesthetic fidelity.
UV Texture Coordinate Mapping
Assign each clothing layer a dedicated UV texture coordinate map to prevent texture coordinate conflicts and enable assignment of PBR materials or shader materials.
UV Mapping Techniques:
- Planar UV projection method
- Cylindrical UV mapping technique
- Blender’s Smart UV Project algorithm
Optimize the UV texture space by allocating greater texture space to visible surface areas like chest emblem graphics or ornamental design elements, while minimizing texture space usage for texture seams or UV shell boundaries. This UV mapping configuration accommodates: - 2048x2048 pixel texture resolution (2K texture maps) - 4096x4096 pixel resolution (4K texture maps)
Texture Map Baking Process
Transfer high-detail surface information from the high-resolution sculpted meshes to the optimized low-polygon meshes through texture map baking process or normal map baking workflow while preserving visual fidelity.
Essential Texture Maps:
- Tangent-space normal maps: Preserve fabric weave details or embroidered patterns
- Ambient occlusion texture maps: Enhance crevice shadow detail
- PBR roughness maps: Define surface reflectivity to regulate specular response
Differentiating how leather material exhibits low roughness value compared to silk material’s high specularity
Employ Adobe Substance Painter or Marmoset Toolbag 4 for baking operations, and verify that the ray distance parameters or baking ray distance values avoid generating texture artifacts where clothing layer overlap occurs.
Independent Accessory Modeling
Model character accessories or equipment accessories as independent mesh objects featuring dedicated polygon geometry, mesh topology structure, and UV-mapped textures.
Accessory Categories:
- Character belts
- Ornamental jewelry items
- Armor shoulder pads
- Sword sheaths or weapon holsters
Configure accessory rigging by binding to skeletal rig bones using parent constraints or copy transforms constraints: - Enable cape mesh to follow spine bone chain movement - Constrain belt buckle to pelvis root bone
This modular accessory approach enables physics-driven interactions or procedural animation behaviors like pendant necklace or chain necklace swaying during jump animation.
Physics-Based Cloth Simulation
Utilize Marvelous Designer 12 to simulate physics-based cloth simulation or fabric dynamics simulation for dynamic garment elements like character capes, anime-style skirts, or kimono sleeves or robe sleeves.
Marvelous Designer Workflow:
- Import the character model’s base body mesh as Marvelous Designer avatar
- Drape 2D fabric pattern pieces or garment pattern templates around the body
- Simulate gravity force simulation and mesh collision detection to generate natural fabric folds
- Export the cloth-simulated mesh output as high-detail reference geometry for retopology process
Rigging and Weight Painting
Bind clothing meshes to character skeletal rig or armature bone structure through rigging process and assign bone influence values using vertex weight painting or bone weight assignment.
Weight Assignment Example:
- 1.0 weight value (100% shoulder bone weight) to jacket vertices near shoulder joint bone
- Gradually blend to 0.5 weight value (50% elbow influence) at elbow joint bone
This enables natural jacket stretching without penetrating or intersecting underlying shirt mesh. Test the weight paint assignment by playing back action-RPG combat animation sequences, adjusting vertex influence weights wherever mesh clipping artifacts occur.
AI-Powered Workflow Acceleration
Threedium’s AI platform accelerates automated mesh decomposition workflows for anime action-RPG character creation. Our AI analyzes uploaded character reference images and creates separate mesh components for recognizable clothing elements, reducing manual separation time by automatically detecting: - RGB color boundary detection - Texture/material edge detection
Threedium’s machine learning AI segments jackets, pants, belts, and accessories into distinct layers, providing mesh selection masks for further refinement in compatible Blender, Maya, or ZBrush workflows.
Render Order Management
Implement mesh render order system or draw call priority hierarchy to manage rendering priorities and prevent z-buffer fighting or depth buffer conflict artifacts.
Render Queue Priority:
- Inner clothing layers (lowest priority)
- Outer garment meshes
- Accessory elements
- Pendant necklaces or chain accessories (highest priority)
This rendering layer hierarchy maintains visual clarity during cinematic cutscene sequences and character creator interface close-up camera angles.
Physics Collision Setup
Create physics collision meshes or cloth collision volumes for each major clothing layer to enable real-time cloth physics simulation in game engines like Unity 2022 LTS.
Collision Configuration:
- Generate low-poly proxy collision meshes around flowing garment elements
- Assign Unity Cloth component that interacts with character body collider
- Set collision offset distance ranging between 0.01 and 0.03 Unity world units
Texture Atlas Optimization
Consolidate accessories with similar PBR material properties into shared texture atlas maps through UV texture atlasing optimization.
Atlasing Strategy:
- Group metallic material accessories (belt buckles, jewelry rings, sword guard fittings) onto a single 2048x2048 pixel metallic atlas sheet
- Maintain fabric elements on separate atlas textures
- Reduces GPU draw call count without sacrificing individual color control
Detail Preservation Through Adaptive Decimation
Preserve ornamental accessory details through adaptive mesh decimation rather than uniform polygon reduction.
Recommended Tools:
- ZBrush 2023 Decimation Master plugin
- Blender 3.x Decimate modifier with UV coordinate preservation setting
Employ edge-preserving decimation algorithm to reduce polygon counts on jewelry meshes while retaining silhouette clarity visible during third-person gameplay camera distance (3-10 meters). ```
What Inputs Help Keep Character Details Clean When Converting Images To 3D?
Inputs that help keep character details clean when converting images to 3D include high-resolution orthographic character sheets at minimum 2048x2048 pixels, multi-angle turnaround references showing front/side/back views, and clean vector-quality line art with uniform 3-5 pixel stroke weight. These inputs enable AI reconstruction to capture proportions, accessories, and facial features without topological artifacts or mesh distortion.
Orthographic Character Sheets Form the Foundation
Character sheets establish accurate proportions and spatial relationships that algorithms leverage to reconstruct geometry without perspective distortion. 3D artists need at least three orthographic views (front, side, and back) to supply reconstruction algorithms sufficient spatial data for generating complete 3D meshes.
Professional game studios create character sheets at 4096x4096 pixel resolution to preserve fine details throughout the conversion process. Clean line art prevents topological artifacts by giving edge-detection algorithms clear boundaries to follow when generating mesh geometry.
Upload sketches with broken lines, overlapping strokes, or inconsistent thickness, and the AI processes erroneously, generating holes, spikes, or warped surfaces in the final model.
Threedium’s AI analyzes uploaded reference images to detect clean edge boundaries, converting vector-quality line work into precise vertex placement that preserves the integrity of the original design.
High-Resolution Source Imagery Captures Fine Details
High-resolution images enable the extraction of fine details like:
- Belt buckles
- Embroidery patterns
- Jewelry elements
These elements define anime action-RPG character identity. Source images require sufficient pixel density (minimum 2048x2048 pixels for full-body characters) to ensure small accessories don’t blur into indistinct color patches during texture generation.
Detail-density varies across character regions, with the following areas demanding the highest resolution:
- Facial features
- Weapon grips
- Costume embellishments
Upload reference images with consistent lighting to eliminate shadow artifacts that AI systems misinterpret as geometry changes. Source images containing harsh shadows or gradient fills cause reconstruction algorithms to fail to distinguish between actual surface depth and lighting effects, generating bumpy textures or incorrect normal maps.
Turnaround Images Show Characters From Multiple Angles
Character turnaround references display the character from multiple angles, supplying AI systems comprehensive spatial data for interpolating intermediate perspectives:
| View Type | Purpose |
|---|---|
| Front | Primary proportions and facial features |
| Three-quarter | Costume wrapping and depth |
| Side | Profile and accessory attachment |
| Back three-quarter | Rear element positioning |
| Back | Complete rear view details |
Multi-angle sheets enable reconstruction algorithms to determine:
- How costume elements wrap around the body
- How hair falls from different viewpoints
- How accessories attach to the character’s form
When artists supply only a single front-facing image, the AI estimates side and rear geometry, generating flat or distorted shapes for elements like capes, backpacks, or ponytails.
Expression Sheets Guide Facial Blendshape Creation
Expression sheets direct blendshape creation by providing clear reference images for each facial pose the character needs. Artists upload facial expression references separately from body turnarounds, supplying dedicated training data for facial rigging algorithms to generate deformation targets.
Essential expressions include:
- Neutral
- Smile
- Frown
- Anger
- Surprise
- Custom emotes specific to the game’s dialogue system
A minimum of eight distinct expressions (the six universal emotions plus talking mouth shapes) ensures characters communicate the emotional range required for action-RPG cutscenes and dialogue interactions.
Expression references with clean line separation between facial features prevent mesh bleeding, where the AI incorrectly merges eye geometry with cheek surfaces or mouth shapes with chin contours.
Clean Line Art Establishes Clear Boundaries
Clean and consistent line art supplies edge-detection algorithms unambiguous data for determining where one surface ends and another begins. This is critical for:
- Separating costume layers
- Defining accessory boundaries
- Establishing facial feature placement
Artists create line art with uniform stroke weight (3-5 pixels at the working resolution) to ensure the AI interprets all lines with equal geometric importance.
AI-ready reference sheets feature clean lines, flat colors, and perfect T-pose symmetry, designed for machine vision processing rather than human artistic appreciation.
Items to remove before uploading:
- Sketch lines
- Construction guides
- Overlapping strokes
Flat Color Fills Prevent Texture Ambiguity
Flat color fills in your reference images help texture-generation algorithms assign material properties without interference from artistic shading or gradient effects. Use solid colors for each costume piece:
- Red for the cape
- Blue for the tunic
- Silver for armor plates
This allows the AI to segment the character into distinct material zones automatically.
Color separation requirements:
- Maintain at least a 2-pixel gap between different colored regions
- Prevents texture bleeding during UV unwrapping
- Ensures armor plates don’t share texture space with underlying fabric
Symmetrical Poses Simplify Mesh Reconstruction
Symmetrical T-pose or A-pose references allow reconstruction algorithms to mirror geometry across the character’s central axis, reducing processing time and ensuring perfect bilateral symmetry for humanoid characters.
Proper positioning guidelines:
- Arms extended horizontally
- Legs slightly apart
- Facing directly forward
- Perfect frontal alignment (nose, chin, and navel form a vertical line)
- Shoulders and hips parallel to the horizontal axis
Asymmetrical poses force reconstruction systems to analyze each body side independently, increasing the chance of proportion mismatches or mirrored accessories appearing in incorrect positions.
Accessory Isolation Sheets Clarify Complex Elements
Accessory isolation sheets show weapons, bags, jewelry, and other detachable items separately from the main character body. This gives the AI dedicated reference data for reconstructing these complex elements without body occlusion.
Create individual reference images for each major accessory:
- Character’s sword (separate sheet)
- Shield (separate sheet)
- Backpack (separate sheet)
Provide front, side, and back views just as you would for the main character.
Detail callouts on accessory sheets specify attachment points, showing exactly where:
- A sword belt connects to the waist
- Shoulder armor straps fasten
- A quiver mounts to the back
Mark these connection points with small circles or arrows in your reference, giving rigging algorithms explicit data for creating proper parent-child relationships in the skeletal hierarchy.
Material Reference Guides Texture Generation
Material reference guides specify surface properties for each costume element. Create a material legend alongside your character sheet, labeling each colored region with its intended material type:
| Color Region | Material Type |
|---|---|
| Red areas | Cotton fabric |
| Gray areas | Steel armor |
| Brown areas | Leather boots |
| Purple areas | Silk cape |
This semantic labeling helps texture-generation algorithms select appropriate procedural shaders and surface detail patterns that match your design intent.
Texture detail density considerations:
- Higher resolution for facial features and hands (close-up viewing)
- Lower detail density for boots and back-facing elements (rarely seen)
Lighting-Neutral References Improve Depth Reconstruction
Lighting-neutral references avoid baked shadows and specular highlights that confuse depth-reconstruction algorithms attempting to distinguish actual geometry from lighting effects.
Best practices:
- Create reference sheets under flat, diffused lighting conditions
- Digitally remove all shading in illustration software
- Present pure color and line information without environmental lighting contamination
Source images containing dramatic shadows under the chin or bright highlights on armor cause the AI to interpret these as actual surface depressions or protrusions, creating incorrect normal maps and bumpy geometry.
Annotation Layers Guide AI Interpretation
Annotation layers on your character sheet provide semantic labels that guide AI interpretation of ambiguous visual elements, specifying:
- Which lines represent hard edges versus soft fabric folds
- Which areas are transparent versus opaque
- Which surfaces are smooth versus textured
Annotation methods:
- Text labels
- Color-coded overlays
- Numbered callouts
Transparency indicators mark areas where costume elements are see-through:
- Mesh panels in armor
- Translucent cape fabric
- Glass visors on helmets
Outline these transparent regions with a distinct color or pattern in your reference sheet, ensuring the reconstruction system creates proper material assignments rather than treating transparent areas as solid geometry.
Consistent Scale Across Reference Sheets
Consistent scale across all reference sheets ensures the AI reconstructs character proportions accurately without size mismatches between front, side, and accessory views.
Scale requirements:
- Align all orthographic views to the same height measurement
- Set the character’s head-to-toe distance at exactly 2048 pixels in each view
- Use grid overlays for visual scale verification
- Include a scale ruler along one edge marked in head-heights or metric units
Your front view shows the character at 2000 pixels tall but your side view renders them at 2200 pixels, and the AI must choose which measurement to trust, potentially creating stretched or compressed final geometry.
Professional character sheets include an absolute measurement reference for the character’s intended size, giving both human artists and AI systems reliable scaling data.
