
How Do You Get Cleaner Topology For A Seinen-Style Anime 3D Character From An Image?
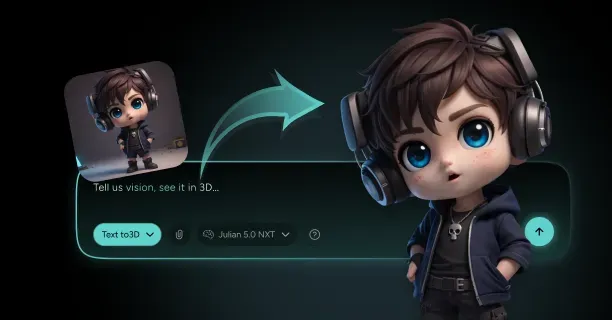
To get cleaner topology for a Seinen-style anime 3D character from an image, upload your reference artwork to Threedium’s AI-powered platform, which automatically constructs an optimized mesh structure using predominantly four-sided polygons (quads) that facilitate smooth deformation during animation and realistic rendering for mature character designs targeting adult demographics typically ages 18-40.
Topology encompasses and defines the flow and structure of polygons on a 3D model’s surface, governing and controlling how vertices, edges, and faces connect to form the mesh geometry. Clean topology guarantees and maintains smooth and predictable deformation during animation: a quality that is crucial for Seinen-style characters that require and necessitate nuanced and realistic emotional expressions differentiated from and contrasting with the exaggerated features common in Shonen anime 3D characters.
Proper facial topology is essential and critical for rendering and displaying subtle expressions without visual artifacts: the glitches and distortions that disrupt and compromise immersion in mature narratives like Vinland Saga or Psycho-Pass: anime series in which atmospheric storytelling depends critically on believable character reactions.
3D artists attain and construct cleaner topology by prioritizing and implementing quad-based mesh construction rather than triangulated surfaces. Clean topology employs and incorporates four-sided polygons technically termed quads because:
- Quads deform and transform predictably when 3D artists rig and animate characters
- Triangles generate and produce unpredictable shading artifacts and deformation issues during facial expressions or body movements
Seinen anime employs and showcases cinematic and atmospheric lighting that reveals and highlights topology flaws, thereby rendering well-structured polygon flow critical for proper shading and rendering. Well-structured topology improves how light and shadows interact with the model’s surface, enabling the sophisticated visual presentation that defines the Seinen demographic’s mature aesthetic.
Retopology Process for Image-Based Generation
The retopology process begins when 3D artists analyze and assess the initial mesh generated from reference images via AI processing, detecting and flagging areas where:
- Polygon density exceeds technical requirements
- Edge loops deviate from natural anatomical contours
Good topology enables and facilitates the realistic deformation of anatomical features like muscles and joints, necessitating and demanding strategic edge loop placement around:
- Eyes
- Mouths
- Shoulders
- Elbows
- Knees
- Other articulation points
3D artists position and orient edge loops perpendicular to the direction of deformation: positioning circular loops around the eyes and mouth, and longitudinal loops along limbs to ensure and guarantee vertices translate and interpolate smoothly during animation rather than generating or producing pinching or stretching artifacts.
| Body Region | Polygon Allocation | Purpose |
|---|---|---|
| Face and Hands | 30-40% higher density | Complex emotional expressions |
| Eyes and Mouth | Highest density | Micro-expressions |
| Limbs and Torso | Standard density | Basic deformation |
| Background Areas | Reduced density | Optimization |
Topology optimization reduces and minimizes polygon count in areas needing or demanding minimal deformation while preserving and sustaining density in expressive regions like the face and hands. Seinen-style characters necessitate and demand complex facial rigging to express and communicate psychological depth and emotional subtlety, requiring and demanding higher polygon density around:
- Eyes
- Eyebrows
- Nasolabial folds
- Mouth corners
3D artists assign and distribute approximately thirty to forty percent more facial polygons compared to Shonen character models to support and enable the realistic emotional range expected in mature narratives, ensuring and guaranteeing each muscle group obtains and possesses adequate geometry for natural movement.
3D artists eliminate and remove n-gons (polygons with more than four sides) and triangles from critical deformation zones by:
- Subdividing strategically
- Consolidating and merging vertices to construct and establish quad-based topology
Threedium’s automated topology cleanup scans and evaluates user-generated models and detects and catalogs topology issues, marking and highlighting problematic polygon configurations that will generate or produce visual artifacts during animation.
Edge Loop Strategy for Facial Animation
You construct facial edge loops following the FACS (Facial Action Coding System) muscle structure to enable realistic expressions. Proper facial topology requires:
- Concentric loops around the eyes starting from the eyelid margin and radiating outward
- Radial loops emanating from the mouth corners extending toward the cheeks and jaw
- Central edge loop running from the forehead down the nose bridge to the chin
You set up a central edge loop running from the forehead down the nose bridge to the chin, providing symmetry reference and supporting vertical facial movements like eyebrow raises and jaw opening.
Additional loops are required for:
- Horizontal loops across the forehead for brow furrowing
- Loops around the nasal area for nostril flaring
- Loops along the jawline for mouth opening and closing
Seinen characters displaying psychological complexity require additional loops in the nasolabial region where age lines and stress expressions show up, differentiating mature character topology from younger demographic styles that minimize these anatomical details.
You maintain consistent polygon density across connected facial regions to prevent shading discontinuities. Abrupt density changes create visible seams where high-resolution areas meet low-resolution geometry, breaking the visual cohesion needed for cinematic Seinen presentation.
Body Topology Optimization
You structure body topology following anatomical muscle groups and skeletal articulation points. You place edge loops around the shoulder girdle in circular patterns that accommodate arm rotation in multiple axes, preventing the geometry collapse that occurs when limbs move away from their rest pose.
Critical placement areas:
- Shoulder girdle: Circular patterns for multi-axis rotation
- Chest and torso: Following ribcage structure for breathing animations
- Limbs: Cylindrical edge flow with perpendicular loops to bone axis
- Joints: Three to five loops at pivot points (elbows, knees)
You optimize limb topology using cylindrical edge flow with loops running perpendicular to the bone axis. You position critical loops at elbow and knee joints where bending concentrates deformation, typically placing three to five loops directly at the joint pivot point with additional loops extending proximally and distally.
You build hand topology with particular attention to finger articulation, creating loops at each knuckle joint and along the palm’s natural crease lines.
Seinen narratives often feature close-up shots of hands during dramatic moments: lighting cigarettes, gripping weapons, making gestures, requiring topology that supports detailed finger poses without artifacts.
UV Unwrapping Considerations
You plan UV layouts during topology construction rather than treating them as separate processes. Clean topology makes UV unwrapping easier by following natural seam locations:
- Along the back centerline for torsos
- Inside limbs for arms and legs
- Behind ears for heads
You maintain rectangular UV islands by preserving quad topology, allowing you to unwrap facial regions using planar or cylindrical projections that minimize distortion.
| UV Allocation | Percentage | Target Area |
|---|---|---|
| Head and Face | 50% | Hero character assets |
| Body and Limbs | 35% | Secondary detail areas |
| Hands | 10% | Close-up requirements |
| Accessories | 5% | Props and details |
Seinen-style characters benefit from high-resolution texture detail in facial regions to capture:
- Skin pores
- Subtle wrinkles
- Realistic surface qualities
Automated Tools and Manual Refinement
You use automated retopology algorithms that trace surface curvature and generate quad-based meshes following optimal edge flow patterns. These algorithms analyze your image-generated model’s surface normals, identifying:
- Areas of high curvature requiring denser geometry
- Flat regions where polygon count can decrease without visual quality loss
You set target polygon counts based on intended platform requirements:
- Higher counts for cinematic renders
- Optimized counts for real-time applications
You manually refine automated topology results because algorithms cannot fully understand character-specific deformation requirements.
Manual refinement includes:
- Adjusting edge loops around asymmetric facial features
- Repositioning vertices to better follow muscle structure
- Adding supporting geometry in oversimplified areas
You use topology checking tools that highlight:
- N-gons
- Triangles
- Non-manifold geometry requiring correction
Non-manifold edges (where more than two faces share a single edge) create rendering errors and prevent proper subdivision surface smoothing, needing vertex merging or face deletion to restore manifold topology.
Subdivision Surface Workflow
You build base topology at relatively low polygon counts, then apply subdivision surface modifiers to generate smooth, high-resolution geometry for rendering. This workflow separates:
- Animation topology: Low-resolution cage controlling deformation
- Display topology: Subdivided surface viewers see
You add edge loops near silhouette edges and detail features to sharpen subdivision results without increasing base topology complexity. You place supporting loops close to edges defining facial features like:
- Eyelids
- Lips
- Nostrils
Subdivision level strategy:
| Body Region | Subdivision Levels | Usage |
|---|---|---|
| Face | 2-3 levels | Close-up shots |
| Limbs and Torso | 1-2 levels | Medium shots |
| Background Elements | 1 level | Distant shots |
Production Pipeline Validation
You validate topology against production pipeline requirements before finalizing the model. You verify:
- Polygon counts fall within technical budgets
- All faces display correct normal orientation
- Compatibility with rigging systems
You test topology compatibility by:
- Creating a basic skeleton
- Applying automatic skinning
- Identifying problematic geometry
- Examining weight distribution across joints
You pose the character through extreme ranges of motion, checking for geometry interpenetration where body parts clip through each other due to insufficient topology density.
You export test models to target platforms:
- Unreal Engine
- Blender
- Other production environments
Platform verification includes:
- Topology imports correctly without errors
- Quad topology subdivides predictably
- UV coordinates transfer without corruption
- Normal maps bake correctly from high-resolution sculpts
Clean topology for Seinen-style anime 3D characters balances geometric efficiency with deformation quality, supporting the nuanced expressions and realistic anatomy that distinguish mature anime demographics. You achieve this balance through:
- Strategic edge loop placement following anatomical structure
- Quad-based mesh construction enabling predictable deformation
- Validation workflows ensuring production compatibility
Our AI analyzes your reference images and generates optimized base topology that you refine manually, combining automated efficiency with artistic control to produce characters meeting the sophisticated visual standards Seinen audiences expect from cinematic storytelling and psychologically complex narratives.
How Do You Preserve Mature Seinen Visual Traits In 3D (Edges, Detail, Proportions)?
You preserve mature seinen visual traits in 3D models by applying non-photorealistic rendering techniques that replicate sharp stylized edges, maintain realistic proportions with subtle exaggeration, and layer fine surface details through custom normal maps and shader-based controls. Seinen manga, a Japanese manga subgenre originating in Japan, specifically caters to adult male audiences aged 18-40 and distinguishes itself via grounded anatomical representation, intricate linework techniques, and atmospheric shading methodologies that express psychological depth through visual narrative rather than fantastical heroism conventions.
Sharp Edges and Dynamic Line Control
3D artists and technical character modelers maintain and replicate the characteristic sharp stylized edges of seinen manga art style by utilizing geometry-based outline rendering techniques and implementing shader-based outline systems that dynamically adjust based on camera viewing angles and mesh surface curvature.
The inverted hull method, a widely-used 3D outline rendering technique in Blender, Maya, and 3ds Max software, procedurally generates visible outlines by:
- Creating a duplicate instance of the character mesh geometry
- Flipping the duplicate’s surface normal vectors inward
- Applying a solid black shader material with slight thickness offset parameters
This geometric processing technique produces consistent edge lines that scale predictably across varying camera viewing distances.
Calibration Guidelines: 3D artists should calibrate hull thickness parameters within the range of 0.002 to 0.008 Blender units (or equivalent scene units), with values proportional to the character model’s scale, to avoid visual artifacts such as excessively thin line appearance at far viewing distances or excessively thick outline rendering at close-up camera positions.
Shader-based outline rendering techniques provide 3D artists and shader developers with dynamic line control capabilities that surpass static geometry methods in performance and flexibility by algorithmically identifying surface normal vector discontinuities and rendering outline lines exclusively at geometric locations where crease angles surpass the user-specified angular threshold parameter.
| Parameter Type | Recommended Range | Purpose |
|---|---|---|
| Angular Threshold | 30-60 degrees | Edge detection sensitivity |
| Hull Thickness | 0.002-0.008 units | Outline visibility |
| Tessellation Factor | 2-8 | Detail density |
Blender’s Freestyle Non-Photorealistic Rendering system, a specialized component developed by the Blender Foundation within the open-source Blender 3D modeling and animation software, procedurally creates non-photorealistic rendering (NPR) lines through customizable line set configurations that dynamically adapt based on:
- Geometric edge type classifications
- Material boundary detection
- Silhouette detection algorithms
3D artists should configure distinct line set configurations within Freestyle renderer for character silhouette outer boundaries, internal crease form details, and material intersection object boundaries to achieve the visual effect of layered linework depth that distinguishes and defines the mature seinen illustration art style.
Line Weight Variation
You replicate the expressive line weight variation found in seinen manga by mapping custom texture controls to your outline shaders that modulate thickness based on surface curvature, lighting conditions, or manually painted weight maps.
Custom texture weight maps modulate rendering parameters for outline line color attributes and thickness attributes through 8-bit grayscale value encoding (range: 0-255), where:
- White regions (value: 255) generate rendering output of thick emphatic outline lines applied to major form boundary geometric features
- Black regions (value: 0) reduce thickness or suppress rendering of outline lines in shadow lighting regions and secondary visual detail areas
3D texture artists manually author these line weight control maps using:
- Substance 3D Painter software (developed by Adobe)
- Blender’s integrated texture paint mode feature
Strategic application involves applying heavier line weight values along:
- Prominent anatomical features including jawline structures
- Eye socket orbital regions
- Major muscle group anatomies
While reducing weight values for outline rendering across smooth transitional geometric surfaces.
Bevel modifiers and shaders simulate chamfered ink lines by adding subtle geometric bevels to hard edges before outline rendering, creating the slight thickness variation and organic quality present in hand-drawn manga rather than perfectly uniform vector lines.
Apply bevel weights selectively to edges requiring emphasis, setting bevel width between 0.001 and 0.003 units to create barely perceptible chamfers that catch outline detection algorithms differently than sharp 90-degree edges.
Edge flow topology proves crucial for guiding line art because outline detection algorithms follow mesh edge loops. Construct topology with deliberate edge flow that traces:
- Natural form boundaries
- Facial features
- Clothing seams
Rather than using arbitrary quad-flow patterns. Model edge loops that follow the direction of underlying muscle fiber, bone structure, and fabric tension lines so that when outline detection activates, the resulting lines reinforce anatomical correctness and material behavior rather than revealing technical mesh construction.
Cel-Shading and Material Rendering
You achieve crisp cel-shading that maintains seinen’s atmospheric lighting by implementing custom shader networks that quantize lighting values into discrete bands rather than smooth gradients. Cel-shading makes 3D models appear flat-shaded by reducing continuous lighting calculations to stepped values.
Configure three to five distinct shading bands representing:
- Highlight
- Midtone
- Core shadow
- Reflected light
To replicate the tonal range manga artists use for dimensional form rendering. Adjust band thresholds through shader ramp nodes, positioning:
- Highlight-to-midtone transition at approximately 0.7 luminance value
- Midtone-to-shadow transition at 0.3 to create dramatic value separation
MatCap (material capture) shading creates stylized lighting that emphasizes your model’s form and edges by mapping spherical texture images directly to the camera view regardless of scene lighting. Select or create MatCap textures with:
- Strong directional lighting
- Sharp value transitions
- Rim lighting emphasis
- Concentrated highlights that accentuate facial planes and muscular definition
MatCap shading benefits seinen character presentation because it maintains consistent dramatic lighting across animation sequences without requiring complex scene lighting setups.
Proportional Accuracy With Strategic Exaggeration
You preserve seinen’s mature proportional standards by maintaining anatomically accurate base measurements while applying subtle strategic exaggeration to features that convey character psychology and narrative role.
Seinen character designs adhere to anatomical standards of realistic human proportions measured between 7.5 and 8 head-height units for adult figure character age categories, in contrast to:
- 6 head-height chibi proportion system (characterized by cute, childlike stylization)
- 9 head-height heroic proportion system (characterized by idealized superheroic physiques)
| Anatomical Feature | Standard Measurement | Verification Method |
|---|---|---|
| Shoulder Width | 2.5 head-width units | Compare to head proportions |
| Arm Length | Mid-thigh position | Neutral relaxed position |
| Torso Length | 2.5 head-height units | Clavicle to pelvis measurement |
3D character designers implement strategic selective exaggeration techniques to specific facial anatomical features that visually express character archetype narrative roles:
- Widen interpupillary eye spacing by 5-10% for protagonist hero characters to increase perceived approachability
- Narrow eye width and sharpen zygomatic cheekbone definition for antagonist villain characters to suggest calculating intelligence
Hand size receives particular attention in seinen work because close-up hand gestures frequently carry narrative weight. Scale hands to 0.75 head-height length rather than the anatomically precise 0.7 ratio to ensure readable silhouettes in medium shots without appearing cartoonish in close-ups.
Surface Detail Layering
You preserve the intricate surface detail characteristic of seinen illustration by generating custom normal maps from your reference image that capture fabric texture, skin pores, and material weathering without adding geometric complexity.
Normal texture maps, a specialized type of texture map used in 3D rendering pipelines, digitally store and represent surface angle geometric variation data within RGB color channel encoding systems:
- Red color channel encodes X-axis surface normal vector data
- Green color channel encodes Y-axis surface normal vector data
- Blue color channel encodes Z-axis surface normal vector data
Extract these from high-resolution reference photos or hand-paint them in Substance Painter to replicate the cross-hatching, stippling, and texture techniques manga artists use to indicate material properties.
Layer multiple normal map channels at varying intensities:
- Base skin texture at 30-40% intensity
- Fabric weave patterns at 60-70% intensity
- Accent details like scars or wrinkles at 90-100% intensity
Tessellation rendering technique, supported by modern GPU hardware components, dynamically subdivides polygon 3D geometry primitives into smaller polygon pieces during the real-time or offline rendering computational process, procedurally generating additional geometric detail that produces visual results of smoother character silhouettes and enables more complex edge detection algorithms for line rendering system components, though at increased computational processing cost.
Implement adaptive tessellation that:
- Increases subdivision density near silhouette edges
- Reduces it across flat interior surfaces
- Concentrates geometric detail where outline rendering benefits most
- Maintains performance efficiency
Configure tessellation factors between 2 and 8 depending on viewing distance, applying higher values for close-up facial renders and lower values for full-body shots.
Digital Inking Techniques
Digital inking collectively describes the 3D techniques you employ, including inverted hull methods, custom shaders, and post-processing filters, to replicate hand-drawn ink line appearance and behavior on your 3D model.
Combine multiple digital inking approaches simultaneously:
- Geometry-based inverted hulls for stable silhouette lines
- Shader-based normal detection for internal form lines
- Post-processing line art modifiers for artistic control over line style and distribution
This layered approach prevents the uniform mechanical appearance that single-method outlining produces.
Post-processing line art adds final refinement by applying screen-space edge detection filters that identify silhouettes, creases, and material boundaries after initial rendering completes. Configure post-processing filters to detect edges through:
- Depth buffer discontinuities
- Normal angle changes
- Material ID boundaries
Each detection method captures different edge types that contribute to complete line coverage. Adjust post-processing line thickness between 1 and 3 pixels at 1080p resolution, scaling proportionally for higher resolutions to maintain consistent visual weight across output formats.
Edge Flow Stylization
Edgeflow stylization represents the deliberate practice of constructing your model’s topology to strategically control where stylized outlines appear, break, or vary in thickness rather than optimizing purely for deformation quality.
Plan edge loops that terminate at natural visual boundaries:
- End loops at hairlines, collar edges, and sleeve cuffs
- Avoid arbitrary continuation across surfaces where outline breaks would appear unnatural
- Create edge flow patterns that follow directional emphasis manga artists use
Directional Edge Flow Patterns:
- Vertical edge loops along the nose bridge and philtrum
- Horizontal loops following eyebrow arches and lip contours
- Radiating loops from joint centers that follow limb musculature
Reference Arc System Works’ character modeling techniques from Guilty Gear, where the studio pioneered 3D anime aesthetics by constructing topology specifically to guide outline rendering rather than following conventional modeling best practices. Their approach positions edge loops to create asymmetric line weights that replicate hand-drawn variation, placing denser edge loops on shadow-facing surfaces where manga artists apply heavier line weights while spacing loops wider across highlight regions.
Shader Networks
You build custom shader networks in Blender or Unreal Engine that combine multiple rendering techniques into unified materials that respond cohesively to lighting and camera changes.
Your shader network includes separate calculation branches for:
- Base color quantization
- Outline detection and rendering
- Specular highlight placement
- Subsurface scattering simulation
Blend these through mix shader nodes weighted by Fresnel effects or custom driver controls.
Implement rim lighting shaders that add subtle edge illumination opposing the primary light direction, replicating the reflected light and atmospheric perspective manga artists indicate through strategic line thinning or highlight placement along form edges. Configure rim light intensity between 0.2 and 0.4 strength with falloff gradients that transition sharply rather than smoothly to maintain cel-shaded aesthetic consistency.
Detail Hierarchy Across Rendering Distances
You establish detail hierarchy systems that maintain visual clarity across different camera distances by adjusting outline thickness, normal map intensity, and geometric detail levels based on screen-space measurements.
Configure level-of-detail (LOD) systems that swap between high-detail hero meshes for close-ups and simplified meshes for distant shots. Each LOD level maintains consistent outline appearance by adjusting hull thickness or shader detection thresholds proportionally to mesh simplification.
Create three to four LOD levels:
- Hero detail for shots within 2 meters
- Medium detail for 2-8 meter range
- Low detail for 8-20 meter range
- Silhouette-only rendering beyond 20 meters
Paint detail masks that control normal map intensity and shader complexity based on camera proximity:
- Activate fine skin pores and fabric weave textures only when the camera approaches within 1.5 meters
- Maintain broader form-defining details at all distances
This selective detail activation prevents visual noise in medium shots while ensuring close-ups reveal the surface richness seinen audiences expect from mature character presentation.
Material Boundary Definition
You define clear material boundaries between skin, clothing, hair, and accessories by assigning distinct material IDs that outline detection systems recognize as valid edge locations. Material boundaries generate outlines even across smooth geometric transitions.
Model clothing as separate mesh objects with slight geometric offset from underlying body surfaces rather than painting clothing directly onto body texture maps. This separation ensures outline rendering creates clear visual distinction between materials that manga artists emphasize through line weight variation and careful ink placement.
Apply subtle geometric offset between material layers:
- 0.001 to 0.005 units depending on material type
- Minimal offset for form-fitting clothing
- Larger offset for loose fabric or armor plating
Configure outline shaders to detect material ID changes and render lines at these boundaries with thickness values 1.5 to 2 times greater than standard surface crease lines, replicating the emphasis manga artists place on material separation.
Lighting Configuration
You configure three-point lighting setups that support seinen’s dramatic presentation requirements while maintaining compatibility with cel-shading and outline rendering systems.
Your key light provides primary directional illumination positioned 30-45 degrees above and to the side of your character, creating the core shadow placement that defines facial planes and muscular structure. Set key light intensity between 0.8 and 1.2 to generate sufficient value contrast for cel-shading quantization without overexposing highlight regions.
Your fill light reduces shadow density to maintain detail visibility in shadow regions. Position fill lights opposite your key light at 50-60% intensity to replicate the ambient bounce light present in manga panel compositions. Add rim lights at 30-40% intensity positioned behind and slightly above your character to create edge separation from backgrounds and emphasize silhouette definition that outline rendering enhances.
Texture Resolution Balance
You allocate texture resolution strategically across character components:
- 2048x2048 pixel maps for faces where detail scrutiny concentrates
- 1024x1024 maps for body surfaces and clothing where viewing distance exceeds detail perception thresholds
Create separate texture sets for different material categories:
- Skin textures encoding subsurface color variation and pore detail
- Fabric textures capturing weave patterns and wear
- Metal textures defining scratches and oxidation that contribute to seinen’s grounded material realism
Paint color variation subtly within texture maps rather than relying on uniform flat colors:
- Add 5-10% luminance variation across skin tones to indicate blood flow concentration and subsurface structure
- Introduce complementary color shifts in shadow regions where manga artists use cooler tones to enhance atmospheric depth
- Maintain color saturation between 30-50% to preserve seinen’s relatively desaturated palette compared to more vibrant anime genres
Custom Tools and Workflow Integration
You integrate custom tools and scripts that automate outline generation and style consistency across multiple character assets. Blender’s Line Art modifier provides a specific tool for generating outlines from mesh geometry with extensive control over edge detection methods, line style, and composition integration.
Configure line art modifiers with separate edge collections for:
- Silhouettes
- Creases
- Material boundaries
- Loose edges
Assign different visual styles to each collection. Enable intersection detection to generate lines where separate mesh objects overlap, capturing the complex line layering present in detailed seinen compositions.
Export characters to Unreal Engine or Unity with custom shader graphs that replicate Blender’s outline and cel-shading appearance while optimizing for real-time rendering performance. Create master materials with exposed parameters for:
- Outline thickness
- Cel-shading band positions
- Detail map intensity
This allows artists to adjust per-character without requiring shader recompilation. Implement these materials with mobile-optimized variants that reduce shader complexity for platform deployment while maintaining visual consistency with hero-quality desktop renders.
When automatically generating seinen-style anime 3D character assets from 2D reference image source materials using Threedium’s AI-powered 3D platform technology, the Threedium AI computational system processes and interprets reference artwork to identify and extract edge emphasis visual patterns, proportional geometric relationships, and detail distribution visual patterns that define the visual identity of mature seinen aesthetic art style categories, then automatically applies appropriate outline rendering parameter configurations and shader material setup configurations that maintain visual fidelity to these characteristic visual traits throughout the automated 2D-to-3D conversion computational workflow, eliminating manual technical setup requirements.
We generate edge flow topology aligned with natural form boundaries and configure shader networks that replicate hand-drawn line quality without requiring manual technical setup, ensuring your final 3D character maintains the psychological depth and visual sophistication seinen audiences expect.


