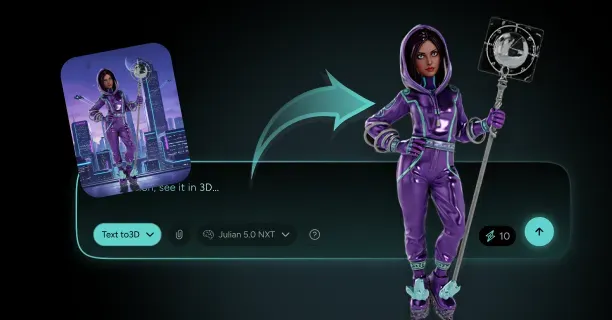
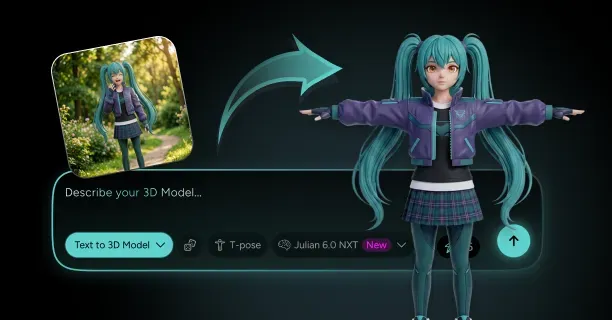
How Do You Make a VRM Avatar From Images?
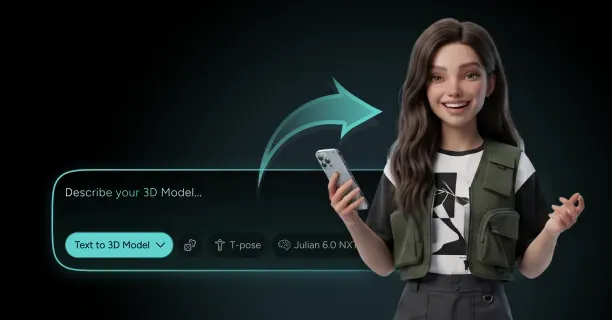
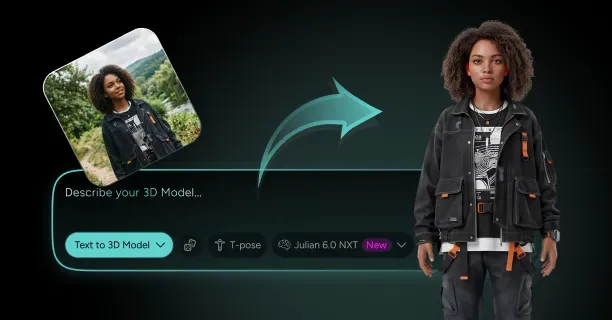
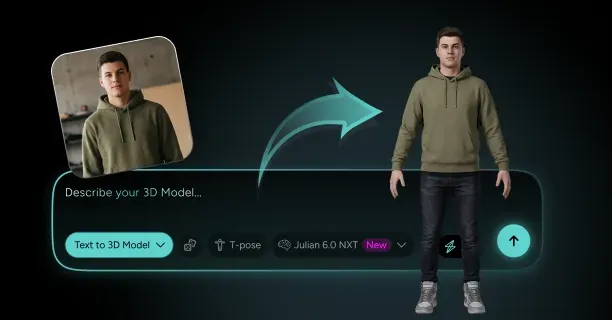
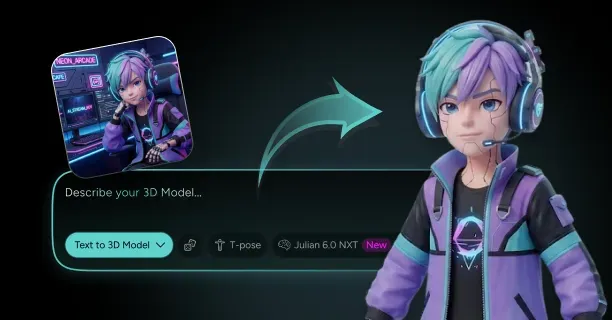
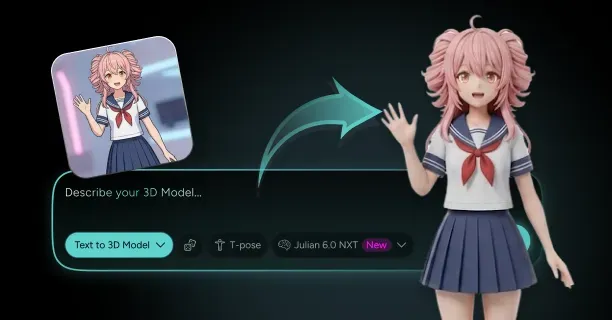
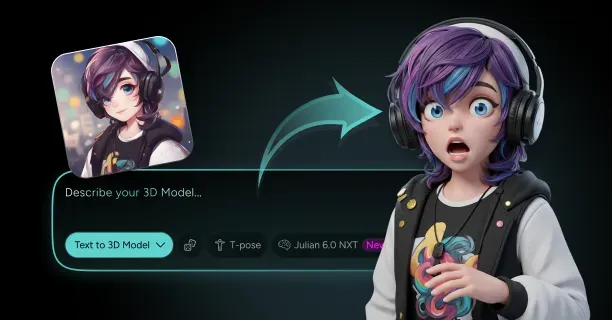
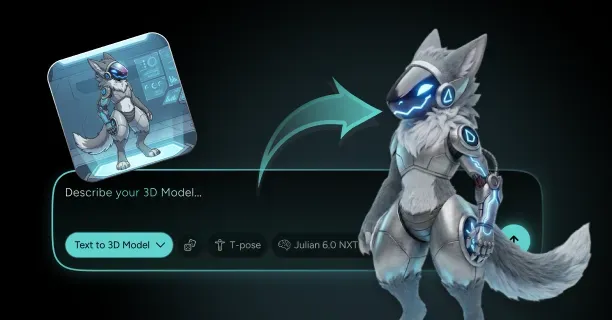
To make a VRM avatar from images, generate a humanoid 3D model from your reference art with an image-to-3D system, export it as GLB or FBX, then convert it in Unity with UniVRM or in Blender with the VRM add-on: set the rig to Humanoid, map the required bones, reassign materials to MToon, define expression presets and spring bones, fill in license metadata, and export a .vrm file. Threedium covers the first and hardest half of that pipeline: its Julian NXT generator turns reference images or a text description into a watertight mesh with PBR textures, an automatic humanoid skeleton, facial rigging with 52 ARKit blendshapes, polygon optimization, and export to GLB, FBX, USDZ, and VRM. Used as a vrm avatar maker, it removes the sculpting, retopology, and weight painting, leaving only the format-specific configuration below.
This page is the format authority. For streaming rig and tracking setup, read the VTuber avatar guide; for the wider interchange landscape, read the 3D file formats overview.
Pick Reference Images With Clear Front and Side Views of Your Character
Image-to-3D reconstruction infers volume from silhouette and shading, so the ceiling on your finished avatar is set before you generate anything. A character turnaround with front, three-quarter, side, and back views at 2048 px on the long edge gives the generator unambiguous information about hair depth, sleeve construction, and footwear shape. A single front-facing full-body image works, but expect to correct the back of the head and any asymmetric accessory afterwards.
Shoot or draw the reference in a relaxed A-pose with arms 30 to 45 degrees from the torso. Dynamic poses bake into the mesh and fight the humanoid rig later, because a skeleton fitted to a crouching mesh cannot be normalized to a clean T-pose without shoulder and hip deformation.
- Remove busy backgrounds so the silhouette reads as one closed shape against flat color.
- Avoid wide-angle perspective. A 50 to 85 mm equivalent framing keeps limb proportions consistent between views.
- Give hair its own reference inset. Hair is what you attach spring bones to, and the generator needs to see where strands separate.
- Keep the face neutral and the mouth closed. A baked smile becomes a permanent smile.
Generate the Base Humanoid 3D Model From Your Images With AI
Feed the references into the generator and describe what images cannot show: body type, height, how the clothing should behave, and any prop that stays a separate mesh. Threedium's 3D model generation reconstructs the mesh, unwraps UVs, bakes a PBR texture set at 2048 or 4096 square, and fits a humanoid skeleton automatically, which matters most because VRM is built around a standard humanoid bone map.
Ask for a T-pose or A-pose at real-world scale, one unit per meter, with the character between 1.4 and 1.8 meters tall. VRM consumers assume metric scale: a model authored in centimeters arrives in VSeeFace a hundred times too large, and every spring bone chain behaves as though gravity were negligible.
Request separated submeshes wherever you plan physics or swapping. Hair, skirt, tail, ears, and detachable props are far easier to assign to spring bone chains as discrete objects than as one welded body, and a fused mesh costs you an hour in Blender separating loose parts and re-weighting boundaries.
Generate at a higher polygon count than you need, then optimize down. Decimating a 200k-triangle mesh to a 45k VTubing budget preserves silhouette better than generating at 45k directly, because the optimizer can see which loops carry the shape.
Check the Mesh Is VTubing-Ready: Polycount, Symmetry, and Clean Topology
Audit the mesh against the budgets your targets enforce before touching UniVRM. A desktop VTubing avatar runs comfortably at 30,000 to 70,000 triangles. If the same file will later be converted for VRChat, that platform's PC performance ranks put Excellent at 32,000 triangles and Good at 70,000, with standalone Quest budgets roughly 7,500 to 20,000. Web delivery wants the file under 15 MB, usually 25,000 to 40,000 triangles on a single 2048 atlas.
Symmetry matters more here than in a static model, because the humanoid rig assumes mirrored limb chains and asymmetric shoulders or hips produce a skeleton Unity's configurator rejects or auto-maps wrongly. Mirror-check across X and fix drift beyond a few millimeters. Verify topology across eyelids and mouth corners too, since those loops are what expression blendshapes deform.
- Delete interior faces: buried eyeballs, a tongue with no opening, torso geometry hidden under clothing.
- Confirm manifold geometry with no loose vertices or zero-area faces. Both survive GLB export and reappear as shading artifacts.
- Keep material slots low. Four to eight is normal for a VRM; twenty is a performance problem in every runtime.
- Check that UV islands do not overlap unintentionally, which makes texture edits ambiguous.
Export the AI Model as GLB or FBX Before VRM Conversion
Most generators do not write VRM directly with full rig fidelity, so you export an intermediate. GLB is glTF 2.0 binary, the same base container VRM extends, so mesh, UVs, textures, skin weights, and morph targets travel cleanly and units stay metric. FBX carries richer skeleton metadata and is what Unity's animation system was built around, but introduces scale factor ambiguity and packs textures inconsistently between exporters.
The practical rule: converting in Blender, export GLB; converting in Unity with UniVRM, export FBX, because Unity's model importer exposes the Rig tab with Humanoid avatar configuration more predictably for FBX than for imported glTF.
Either way, confirm the export includes blendshapes or morph targets. Threedium's 52 ARKit blendshapes map onto VRM expression presets with light remapping, and losing them means rebuilding facial expression from scratch. In FBX exporters this is a "Blend Shapes" checkbox; in glTF it is "Export Morph Targets" plus normals and tangents.
Import Into Unity and Install UniVRM (or Use Blender's VRM Add-on)
Two toolchains produce valid VRM files. UniVRM is the reference implementation maintained alongside the specification and distributed as Unity packages from its GitHub releases: install the VRM package for 0.x export, the VRM-1.0 package for 1.0, or both, into a project on a Unity LTS release. You then get VRM0 and VRM1 menu entries plus inspector components for meta, expressions, spring bones, first person, and look-at.
The VRM Add-on for Blender is the alternative, and a straightforward avatar never needs Unity at all. It adds VRM import and export, an armature panel for humanoid bone assignment, MToon properties in the shader editor, and spring bone configuration on the armature, collapsing a two-application workflow into one.
- Choose Unity plus UniVRM for exact spec compliance, VRM 1.0 constraints, or when you also plan a VRChat build from the same project.
- Choose Blender plus the add-on when the model needs geometry fixes anyway, or when converting a GLB and staying in one tool.
- Keep both if you produce avatars regularly: Blender repairs better, Unity validates better.
Set the Rig to Humanoid and Normalize the T-Pose
Select the imported model, open the Rig tab, set Animation Type to Humanoid, leave Avatar Definition as "Create From This Model", and press Apply. Unity attempts an automatic bone mapping and reports a green check or a red one. Open Configure regardless, because auto-mapping is frequently right about arms and wrong about chest or upper chest.
Unity needs a recognizable T-pose to build a humanoid avatar. If your mesh is in an A-pose, use Pose > Enforce T-Pose inside the configuration window, then Apply. This changes only the reference pose used to compute muscle ranges, not the bind pose of the mesh, which is why the next step exists.
At export, enable Freeze T-Pose (labelled "Force T Pose" or "Pose Freeze" depending on version). That bakes the enforced pose into the exported mesh and skeleton so the file's rest pose is a true T-pose. Skipping it is the single most common reason an avatar loads into a tracker with arms drooping at 45 degrees: the consumer applies humanoid animation relative to a rest pose that is not what the spec expects.
Map the Required Humanoid Bones: Hips, Spine, Head, Arms, and Legs
VRM defines a fixed vocabulary of 55 humanoid bones, of which fifteen are mandatory: hips, spine, head, the three-bone arm chain on each side (upperArm, lowerArm, hand), and the three-bone leg chain on each side (upperLeg, lowerLeg, foot). Everything else, including chest, upperChest, neck, eyes, jaw, toes, and all thirty finger bones, is optional in the specification even though most apps behave far better when neck and eyes are present.
Missing an optional bone does not block export; it silently removes capability. Without a neck, head tracking pivots at the shoulders and looks stiff. Without chest and upperChest, the torso bends as one rigid block. Without eye bones, you must fall back to blendshape look-at. Without toes, feet stay flat under full-body tracking.
Source naming does not have to match VRM terminology, since mapping is explicit drag and drop, but consistent naming makes auto-mapping work: bones called J_Bip_L_UpperArm or LeftArm map automatically, bones called Bone_017 do not. Include fingers if you can. Even a basic three-joint mapping per finger unlocks gesture presets in VNyan and Warudo, Leap Motion tracking, and the default hand poses social platforms apply. Adding them later means re-exporting the whole avatar and redoing spring bone setup, so it is cheaper in the first pass.
Reassign Every Material to MToon, Unlit, or Standard Shaders
VRM 0.x permits three shader families in an exported file: MToon, Unlit variants, and Unity's Standard shader. VRM 1.0 formalizes this as VRMC_materials_mtoon layered over standard glTF PBR materials with unlit as fallback. Anything else, including custom shader graphs and third-party toon shaders, is outside the format and will be substituted or dropped by the consumer.
Your generated model arrives with PBR materials referencing base color, metallic-roughness, normal, and occlusion. Base color becomes the Lit Color texture and you author a Shade Color, typically the base desaturated slightly, shifted toward blue-violet, at 70 to 85 percent brightness. Normal maps carry over; metallic and roughness do not exist in MToon and are discarded.
- Skin: shade at 80 percent brightness with a warm-to-cool shift, and a narrow outline so the face does not read as heavily lined.
- Hair: strongest shade contrast, plus a MatCap texture for the anime highlight band if the style calls for it.
- Eyes: usually Unlit, so the iris never darkens with scene lighting. This is the single most effective readability fix for a VTuber face.
- Clothing: moderate shade contrast, outlines wider than skin, emissive only where the design actually glows.
Configure Expression Presets: Joy, Anger, Sorrow, Fun, and Lip-Sync Visemes
Expressions in VRM are named containers binding one or more mesh blendshapes, material color changes, or UV offsets to a single 0-to-1 weight. Apps do not read your blendshape names, they read preset names. In VRM 0.x the emotion presets are joy, angry, sorrow, fun plus neutral, the visemes are a, i, u, e, o, the blink set is blink, blink_l, blink_r, and the look presets are lookup, lookdown, lookleft, lookright.
VRM 1.0 renames all of them. Emotions become happy, angry, sad, relaxed, with surprised added as a sixth. Visemes become aa, ih, ou, ee, oh. Blink and look presets adopt camelCase. Behavior is identical, but a 1.0 file carrying 0.x names has no working expressions.
If your model shipped with 52 ARKit blendshapes you have far more granularity than the presets need, and the mapping is direct: jawOpen plus mouthFunnel drives "ou", mouthSmile_L and mouthSmile_R together drive happy, eyeBlink_L drives blinkLeft. Build each preset as a weighted combination rather than a one-to-one binding and the result is noticeably more expressive. Set the binary flag on blink presets so they snap between 0 and 1 instead of interpolating, which removes the half-closed eyelid frames that make webcam blinks look sleepy.
Add Spring Bone Chains and Collider Groups for Hair, Skirts, and Tails
Spring bones are VRM's built-in secondary animation: chains that follow their parent with damped delay, producing hair sway, skirt swing, and tail motion with no physics engine in the consuming app. You define chains, set parameters, and add colliders so moving geometry does not pass through the body.
Build chains root outward. Twin tails typically want 4 to 6 bones each; a long hair curtain wants 3 to 5 bones across 6 to 10 strand groups; a pleated skirt wants 3 bones per panel across 8 to 16 panels. Every bone must be a child of the previous one, and the chain root must be parented to a static bone such as head, chest, or hips.
- Bangs need the shortest, stiffest chains. Overactive front hair is the first thing viewers notice on camera.
- Side and back hair carry the visible motion: longest chains, lowest stiffness.
- Skirts need chest and thigh colliders, or legs punch through during a walk cycle or a sitting pose.
- Ears, tails, scarves, and ribbons use the same system; keep tail chains to 6 to 10 bones to stay predictable.
Colliders are spheres in VRM 0.x, spheres or capsules in VRM 1.0. Place a sphere group over the skull, a capsule for the chest, and capsules along the thighs, with radii slightly exceeding the visible mesh so hair rests on the surface. Each group must be explicitly assigned to the chains that should respect it; a chain with no assigned group ignores the body entirely.
Set Look-At Behavior So Your Avatar's Eyes Track the Camera
VRM defines first-person and look-at configuration telling consuming apps how gaze should follow a target, with two implementations you choose between. Bone-based look-at rotates the leftEye and rightEye humanoid bones within horizontal and vertical range curves, usually 10 to 20 degrees inward and outward and 8 to 12 degrees up and down. Expression-based look-at drives the lookUp, lookDown, lookLeft, and lookRight presets instead, moving the iris by UV offset or blendshape.
Pick bone-based if the eyes are real geometry with their own bones, which covers most generated and modelled avatars. Pick expression-based if the eyes are painted on a flat plane with UV-shifted irises, common in highly stylized and chibi designs. Configuring both produces double movement and eyes that overshoot.
The first person settings in the same section control what the avatar sees in VR. Set a first-person bone, normally head, with an offset to eye position around 0.06 m forward and 0.06 m up, then flag each renderer as Auto, Both, ThirdPersonOnly, or FirstPersonOnly. Marking the head mesh ThirdPersonOnly is what stops the inside of your own skull filling the headset view in social VR.
Fill In VRM Metadata: Author, Avatar Permissions, and Redistribution License
Metadata is mandatory. UniVRM refuses to export without at least a title, author, and license selection, and that is deliberate: the format was designed so permissions travel inside the file rather than in a separate readme that gets lost the first time someone re-uploads it.
Fill in title, version, author, contact information, and a reference URL if the design derives from existing work. Add a thumbnail, typically 1024 square, because most VRM launchers and world platforms show it in their avatar picker and a file without one displays a grey placeholder.
Then set the permission flags. Avatar permission answers who may impersonate the character: only the author, only explicitly licensed persons, or everyone. Separate booleans cover violent usage, sexual usage, and commercial usage, with VRM 1.0 adding political or religious usage and antisocial usage. The redistribution and modification license answers whether the file may be passed on and altered, from prohibited through the Creative Commons family to a custom license URL.
VRM metadata is a declaration, not DRM. Nothing prevents a determined person from stripping it. Its value is that it makes intent unambiguous, which is what platforms and commissioners rely on in a dispute.
Export as VRM 0.x or VRM 1.0 and Test the File in VSeeFace or Warudo
With the model in the scene hierarchy and components configured, run VRM0 > Export VRM 0.x or VRM1 > Export VRM. Enable Freeze T-Pose, leave blendshape reduction off unless you know which shapes are unused, and write the file. A typical avatar exports at 8 to 40 MB depending on texture resolution and count.
Test in the actual target app, not the Unity preview. Load the file into VSeeFace or Warudo and check, in order: scale against the default camera, T-pose correctness, blink firing, each emotion preset, viseme response while speaking, hair movement on a fast head turn, and clipping during a lean.
- Expressions do nothing: preset names are wrong, or the file was exported as the wrong spec version.
- Avatar is huge or tiny: the source was authored in centimeters or inches rather than meters.
- Hair is rigid: no spring bone chains, or chain roots parented to something that never moves.
- Arms droop: Freeze T-Pose was not enabled at export.
What Makes VRM Different From FBX, GLB, and Other Avatar Formats?
VRM is not a general-purpose 3D format. It is a narrow, opinionated profile of glTF 2.0 that answers questions FBX and GLB deliberately leave open: which bones a humanoid has, what an expression is called, how hair moves, how the character is shaded, and who may use it. That constraint is the point, and it is why a vrm file loads into a dozen unrelated applications and works while a generic FBX avatar needs custom integration in each one.
Why VRM Is a glTF 2.0 Extension Built Specifically for Humanoid Avatars
Open a .vrm in a hex editor and you will see the glTF magic bytes at the start. A VRM file is a binary glTF container with extra extension objects in its JSON chunk. Mesh data, accessors, skins, morph targets, textures, and node hierarchy are stored exactly as in any glTF asset, which is why a plain glTF viewer can usually display a VRM's geometry with no VRM support at all.
The VRM layer sits on top. VRM 0.x keeps everything under a single extensions.VRM object holding humanoid, meta, firstPerson, blendShapeMaster, secondaryAnimation, and materialProperties. VRM 1.0 splits it into purpose-built extensions: VRMC_vrm for meta, humanoid, first person, look-at and expressions, VRMC_springBone for physics, VRMC_node_constraint for constraints, and VRMC_materials_mtoon for toon shading.
The consequence is graceful degradation. A runtime that understands glTF but not VRM still gets a textured, skinned mesh; one that understands VRM gets a fully specified humanoid with named expressions, physics, licensing, and shading. Compare that with FBX, where a proprietary versioned binary lets two exporters produce files that behave differently in one importer.
VRM also inherits glTF's limits: complex constraint rigs, IK setups, and procedural deformers were never standardized there and cannot be smuggled in, so a source rig depending on corrective shape drivers or a control curve hierarchy loses all of it.
VRM 0.x vs VRM 1.0: Coordinate Flip, Constraints, and the New Surprise Expression
The vrm 0.x vs vrm 1.0 question comes up on every conversion, and the differences are structural. The most consequential is orientation: VRM 0.x avatars face +Z, backwards relative to the glTF convention, while VRM 1.0 corrects this so avatars face -Z, matching glTF and almost every engine's forward axis. Converting 0.x to 1.0 therefore requires a 180-degree rotation around Y, which toolchains apply for you and which explains why a naively converted avatar appears to moonwalk.
| Aspect | VRM 0.x | VRM 1.0 |
|---|---|---|
| Extension key | Single VRM object | VRMC_vrm plus separate springBone, mtoon, constraint extensions |
| Forward axis | +Z, against glTF convention | -Z, matches glTF |
| Emotion presets | joy, angry, sorrow, fun, neutral | happy, angry, sad, relaxed, surprised, neutral |
| Viseme names | a, i, u, e, o | aa, ih, ou, ee, oh |
| Blink and look naming | blink_l, lookup (lowercase) | blinkLeft, lookUp (camelCase) |
| Spring bone colliders | Spheres only | Spheres and capsules |
| Node constraints | Not available | Roll, aim, and rotation constraints |
| Expression override | Not specified | Blink, look-at, and mouth override rules per expression |
| Metadata | Fixed license enum | Granular permission flags plus license URL |
| App support | Near universal | Growing, still incomplete |
The added surprised expression is small but useful: 0.x forced creators to overload "fun" or a custom expression for shock reactions, and every app interpreted that differently. VRM 1.0 also introduces expression override semantics, so a preset can declare that it suppresses blinking or look-at while active, which stops an avatar blinking mid-scream.
Node constraints are the other genuine addition. VRMC_node_constraint supports roll, aim, and rotation constraints, enough to drive a twist bone from a wrist rotation or point an accessory at a target without baked animation. It is not a rigging system, but it removes the most common reason people needed engine-side scripting.
Which Version To Export When Your Target App Still Requires VRM 0.x
Compatibility, not features, decides this. VRM 0.x remains the safest export for VTubing because the most widely used free tracker, VSeeFace, runs on an older Unity runtime and does not natively load 1.0 files. A long tail of community tools is in the same position.
VRM 1.0 is right when your targets are current: Warudo, VNyan, three.js through @pixiv/three-vrm, Blender via the add-on, and newer Unity integrations all handle it. It is also the better archival format. Upgrading 0.x to 1.0 is mechanical and well supported by UniVRM's migration path, while downgrading loses constraints, capsule colliders, and the surprised expression, and forces a full rename of every preset.
- Export both. Keep the Unity or Blender scene as master and produce a 0.x and a 1.0 file from it; the extra export takes two minutes.
- Name files unambiguously, for example
character_vrm0.vrmandcharacter_vrm1.vrm. Support threads where nobody knows which version was sent are a real time sink. - If you sell avatars, ship both plus the source, or buyers on a 0.x-only tracker will ask you to downgrade by hand.
The Humanoid Bone Map Explained: Required Bones vs Optional Fingers and Toes
The humanoid rig is why VRM interoperates. Rather than shipping animation bound to your specific skeleton, a VRM declares which of its nodes fills each standardized role, and consuming apps retarget onto those roles. An animation authored for one avatar plays on any other regardless of proportions, because the app maps role to role rather than bone name to bone name.
Optional bones fall into tiers of practical importance: neck and eyes are technically optional but effectively required for a VTuber, while chest and upperChest add the torso articulation that makes leaning and breathing read naturally.
Fingers are fifteen bones per hand, being proximal, intermediate, and distal joints for each of five digits. They are optional and frequently omitted by generated models, which is a false economy: without them the hands stay frozen in whatever pose the mesh was built in, and any app applying a default hand pose produces nothing. Toes are one bone per foot and matter only for full-body tracking. Jaw exists in the spec but is rarely used, since VRM lip sync is blendshape-driven.
Bone roles are exclusive. One node cannot fill two humanoid roles, and a node used as a humanoid bone cannot also be a spring bone joint. Either mistake is a top cause of export validation failure, second only to a broken T-pose.
How Expression Presets Standardize Blendshapes Across Every VRM App
A blendshape, or morph target in glTF terms, is a stored vertex offset that deforms a mesh as its weight rises. Every 3D format has them. What no other avatar format standardizes is what they mean. Your model might have a shape called Fcl_MTH_A, viseme_aa, or Mouth_Open_Wide, and an application receiving a raw FBX has no way to know which one to fire when the microphone detects an open vowel.
VRM expression presets solve this with an indirection layer. The file declares a preset named aa, and that preset binds to whichever mesh and blendshape index actually produces an "ah" mouth, at whatever weight the author chose. The app fires aa, never needing to know your naming scheme, and you never rename a source shape.
Presets also bind things blendshapes cannot express. One expression may drive multiple blendshapes across multiple meshes at different weights, change a material's base color or emissive factor, and shift its UV offset. That last capability is how flat-plane eyes move their irises and how blush appears on toon faces with no deformation at all.
VRM also supports custom expressions with arbitrary names. Apps never fire them automatically, but hotkey systems in VSeeFace, VNyan, and Warudo bind a key or chat command to any named expression, which is where stylized reactions live: heart eyes, spiral eyes, an anger vein.
VRM Expression Preset Naming: Why a Preset Named Wrong Silently Does Nothing in VSeeFace
This failure deserves its own section because it produces no error anywhere in the pipeline. The export succeeds, the file validates, the avatar loads, and the blendshapes exist and can be scrubbed by hand. Yet the mouth never moves when you speak, the emotion hotkeys do nothing, and no log line explains why.
The reason is that preset matching is by exact reserved name, and anything that is not an exact match becomes a custom expression. Custom expressions are perfectly valid, so nothing complains: the app simply never fires them, because automatic drivers only look for reserved names. Every one of the following is a silent no-op.
- Exporting VRM 0.x with 1.0 names. A 0.x file whose presets are
happy,aa, andblinkLefthas zero working expressions in VSeeFace, which expectsjoy,a, andblink_l. - Exporting VRM 1.0 with 0.x names, the reverse mistake, usually made by pasting an old expression list into a new project.
- Capitalization drift:
Joy,Blink, orLookUpin a 0.x file,HappyorBlinkLeftin 1.0. Matching is case sensitive in practice. - Plausible substitutions:
smileforjoy,sadin a 0.x file where the reserved name issorrow,ahfora,blink_leftforblink_l. - Whitespace: a trailing space in a preset name is invisible in the inspector and defeats the match completely.
Diagnose it in two minutes. Load the avatar in VSeeFace and open the expression hotkey configuration: presets that matched appear under their standard slots, presets that did not appear as custom entries. If your entire emotion set is sitting in the custom list, the names are wrong for the spec version you exported.
The fix is renaming in the source project and re-exporting, never editing the .vrm. In UniVRM, reserved names come from the preset enum, so the real error is usually having created custom expressions rather than selecting preset slots: delete them, add the correct slots, rebind the same blendshapes, export again.
How Spring Bones Simulate Hair and Clothing Physics Without a Game Engine
Spring bones are a deliberately simple physics model, and that simplicity is what makes them portable. Each joint stores a rest direction relative to its parent. Every frame the app moves the joint where inertia would carry it, pulls it back toward rest by the stiffness value, applies gravity along a specified direction, damps velocity by drag, then resolves collisions against assigned colliders using the joint's hit radius.
There is no mass, no cloth solver, no self-collision, and no constraint network. That is precisely why the same avatar behaves nearly identically in VSeeFace, Warudo, Cluster, Blender, and a three.js page: the algorithm is small enough that every implementation converges. A real cloth simulation would not survive that trip.
Parameters live per chain, or per joint in VRM 1.0, which lets a hair strand be stiff at the scalp and loose at the tip. Colliders are defined on nodes and grouped, then referenced by chains. A center node can be specified so inertia is calculated relative to a moving reference, which is what stops hair flying backwards every time a world teleports the avatar's root transform.
Practically, spring bones cover hair, tails, ears, ribbons, scarves, skirts, sleeves, and dangling accessories, but not anything needing surface-to-surface contact such as a cape draping over a shoulder. For those, model the drape into the mesh and keep motion to the free edges.
Tuning Stiffness, Gravity, and Drag So Spring Bones Do Not Jitter or Clip
Start from a known-good baseline rather than the defaults. Medium-length back hair at stiffness 0.8 to 1.5, gravity power 0.1 to 0.3 with direction (0, -1, 0), drag 0.4 to 0.6, and a hit radius of 0.02 to 0.04 meters reads as hair rather than as rubber or rope.
| Element | Stiffness | Gravity power | Drag | Chain length |
|---|---|---|---|---|
| Bangs / front hair | 2.0 - 3.0 | 0.0 - 0.1 | 0.6 - 0.8 | 2 - 3 bones |
| Side hair | 1.0 - 2.0 | 0.1 - 0.2 | 0.5 - 0.7 | 3 - 5 bones |
| Back / long hair | 0.8 - 1.5 | 0.1 - 0.3 | 0.4 - 0.6 | 4 - 8 bones |
| Twin tails | 0.6 - 1.2 | 0.2 - 0.4 | 0.3 - 0.5 | 4 - 6 bones |
| Skirt panels | 1.5 - 2.5 | 0.2 - 0.4 | 0.6 - 0.8 | 2 - 3 bones |
| Tail | 0.5 - 1.0 | 0.05 - 0.2 | 0.3 - 0.5 | 6 - 10 bones |
| Ribbons and small props | 1.5 - 2.5 | 0.1 - 0.2 | 0.5 - 0.7 | 2 - 4 bones |
Jitter almost always means stiffness is too high for the drag value, so the chain overshoots rest and oscillates. Raise drag before lowering stiffness, since drag damps oscillation without making hair feel dead. Jitter only at low frame rates is different: some implementations integrate per frame rather than at a fixed timestep, so a stream dropping to 20 fps shakes hair that is stable at 60.
Clipping means no collider group is assigned to the chain, the collider radius is smaller than the surface it represents, or the joint hit radius is too small. Increase collider radius until hair rests just off the mesh, then raise hit radius on the offending chain. Skirts need capsules along the femur, not one sphere at the hip.
Test spring bones with fast motion, not slow. Turn the avatar's head 90 degrees in a single frame and watch the following second. Settings that look fine during gentle movement frequently explode under a quick head turn or a sudden lean.
What the MToon Shader Does: Cel Shading, Rim Light, and Outline Width
The mtoon shader is VRM's standardized toon shading model, and like spring bones it is specified tightly enough that every implementation produces near-identical results. Instead of a continuous diffuse falloff, MToon quantizes lighting into a lit zone and a shade zone with a controllable transition.
Core parameters are lit color and its texture, shade color and its texture, and two shaping values. Shading toony controls how hard the terminator is, from 0 for a smooth gradient to 1 for a razor edge, with 0.8 to 0.95 typical for anime styling. Shading shift moves the terminator toward or away from the light, deciding how much surface sits in shade at a given angle.
- Rim light: fresnel edge glow with its own color, lighting mix, and fresnel power. Subtle rim at 0.1 to 0.3 separates the avatar from a busy stream background without looking like an effect.
- Outline: an inverted-hull pass with width mode None, World Coordinates, or Screen Coordinates. World keeps thickness physically consistent as the camera moves; screen keeps it visually constant at any distance, which is usually what a VTuber wants.
- Outline width: typically 0.02 to 0.08 in world mode, combined with a width multiply texture to thin the line on the face and thicken it on clothing.
- MatCap: a texture sampled by view-space normal, used for the sliding highlight band on anime hair and for fake metal and glass.
- Emissive and UV animation: self-illumination for glowing details, and scrolling or rotating UVs for flowing patterns with no animation data.
MToon omits the metallic-roughness workflow entirely, so a PBR-generated model needs a shade texture authored instead. Derive it from the base color: desaturate slightly, shift the hue toward blue-violet, drop brightness to 70 to 85 percent. One image operation per material, and far better than a flat shade color.
How VRM Metadata Enforces Who May Use, Modify, and Redistribute Your Avatar
No other mainstream 3D format embeds a machine-readable rights declaration inside the file, and it is one reason VRM took hold in a community where a character is an identity rather than an asset. The metadata block answers three questions people routinely conflate. The first is avatar permission: who may embody this character, restricted to the author, to explicitly licensed persons, or open to everyone. This is about impersonation rather than file copying, and it is the flag that matters if you are a streamer whose public face is this model.
The second is usage restriction: whether the avatar may appear in excessively violent content, sexual content, and commercial contexts. VRM 1.0 expands commercial usage from a boolean into personal non-profit, personal profit, and corporate tiers, and adds political or religious and antisocial usage flags.
The third is the redistribution and modification license: whether the file may be passed on and whether it may be altered. VRM 1.0 separates modification into prohibited, allowed, and allowed with redistribution, and adds a credit notation flag. Platforms such as Cluster and VirtualCast read these fields before letting a user upload a file that is not theirs.
Converting FBX to VRM in Unity With UniVRM, Step by Step
This is the canonical path to convert fbx to vrm, and it is worth doing slowly once so the failure modes become recognizable. Create a Unity project on an LTS version, set color space to Linear, and import the UniVRM package for your target spec version.
- Drag the FBX and its textures into Assets. If textures were embedded, use Extract Textures and Extract Materials so they become editable assets.
- In the model importer's Rig tab set Animation Type to Humanoid and press Apply, then open Configure and verify every mapped bone, especially chest, upper chest, and neck.
- Use Pose > Enforce T-Pose if the source is in A-pose, then Apply and Done.
- Drag the model into the scene at origin with identity rotation and scale.
- Convert every material: create MToon materials, assign lit and shade textures, normal maps, and outline settings, and set eye materials to Unlit if you want them lighting-independent.
- Run VRM0 > Export to VRM 0.x or VRM1 > Export VRM, fill in title, author, and license, enable Freeze T-Pose, and write the file.
- Re-import the exported .vrm into the same project. UniVRM generates a prefab carrying the expression proxy, spring bone, first person, and look-at components.
- Configure expressions, spring bones and colliders, look-at, and first-person settings on that prefab, then export a second time.
The two-pass structure exists because VRM components only appear on a VRM prefab, not on a raw FBX import, so configuring expressions before the first export is impossible. It surprises everybody once; after that, iteration is quick.
Converting GLB to VRM: What Carries Over and What You Must Rebuild
GLB to VRM is conceptually cleaner than FBX to VRM because both sides are glTF, so geometry, UVs, textures, skin weights, and morph targets transfer without a format translation. Scale is already metric, textures are already embedded with defined color spaces, and morph targets keep their names.
What does not carry over is everything VRM adds. A GLB has no concept of humanoid bone roles, so mapping is manual. It has no expression presets, only raw morph targets, so every preset must be authored. It has no spring bones, no colliders, no MToon parameters, no first-person or look-at configuration, and no metadata. A GLB gives you the mesh and the skeleton, and nothing that makes a VRM a VRM.
- Carries over from either source: mesh, UVs, skin weights, skeleton hierarchy, and morph targets, assuming blendshapes were enabled at FBX export.
- Carries over more reliably from GLB: texture color space and metric scale, both of which FBX frequently gets wrong.
- Must be authored regardless of source: humanoid bone roles, expression presets, spring bones and colliders, MToon materials, and metadata.
For GLB specifically, Blender with the VRM add-on is usually faster: import, assign humanoid bones, convert materials, define spring bone chains, fill in metadata, export. No prefab round trip, and geometry repair is available in the same session.
Fixing Common Conversion Failures: Missing Bones, Pink Materials, and Broken Normals
Conversion failures cluster into a handful of recognizable shapes. Working through them in a fixed order saves more time than debugging whatever looks most alarming.
- Export blocked, missing required bone. One of the fifteen mandatory roles is unmapped, or a node is assigned to two roles. Check for empty slots in the body, arms, and legs tabs.
- Pink or magenta materials. The shader is missing, not the texture, which is normal after moving a project between render pipelines. Reassign MToon from the correct UniVRM version.
- Black or blown-out avatar. Color space is Gamma instead of Linear, or a base color texture was imported with sRGB unchecked. Both are one-checkbox fixes and invisible until compared against a reference.
- Faceted or inverted shading. Normals were not exported, were recalculated flat, or faces are inverted. Recalculate normals outside, enable shade smooth with a 30 degree auto-smooth angle, re-export.
- Expressions present but inert. Preset naming mismatch for the exported spec version, not a rigging problem.
- Avatar drooping or twisted at rest. Freeze T-Pose was skipped, or Enforce T-Pose was applied in the configurator and never baked at export.
- Mesh explodes on animation. Skin weights exceed the four-influences-per-vertex limit glTF enforces and the extras were silently dropped. Limit to 4 and normalize before export.
- Textures missing after transfer. Someone exported glTF separate rather than binary. A VRM must be a single self-contained binary file.
When a file is badly broken, re-importing the exported .vrm into a clean Unity project is a fast diagnostic, since UniVRM reports what it could and could not reconstruct. If geometry rather than configuration is at fault, regenerating the base model through Threedium's avatar generation usually beats repairing topology by hand, since your format configuration lives in the scene and only the mesh gets swapped.
Which Apps and Platforms Can Use Your VRM Avatar?
A finished .vrm is portable across VTubing trackers, social VR worlds, game engines, DCC tools, and the browser. Support is broad but uneven, mostly along the 0.x versus 1.0 line, so it is worth knowing where your file will land before choosing an export version.
VTubing Trackers: VSeeFace, Warudo, VNyan, and Animaze
The four most common desktop trackers all accept VRM, with differences in spec version support and pricing that determine which file you hand a client.
| Application | VRM 0.x | VRM 1.0 | Cost | Notes |
|---|---|---|---|---|
| VSeeFace | Yes | No, not natively | Free | Windows only; also supports its own VSFAvatar bundle format |
| Warudo | Yes | Yes | Free tier plus paid Steam version | Broadest format support, including MMD and custom assets |
| VNyan | Yes | Partial | Free | Node-graph logic for stream interactivity |
| Animaze | Yes, via Animaze Editor | No | Free tier plus subscription | Import path is through the editor, not drag and drop |
All four consume the same expression presets and spring bone data, which is the practical payoff of the format: one file, four applications, no per-app rebuild. Tracking input differs, some reading a webcam directly and others accepting ARKit data over the VMC protocol, but that is capture-side and does not change the file.
Tracking setup, calibration, hotkeys, and stream integration are a separate subject. The VTuber avatar guide covers that end of the workflow; this page stays on the format.
Social VR and Metaverse Worlds: Cluster, VirtualCast, and VIVERSE
Cluster accepts VRM uploads through its web interface and runs them in browser, desktop, mobile, and VR clients. Because it targets mobile hardware too, keep triangles well under 70,000, materials in single digits, and textures at 2048 or below if the avatar should load smoothly in a crowded room.
VirtualCast was built around VRM from the start and is the closest thing to a native environment for the format. VIVERSE supports VRM avatars in its web-based worlds, where the browser runtime makes file size and draw call count the binding constraints rather than polygon count.
Metadata matters more here than on your own desktop. Platforms hosting user uploads read the avatar permission and redistribution fields, and a file marked author-only can be rejected when anyone else uploads it, so confirm before delivery that a commissioned avatar's permission flags name you rather than the artist.
Loading VRM at Runtime in Unity, Unreal Engine, and Godot
Runtime loading is where VRM becomes interesting for applications rather than streaming: users bring their own avatar file and your app displays it with no build-time import step. In Unity, UniVRM provides asynchronous runtime loading that returns an instantiated hierarchy with the humanoid Animator, expression proxy, spring bones, and look-at already wired. Load the bytes, await the import, retarget existing humanoid animation clips onto the resulting Animator, and the avatar behaves like any Mecanim character. Dispose properly, because a runtime-loaded avatar allocates meshes and textures that are not collected automatically.
Unreal Engine has no first-party VRM support. The community VRM4U plugin handles import and runtime loading, converting the humanoid skeleton for Unreal's animation system and translating MToon into Unreal materials, though expect material tuning since Unreal's shading model sits far from MToon's assumptions. In Godot, the godot-vrm addon from the V-Sekai project provides import while Godot's own glTF pipeline handles the container; spring bone and MToon support exist but are less mature, so validate rather than assume parity.
Why VRChat Requires a Unity Upload Instead of a Direct VRM Import
VRChat does not load VRM files, which confuses people constantly because VRChat and VRM occupy the same cultural space. The reason is architectural: VRChat avatars are Unity prefabs compiled into platform-specific asset bundles by the VRChat SDK and uploaded to VRChat's servers, so the runtime consumes bundles rather than model files and there is no import path for any external format.
VRChat's avatar system also uses its own components: physics comes from PhysBones rather than spring bones, expressions come from an animator controller with a menu and parameters rather than named presets, and visemes and eye look-at are configured on the VRC Avatar Descriptor. None have a lossless one-to-one VRM equivalent, so you convert. Import the VRM into a Unity project containing the VRChat SDK, then either configure the descriptor manually or use the community VRM Converter for VRChat, which maps the humanoid rig, generates a descriptor, translates expressions to visemes where it can, and converts spring bone chains into PhysBones with approximately equivalent parameters. Review the physics output specifically; approximate is the operative word.
Budget for the performance rank while you are there. VRChat's PC ranks put Excellent at 32,000 triangles and Good at 70,000, with tighter caps on material slots, skinned meshes, and bones, and Quest budgets are far smaller again. A VRM built for a desktop tracker frequently lands at Poor unoptimized.
Importing VRM Into Blender for Animation, Posing, and Renders
The VRM Add-on for Blender imports both 0.x and 1.0 files with armature, meshes, shape keys, MToon material properties, and spring bone definitions preserved as add-on data. That makes Blender the practical hub for everything the format itself does not do: keyframed animation, posed renders, thumbnail art, outfit modelling, and geometry repair.
After import, humanoid bone assignments live in an armature panel where you can correct them, and MToon parameters appear as editable node properties. Shape keys keep their original names, so you can add or fix blendshapes and rebind them to expression presets before exporting again.
- Author idle, wave, and reaction animations for playback in trackers and engines.
- Render promotional art and stream assets at high resolution with proper lighting, which no tracker can do.
- Model alternate outfits on the existing armature and export variant .vrm files sharing one skeleton.
- Repair normals, non-manifold geometry, weights, decimation, and UVs, all easier here than in Unity.
Round-trip only with the add-on's exporter. Blender's generic glTF exporter writes a valid GLB and silently discards every VRM extension, producing a file that looks correct in a viewer and has no humanoid, no expressions, and no physics.
Showing VRM Avatars on the Web With Three.js and @pixiv/three-vrm
Displaying VRM in a browser is a solved problem thanks to @pixiv/three-vrm, a plugin for three.js's GLTFLoader. Register the VRM loader plugin on the loader, load the file, and you receive a VRM object exposing the humanoid, expression manager, look-at, and spring bone manager.
The pattern is small: register the loader plugin, load the URL, pull the VRM from the parsed result's user data, add its scene to yours, and call the VRM's update method with the frame delta inside your render loop. That update call advances spring bones and look-at; omit it and the avatar renders correctly but stays rigid.
Two utilities matter in real deployments. For VRM 0.x models, apply the rotation helper that corrects the +Z forward convention, or the avatar faces away from the camera. Then run the utilities that remove unused vertices and combine skeletons, which cuts draw calls on avatars built from many submeshes.
Budget for the web as you would for mobile: under 15 MB total, a single 2048 atlas, roughly 25,000 to 40,000 triangles, and low material count, since each material is a draw call in a page that also renders an environment. Producing a lighter web variant alongside the full-quality model is standard practice, and Threedium's polygon optimization and multi-format export exists for that kind of per-target derivative.
Frequently Asked Questions About VRM Avatar Makers
Short answers to the questions that come up most often when people start working with the format.
What is a VRM file and what is it used for?
A vrm file is a 3D humanoid avatar stored as binary glTF 2.0 with VRM extensions adding a standardized humanoid bone map, named expression presets, spring bone physics, MToon toon shading, first-person and look-at configuration, and embedded licensing metadata. It is used for VTubing, social VR and metaverse worlds, and any application that lets users bring their own character.
The point is portability of a complete character rather than of geometry alone. One file works in VSeeFace, Warudo, Cluster, VirtualCast, Blender, Unity, and a browser page with no per-application rebuild, because everything needed to animate the character is declared inside the file in a shared vocabulary.
How do I convert an FBX or GLB file to VRM for free?
Both free routes are complete: Unity with UniVRM, or Blender with the VRM Add-on. Unity Personal is free below the revenue threshold, Blender is free, and both add-ons are open source. Import the model, set up humanoid bone mapping, convert materials to MToon, author expressions and spring bones, fill in metadata, and export.
Choose Unity for FBX sources and any project that will also produce a VRChat build; choose Blender for GLB sources and models needing repair. No reliable one-click converter exists, because humanoid mapping, expressions, physics, and licensing are absent from the source file and must be authored.
Is VRoid Studio the only way to make a VRM avatar?
No. VRoid Studio is the best-known free character creator and exports VRM directly, but it is parametric: you work within its body types, face sliders, and hair tools, and results share a recognizable underlying base. That suits many people and limits anyone who wants a genuinely distinct character.
The alternatives are AI generation from your own reference art, a manual pipeline in Blender or Maya, or a commission. Generating from images preserves your design, since the mesh is reconstructed from your artwork rather than assembled from presets. Threedium's avatar generation takes that route, with human 3D artist refinement available on enterprise tiers.
What is the difference between VRM 0.x and VRM 1.0?
VRM 1.0 fixes the forward axis so avatars face -Z in line with glTF instead of +Z, splits the single VRM extension into separate extensions for the avatar, spring bones, constraints, and MToon, renames every expression preset, adds a surprised expression, adds capsule colliders and node constraints, and replaces the fixed license enum with granular permission flags.
Functionally the two describe the same kind of avatar. The distinction matters day to day because of compatibility: VSeeFace and a number of older tools still require 0.x, while Warudo, current three-vrm, and the Blender add-on handle 1.0. Exporting both versions from one source scene is the pragmatic answer.
Can I use a VRM avatar in VRChat?
Not directly. VRChat has no VRM importer, because its avatars are Unity prefabs compiled into asset bundles by the VRChat SDK and uploaded, rather than model files loaded at runtime. You convert the VRM inside a Unity project with the SDK installed and upload from there.
The conversion is routine but lossy: spring bones become PhysBones with approximated parameters, expression presets become animator states and menu entries, and visemes move to the VRC Avatar Descriptor. The community VRM Converter for VRChat automates most of it. Expect to optimize too, since Excellent on PC is 32,000 triangles.
How much does a custom VRM avatar commission cost?
Custom VRM avatar commissions generally run 300 to 800 USD for a simple model from an emerging artist, 1,000 to 3,000 USD for a well-built model from an established creator, and 3,000 to 10,000 USD or more for detailed designs with complex outfits, props, and extensive custom expressions. Typical turnaround is 3 to 10 weeks, longer in peak seasons.
Rigging-only work, where you supply the model and the artist handles humanoid mapping, expressions, spring bones, and export, usually falls between 150 and 500 USD. Character design alone is a separate line item, often 100 to 500 USD for a reference sheet.
AI generation sits elsewhere on the curve: minutes to hours instead of weeks, a fraction of the cost, and a result that still needs the format configuration described above. Generating the base mesh, textures, and rig automatically and then doing the VRM setup yourself, or paying a rigger for that pass, covers most of what a full commission delivers.
Why does my VRM avatar's hair or skirt not move?
Almost always because spring bones were never configured. Hair geometry alone does nothing: it needs a chain of bones, weighted to that geometry, registered as a spring bone group with stiffness, gravity, and drag values. A model whose hair is rigidly weighted to the head bone is static by construction, and no tracker can add motion to it.
Other causes, in order of frequency: the chain root is parented to a node that never moves; stiffness is high and gravity low enough that motion is imperceptible; geometry is weighted to the head rather than the chain bones; or a generic glTF exporter discarded the VRM extensions entirely.
If hair moves but passes through the body, the problem is colliders rather than chains. Add a head sphere group, a chest capsule, and thigh capsules, assign those groups to the affected chains, and increase collider radius until the hair rests just off the surface.