How Do You Make a Fursona 3D Model From Images?
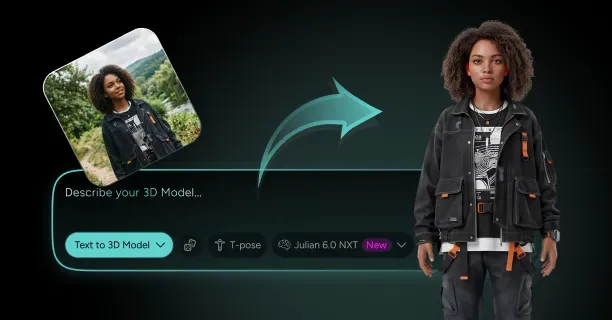
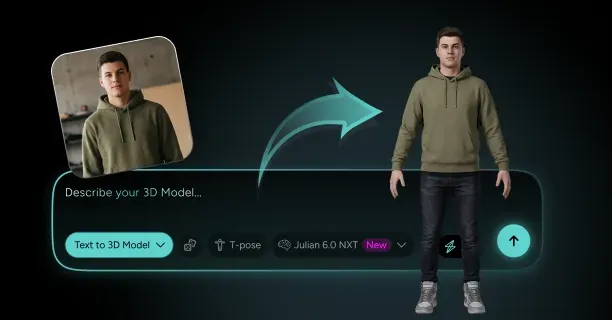
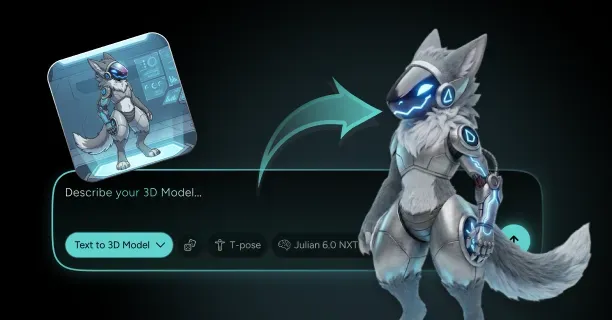
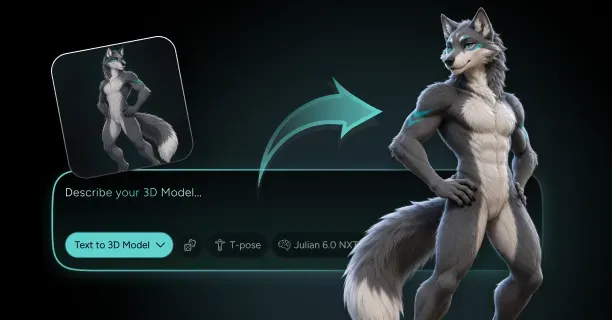
To make a fursona 3D model from images, upload your reference sheet or character art to Threedium, describe the species and its defining traits in the prompt field, and let the Julian NXT generator reconstruct a watertight anthro mesh with PBR textures baked from your markings. You then review the mesh against your sheet, refine the paws, muzzle, and tail in a detail pass, and let the platform apply an anthro-ready skeleton with tail chain, ear bones, and a jaw joint before exporting to GLB, FBX, USDZ, or VRM. The whole loop runs in a single sitting, which is the practical difference between a 3D fursona generator and a commission queue measured in weeks.
Preparing Your Reference: What Actually Works as AI Input
A standard fursona reference sheet is the single best input you can give an image-to-3D system, because it already contains what the reconstruction needs: a front orthographic view, a side or three-quarter view, a back view showing dorsal markings, and usually a flat color palette with hex swatches. Feed all of those views in one batch rather than one at a time. The generator resolves silhouette from the front, snout length and chest depth from the side, and tail attachment plus back stripes from the rear, and disagreement between those views is the most common cause of a lumpy result.
Not every input is equally usable. A single dynamic illustration with the character mid-leap and a dramatic camera angle gives the reconstruction almost no reliable proportion data, and it will invent the parts it cannot see. Fursuit photographs carry real lighting and real volume, which helps, but the suit's foam head is thicker than the drawn character and baked-in shadows end up painted into the albedo. If a fursuit photo is all you have, shoot in flat overcast or diffuse indoor light, stand the suiter in an A-pose against a plain wall, and take front, side, and back at the same distance and focal length.
- Best input: a three-view ref sheet at 2000 px or larger per view, flat lighting, neutral A-pose or T-pose, visible palette swatches
- Workable: two or three separate pieces of art of the same character in similar poses, plus a written description of anything they disagree on
- Workable with care: flat-lit fursuit photos from three angles, cropped tight, no strong colored bounce light
- Weak: one action pose, heavy cel shading with painted highlights, chibi proportions mixed with a realistic head
- Unusable alone: headshot icons, badge art, or anything under roughly 800 px on the long edge
If your fursona only exists as a bust or a badge, draw the missing views before you upload, even roughly. Keep the eye line, shoulder line, and hip line at matching heights across all three views: a side view sitting half a head taller than the front is the most common cause of a twisted result.
Uploading Your Reference to Threedium and Naming Your Species
Upload the views together and lead your prompt with the species, because species is the strongest single lever on the base mesh you get back. "Anthro red fox, male, athletic build" produces a fundamentally different skull, ear set, and leg configuration than "anthro house cat, female, slim." Naming a real animal gives the system a proportion reference it can lean on; naming only "furry character" leaves it guessing between a hundred body plans. If your fursona is a hybrid, name the dominant species first and the secondary traits after it: "anthro wolf with feline eyes and a long ringed raccoon tail" is parseable, while "wolf-cat-dragon hybrid" is not.
Write the prompt as a short spec sheet rather than prose. Species, sex and build, height class, style target, and then the trait list. Roughly this shape works well:
- Species and morph: anthro timber wolf, digitigrade, adult male, lean muscular build
- Proportions: roughly 7 heads tall, broad shoulders, narrow waist, plantar paw pads
- Head: long tapered muzzle, defined stop, upright triangular ears, amber eyes
- Coat: charcoal gray dorsal, cream ventral from chin to groin, black sock markings to mid-forearm
- Tail: thick brush tail, roughly 60 percent of body height, black tip
Keep the sheet uploaded while you iterate. The value of a fursona maker workflow is that regeneration costs minutes, so run three or four passes changing one variable each time: muzzle length, then ear size, then digit thickness.
Put your palette hex codes directly in the prompt text as well as in the image. Reconstruction reads color from pixels, and pixels carry the lighting the artist painted. Writing #3B3F45 dorsal, #E8DCC4 ventral gives the texture pass an unambiguous target and saves you a hue-correction round trip in Photoshop later.
Prompting Species Traits: Muzzle Length, Ear Shape, and Tail Type
Three traits carry most of the recognizability of an anthro character 3D model: the muzzle, the ears, and the tail. Describe muzzle length as a proportion, not an adjective. "Long muzzle" is ambiguous across species; "snout projecting roughly 35 percent of total head length, with a defined brow stop" is not. Canids typically land between 30 and 45 percent of head length, felines between 12 and 20 percent with a broad whisker pad mass, and mustelids and equines sit at the extremes on either side. Add the profile shape separately: tapered, blunt, boxy, or upturned. Also specify whether the nose leather is a wide canid triangle, a small feline wedge, or a flat rhinarium, because that single surface reads at any distance.
Ears need shape, set, and angle. Shape covers the outline: tall triangle, rounded bear cup, tufted lynx tip, long lop rabbit, folded scottish. Set is where they attach on the skull, which is the trait most often generated wrong: canid and feline ears sit high and near the top plane of the skull, while primate-adjacent and some fictional species sit lateral, near eye level. Angle is the rest position, usually 10 to 25 degrees outward from vertical. State all three: "tall triangular ears set high on the skull, resting 15 degrees outward, with visible inner ear fur tufts."
For tails, give the type, the length relative to the body, and the cross-section. A fox brush tail, a squirrel plume, a lemur ringed rod, a rat whip, and a dragon taper all attach and hang differently. Length matters for physics later: anything past 70 percent of standing height will drag through floors in real-time engines unless you author the rest pose with a lift. Specify base thickness too, since a thick base is what sells a heavy tail as anatomically attached rather than glued on.
Locking In Markings, Color Palette, and Pattern Symmetry
Markings are what make the model yours rather than a generic species base, and they are the part most likely to drift during generation. Break your pattern description into named regions and describe each one by boundary, not by vibe. "Cream ventral running from the lower jaw down the throat, chest, and belly, ending in a rounded point at the navel" is a boundary. "White chest floof" is a vibe, and vibes come back different every run.
Decide early whether your fursona is symmetric. Symmetric patterns are cheaper to keep sharp because the texture pass can mirror UV islands and effectively double texel density on the same budget. Asymmetric markings, a single eye patch or one dark forelimb, must be called out explicitly, because the default assumption in almost every reconstruction system is bilateral symmetry. Say "asymmetric: dark patch over the LEFT eye only, right side clean" and verify it on the mesh, since a mirrored UV layout will happily flip it.
Keep the palette tight. Four to six colors covers almost every well-designed fursona: a primary coat, a ventral, a marking accent, an eye color, and a soft-part color for nose, pads, and inner ear. Twelve-color palettes look busy at avatar scale and eat texture resolution on transitions nobody sees.
Hard-edged markings survive downscaling much better than airbrushed gradients. If your reference art uses soft blended transitions between coat colors, expect them to read as muddy at 1024 x 1024 texture resolution. Where a marking is part of the character's identity, redraw that boundary hard in your reference before you upload.
Choosing a Style: Toony, Semi-Realistic, or Realistic Anthro
Style changes the topology, the texture strategy, and how much fur geometry you can afford, so pick it before generation rather than after.
Toony means simplified forms, oversized head and eyes, flat or two-tone shading, minimal fur detail, and markings painted as clean vector-like shapes. It is the cheapest style to run in real time, holds up at 15,000 to 30,000 triangles, and forgives topology sins because there is little fine deformation to break. Most social VR fursonas live here, and it is the safest starting point if the model is destined for a headset.
Semi-realistic keeps believable animal anatomy, muscle masses, and a real skull under the surface, but stylizes the eyes and simplifies the fur into painted clumps plus a few geometry cards at the ruff, cheeks, and tail. This is the most common commission style and the best compromise for a character that has to work in both a render and an engine. Budget 30,000 to 60,000 triangles and a 2K texture set.
Realistic anthro pushes toward film-adjacent anatomy with dense fur, real specular breakup, subsurface in the nose and inner ear, and correct muscle insertions. Choose it when the deliverable is a still image, a printed figure, or a cinematic, and accept that it needs a separate optimized variant for anything interactive.
Reviewing the Generated Mesh Against Your Reference Sheet
Do not judge the result from the default three-quarter preview. Put the model in front of your reference sheet at matching camera angles and check specific landmarks in order, because a generated furry 3D model usually fails in predictable places rather than everywhere at once.
- Silhouette first, in solid black. Render or view the front and side as a flat silhouette. Muzzle projection, ear height, tail mass, and digitigrade hock angle should be readable with zero surface detail.
- Head-to-body ratio. Count heads at standing height and compare it to your sheet. Anthro designs commonly sit between 6 and 7.5 heads; toony sits at 4 to 5.5. A half-head drift changes the whole read of the character.
- Muzzle in profile. Check the stop, the bridge line, and whether the lower jaw actually sits inside the upper. Generated muzzles often come back with the chin too far forward.
- Ear attachment. Look from the top down. Ears should emerge from the skull surface with a thickened base, not float as flat cards intersecting the head.
- Tail base. From behind, the tail should continue the spine's taper. A tail that starts as a cylinder pushed into the pelvis will never deform convincingly.
- Marking placement. Compare each named region against the sheet, then check the asymmetric ones twice.
Fix anything on that list by regenerating with a corrected prompt rather than by sculpting. Regeneration is cheap and the mesh stays clean, while hand-sculpting to move an ear two centimeters costs more time and leaves you maintaining the topology by hand.
Refining Paws, Claws, and Toe Beans in the Detail Pass
Paws are where furry models are judged, and they are the hardest region for any automated pass because they combine small forms, hard surfaces, and heavy deformation in a few square centimeters. Run them as a dedicated detail pass with specific instructions rather than hoping the first generation nails them.
Decide the hand configuration first: human-shaped with claws, pawed hands with thick digits and visible pads, or full paws with vestigial thumbs. Ask for slightly separated fingers in the rest pose, roughly 3 to 6 degrees of splay, so the skinning has room before the digits collide. Pads, the toe beans, should be modeled as a subtle raised form of 1 to 3 mm at character scale plus a distinct material region, not painted flat and not sculpted as domes. A large metacarpal pad plus four digital pads on the hand, and a large metatarsal pad plus four on the foot, is the standard layout for canid and feline sonas. Give them their own color in the palette and their own roughness value: pads should read wetter and smoother than surrounding fur, roughness around 0.35 to 0.5 against fur at 0.7 to 0.9.
Claws want to be separate geometry with hard normals, sunk into the digit so the base is buried rather than butt-joined to the surface. Keep them short unless the design demands otherwise, since long claws are the first thing to clip through a coffee mug in social VR. For retractable feline claws, model them extended and add a scale-driven toggle rather than animating a sheath.
Rigging an Anthro Skeleton: Tail Chain, Ear Bones, and Jaw
Threedium applies automatic rigging as part of generation, and for anthro characters that skeleton needs more than a stock humanoid hierarchy. A usable fursona rig carries the standard humanoid bone chain plus four anthro additions: a tail chain, ear chains, a jaw joint, and optional secondary chains for a mane, ruff, or long ear tufts.
A practical bone count for a real-time fursona looks like this:
- Core humanoid, 55 to 60 bones: spine, arms, legs, and 3 joints per finger; drop finger bones on toony builds to save budget
- Tail, 5 to 8 bones: longer chains look smoother but cost affected transforms against performance ranks
- Ears, 2 to 3 bones each: base bone animation-driven, tip bone physics-driven
- Jaw, 1 bone: pivot placed at the ear canal, not at the chin
- Digitigrade leg, 4 bones per side: thigh, shin, metatarsal, toe, mapping to UpperLeg, LowerLeg, Foot, Toes
Jaw placement is wrong on a startling number of furry models. The mandible hinges just in front of and slightly below the ear opening, not at the back of the muzzle, and a pivot set too far forward makes the jaw scissor open like a box lid while creasing the cheek. Set it at ear level and the whole lower face rotates as one believable mass.
Exporting Your Fursona as GLB, FBX, USDZ, or VRM
Pick the format by destination, not by habit. Each one carries a different subset of what your model contains, and exporting to the wrong one silently drops the thing you cared about.
- FBX for Unity, Unreal, avatar uploads, and Blender round trips: carries mesh, skeleton, skin weights, blend shapes, and animation, but has no PBR material standard, so textures are reassigned in the engine
- GLB for web viewers, previews, and portfolio embeds: mesh, embedded PBR textures, skeleton, and morph targets in a single binary that gets large fast with 4K maps
- USDZ for iOS AR quick look: mesh and PBR textures with narrow rig and blend shape support, so treat it as a viewer format
- VRM for VRM-compatible apps and streaming tools: humanoid bone map, a defined blend shape preset list, spring bones, and first-person settings, with strict humanoid mapping that makes digitigrade legs a deliberate assignment
For a furry VRChat avatar, export FBX and keep the textures as separate files so you control compression in Unity. For anything you want to post, GLB is the friendliest single-file option. VRM is the right call if the fursona doubles as a streaming avatar, and the face tracking side of that setup, including the 52 ARKit blendshapes and the perfect-sync workflow, is covered on the VTuber avatar page rather than here.
Adding Fur Detail Passes in Blender After Export
Generated fursonas come back with fur represented in the texture: painted clumps, a normal map with directional breakup, and roughness variation. That is the correct default, and for a toony sona it may be the finished look. For semi-realistic and realistic styles you will want to add geometry where fur silhouettes matter, which means a Blender pass after export.
Work in four zones and leave the rest painted. The neck ruff and chest floof, the cheek fur, the tail, and the forearm and hock tufts account for nearly all the visible fur silhouette on an anthro character. Adding cards there costs a few thousand triangles and reads as full fur; adding cards everywhere costs a hundred thousand and reads as a shag carpet.
The efficient method is to groom a representative patch with Blender's hair curves system, render an orthographic pass to a transparent PNG at 2048 x 512 containing four to eight strip variants, then build low-poly cards that sample rows from that atlas. This gives film-grade fur detail at real-time cost and keeps every card on a single material.
- Card geometry: 2 to 4 quads per card, curved along the flow direction, never a single flat plane
- Placement: layer from the inside out, with the deepest layer nearly opaque and the outer layer wispy
- Normals: transfer normals from the underlying body mesh so cards light as part of the surface instead of as loose planes
- Weights: copy skin weights from the body vertex under each card root, then smooth once
Once the fur pass is done and re-exported, drop the FBX into a Unity project with the relevant SDK and check it in play mode before you publish; the full upload, avatar descriptor, and Quest conversion workflow lives on the VRChat avatar page.
Why Fur, Muzzles, and Digitigrade Legs Break Standard Rigs
Anthro characters break the assumptions baked into most humanoid pipelines. A human rig expects a flat face with lips that stretch, a plantigrade foot that lies flat on the ground, no appendages hanging off the pelvis or skull, and a skin surface with no volume above it. A fursona violates all four at once. These are the specific failure modes and the specific fixes.
Fur Cards vs Shell Fur vs Painted Fur Textures: Which To Use When
The fur cards vs shell fur question comes up on every furry model, and the honest answer is that a good character uses all three techniques in different regions. Painted fur handles the body, cards handle the silhouette edges, and shells handle short dense patches where you need visible depth without an outline. Choosing one technique for the whole character is what produces either a flat plastic look or an unusable triangle count.
| Technique | How it works | Typical cost | Best for | Avoid when |
|---|---|---|---|---|
| Painted fur | Albedo clumps plus directional normal map and roughness breakup | Zero extra geometry | Torso, limbs, face, anything with short coat | You need a broken silhouette against a bright background |
| Fur cards | Alpha-cutout strips of 2 to 4 quads, layered along flow | Roughly 40 to 200 triangles per card, 3,000 to 12,000 per character | Ruff, cheeks, tail, ankle and elbow tufts, mane | Camera gets very close, or the platform limits transparency |
| Shell fur | N offset copies of a surface with a noise alpha, faked depth | Multiplies the shelled region's triangles by the shell count, commonly 6 to 16 | Small dense patches: chest, shoulder caps, top of the head | Applied to a whole body, or on any Quest or mobile target |
| Groomed strands | Real curve hair rendered as geometry or strands | Hundreds of thousands of segments | Offline renders, cinematics, print reference | Anything real-time; bake it to cards instead |
The layering discipline is simple: paint the coat as if there will be no geometry at all, add cards only where the outline would otherwise be a clean curve no animal has, then add shells only if a patch still reads as painted-on at conversational distance. Cap the shell count at 8 for anything interactive, and remember shells cost fill rate as well as triangles.
Shell fur on a full body is the single most common cause of an unshippable furry avatar. A 25,000 triangle body at 12 shells becomes 300,000 triangles, blows every performance rank, and will not upload to standalone headsets at all. Shell only the patches that need depth, and never shell a surface that deforms heavily.
Why Real-Time Avatars Use Alpha Fur Cards Instead of Particle Hair
Groomed particle or curve hair looks correct because it is correct, and it is also entirely unsuitable for a real-time avatar. A realistic fursona groom runs somewhere between 200,000 and 2 million hair strands, each subdivided into 4 to 12 segments. Even rendered as camera-facing ribbons that is millions of primitives, all of them tiny, all of them transparent, all of them needing to be sorted or hashed against each other per frame. Real-time renderers are built around a fundamentally different assumption: relatively large opaque triangles, sorted once, shaded once. Sub-pixel transparent geometry breaks quad efficiency on the GPU, defeats early depth rejection, and destroys frame time long before it exhausts memory.
Cards solve the same visual problem with a hundredth of the primitives. A single card carries the appearance of 20 to 60 strands as a texture, so a full ruff that would need 8,000 strands becomes 60 to 150 cards. Because each card is a real surface with a real normal, it also shades correctly and casts sensible shadows, which pure billboards do not.
The rendering mode you choose for those cards matters as much as the geometry. Alpha blend gives the softest edges but has no reliable sort order, so cards flicker and pop as the camera moves. Alpha cutout is sorted correctly because it writes depth, but produces hard aliased edges. The usual answer is cutout with a clip threshold around 0.4 to 0.5, combined with alpha-to-coverage where the platform supports it, which softens edges through multisampling instead of blending. Keep the whole fur set on one material so the sorting question only has to be answered once.
Muzzle and Snout Topology: Edge Loops That Survive Jaw Deformation
A muzzle is a cantilevered mass with a hinge running through the middle of it. When the jaw opens 25 degrees, the lower half of a long snout swings through a far larger arc than a human chin, and topology that would be fine on a human face tears along the lip line.
The rule that fixes most muzzle problems is concentric loops around the mouth opening. You want at least three continuous edge loops encircling the lips, forming a ring that runs from the upper lip, around the corner of the mouth, along the lower lip, and back. That ring is what lets the mouth open without dragging the cheek. A fourth loop just outside it, following the lip line back to the commissure, gives you room for a snarl or a smile. Inside the ring, the lip itself should be two loops thick so it has an actual edge instead of a knife-thin border.
Along the length of the snout you want four to six cross-sectional loops from the nose leather back to the stop, tightening near the nose where curvature is highest. Poles, the vertices where three or five edges meet, must be kept out of the deforming zone. Put them on the bridge of the nose, under the chin, and behind the whisker pad mass, never at the lip corner where they cause pinching on every mouth shape.
Canine, Feline, Avian, and Reptilian Muzzles: Adjusting the Base Mesh
The same base head can serve every anthro species if you understand which loops move and which stay. Species differences live in three places: the projection of the snout, the mass distribution around the mouth, and whether the mouth surface deforms at all.
| Species group | Snout length | Key mass | Topology adjustment | Lip sync approach |
|---|---|---|---|---|
| Canine | 30 to 45 percent of head length | Long lip line, flews, defined stop | Stretch the 5 cross loops forward, keep lip ring proportional to snout width | Full lip and jaw visemes; the flew edge does most of the work |
| Feline | 12 to 20 percent | Broad whisker pads, high cheekbone, short lip line | Collapse cross loops to 3, widen the loops around the whisker pad into a separate rounded mass | Jaw-driven with small lip motion; whisker pads must move with the upper lip |
| Avian | Beak, 25 to 50 percent, rigid | Hard keratin, no soft lip | Separate beak object with hard normals; body mesh ends at the cere; no lip ring | Jaw hinge rotation plus tongue and head motion; no lip shapes at all |
| Reptilian and draconic | 35 to 60 percent | Scale plates, brow ridge, rigid lip margin | Keep the lip ring but reduce it to 2 loops; add loops along scute boundaries so plates stay planar | Jaw rotation dominant; small lip curl only, teeth stay visible |
Avian and reptilian sonas need a mental adjustment more than a technical one. Birds and most reptiles have no soft lips, so the mouth opens as a rigid hinge, and giving a beak human-style visemes produces a rubbery, unsettling result. Carry expression in the jaw angle, the tongue, the head tilt, the eye shape, and the feather or frill positions instead.
For scaled species, keep the scale pattern in a tiling normal map at 2 to 4 UV repeats and layer unique color markings on top in the albedo. Baking every scale into a unique 2K map wastes resolution on a repeating pattern and makes markings blurry.
Digitigrade vs Plantigrade Legs: Rigging the Raised Hock Correctly
Digitigrade legs rigging is the most misunderstood part of anthro character work, and most of the confusion comes from a naming mistake. The backward-bending joint on a digitigrade leg is not a reversed knee. It is the ankle. The animal is standing on its toes, the long bone you read as a shin is actually the metatarsals, and the real knee is up near the body, usually hidden in the thigh mass.
Once you name the joints correctly, the rig follows. A digitigrade leg needs four bones per side, and they map cleanly onto a standard humanoid rig:
- Thigh to UpperLeg. Runs from hip to the true knee, which sits high and forward.
- Shin to LowerLeg. Runs from the knee down and back to the hock. This is the segment that creates the backward angle.
- Metatarsal to Foot. The long near-vertical bone from hock to the ball of the paw. In a plantigrade human this bone is short and horizontal, which is the whole source of the trouble.
- Toe to Toes. The flat pad and digits that actually contact the ground.
Because engines expect the Foot bone to be roughly horizontal at ground level, a near-vertical metatarsal assigned to Foot confuses inverse kinematics, and the avatar hovers, sinks, or locks its legs straight. Three mitigations: place the toe bone horizontal at exactly floor height in the rest pose, keep the true knee's forward bend within roughly 10 to 25 degrees so the solver has an unambiguous bend direction, and keep hip-to-floor leg length near 45 to 52 percent of total height.
With full-body tracking, be conservative: a moderate hock of roughly 130 to 145 degrees between shin and metatarsal tracks well and still reads unmistakably as an animal leg, while extreme proportions fall apart once real knee data drives them.
Check the rest pose with the paw pads flat on the world floor plane before you rig, not after. If the toe bone sits 2 cm above or below Y=0, every locomotion animation you apply will look like the character is skating or wading, and the fix at that point means re-binding the whole leg.
Weight Painting Tails: Chain Bones, Dynamic Bones, and PhysBones
A tail is a soft mass attached to a rigid pelvis, and both halves of that sentence need to be true in the weighting. Weight the first tail bone as a blend with the hips and lowest spine bone, typically 60 to 75 percent tail root and 25 to 40 percent hips across the two rows of vertices at the junction. Snapping to 100 percent tail at a hard boundary creates the crease ring that gives away an auto-bind.
Down the length of the tail, keep influences overlapping, with each vertex ring driven by no more than two or three bones. On a thick brush tail, weight the outer fur vertices one bone further down the chain than the core vertices at the same height, which makes a heavy tail feel like it has inertia before physics is even applied.
Physics comes from spring bone systems: PhysBones in VRChat, spring bones in VRM, and the older Dynamic Bone component that PhysBones replaced. Whichever you use, the settings principles are the same. A tail wants moderate pull so it returns to rest, low stiffness so it can curl, and enough gravity to keep it from floating like a balloon. Starting values that work for a medium fox tail:
- Pull: 0.2 to 0.35, higher for a stubby tail, lower for a long whip
- Spring: 0.4 to 0.7, which controls the bounce back through rest
- Stiffness: 0.1 to 0.25, keep low so the tail can actually curve
- Gravity: 0.05 to 0.15 with gravity falloff around 0.5, so the tip droops more than the base
- Immobile: 0.3 to 0.5, which stops the tail from whipping violently every time you walk
Set the physics component on the tail root's parent, not on the root itself, so the first bone stays under animation control. That way an emote can lift or wag the tail deliberately while the remaining bones still simulate. Add one or two colliders at the thighs so the tail does not pass through the legs, and remember that colliders and affected transforms both count against real-time performance budgets.
Rigging Expressive Ears That Swivel and Flatten With Emotes
Ears carry more emotional information on a furry character than the mouth does: flattened reads as fear or anger, one swiveled reads as curiosity, perked reads as alert. Use two or three bones per ear. The base bone handles swivel and flatten and should be animation-driven. The mid and tip bones handle secondary motion and should be physics-driven, so the ear tip flicks when the head turns. Splitting responsibilities this way is what avoids the classic conflict where a spring bone system fights an animated pose and the ear vibrates in place.
Author the flatten as a rotation, not a scale or a blend shape. Flattening is roughly a combination of pitch back 50 to 70 degrees and roll outward 20 to 35 degrees from rest, which a single bone handles cleanly and which blends smoothly with other poses. Blend shapes for ear position exist but they fight spring physics and cannot be layered, so keep them for shape changes that bones cannot do, like an ear folding along its own length.
Weight the ear base generously into the skull: the bottom two vertex rings nearly fully skull-weighted, with the transition spread over three or four rows so a hard swivel does not tear the head surface. Weight large inner ear tufts to the ear bones, or they will stay behind when the ear moves.
Keeping Complex Markings Sharp: UV Seams and Texture Resolution
Complex markings are the most texture-hungry feature a fursona can have, and blurry stripes are the fastest way to make an otherwise good model look cheap. Sharpness comes from three things: enough texel density, seams in the right places, and enough padding around islands.
Aim for a consistent texel density across the body and then deliberately break it in favor of the head. A useful target for a full-body avatar is around 1024 pixels per meter of surface on the body, roughly doubled on the face and hands where people actually look. On a 2048 x 2048 texture, the head and neck island group should occupy something like 25 to 35 percent of the sheet even though the head is a small fraction of the surface area.
Place seams where markings are not. This sounds obvious and is routinely ignored. The standard human-figure seam layout runs down the inside of the arms and legs, up the spine, and around the hairline, which is fine until your fursona has a dorsal stripe running exactly along the spine seam or ringed tail bands crossing an axial cut. Move the seam: run the tail seam along the underside, run the back seam slightly off-center, and cut around a marking's boundary rather than through the middle of it.
- Padding: 8 pixels minimum at 1K, 16 pixels at 2K, so mip levels do not bleed background into a marking edge
- Mirroring: overlap symmetric islands to double effective resolution, but break the mirror for any asymmetric marking
- Straightening: unwrap limbs and the tail as straightened tubes so bands stay axis-aligned and stay crisp
- Compression: use a higher-quality compression setting on the head atlas; block compression artifacts show worst on hard color boundaries
Blend Shapes for Muzzle Visemes and Furry Facial Expressions
A fursona needs two different sets of face shapes: visemes for speech and expressions for emotion. They are authored differently and they need to be layerable without fighting each other.
Visemes are the mouth shapes for phoneme groups, and social VR platforms commonly use a 15-viseme set: silence plus PP, FF, TH, DD, KK, CH, SS, NN, RR, AA, E, IH, OH, OU. Most need reinterpretation on a muzzle. A human FF is upper teeth on lower lip, which a long canid snout with flews cannot do convincingly, so approximate it with a lower-lip tuck and a small jaw close. The safest approach on a long snout is to drive roughly 60 percent of each viseme from the jaw bone and use blend shapes for the remaining lip detail, which avoids the rubber-lip effect.
Expressions are separate and should be additive. A workable minimum set for a furry character:
- Brow: raise, furrow, and an asymmetric single raise
- Eyes: blink left, blink right, wide, squint, plus a happy closed-arc shape
- Muzzle: smile, frown, snarl with lip curl and visible canines, puffed cheeks
- Nose: scrunch, which pulls the bridge up and is what actually sells a snarl
- Tongue: out, up, and a small blep, which the furry community will use more than any other shape
Author expressions so they do not overwrite the viseme region. If your smile shape moves the same vertices that the AA viseme moves at the same magnitude, combining them at full strength doubles the displacement and tears the mesh. Test every expression against every viseme at 100 percent both, and dial back the overlapping region until the worst pair is clean. Where a character also needs precise facial capture, the 52 ARKit blendshape standard is the right target and the mapping details are handled on the VTuber avatar page.
Hitting VRChat Performance Ranks With Fur Geometry in the Budget
Fur geometry and performance ranks are in direct tension, and the way to win is to decide the rank first and spend the budget deliberately rather than modeling freely and optimizing at the end. On PC, the Excellent tier sits around 32,000 triangles with 4 material slots, Good roughly doubles the triangles to about 70,000 and allows 8 materials, Medium keeps the triangle ceiling and allows more materials and bones, and Poor tolerates well over 100,000. On standalone headsets the ceilings collapse: Excellent lands near 7,500 triangles with a single material, and the hard upload ceiling for Android builds is roughly 20,000 triangles.
Given a 32,000 triangle budget, a realistic allocation for a semi-realistic fursona looks like this:
- Body and limbs, 10,000 to 13,000: loops concentrated at shoulder, hip, elbow, knee, and hock
- Head and muzzle, 5,000 to 7,000: densest region, where the lip ring is non-negotiable
- Hands and paws, 3,000 to 4,000: includes pads and claws
- Tail core, 1,500 to 2,500: 8 to 12 sided rings with tapering segment length
- Fur cards, 4,000 to 8,000: ruff, cheeks, tail, and tufts only
- Eyes, teeth, tongue, 1,500 to 2,500: teeth are routinely over-modeled and 500 triangles is plenty
The savings that cost nothing visually are in places nobody looks: the inside of the mouth, the soles of the paws, geometry hidden under clothing, and evenly tessellated flat areas like the upper back. Halving those regions typically recovers 3,000 to 5,000 triangles, an entire fur card set.
Atlasing your textures into a single sheet and cutting material slots down to one or two is the other half of hitting a rank, and the step-by-step atlas, shader swap, and Quest conversion workflow is documented on the VRChat avatar page.
Should You Commission a Fursona Model or Generate One With AI?
Commissions, bases, and AI generation are three different products at three different price points, and the right choice depends on how finished you need the result to be, how fast, and how much of the file you need to own. Most people end up combining at least two of them.
What Fursona 3D Model Commissions Cost in 2026: The $250-$800 Range
A full custom furry avatar commission price for a from-scratch 3D fursona generally lands between $250 and $800 in the current market. That range buys a modeled, textured, rigged, and platform-ready avatar built to your reference sheet, usually with basic toggles and physics on the tail and ears. Below roughly $250 you are typically buying a base edit rather than an original model. Above $800 you are paying for complexity: custom shaders, extensive toggle systems, multiple outfits, props with their own animations, or an artist with a name and a waiting list.
Understanding what drives the number helps you brief better and negotiate honestly:
- Species complexity: a short-furred canid is straightforward; a feathered avian, a many-tailed kitsune, or a heavily scaled dragon adds days of texture work
- Fur strategy: painted-only is cheapest; a full card groom on ruff and tail adds meaningful hours
- Markings: simple two-tone is fast; intricate asymmetric tribal markings can double texture time
- Deliverables: a single PC upload versus PC plus a Quest variant plus source files
- Extras: clothing sets, accessories, custom gestures, audio-reactive toggles, and NSFW variants are all separately priced
Prices are also strongly reputational. An artist with a visible portfolio and a track record of delivering on time commands a premium unrelated to technical difficulty, and it is usually worth paying: the failure mode of a cheap commission is not a worse model, it is no model.
Commission Queues and Turnaround: Why 2-6 Weeks Is the Norm
Active work time on a custom fursona is typically 25 to 60 hours spread across blockout, sculpt, retopology, UVs, texturing, rigging, physics setup, and platform testing. Compressed into a full-time week that would be six or seven days. In practice, delivery takes 2 to 6 weeks, and the gap is almost entirely scheduling rather than effort.
Three things stretch the calendar. First, most furry 3D artists take commissions in slots and work several at once, so your project shares an artist with two or three others. Second, revision rounds are asynchronous: the artist sends a blockout, you look at it eight hours later, you ask for a longer muzzle, they get to it the next working day. Three rounds of that is a week of calendar time and maybe three hours of work. Third, the queue itself. Popular artists open limited slots a few times a year, and the wait from payment to start can run one to six months before the 2 to 6 week production window even begins.
You can compress this by showing up prepared: send a complete three-view reference sheet, a written trait spec, your target platform and performance rank, and your top three priorities up front. Batch revision notes into one message per round instead of trickling them in, and give explicit approval when a stage is right so the artist can move on.
Buying a Furry Avatar Base and Retexturing vs a From-Scratch Custom
A furry avatar base is a pre-made, pre-rigged anthro body sold as a starting point, typically $25 to $60 on marketplaces like Gumroad and Booth. You buy the base, retexture it with your markings, sometimes adjust proportions and swap the head or tail, and upload. Base edits are by far the most common route into a furry 3D avatar, and they are a legitimate one.
The advantages are real: topology, rig, visemes, and physics are already solved and tested, the model is known to hit a performance rank, and a community has usually documented every quirk. If you can paint, you can have a recognizable version of your fursona in a weekend for under $100.
The limits are equally real. A base has one body plan, and if your fursona is a lanky mustelid or a heavy-set bear, stretching a generic canid base to fit produces distorted UVs and stretched markings. Base heads are species-specific, so a feline sona on a canid base needs a head swap, which is exactly the technically hard part. And most importantly, everyone can tell. Popular bases have a recognizable silhouette and you will meet yourself in a public instance.
| Route | Typical cost | Time to usable model | Uniqueness | You own |
|---|---|---|---|---|
| Bought base, self-retextured | $25 to $80 | 1 to 3 days | Low; shared silhouette | A license to use, usually not to redistribute |
| Base edit commission | $80 to $250 | 1 to 3 weeks | Medium | Your textures plus a licensed base |
| From-scratch commission | $250 to $800 | 2 to 6 weeks after queue | High | Whatever the contract says; ask explicitly |
| AI generation | Platform subscription | Same day | High; driven by your own reference | Your exported source files |
Where AI Generation Fits: Same-Day Iteration and Owning Your Files
AI generation does not replace a skilled furry 3D artist. It collapses the slowest and least creative part of the pipeline, blockout and base mesh construction, from days into minutes, and hands you the source files immediately. That iteration speed changes how you design: when a regeneration takes minutes, you can test whether your fursona's muzzle should be 30 or 40 percent of head length by looking at both, try the toony and the semi-realistic version side by side, and discover that the tail you have drawn for six years reads as too thin in 3D. Designing by comparison rather than by description is a real improvement over a workflow where every change is a favor you ask of a busy person.
File ownership is the other structural difference. Generating through an avatar generation platform leaves you with the mesh, the textures, and the rig as files on your drive in standard formats. You can open them in Blender, edit them forever, make a Quest variant, make a print variant, hand them to an artist for a polish pass, and never need anyone's permission or availability again. That matters more than it sounds like it does when, two years later, you want to change one marking.
Where AI generation is genuinely weaker: stylization that matches one artist's hand, complex layered outfit systems, and the last 10 percent of polish on a hero character. Enterprise tiers that include refinement by human 3D artists exist precisely because that last stretch is real craft.
Using an AI-Generated Mesh as a Blockout for a Commissioned Artist
The most effective hybrid workflow in 2026 is to generate first and commission second. Instead of sending your artist a flat reference sheet and a paragraph of description, you send them a 3D blockout that already answers the proportion questions.
The entire design-negotiation phase then happens before the commission starts. Muzzle length, head-to-body ratio, tail mass, hock angle, ear set, and marking placement are settled in geometry rather than prose, so the artist starts with an approved silhouette, the stage that usually eats two or three revision rounds. Many artists quote a shorter timeline for a project that arrives this way.
Be upfront about what you are sending and why. Package it cleanly:
- The blockout as an FBX and a GLB, with scale set so the character is at correct height in meters
- The reference sheet the blockout came from, so they can see your original intent
- A written note stating this is AI-generated and intended as a proportion reference, not as geometry to ship
- Turntable screenshots with your annotations on what is correct and what is only approximate
Some artists prefer their own blockout and will treat yours purely as reference; others will happily retopologize over it. Ask at the quoting stage rather than assuming.
Licensing, TOS, and Who Owns the Rights to Your Fursona Model
Ownership questions in this space split into three separate objects that people constantly confuse: the character design, the model file, and any base or asset licensed into it. You can own one and not the others.
Your fursona as a character, the name, the design, the markings, is generally yours if you created it or bought the design with a transfer of rights, and commissioning a 3D model does not change that. The model file is a separate work: in most artists' terms of service, the artist retains rights in the file and grants you a license that permits personal use, streaming, and social VR while prohibiting redistribution, resale, and commercial use without a separate agreement.
Get these four points in writing before payment, every time:
- Do you receive source files such as the .blend, the layered textures, and the Unity package, or only a compiled export?
- Can you modify it yourself later, or hire a different artist to modify it?
- What commercial uses are permitted: merch, monetized streaming, VTuber sponsorships, selling renders?
- Is any third-party base or asset included, and does its own license carry restrictions that pass through to you?
That last one catches people. If a commissioned model was built on a purchased base, the base creator's terms still apply, and many bases prohibit redistributing the mesh even as part of a commissioned work. For AI-generated models, read the platform's terms for what you may do with outputs, and note that this is exactly where generation is structurally simpler: you generated it from your own reference, you hold the export, and there is no third-party base license buried three layers down.
Frequently Asked Questions About Fursona 3D Models
How much does a fursona 3D model cost?
A from-scratch custom fursona 3D model typically costs $250 to $800 commissioned, while a retextured avatar base runs $25 to $80 for the base plus your own texturing time, and a base-edit commission sits between them at roughly $80 to $250. AI generation is priced as a platform subscription rather than per model, which changes the economics if you want several variants or expect to iterate.
Complexity is the main multiplier: feathers, scales, many-tailed designs, intricate asymmetric markings, full card fur, and elaborate toggle systems push a commission past $800 and can reach $2,000 for a hero character with a full wardrobe. Ask any quote to itemize so you can drop what you do not need.
Can AI turn a 2D fursona reference sheet into a 3D model?
Yes. Turning a fursona reference sheet to 3D model is exactly the case image-to-3D reconstruction handles best, because a ref sheet already provides the orthographic front, side, and back views that the reconstruction needs to resolve depth and silhouette. Upload the sheet, describe the species and traits in text, and the generator produces a textured, rigged mesh you can export and refine.
Quality depends heavily on the sheet. Flat lighting, a neutral A-pose, consistent proportions between views, and visible markings on all sides improve the result, while dynamic poses and views that disagree with each other produce disappointing output. The fix is almost always to improve the input rather than fight the generator.
What software do furries use to make 3D models?
Blender is overwhelmingly the standard for modeling, rigging, and fur work in the furry community, mostly because it is free and every tutorial assumes it. Unity is required for social VR uploads, Substance 3D Painter is common for texturing, and ZBrush appears in the workflows of artists who sculpt high-detail anatomy before retopologizing.
A realistic beginner stack is Blender plus Unity, since Blender alone can cover texturing with its built-in painting. Adding an AI generation step in front does not replace any of them; it replaces the blockout and base mesh work that most people find hardest to start.
How do I get my fursona into VRChat?
Export your finished model as an FBX, import it into a Unity project with the platform SDK installed, add an avatar descriptor, set the viewpoint and lip sync, configure PhysBones on the tail and ears, and upload. The model must hit the platform's triangle, material, and bone limits for the tier you are targeting, and standalone headset builds need a separate, much lighter variant.
The most common blockers are avatar scale, viewpoint placement inside the muzzle rather than at the eyes, and rank failures caused by fur geometry or material slots. The complete upload sequence is documented on the VRChat avatar page.
Can I 3D print my fursona model?
Yes, but an avatar-optimized model is not a printable one and needs conversion first. Printing requires a watertight, manifold mesh with real wall thickness, so alpha fur cards, single-sided planes, floating eyes, and intersecting-but-unjoined parts all have to be resolved into solid geometry before slicing.
Practical targets: merge everything into one solid, hollow to a wall thickness of 1.5 to 2 mm for FDM or 1.2 to 2 mm for resin, add 3 to 4 mm drain holes, and print at 100 to 200 mm tall. Replace fur cards with sculpted clumps, thicken claws and ear tips so they survive handling, export STL or OBJ rather than GLB, and run a mesh repair pass before slicing.
How long does it take to model a furry character in Blender?
For an experienced artist, a complete furry character in Blender takes roughly 25 to 60 hours of active work: sculpting and blockout, retopology, UV unwrapping, texturing, rigging, weight painting, fur cards, and engine testing. Delivery calendar time is longer because of revision cycles and queue position.
For a first-timer learning as they go, expect 100 to 300 hours spread over months, with the difficulty concentrated in retopology, weight painting, and the muzzle. That is the honest number, and it explains why base edits and generated blockouts are so popular: starting from a generated mesh removes the first 20 to 30 percent of that time, which is where most beginners give up.
What is the difference between a fursona and a furry avatar?
A fursona is a character: a personal anthropomorphic persona with a species, a design, a name, and usually a personality, which exists independently of any particular medium. A furry avatar is a specific 3D implementation of a character used in a virtual environment, with a rig, blend shapes, physics, and platform-specific optimization.
In practice one fursona might exist as several avatars: a full-detail PC version, a stripped-down standalone headset version, a VRM for streaming, and a print-ready solid. Keeping the distinction clear matters when you commission or generate, because you are always asking for an implementation of a design. Building all of them from one well-organized 3D model source is what keeps a fursona recognizable across every platform it shows up on.