How Do You Make a PNGTuber Avatar (and Upgrade It to 3D)?
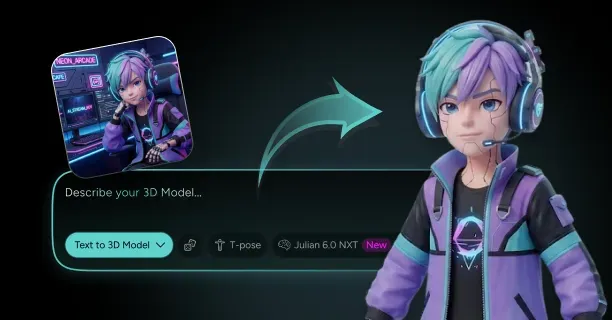
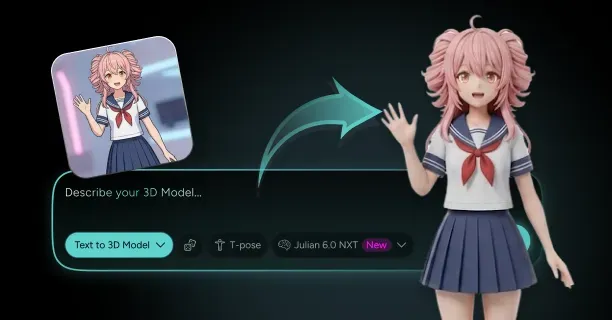
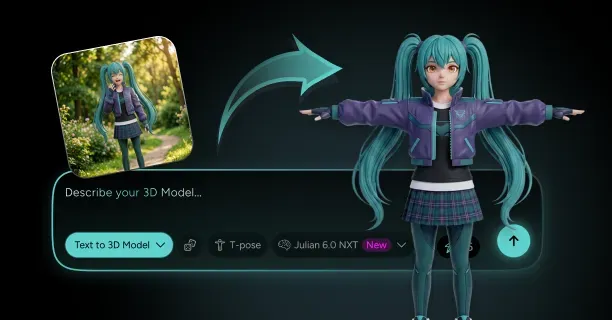
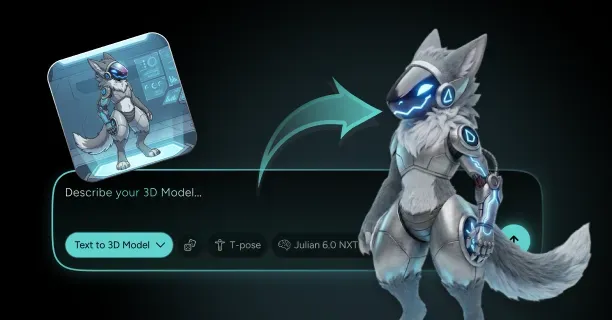
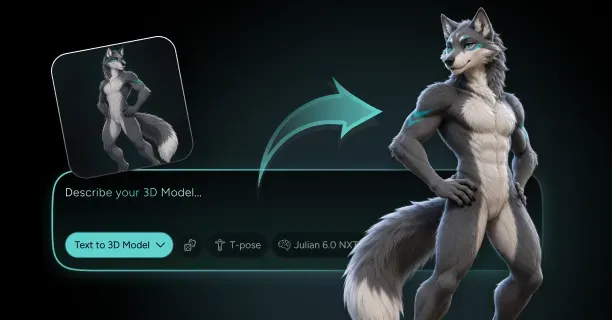
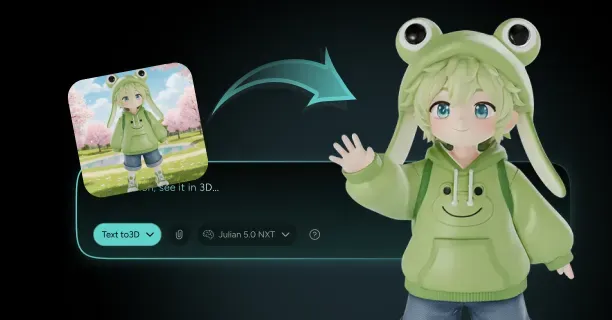
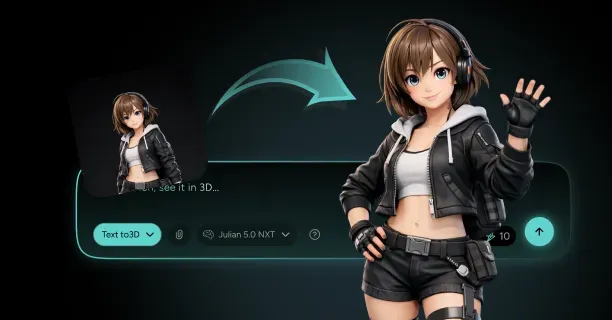
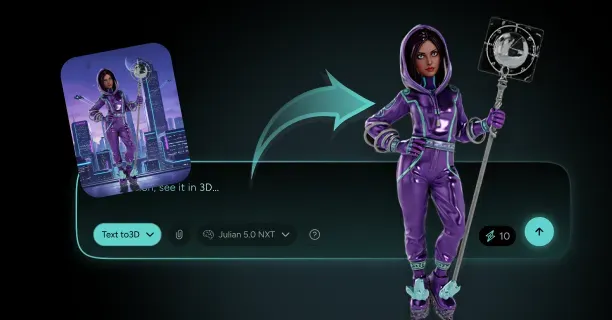
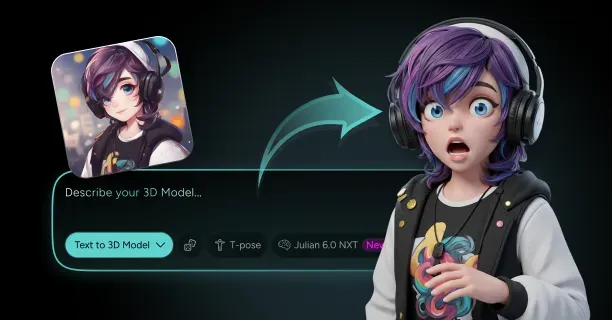
To make a PNGTuber avatar you need exactly two things: a set of transparent PNG frames of your character (at minimum a mouth-closed idle and a mouth-open talking pose) and a free pngtuber maker such as veadotube mini that swaps between those frames based on your microphone level. Export each frame at 1024x1024 with a clean alpha channel, keep every frame on the same canvas so the art does not jitter, load the states into your chosen app, and capture the window in OBS. When you outgrow a flat image, the same character art can be fed into Threedium as an image-to-3D reference to produce a rigged, face-trackable 3D model in GLB, FBX, USDZ, or VRM without commissioning a modeller from scratch.
Generate Your PNGTuber Character Art From a Text Prompt (No Drawing Needed)
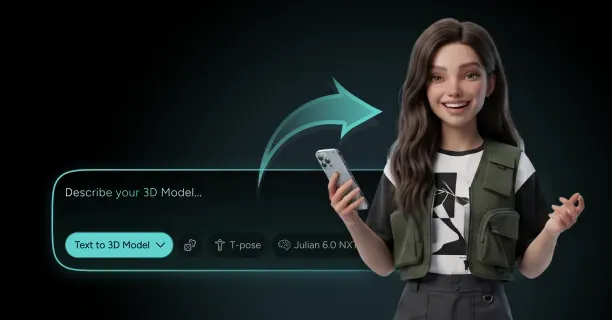
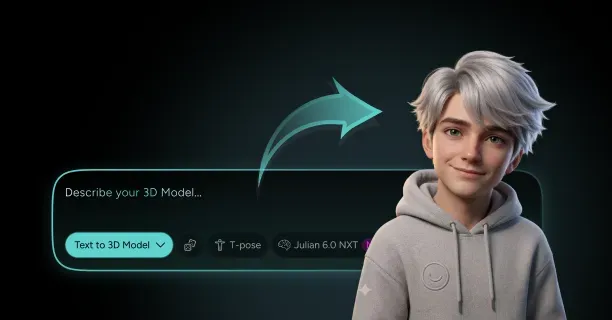
You do not need to draw. There are two viable no-draw routes, and they produce meaningfully different results. The 2D route uses a text-to-image generator to produce your character directly as flat art. The 3D-first route generates a full 3D character from the same description and renders your PNG frames out of it, which costs a little more setup time but gives you frames that are guaranteed consistent and a model you already own for the upgrade later.
If you take the 2D route, prompt for the framing explicitly. Something like "chest-up portrait, facing camera, neutral three-quarter angle, flat cel shading, thick clean outlines, plain solid background, no text" gets you far closer to a usable frame than a generic character prompt. Ask for a plain solid background in a colour that appears nowhere on the character (magenta and lime are the classics) so background removal is trivial later, and generate at the highest resolution the tool offers.
If you take the 3D-first route, describe the character to a text-to-3D generator such as Threedium's 3D model generator and render your frames from a fixed camera. The consistency advantage is enormous: every frame comes from the same geometry under the same camera, so there is zero drift between states, and expressions you add months later still match. Either way, generate three or four candidate designs before committing, because the biggest regret in the how to make a pngtuber workflow is locking in a design that does not read at 300 pixels tall.
Pick an Art Style That Reads at Webcam Size: Chibi, Anime Bust-Up, or Mascot
Your avatar will spend its life at roughly the size of a webcam box: typically 320 to 500 pixels tall in a 1920x1080 canvas, and often smaller once a viewer watches on a phone. That constraint dictates style far more than personal taste does. Detail that vanishes below 400 pixels is detail you paid for and nobody sees.
Three styles dominate the format because all three survive downscaling:
- Chibi: an oversized head at roughly a 1:2 or 1:2.5 head-to-body ratio, tiny torso, minimal limbs. The head is the entire read, which is perfect when the head is the only part doing anything, and it hides the fact that a PNGTuber has no functioning arms.
- Anime bust-up: shoulders-and-head framing at normal proportions, the closest match to a real webcam crop. It transitions most naturally to a 3D model later because the proportions are already human.
- Mascot: an animal, object, or abstract shape with a very strong silhouette. Mascots win the thumbnail and emote game because the shape alone is recognisable at 28x28 pixels.
Whatever you choose, use outlines of at least 4 to 6 pixels at your 1024px working size, keep the value contrast against a dark stream background high, and test early by dropping the frame into OBS at its real broadcast size.
Create the Two Core Frames: Mouth-Closed Idle and Mouth-Open Talking
Every PNGTuber setup in existence is built on a two-frame loop. Frame one is the idle: mouth closed, neutral expression, the pose viewers see 60 to 70 percent of the time. Frame two is the talking frame, shown whenever your microphone is above a threshold.
The mistake beginners make is changing only the mouth, which reads as a glitch rather than as speech. Well-received PNGTubers change two to four elements between idle and talking: mouth opens, eyebrows lift 3 to 5 pixels, eyes widen slightly, and the whole head shifts up 6 to 10 pixels. That vertical shift is what your brain reads as energy, and it is the cheapest upgrade available.
Build both frames from one master file with layers rather than generating two independent images: duplicate the idle, edit the mouth layer, nudge the brow layer, export. If a text-to-image tool will not give you a matching mouth-open version, erase the mouth area on a copy and paint a simple shape (a rounded trapezoid with a darker interior and a light tongue reads correctly at stream size), keeping every other pixel byte-identical. Name exports predictably, such as idle_eyesopen_mouthclosed.png, because you will add six to twelve more files before you are done.
Add Blink Frames for the Full Four-State Setup (Eyes x Mouth Combinations)
Two frames get you on stream. Four frames get you something that looks alive. The standard four-state setup is the full cross product of two eye states and two mouth states, which is what veadotube mini and most other tools expect you to supply per expression.
| State | Eyes | Mouth | When it plays | Approx. screen time |
|---|---|---|---|---|
| Idle | Open | Closed | Silent, not blinking | 55-65% |
| Talking | Open | Open | Mic above threshold | 25-35% |
| Blink idle | Closed | Closed | Silent, blink triggered | 3-6% |
| Blink talking | Closed | Open | Blink fires while speaking | 2-4% |
Producing the blink versions is mechanical once you have the layered master: hide the open-eye layer, show a closed-eye layer, export. A closed eye at PNGTuber scale is usually a curved 4 to 6 pixel stroke in your line-art colour following the upper lash line. Do not draw a flat horizontal line; a slight downward curve reads as a relaxed blink, a flat line reads as annoyance.
Set blink timing to match human behaviour rather than a metronome. People blink roughly every 3 to 6 seconds, and a blink lasts about 100 to 400 milliseconds. A randomised interval of 3 to 5 seconds with a 120 to 180 millisecond duration reads as natural; faster looks twitchy, slower than 8 seconds reads as a mannequin.
Remove the Background and Export Transparent PNGs at 1024x1024
PNGTuber software needs a real alpha channel, not a white rectangle. Export every frame as a 32-bit PNG (RGBA) with the background fully erased. If you generated on a solid magenta or lime background, select by colour range, expand the selection by 1 pixel, feather by 0.5, delete, then inspect the edges at 400 percent zoom.
1024x1024 is the right working and delivery resolution. It is comfortably above the 300 to 500 pixel height your avatar occupies on a 1080p canvas, which leaves headroom for zoom-ins, thumbnails, and a future move to a 1440p canvas. It is also cheap: a 1024x1024 RGBA texture costs about 4 MB of VRAM uncompressed, so even a twelve-state set is under 50 MB of graphics memory.
- Every frame is the same pixel dimensions with the character in the same position. Never "trim to content" or "export layer bounds".
- Alpha is genuinely transparent, not a checkerboard baked into the pixels. Open the file over black and over white.
- No stray semi-transparent pixels far from the character. A single 3 percent alpha pixel in a corner silently changes how some tools compute the bounding box.
- Per-frame file size under roughly 1.5 MB. A flat-shaded character exporting at 6 MB means a hidden layer or 16-bit colour depth was left enabled.
Export PNG, not JPG or WebP, for your avatar frames. JPG has no alpha channel at all, and while WebP does support alpha, several PNGTuber apps and older OBS builds will either refuse the file or load it with the alpha discarded, which leaves you debugging a white box on stream instead of streaming.
Keep Every Frame Pixel-Aligned So Your Avatar Does Not Jitter Between States
This is the failure that ruins more PNGTuber debuts than any other, and it is entirely preventable. If frame two is cropped even two pixels differently from frame one, your avatar will visibly jump every time you open your mouth. Viewers will not be able to name what is wrong, but they will describe the avatar as "cheap" or "janky".
The root cause is almost always an export setting, not the art. Tools that auto-crop to visible content produce a different bounding box for a frame where the mouth is open and the head is raised, so the software centres two differently-sized images and the character slides. The fix is a discipline, not a filter: one master canvas, toggle layer visibility, export the full canvas every single time.
Verify alignment before you go live with a difference test. Stack the idle and talking frames in any layered editor and set the top layer's blend mode to Difference. Everything that did not change should be pure black. A faint outline of the whole character rather than just the mouth and brow means the frames are offset and need re-exporting. The same check applies to expression sets you commission later: never scale a mismatched canvas, place it on a fresh 1024x1024 canvas instead.
Load Your PNG States Into veadotube mini and Map Them to Mic Activity
veadotube mini is the default answer for a free pngtuber maker on Windows and Linux: it is free, it launches in a couple of seconds, it idles at a very low CPU cost, and its entire mental model is the four-state matrix you just built. It is distributed by its developers on itch.io as a small standalone download with no installer and no account.
- Launch the app. You get a placeholder avatar and a small toolbar of icons along the window edge. Open the states panel, where every avatar expression lives.
- Create a new state and name it, such as
default. A state is not a single image: it is a container for the eye and mouth combinations. - Assign your four PNGs to the four slots: eyes open / mouth closed, eyes open / mouth open, eyes closed / mouth closed, eyes closed / mouth open. This mapping is what makes the avatar reactive.
- Open the microphone settings and select your actual input device, not the Windows default, which frequently resolves to a webcam mic.
- Set blink interval and duration in the same panel, then talk normally and watch the preview.
If your avatar never opens its mouth, the cause is nearly always the input device selection or Windows microphone privacy permissions, not the threshold. If it never closes its mouth, the threshold is sitting below your room noise floor.
Tune Mic Sensitivity and Talk Thresholds So Mouth Flaps Match Your Voice
A PNGTuber lives or dies on threshold tuning. The goal is that the mouth opens on the first syllable of a word and closes during real pauses, without flapping at your keyboard, your fan, or your dog.
Start by finding your two reference levels. With the mic live and you silent, your noise floor on a decent condenser or dynamic mic in a normal room typically sits around -60 to -50 dBFS. Speaking at your normal stream volume, your voice should peak around -12 to -6 dBFS. That gap is enormous, which is why the correct threshold is not a delicate setting: park it around -35 dBFS, comfortably above the noise floor and well below your quietest speech. Then test it with the loudest thing you actually do on stream, not with a calm test sentence.
- Chattering is the mouth stuttering open and closed within a single word, caused by the natural amplitude dips between syllables. The fix is a hold or release time of 100 to 200 milliseconds, which keeps the mouth open through a dip. If your app does not expose a hold time, raise smoothing slightly instead.
- Lag is the mouth opening a beat after you start speaking, caused by too much smoothing or an attack time above roughly 40 milliseconds. Keep attack fast and compensate for noise with the threshold, not with a slow attack.
If you already run a noise gate in OBS or VoiceMeeter, feed your avatar app the gated signal rather than the raw mic by routing the processed output to a virtual audio cable and selecting that cable as the avatar's input. The gate has already made the silent-versus-speaking decision more accurately than an amplitude threshold can, and your mouth flaps inherit that accuracy for free.
Add Bounce, Wobble, and Sprite-Sheet Animation in PNGTuber Plus
PNGTuber Plus is the step up from a pure state-swapper. It is free, open source, built in Godot, and it treats your avatar as a set of layered parts with physics rather than as four flat images. If veadotube mini answers "which picture is showing", PNGTuber Plus answers "how does that picture move".
- Bounce: a vertical hop each time the mic crosses the talk threshold. Keep amplitude at 5 to 12 percent of the avatar's height; large bounces are funny for one clip and exhausting for a three-hour stream.
- Wobble and stretch: squash-and-stretch applied on the bounce. A vertical stretch factor of 1.05 to 1.10 reads as cartoon energy without turning your character into a rubber band.
- Drag physics on child layers: parent hair, ears, or a hat to the head layer with a drag value so they trail behind movement. This is the single effect that most convinces viewers the avatar is a puppet rather than a picture.
- Sprite-sheet animation: a strip of frames played at a set rate, for looping details such as a flickering flame or a tail flick. 6 to 12 fps is plenty for stylised art.
Because layers are separate, PNGTuber Plus wants your art exported differently: instead of four flattened composites, export each part (body, head, eyes open, eyes closed, mouth closed, mouth open, hair front, hair back, accessories) as its own transparent PNG on the shared 1024x1024 canvas. Keeping that canvas identical across every part is what lets the app stack them without you nudging offsets by hand. Costume slots are the other draw: alternate looks bind to number keys, so you can swap an outfit mid-sentence.
Capture Your Avatar in OBS With Spout2, Window Capture, or a Chroma Key
A correct pngtuber OBS setup comes down to picking the right capture path, and there are exactly three that work.
Spout2 is the best option on Windows. Spout is a GPU-to-GPU texture sharing framework, so frames go straight from the app to OBS with the alpha channel intact and no window compositing in between. Enable the Spout output in your avatar app's settings, install the Spout2 Capture plugin for OBS, then use Sources > Add > Spout2 Capture and pick your app from the sender list. True transparency, no window borders, no artefacts if you move the window.
Window Capture is the fallback. Add Sources > Add > Window Capture, select the avatar app, set Capture Method to "Windows 10 (1903 and up)", and enable Client Area so the title bar is excluded. Whether transparency survives depends on your Windows version and GPU driver, so test it: if you get a black or grey background, move to the chroma key path rather than fighting it.
Chroma key is the universal fallback. Set the app's window background to a solid colour that appears nowhere in your art, capture the window normally, then right-click the source and choose Filters > Effect Filters > + > Chroma Key. Start with Similarity around 400 and Smoothness around 80, raise Similarity in steps of 25 until the background is gone, then back off one step. If green bleeds onto your outlines, increase Spill Reduction toward 100, or switch the background to magenta.
Set Up Hotkey Expression States for Laugh, Rage, and Surprise Reactions
Expression hotkeys separate a PNGTuber that viewers clip from one they scroll past. Each expression is another complete four-state set (or layered costume) bound to a key you can hit without looking. Start with a small, high-usage set rather than twenty states you never reach.
- Default: neutral, the state you spend most of your time in and the one every other state returns to.
- Laugh: eyes squinted into upward arcs, mouth wide, brows raised. This gets used more than any other expression.
- Rage: brows angled sharply down, mouth square or fanged, optional red overlay or steam accessory. Essential for gaming content.
- Surprise: eyes wide with a visible highlight, small round mouth, head shifted back a few pixels.
- Deadpan: flat half-lidded eyes, straight mouth. The comedic value of an unimpressed stare is disproportionate to how easy it is to draw.
Bind them to keys your hand already rests near. Number keys 1 through 5 are the convention, but if you play games with your left hand on WASD, use the numpad or the F13 to F24 range emitted by a macro pad so a game and your avatar never fight over the same key. Before you rely on any binding, verify whether the app registers global hotkeys or only responds while its window is focused. Finally, decide whether each expression is toggle or momentary: a momentary rage that snaps back on key release is easier to use in fast conversation, and an auto-return timer of 3 to 8 seconds means you never get stuck in a laughing face during a serious announcement.
How Do You Upgrade a PNGTuber Into a Full 3D VTuber Model?
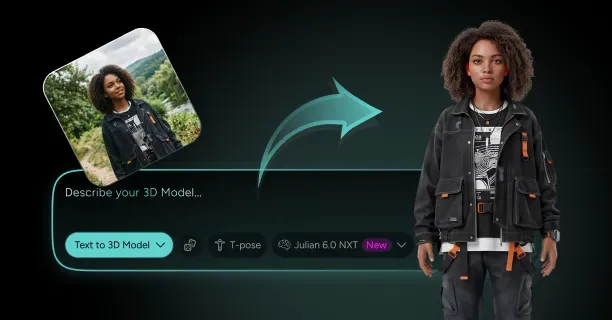
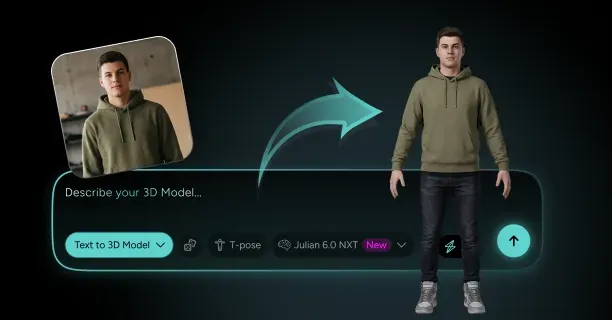
You upgrade a PNGTuber into a 3D VTuber by feeding your existing character art into an image-to-3D generator as reference, generating a textured mesh, having it auto-rigged with 52 ARKit blendshapes for face tracking, and exporting to the format your streaming software reads: VRM for VSeeFace, VNyan, or Warudo, FBX for Unity-based pipelines, GLB for web and general use. Platforms such as Threedium's avatar generator compress what used to be a two-to-four month commission into a same-day pngtuber to 3d model path, and your flat PNG set stays on disk as a zero-risk fallback. The sections below cover when the upgrade is worth it, how to keep the character recognisable, and what the real cost difference looks like.
Signs Your Stream Has Outgrown a Static PNG (and When To Stay 2D)
The honest version of the pngtuber vs vtuber question is not about prestige, it is about whether your content asks the avatar to do things a flat image cannot. Four signals mean you have genuinely outgrown 2D:
- You keep wanting to gesture, point, or hold objects. A PNG has no arms and no depth, so every "look at this" moment gets narrated instead of shown.
- You do collabs or multi-cam scenes where two avatars should look at each other. Flat frames only face forward.
- You are producing clips, shorts, or full-motion segments where the avatar moves through a scene rather than sitting in a corner box.
- Your expression set has grown past roughly twelve states and you are maintaining dozens of PNG files that all need re-exporting whenever the design changes.
Equally, there are real reasons to stay 2D. Stay with a reactive png avatar if your machine is already near its limits, if your content is podcast-style talking where a bust is all anyone needs, or if your brand identity is specifically the flat illustrated look. Plenty of large channels are still PNGTubers on purpose, and the middle path (build the 3D model, keep the PNG set, choose per stream) is what most people should actually do.
Turn Your Existing PNGTuber Art Into a 3D Model With Image-to-3D AI
Image-to-3D reconstruction infers geometry and materials from one or more reference views. Output quality is governed almost entirely by reference quality, so treat this as an art-prep task rather than a button press.
Prepare your references like this:
- Use your idle frame with eyes open and mouth closed as the primary reference. Neutral poses reconstruct far more reliably, because an open mouth or squinted eyes get baked into the geometry permanently.
- Supply it on a transparent or plain background at the highest resolution you have. 1024x1024 is workable; 2048x2048 is better.
- Add side and three-quarter views if you have them. Multi-view references dramatically improve the back of the head, hair volume, and profile silhouette, the three areas a single front view has to guess at.
- Write a short text description alongside the images naming style, materials, and anything the image hides, for example "stylised anime character, cel-shaded, short silver hair, oversized hoodie, arms at sides".
Once generated, the Julian NXT pipeline produces the mesh with PBR texture maps (base colour, normal, roughness, metallic), applies polygon optimisation to bring the triangle count into a real-time-friendly range, and can auto-rig the result including a facial rig with 52 ARKit blendshapes where the character is humanoid. That blendshape set is the same standard iPhone face tracking emits, which is what lets VSeeFace, VNyan, or a Unity scene drive your model's face without you authoring a single shape key by hand.
Keep Your Character Design Consistent Between the 2D and 3D Versions
Your audience recognises your pngtuber avatar by a small number of features, rarely the ones you would list: the silhouette, the hair shape, two or three signature colours, and one distinctive accessory. If those survive the jump to 3D, viewers accept an enormous amount of change everywhere else. Build a short design lock-sheet before you generate and check the output against it:
- Hex colour codes for hair, eyes, skin, and the two main clothing colours. Eyedropper them from your original PNG and correct the 3D textures toward those values rather than accepting what the generator produced.
- Silhouette landmarks: hair spikes or curls, ears or horns, collar shape. Check them by filling your PNG with solid black and comparing against a black-filled render of the 3D model.
- Signature accessory: the headphones, the eyepatch, the hoodie strings, the pin. If exactly one thing has to be pixel-faithful, it is this.
- Proportion ratio: a 1:2.5 chibi that comes back as a 1:6 realistic figure is a different character wearing the same clothes.
Shading style is the sneakiest mismatch. If your original was cel-shaded, push the 3D material toward a matte look: raise roughness to roughly 0.7 to 0.9, drop metallic to zero on skin and cloth, and light with a soft key and fill rather than a single harsh lamp. That one adjustment usually closes most of the perceived gap.
Matching Your 3D Model's Camera Angle and Crop to Your Old PNG Frames So Regulars Still Recognise You
Almost nobody does this, and it is the highest-leverage twenty minutes in the whole upgrade. Your regulars have spent hundreds of hours looking at your avatar from one fixed angle at one fixed crop. If the 3D debut arrives at a different focal length, head tilt, and shoulder crop, it reads as a new character even when the design is identical.
Work backwards from your PNG. Open the idle frame and note three measurements: where the crop line falls, how much of the frame height the head occupies, and what yaw angle the character faces. Then reproduce them in your 3D scene.
- Set a narrow field of view, around 20 to 30 degrees, and move the camera back rather than using a wide 50 to 60 degree lens up close. Wide FOV at close range exaggerates the nose and shrinks the ears, exactly the distortion flat art never has.
- Position the camera at eye height and level. A three-degree downward tilt changes the character's read from confident to shy without anyone knowing why.
- Dolly until the head occupies the same percentage of frame height you measured, then frame so the crop line lands in the same place.
- Apply the same yaw. If your art was a slight three-quarter, rotate the model, not the camera, so the lighting stays consistent.
Save that camera as a preset so you can return to it instantly, then run a real A/B test: put the old PNG and the new 3D render side by side at broadcast size and step back until both are thumbnail-sized. If the two silhouettes overlap almost perfectly, your regulars will recognise you on frame one.
GLB, USDZ, FBX, and VRM: Which Export Format Your Streaming Software Needs
Exporting the wrong format is the most common reason a perfectly good model refuses to load in a streaming app. The four formats worth knowing are not interchangeable, and each one exists for a different consumer.
| Format | Best for | Carries rig | Carries blendshapes | Notes |
|---|---|---|---|---|
| VRM | VSeeFace, VNyan, Warudo | Yes, humanoid-normalised | Yes, expression presets | glTF-based; standard bone naming and look-at data |
| GLB | Web, three.js, general engine import | Yes | Yes, morph targets | Self-contained binary with textures embedded |
| FBX | Unity, Unreal, Blender pipelines | Yes | Yes, blend shapes | Production standard; check units and axis on import |
| USDZ | iOS AR Quick Look previews | Limited | Limited | Phone previews only, not a VTuber runtime format |
The decision tree is short. Streaming with VSeeFace, VNyan, or Warudo means VRM, because those apps expect the VRM humanoid bone map and expression presets. Building a custom Unity or Unreal scene means FBX. Handing the model to a designer, dropping it into a web viewer, or archiving a version that opens anywhere means GLB. Take USDZ only for iOS AR previews. Threedium exports GLB, USDZ, and FBX, with VRM available for avatar work, so pick for your destination rather than converting later.
Export more than one format the first time and keep them all. Re-exporting after you have made rig or material tweaks downstream means redoing that work. A folder holding a VRM for streaming, an FBX for engine work, and a GLB as the archival master is the setup you will thank yourself for in six months.
Two gotchas worth pre-empting. FBX has a long history of unit and axis mismatches: check that your model imports at roughly 1.6 to 1.8 metres tall for a human-proportioned character and is Y-up. VRM has two generations, VRM 0.x and VRM 1.0, with different expression systems, so confirm which one your streaming software supports before you commit.
Refine the Generated Mesh Before Rigging So Face Tracking Reads Cleanly
Face tracking deforms geometry. If the geometry around the eyes and mouth is sparse or fused, no amount of tracking quality produces a clean expression, because there are not enough vertices in the right places to move. Ten minutes of mesh checking before rigging saves hours of debugging afterwards.
Check these five things on any generated mesh destined for a face rig:
- Triangle count in a real-time range. A streaming avatar is comfortable at 30,000 to 80,000 triangles. Below about 15,000 the face will not deform smoothly; above 150,000 you are paying frame time for detail nobody sees at webcam size. Automatic polygon optimisation should land you inside that window.
- Edge density around the eyes and mouth. These move most, so you want visibly denser topology in a ring around each eye and around the lips than on the back of the skull.
- An open, unfused mouth cavity. If the lips are a single closed surface with no interior, opening the jaw stretches the face like a balloon. A basic interior with a tongue shape is enough.
- Separated eyeballs, so they can rotate for look-at tracking rather than being painted onto the face.
- Texture resolution matched to use. 2048x2048 is the sweet spot for a streaming avatar; 4096 is only worth it for close-up renders or print.
Fix problems by regenerating with better references first, and only fall back to manual cleanup in Blender if that fails. On enterprise tiers you can also route the model through human 3D artist refinement, which is the right call for unusual silhouettes (large hair pieces, mechanical parts, non-humanoid anatomy) that automated reconstruction consistently simplifies.
What Rigging and Face Tracking Add on Top (and Where To Learn the Full 3D VTuber Workflow)
Rigging is the skeleton and skin weighting that lets the mesh move; face tracking is the live input that drives it. Together they turn a static 3D bust into an avatar that mirrors your head turns, eye direction, blinks, brow raises, and mouth shapes at the roughly 30 to 60 samples per second your tracking source provides. Auto-rigging plus the 52 ARKit blendshape set gets you a working, trackable model without authoring any of it manually.
This page is not the place to teach that end to end, and pretending otherwise would make it worse at its actual job. For the full skeleton, weight-painting, and blendshape workflow, see the dedicated 3D model rigging guide. For the complete streaming-side workflow (tracking software choice, calibration, VRM expression mapping, and scene setup), see the 3D VTuber model guide. Read those two after you have a mesh you are happy with, not before.
AI Upgrade vs a $1,000-$5,000 3D Commission: The Real Cost Comparison
Commissioned 3D VTuber models are genuinely expensive, and the prices are not artists overcharging: a full custom model is weeks of skilled labour across modelling, texturing, rigging, and expression authoring. Typical market rates sit around $1,000 to $2,500 for a simpler stylised model and $2,500 to $5,000 or more for a detailed custom character with extensive expressions and physics, with turnaround commonly running two to four months and popular artists booked out well beyond that.
For comparison, pngtuber commission cost is an entirely different tier: a simple two-frame PNG set typically runs $50 to $150, a full four-state set with a few expressions lands around $150 to $350, and an elaborate multi-outfit set with many reactions can reach $500, usually delivered in one to three weeks. A rigged Live2D model sits between the two, commonly $300 to $2,000 depending on how many parameters are rigged.
Set against those numbers, AI generation changes the shape of the decision rather than just the price:
- DIY PNG set: $0 plus your time, an evening to a weekend, unlimited revisions. Right for starting out and testing a concept.
- AI 3D generation: subscription tier cost, minutes to a day, regenerate freely. Right for fast iteration on a design you have not locked yet.
- AI generation plus artist refinement: enterprise tier, turnaround in days. Right when you need commission-grade polish on a design you have committed to.
- Full custom commission: $1,000-$5,000+, two to four months. Right for a flagship model or a character with unusual anatomy that needs a modeller's judgement.
The honest framing is not "AI replaces commissions", it is that they solve different problems. Generation is unbeatable at iteration speed: you can test five character concepts in an afternoon and find out which one you actually want to be for the next three years, which is exactly the question a $3,000 commission forces you to answer up front with no information. The pragmatic sequence for most streamers is to generate, stream with it for a month, and then commission or refine with a design you have real data on.
Keep Your PNGTuber as a Low-CPU Backup While You Test the 3D Model
Never delete your PNG set. Keep it configured as a second OBS scene and treat it as your production fallback, because the failure modes of a 3D setup are real and they happen live.
A 3D stack has failure points a PNG set does not: the tracking source can drop, the tracking app can crash, a driver update can break the capture path, and a heavy game can starve the tracker of CPU. The resource gap matters too. A PNG state-swapper is essentially free, while a 3D avatar adds a capture stream, a tracking solver, and a real-time render, together commonly costing 10 to 25 percent CPU and a noticeable share of GPU on a mid-range machine.
Set the fallback up so switching is a single keystroke:
- Build two OBS scenes, Main 3D and Main PNG, identical in every respect except the avatar source, so the layout does not shift when you switch.
- Bind a global OBS hotkey to each scene and put both on a Stream Deck page you can reach without alt-tabbing.
- Leave your PNG app running and minimised during 3D streams. It costs almost nothing idle, and cold-starting it mid-incident costs you thirty seconds of dead air.
- Rehearse the switch once off-stream so the muscle memory exists before you need it.
Render Fresh PNGTuber Frames From Your 3D Model for Low-Spec Streams
Here is the trick that closes the loop: once you have a 3D model, it becomes the best pngtuber maker you will ever own. Pose it, set your matched camera, and render out PNG states on demand. Every frame comes from identical geometry under an identical camera and identical lighting, so the pixel-alignment problem that plagues hand-made sets disappears entirely.
The render recipe:
- Load the model, set the camera to the preset you matched to your original crop, and lock it so nothing moves between renders.
- Render at 1024x1024 with a transparent film background (in Blender, enable Film > Transparent and output RGBA PNG). Confirm the alpha is real over both black and white.
- Drive the blendshapes to each state and render one frame each across the four eye/mouth combinations, then repeat the four-frame set per expression: laugh, rage, surprise, deadpan.
- Use a soft two-light setup (key plus fill, no hard rim) and keep it identical across every render, or your expression sets will not match.
- Batch-name outputs to the scheme your PNG app expects and load the folder in one pass.
Sixteen to twenty-four frames covers a rich expression set and takes an afternoon. The results are frequently better than the original hand-made art, because you get consistent lighting, consistent proportions, and the option to add new expressions any time. Your 3D model becomes the single source of truth for both tiers, so a design change propagates to your 3D stream and your PNG stream with one re-render instead of two separate commissions.
Which PNGTuber Maker Software and Settings Work Best on Stream?
The right pngtuber maker depends on how much motion you want and how much setup time you will spend. veadotube mini wins on speed and simplicity, PNGTuber Plus wins on animation and layered physics, and the paid Steam options win on convenience. What actually determines stream quality, though, is not the app: it is your capture path, your alpha edges, your resolution choice, and your hotkey layout.
veadotube mini vs PNGTuber Plus vs PngTuber Maker on Steam: Which Fits Your Setup?
All three drive a mic-reactive avatar. The differences are how much they animate, how much art prep they demand, and how much hand-holding they provide.
| Tool | Cost | Art prep required | Motion features | Resource cost | Best for |
|---|---|---|---|---|---|
| veadotube mini | Free | 4 flattened PNGs per expression | State swapping, blink timing, basic bob | Very low | Fastest path to live; low-spec machines |
| PNGTuber Plus | Free, open source | Separate PNG per layer | Bounce, wobble, drag physics, sprite sheets, costumes | Low to moderate | An animated feel without moving to Live2D |
| Paid Steam apps | Small one-off purchase | Varies, usually guided | Typically bounce plus expression slots | Low | Steam-managed installs and a guided editor |
Choose veadotube mini if you want to be live in under an hour, are on older hardware, or already have flattened composite frames. It is also the safest option to run alongside a demanding game, because it is barely doing anything.
Choose PNGTuber Plus if your avatar feeling alive matters more than setup time. Drag physics on hair and accessories plus sprite-sheet loops produce a noticeably more expensive-looking result. The trade is exporting your art as separate parts on a shared canvas, which is real work if you generated flattened composites.
Choose a paid Steam app if you value a built-in editor and updates you never have to think about. Functionally you are not getting capabilities the free tools lack; you are buying packaging and support. Whichever you pick, keep the master layered file and the exported PNGs in a folder you control rather than one the app owns, so switching tools later is a re-import rather than a rebuild.
Why Your PNGTuber Flickers or Lags in OBS (and the Capture-Mode Fix)
Flicker, tearing, and a half-second delay between your voice and your mouth are the three complaints that dominate PNGTuber troubleshooting, and they have distinct causes. Diagnose by symptom rather than by trying settings at random.
- Whole-source flicker or black frames means the capture method is fighting the window compositor. Switch Capture Method to "Windows 10 (1903 and up)", or move to Spout2 Capture, which bypasses window capture entirely.
- The source goes blank when you minimise or alt-tab. The window is not rendered when hidden. Leave it visible on a second monitor, or use Spout2, which keeps sending regardless of window state.
- Mouth movement lags your voice. Usually the avatar app's smoothing or attack setting, not OBS. Reduce smoothing, shorten attack, and drop the buffer size if you route audio through a virtual cable.
- Shimmering or crawling edges while the avatar bounces. A scaling artefact. Set Scale Filtering on the source to Bicubic or Lanczos and prefer clean fractions of the native size.
- Stuttering only during gameplay. The avatar process is CPU-starved. Lower your game's frame cap or raise the avatar app's process priority. Do not fix this by lowering OBS encoder quality.
The principle underneath all of these: window capture is a compatibility path, not a quality path, and it is subject to compositor behaviour, driver quirks, DPI scaling, and occlusion. Spout2 hands textures between applications on the GPU, so most of that class of problem does not exist. Use it where supported and treat window capture as the fallback.
Before you change anything in OBS, check that your avatar app is running on the same GPU as OBS. On laptops with switchable graphics, a lightweight avatar app frequently lands on the integrated GPU while OBS runs on the discrete one, which forces an expensive cross-GPU copy every frame and produces exactly the stutter people spend hours blaming on capture settings.
How To Fix White Fringing and Halo Edges on Your Transparent PNG
White fringing is the pale outline that appears around your character over a dark stream background. It is caused by edge pixels that retain colour from the background they were matted against: on a white canvas, the semi-transparent pixels along every edge are a blend of character colour and white, and erasing the background leaves those blended pixels glowing.
Fix it at the source rather than compensating in OBS:
- Defringe in your image editor. In Photoshop, Layer > Matting > Defringe at a radius of 1 or 2 pixels, or Remove White Matte if the background was white. Krita and GIMP have equivalent colour-decontamination options.
- Expand the selection before deleting. When selecting the background by colour, grow the selection 1 pixel into the character so contaminated blend pixels go with it.
- Re-matte against your actual background colour. If your stream background is dark, composite onto a dark canvas before erasing so residual edge blend leans dark and reads as anti-aliasing.
- Never key a PNG that already has alpha. A chroma key filter on an already-transparent image eats into your character's colours.
A dark halo is the same problem inverted: art matted against black, or straight-alpha compositing applied to premultiplied data. Diagnose it identically. Put the frame on mid-grey at 400 percent zoom; a consistent lighter or darker ring one to two pixels wide all the way around is contamination, not art.
If you are stuck with a flattened delivery you cannot re-export, a workable salvage is a 1-pixel erode on the alpha channel followed by a very slight blur back, which trims the contaminated ring at the cost of a hair's width of outline. At stream size nobody will see the difference.
What Resolution Keeps Your Avatar Sharp Without Hurting OBS Performance
The short answer is 1024x1024 per frame for almost everyone, and 2048x2048 only if you regularly zoom the avatar to fill a large portion of the screen or produce high-resolution thumbnails from the same assets.
The reasoning is arithmetic, not taste. On a 1920x1080 canvas, an avatar in a corner box occupies roughly 300 to 500 pixels of height, so a 1024px source is being downscaled, which is the good direction: downscaling loses nothing visible while upscaling produces softness. On a 1440p canvas the same box is around 600 to 700 pixels, still comfortably inside what 1024 supplies.
Memory is the constraint people forget. An uncompressed 1024x1024 RGBA texture is about 4 MB in VRAM, so a twelve-state expression library is roughly 48 MB. The same library at 4096x4096 is around 768 MB, which on a card already holding your game, your encoder, and OBS's compositor is enough to cause real problems.
Three related settings that matter more than raw resolution:
- Display at a clean fraction. A 1024px source at 512px (exactly half) or 256px (exactly a quarter) resamples cleanly. Arbitrary sizes like 437px introduce subtle shimmer on any motion.
- Set Scale Filtering explicitly. Right-click the OBS source and choose Bicubic for smooth art or Lanczos for detailed art. Leaving it on the default point filtering is what makes downscaled avatars look crunchy.
How To Trigger Emotion States From a Stream Deck or Keyboard Hotkeys
Hotkeys are the interface between you and your avatar's performance, so the layout deserves the same thought as a game's keybinds. There are three routes.
Direct keyboard hotkeys are simplest: bind expressions to keys inside the avatar app and press them. The critical question is whether the app registers global hotkeys or only local ones that work while its window is focused. Local-only hotkeys are useless while you are fullscreen in a game, so test this first.
Stream Deck via key emulation is the most universal approach and works with any app. Create a Hotkey action, assign it the combination your avatar app listens for, and the deck emits that keystroke to the focused window. To avoid collisions with game keybinds, use Ctrl+Alt+F1 through Ctrl+Alt+F8, or the F13 to F24 range, which physical keyboards do not have and games therefore never bind.
Direct integration is cleanest where it exists: some avatar tools expose a local API or WebSocket interface that community plugins use to switch states without touching the keyboard, sidestepping focus and collision issues entirely. Whichever route you take, keep live expressions to five or six (anything more will not get used under pressure), group related states on adjacent buttons, and build a dedicated reset key that always returns to default.
Can You Use Animated GIFs Instead of Static PNGs? GIFTuber Setups Explained
Yes, animated avatars are viable, but GIF is usually the wrong container. The GIFTuber look (a looping animated avatar rather than a two-frame swap) is worth having; the format most people reach for to get it will cost you image quality.
GIF has two hard limits that show up immediately on a stream overlay. It is capped at a 256-colour palette, which bands any gradient or soft shading. More importantly, GIF transparency is 1-bit: every pixel is fully opaque or fully transparent, with no partial alpha and therefore no anti-aliased edges. That is the jagged staircase outline that instantly identifies a GIF avatar over a busy background.
Better options, in order:
- Sprite sheets inside your avatar app. In PNGTuber Plus, a strip of PNG frames at 6 to 12 fps gives full 8-bit alpha and full colour, and lets the animation coexist with mic reactivity and physics. This is the correct answer for most animated PNGTuber ideas.
- WebM with alpha as an OBS Media Source. Encode VP9 or VP8 with an alpha channel (the
yuva420ppixel format) and add it as a looping Media Source. True 8-bit alpha, full colour, efficient compression. - APNG where a tool supports it: animated PNG with proper alpha, though support is inconsistent.
- GIF only for small, hard-edged decorations where the palette and alpha limits do not matter.
There is a functional trade-off too. A looping media source in OBS plays on its own timeline and is not reactive to your microphone, so a GIF or WebM avatar is decorative rather than responsive. If you want animation and speech reactivity, the animation has to live inside the avatar app as a sprite sheet. Many streamers run both: a reactive avatar from the app, plus a small animated WebM element such as a floating pet beside it.
Frequently Asked Questions About Making PNGTuber Avatars
How do I make a PNGTuber for free?
You can build a complete PNGTuber for zero cost. Use a free image editor such as Krita or GIMP to prepare your frames, export four transparent PNGs at 1024x1024, and load them into veadotube mini or PNGTuber Plus, both of which are free downloads. Capture the result in OBS, which is also free, and you are live without spending anything.
The only cost you might hit is character art. If you cannot draw, a text-to-image generator can produce your base character, and a free pngtuber maker workflow end to end is the norm in this format rather than the exception, which is a large part of why PNGTubing became the default entry point into avatar streaming.
How many images do you need for a PNGTuber?
The absolute minimum is two: mouth closed and mouth open. The standard, and what most software expects, is four: the full cross product of eyes open or closed with mouth open or closed. A comfortable working set for a real stream is sixteen to twenty-four, which is four states each across four to six expressions.
Scale up deliberately. Ship with four images, stream for two weeks, and note which reactions you keep wishing you had. That list is more accurate than anything you would guess in advance, so every frame you add afterwards is one you will actually use.
What software do most PNGTubers use?
veadotube mini is the most widely used, because it is free, tiny, and does exactly one job well. PNGTuber Plus is the most common step up for streamers who want bounce, physics, and sprite-sheet animation. On the capture side, essentially everyone uses OBS Studio or a fork of it such as Streamlabs Desktop.
For art preparation, the common stack is Krita, GIMP, Photoshop, or Clip Studio Paint, plus a text-to-image generator for anyone who does not draw. Streamers who have upgraded past 2D typically add VSeeFace, VNyan, or Warudo alongside OBS, and keep the PNG tool installed as a fallback.
How much does a PNGTuber commission cost?
A simple two-frame PNGTuber commission typically costs $50 to $150. A full four-state set with two or three extra expressions usually lands around $150 to $350, and an elaborate set with multiple outfits and many reactions can reach $500. Turnaround is commonly one to three weeks, though popular artists book out further.
What drives price is frame count, not just design complexity: every extra expression is another four frames to draw and align. When you commission, specify the canvas size (1024x1024), request the layered source file as a deliverable, and confirm all frames export on an identical canvas. Those three requests cost the artist nothing and save you the pixel-alignment problems that otherwise appear on your first stream.
What is the difference between a PNGTuber and a VTuber?
A PNGTuber is a subtype of VTuber that uses static images swapped by microphone level. A VTuber in the broader sense uses a rigged model driven by live tracking, either Live2D (2D art rigged with deformable mesh parameters) or a full 3D model with a skeleton and blendshapes. The core distinction in the pngtuber vs vtuber comparison is input: a PNGTuber reacts to audio amplitude only, while a rigged VTuber tracks your actual head position, eye direction, blinks, and mouth shapes.
The practical differences follow from that. PNGTubers cost almost nothing, run on any hardware, and need no camera. Rigged VTubers cost hundreds to thousands, need a camera plus tracking software, and consume more CPU and GPU, but can gesture, turn, look around, and appear in full-body scenes. Neither is more legitimate; they are different production tiers, and many channels run both.
Can I make a PNGTuber without knowing how to draw?
Yes, and it is now the common path. A text-to-image generator can produce your character from a written description, and a text-to-3D or image-to-3D platform can produce a model you render clean, perfectly aligned frames from. Neither route requires you to draw a single line.
You still need basic image-editing competence: removing a background, toggling layers, exporting a transparent PNG at a fixed canvas size. The 3D route reduces even that, because rendering states from a model produces transparent, identically-framed PNGs directly. If you are choosing today, generate the character in 3D first and derive the 2D frames from it, because that gives you both tiers from one asset.
How do I make my PNGTuber blink?
Create a duplicate of each frame with the eyes closed, then assign those to the eyes-closed slots in your avatar app. The app handles timing automatically once the images are in place. Set the blink interval to roughly 3 to 5 seconds with a duration of 120 to 180 milliseconds.
Drawing a closed eye is easier than it sounds: at PNGTuber resolution it is usually a 4 to 6 pixel curved stroke in your line-art colour following the upper lash line, plus any lash detail your style uses. Keep every other pixel identical to the open-eye frame so nothing shifts during the blink, and enable randomised intervals if your app supports them, because a perfectly regular blink reads as artificial.
Can I turn my PNGTuber into a 3D model later?
Yes. Your existing PNG art is a usable reference for image-to-3D generation, and the neutral idle frame is the best starting point. Upload it to an AI 3D model generator, add side or three-quarter views if you have them, and you get a textured mesh that can be auto-rigged with 52 ARKit blendshapes and exported as GLB, USDZ, FBX, or VRM.
Two things make the transition go well. Keep your hex colour codes, silhouette landmarks, and signature accessory consistent so viewers recognise the character instantly, and match your 3D camera's field of view and crop to your original PNG framing before you debut it. Once the model exists the relationship inverts: you render new PNG frames out of it whenever you need them, giving you a permanently consistent 2D fallback without maintaining two designs.