How Do You Make a Realistic 3D Avatar From Photos?
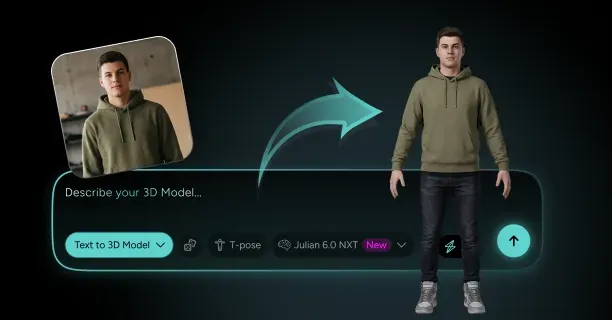
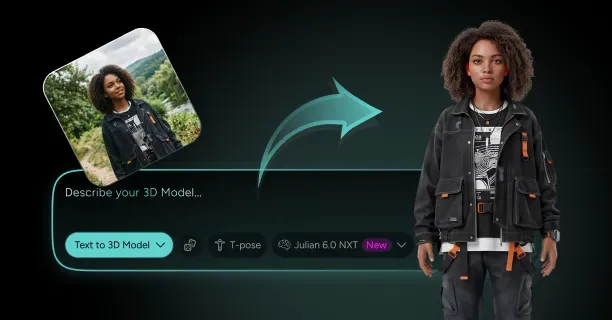
To make a realistic 3D avatar from photos, you shoot two to five sharp reference images under flat diffuse light with a neutral expression, hand them to a reconstruction model that infers a head and body mesh, then rebuild the surface as PBR skin textures with subsurface scattering, roughness variation, and detail normals before rigging and exporting. A realistic 3d avatar creator like Threedium's 3D model generator handles that chain in one pass: its Julian NXT generator turns your reference photos into a watertight mesh with a full albedo, roughness, normal, and ambient occlusion set, an auto-generated skeleton with facial blendshapes where relevant, polygon optimization, and export to GLB, USDZ, FBX, and VRM. The part no generator does for you is judgment: deciding when the likeness is close enough, and when the skin has crossed from lifelike into waxy.
This guide is written for the person who wants a usable digital double today, not a research overview. It walks the capture setup, the mesh, the likeness landmarks that actually carry recognition, the four texture maps that make skin read as skin, hair, eyes, rigging, and export settings. Then it spends a long second section on the failure mode that defines this whole category: the uncanny valley, why it fires, and the specific numbers that pull you back out of it. Stylized transformations, cartoon proportions, and stream-ready character work live on other pages in the avatar generation hub. This one is about photoreal.
Capturing Reference Photos: Neutral Expression, Diffuse Light, Three Angles
Everything downstream inherits the quality of your capture, so treat this as the highest-leverage twenty minutes of the project. Shoot three core angles: a straight-on frontal, a three-quarter at roughly 35 to 45 degrees, and a full profile at 90 degrees. The frontal carries eye spacing and mouth width, the profile carries the nose bridge and chin projection, and the three-quarter resolves the cheekbone and jaw transition that neither of the other two describes well. If you can only supply one image for a 3d avatar from photo workflow, make it the three-quarter, because it contains partial information from both extremes.
Light matters more than camera. You want broad, diffuse, frontal light: an overcast window, a north-facing room, or a large softbox slightly above eye level. What you are avoiding is directional shadow, because any shadow in the reference gets read as pigment and bakes permanently into the albedo. A hard nose shadow becomes a dark stripe no lighting setup can remove later. Never shoot in direct sun.
Practical capture checklist before you upload anything:
- Neutral expression, lips closed but not pressed, jaw relaxed, eyes open normally rather than wide.
- Hair pulled back off the forehead and ears with a clip or band so the hairline and ear shape are visible.
- No glasses, no hats, no heavy makeup contouring, which reads as bone structure that is not there.
- Camera at eye level, roughly 1.5 to 2 meters back, zoomed in rather than stepped in, to avoid wide-angle nose distortion.
- At least 2048 px across the face crop, sharp, no motion blur, no beauty-mode smoothing from a phone camera.
- Plain mid-gray or neutral background so the silhouette separates cleanly.
Phone portrait modes are the quiet killer here. Computational skin smoothing removes exactly the pore-level and blemish information that makes a face read as human, and the synthetic depth blur confuses silhouette extraction around hair. Shoot in the plain photo mode, with beautification and HDR portrait effects disabled.
Generating the Base Head and Body Mesh From Your Photos
Once your references go in, the generator produces a base mesh: a closed, manifold head and body surface with UV coordinates already laid out. What you are inspecting first is not likeness but topology, because topology decides whether the face can deform later. Look for edge loops that circle the eyes and mouth in concentric rings, a loop following the nasolabial fold, and quads rather than long thin triangles across the cheeks. A face without those loops will crease badly the first time it smiles.
Polygon budgets depend on destination. For a real-time avatar in a headset, a head of 12,000 to 25,000 triangles is generous, and a full realistic body lands between 30,000 and 70,000 triangles on PC-class hardware. Standalone headsets are tighter, often demanding the whole avatar sit near 10,000 to 20,000 triangles. Offline rendering has no such ceiling, and a subdivided head can pass 500,000 polygons without anyone caring.
Check the mesh for the three artifacts that reconstruction commonly produces. First, ear geometry fused to the skull, which happens when hair covers the ear in every reference. Second, a nostril interior that is closed over or filled solid, visible the moment the head tilts up. Third, an inner mouth that is missing or modeled as a flat plane, which matters as soon as the avatar speaks. Threedium's enterprise tiers put human 3D artists on exactly these repairs, which is the sensible route for a shipped product. Broader mesh cleanup practice is covered in the 3D model generation guide.
Dialing In Likeness: Eye Spacing, Nose Bridge, Jawline, and Hairline
Likeness is not distributed evenly across a face. Recognition is dominated by a handful of relationships, and if you fix those four the model reads as you even when other details are approximate. The most important is interpupillary distance relative to face width. Adult IPD ranges roughly 56 to 72 mm with a mean near 63 mm, and being off by 3 mm reads instantly as "similar person, not that person."
The nose bridge is second, and it is a profile problem. What carries identity is the nasion depth, meaning how deeply the bridge sets between the brows, plus the angle from bridge to tip and whether the profile line is straight, convex, or slightly concave. Generators tend to regress noses toward an average, softening a distinctive bridge into something generic. Compare your profile render against your profile photo at matched scale and correct the bridge before anything else.
Third is the jaw and chin. Identity lives in the gonial angle, the corner where the jaw turns up toward the ear, and in chin projection past the lower lip. A jaw 5 mm too wide makes the face read as heavier and older. Fourth is the hairline. Temple recession, widow's peak, and hairline height define the top third of the silhouette, and a wrong hairline defeats an otherwise excellent face scan to 3d model conversion because it changes the outline your brain matches first.
Building PBR Skin Textures: Albedo Without Baked-In Shadows
Albedo, sometimes called base color or diffuse, should contain only the color of the skin itself: melanin distribution, redness in the cheeks and around the nose, bluish tones under the eyes, lip pigment, freckles, and any scars or moles. It should contain no shadow, no highlight, and no ambient occlusion. This is the rule most photo-derived skin breaks, and once broken it is hard to hide, because a shadow painted into the color map does not move when the light moves.
Diagnose baked lighting with a simple test: load the model with a flat, uniform environment and no directional light. If you can still see a shadow beside the nose, under the chin, or in the eye sockets, that darkness is in the albedo and needs removing. Dodge those regions back up until the map looks flat and slightly lifeless on its own. Good skin albedo always looks wrong in isolation, like a printed medical illustration; it only comes alive once scattering and roughness sit on top.
The tonal targets are worth memorizing, because clipping at either end destroys realism. Skin albedo should stay roughly between 0.15 and 0.65 in linear sRGB terms: no pure black anywhere, no blown white anywhere. Even the palest skin sits under 0.7 in base color and the deepest above 0.05. Outside that band you get the chalky or crushed look that instantly reads as a game asset.
- Remove specular highlights on the forehead, nose tip, and cheekbones before using a photo as albedo source.
- Keep redness concentrated in the cheeks, nose, ears, knuckles, and elbows, which are the real vascular zones.
- Push a cooler, slightly desaturated tone into the beard and upper-lip region on men, even when clean-shaven.
- Never sharpen the albedo globally; sharpening creates halo edges around nostrils and lash lines.
Adding Subsurface Scattering So Ears and Nostrils Transmit Light
Skin is not an opaque surface. Light enters it, bounces through tissue, and leaves somewhere slightly different, which is why a backlit ear glows orange-red and why the sides of the nose feel soft rather than plastic. Rendering that behavior is subsurface scattering, and it is the single largest quality jump available between a mannequin and a person. Without it, no amount of texture resolution will save you.
The practical controls are scatter color and scatter radius. Scatter color for human skin sits in the warm red range across all skin tones, because it is describing hemoglobin and tissue, not surface pigment. Scatter radius, expressed per channel, follows the classic asymmetry: red travels furthest, green much less, blue barely at all. A reliable starting point in centimeters is roughly 0.9 red, 0.3 green, 0.15 blue, scaled to your model's real-world units. If your avatar is built at real scale in meters, convert accordingly or the effect will either vanish or turn the head into a glowing lantern.
Scattering should not be uniform across the body. Thin tissue transmits more, so ears, nostril wings, eyelids, lips, and finger webbing need noticeably more than the forehead, back, or palms. Authoring a scatter mask, a grayscale map weighting the effect, is what separates competent skin from excellent skin. Real-time engines approximate all this with screen-space or pre-integrated methods, so confirm what your destination runtime honors before tuning for hours.
Subsurface radius is scale-dependent, not scale-invariant. A head modeled at 0.2 units tall instead of real-world 0.23 meters will scatter light as if it were a different physical size, and you will chase the wrong parameter for an hour. Set true scale first, then tune scattering.
Roughness and Specular Maps: Oily T-Zone vs Matte Cheeks
A uniform roughness value is the fastest way to make a face look like a shop mannequin. Real skin varies enormously across a few centimeters, and reproducing that variation is what makes a light source travel believably across a moving face. The T-zone, meaning forehead, nose, and the small triangle of the chin, is oilier and therefore smoother, with roughness commonly around 0.35 to 0.45. Cheeks, temples, and the neck are drier and rougher, sitting nearer 0.5 to 0.6.
The extremes matter too. Lips are wetter and can drop to 0.25 to 0.35, especially along the lower lip's inner edge. The wet line where the lower eyelid meets the eyeball is the smoothest skin-adjacent surface on the face and belongs down near 0.15. Meanwhile eyebrows, beard stubble, and the scalp under hair are rougher and can push past 0.65. Painting this variation, rather than sliding one global value, is the difference between a face that responds to light and one that sits flat.
For specular, the honest answer is to leave it alone. Skin has an index of refraction near 1.4 to 1.45, matching the default 0.5 specular value in a metallic-roughness workflow, and metalness is 0 everywhere on a human without exception. The mistakes to watch for are lifting specular to fake shine, which produces a fever-sweat look, and a global gloss layer that makes the head look laminated.
Hair Cards vs Strand Grooms for Real-Time Realism
Hair is where realistic avatars most often collapse, because it is the one element that cannot be solved by better photo references. There are two viable approaches and they serve different destinations. Hair cards are flat textured planes with alpha transparency arranged in overlapping clumps, and they are what nearly every real-time avatar ships with. A convincing card-based hairstyle uses 800 to 3,000 cards and lands somewhere between 6,000 and 20,000 triangles for a full head of medium-length hair.
The craft in cards is layering. Build three passes: a dense base layer that blocks skin from showing through, a mid layer establishing silhouette and parting, and a sparse flyaway layer of single-strand cards that breaks the outline. Skipping that third layer is the most common cause of hair that looks molded on. Cards also need correct anisotropic shading so the highlight runs as a band rather than a point.
Strand grooms model individual hairs as curves, typically 60,000 to 150,000 rendered strands interpolated from a few thousand guides. They look categorically better in close-up and simulate properly under motion, but they rarely survive export to GLB or VRM intact. Use strands for previs, offline renders, and high-end engine work; use cards for anything running in a headset or browser.
Eyes That Read as Alive: Cornea Bulge, Refraction, and the Wet Line
Viewers look at eyes first and forgive errors there least. An anatomically correct eye is two nested surfaces, not a painted sphere. The sclera is roughly 24 mm in diameter, and sitting proud of it is the cornea, a smaller, more curved dome about 11 to 12 mm across that bulges outward by roughly 2.5 mm. That bulge is why eyelids visibly deform as the eye moves under them, and modeling it is non-negotiable if the avatar will ever look sideways.
Refraction is what gives an iris depth. The cornea has an IOR near 1.376, and light bending through it makes the iris appear magnified and shifted off-axis. Offline, model this literally with a transmissive cornea over a recessed iris. In real time, fake it by indenting the iris geometry inward by 2 to 3 mm behind a smooth outer surface, which produces convincing parallax at almost no cost. A flat iris disc glued to the front of the eyeball is the most recognizable tell of a cheap avatar.
Then there is the wet contact between lids and eyeball. Real eyes have a meniscus of tear fluid along the lower lid margin and a darker occlusion line where the upper lid shadows the sclera. Without those, eyes look pasted into their sockets. Add a thin tear-line strip with very low roughness along the lower lid, and paint an occlusion gradient into the upper sclera so the eyeball does not glow brighter than the face around it.
Rigging Realistic Expressions: FACS Blendshapes and the 52 ARKit Shapes
A realistic avatar needs a facial rig built on FACS logic, meaning shapes that correspond to individual muscle actions rather than whole emotions. The de facto real-time standard is the 52 ARKit blendshapes, which cover brow, eye, jaw, mouth, cheek, nose, and tongue motion and are understood by essentially every face-tracking pipeline, headset runtime, and social platform worth targeting. Threedium generates this set automatically on avatar models where facial animation is relevant, alongside the skeleton.
For photoreal work, the two rig details that matter most are corrective shapes and skin sliding. Corrective shapes fire when two base shapes combine and would otherwise intersect, most notoriously jaw-open plus mouth-smile. Skin sliding means the skin moves over the underlying bone rather than with it, which is what keeps a smile from looking like an inflating balloon. Both are refinements applied on top of the base 52, and this page treats them only in passing: the deep treatment of blendshape authoring, retargeting, and per-shape tuning lives with the companion avatar guides and the rigging documentation, which covers skeleton naming, weight painting, and animation retargeting in detail.
Exporting Your Digital Double: GLB, FBX, USDZ, and VRM Settings for Realism
Export is where realistic avatars quietly lose half their quality, because every container drops something. Decide the destination first, then export specifically for it rather than producing one file and hoping. GLB is the web and general real-time choice: it packs geometry, textures, and animation into one binary file, supports metallic-roughness PBR natively, and carries blendshapes as morph targets. It does not natively carry advanced subsurface scattering, so expect to reconstruct that in the destination engine's material.
FBX remains the interchange format for Unreal and Unity pipelines because it preserves skeletons, skin weights, and blendshape names most reliably, though textures travel as separate files and material definitions rarely survive intact. USDZ is what you need for iOS Quick Look and Apple platforms, and it is strict: keep to a single scene, embed textures, and expect Quick Look to ignore anything exotic in your material graph. VRM is the social-avatar container, carrying not just the mesh but standardized humanoid bone mapping, spring-bone physics for hair, expression presets, and license metadata about how your likeness may be used.
Before shipping any of these, verify scale, orientation, and naming: an adult avatar around 1.6 to 1.9 meters tall, feet at the origin, and blendshape names matching the exact ARKit strings so face tracking binds automatically. Format tradeoffs, texture packing, and compression options are laid out in the 3D file format reference.
| Format | Best destination | Preserves | Loses |
|---|---|---|---|
| GLB | Web, WebXR, general real-time | PBR materials, morph targets, skeleton, animation, embedded textures | Advanced subsurface, strand hair, multi-UV material stacks |
| FBX | Unreal Engine, Unity, DCC round-trip | Skeleton hierarchy, skin weights, blendshape names, animation clips | Material graphs, embedded textures in most exporters |
| USDZ | iOS AR Quick Look, Apple ecosystem | Geometry, PBR textures, simple animation, real-world scale | Complex shaders, many morph target setups, multiple scenes |
| VRM | Social VR, VTuber and avatar platforms | Humanoid bone map, expressions, spring bones, usage license metadata | Nonstandard skeletons, engine-specific shaders, strand grooms |
Why Do Realistic Avatars Fall Into the Uncanny Valley, and How Do You Escape It?
Realistic avatars fall into the uncanny valley when their realism is uneven: when photoreal skin sits under dead eyes, or an accurate face moves with mechanical timing, or a perfect still render breaks the moment it animates. The escape is not more realism everywhere. It is consistency of realism across surface, motion, and eyes, plus a deliberate decision about how close to the real person you actually want to land. This section is the technical core of this page, and it stays self-contained so you can work through it as a diagnostic checklist.
What Actually Triggers the Uncanny Valley Response?
The uncanny valley describes a nonlinear relationship between how human something looks and how comfortable people feel about it. Comfort rises with realism, drops sharply near, but not at, full realism, then recovers once the depiction is indistinguishable from a real person. The practical consequence is brutal: a moderately stylized avatar can be more pleasant than an expensively realistic one, and pushing from 85 to 92 percent realism can make your result worse.
The common explanations all point at the same operational cause. One reading is that the human face triggers a specialized perceptual system with extremely fine tolerances, so once something crosses into "human," it is graded against real faces rather than against other artwork. Another is that mismatched cues create conflict, since the brain receives "alive" from the skin and "not alive" from the eyes and cannot reconcile them.
What those readings share is that inconsistency, not insufficiency, is the trigger. Uniformly stylized characters feel fine at any level of abstraction. Uniformly photoreal characters feel fine. What feels wrong is a photoreal skin shader over a rigid rig, or a beautifully modeled face with cartoon eye motion. That is genuinely good news, because it means your job is auditing for mismatches rather than chasing infinite fidelity.
Plastic-Looking Skin: Diagnosing Roughness Map Mistakes
Plastic skin is a roughness problem far more often than a texture-resolution problem. The diagnostic test is simple: light your avatar with a single small area light and orbit slowly. On real skin, the highlight is a soft, irregular, elongated shape that changes character as it moves from the oily forehead onto the drier cheek. On plastic skin, the highlight stays the same crisp round shape everywhere, sliding across the surface like a spot on a billiard ball.
Three mistakes produce that result. First, a constant roughness value with no map at all, the default state of many auto-generated materials. Second, a roughness map derived by desaturating the albedo, which encodes pigment as surface property so freckles become bumps. Third, roughness authored in the wrong color space, since it must be a linear, non-color texture and loading it as sRGB flattens the useful range.
Fixing it means painting real variation. Start at a base of 0.5, mask the T-zone down toward 0.4 and the cheeks up toward 0.55, then overlay fine pore-derived breakup at plus or minus 0.05 so the surface is never uniform. That last step is disproportionately effective: even small stochastic variation destroys the billiard-ball highlight and reads as organic.
Check color space on every non-color map before debugging anything else. Roughness, metalness, normal, and ambient occlusion maps must all be loaded as linear or non-color data. Loading a normal map as sRGB produces subtly wrong lighting that people spend days blaming on their scattering settings.
How Much Subsurface Scattering Is Too Much?
Too much scattering produces a face that looks like it is lit from inside, or worse, like candle wax. The tells are consistent: shadow terminators become mushy and lose all definition, the nose loses its shape because the light bleeds straight through it, and skin picks up a uniform pinkish glow that persists regardless of lighting direction. If your avatar looks vaguely feverish in every environment, the radius is too high.
The dominant error is scale mismatch. Scatter radius is specified in world units, so a head authored in centimeters and interpreted as meters scatters a hundred times too far. Before touching any slider, confirm that your head measures roughly 0.22 to 0.24 meters from chin to crown in the scene's real units. Once scale is right, most default skin presets land in a usable range immediately.
The second error is full-strength scattering across the whole body. Thick regions such as the back, thighs, torso, and palms transmit very little light and should be masked to roughly 20 to 40 percent of the facial value. Check it against yourself: a phone light behind your ear glows orange, behind your forearm almost nothing passes. Your scatter mask should encode that difference.
Dead-Eye Syndrome: Blink Timing, Micro-Saccades, and Gaze Offsets
Even flawless skin fails if the eyes behave like glass marbles. Real eyes are almost never still. They perform micro-saccades, tiny involuntary jumps of well under a degree, several times per second, plus larger saccades as attention shifts. An avatar whose eyes hold perfectly steady on a target reads as either hypnotized or dead. Adding a small procedural jitter of 0.1 to 0.5 degrees at roughly 1 to 3 Hz is a cheap change with a large payoff.
Blink timing is equally diagnostic. Humans blink around 15 to 20 times per minute at rest, and a blink takes roughly 100 to 150 milliseconds to close and slightly longer to open. Get the rhythm wrong and the effect is immediate: blinking on a fixed metronome reads as robotic, blinking too slowly reads as sedated, and a symmetrical linear blink curve reads as mechanical. Randomize the interval, make the close faster than the open, and occasionally fire a double blink.
Then there are the coupled behaviors people notice without naming. Eyelids follow vertical gaze, so looking down lowers the upper lid. Eyes lead head turns by roughly 50 to 100 milliseconds, because people look before they turn. And convergence must be correct: both eyes aiming at the same point, since a fraction of a degree of divergence produces the unfocused stare viewers find unsettling without knowing why.
Why a Perfect Still Render Can Still Move Wrong
A still frame hides every motion defect, which is why avatars that look stunning in a portfolio render fall apart in a live session. Motion carries its own realism requirements, and they are largely independent of the surface work you did earlier. The most common failure is uniform velocity: expressions that begin and end at the same speed. Real facial motion is heavily eased, with fast onsets and slower decays, and different muscles operating at different rates.
A second failure is perfect symmetry. Real faces are asymmetric in motion far more than in structure, and a smile that fires identically on both sides at identical timing reads as synthetic. Offsetting one side by 30 to 80 milliseconds and scaling it to 90 percent of the other side's amplitude is often enough to fix it. The same applies to eyebrow raises and mouth corner pulls.
Third is the absence of idle motion. A real person at rest still breathes, shifts weight, swallows, and adjusts the head by a degree or two. An avatar frozen between animations looks like a paused video. Layering a subtle idle track, including a chest rise every 3 to 5 seconds and low-amplitude head noise, restores the sense of a living presence. Fourth: speech does not start at the mouth. Jaw and lip motion should lag anticipatory head and brow movement, and audio drifting more than about 40 milliseconds from the visemes registers as desync.
Texture Budgets: When 2K Maps Fail and 4K Maps Are Overkill
Texture resolution should be chosen from viewing distance and screen coverage, not from a general preference for bigger numbers. The useful metric is texel density: how many texture pixels land on a given amount of surface. For a face that will be seen at conversational distance in VR, you want roughly 1,024 to 2,048 pixels across the facial area alone, which usually means a 2K map dedicated to the head rather than shared with the whole body.
2K fails when the face occupies a small fraction of a shared atlas. If a single 2048 texture covers head, body, hands, and clothing, the face may receive only 512 pixels of coverage, and pores, lash lines, and lip detail disappear into mush. The fix is not a bigger atlas but a separate material for the head, standard practice for realistic characters at the cost of one draw call.
4K becomes overkill fast. A 4096 map on a head that never fills more than a third of the screen wastes memory that could go to better hair, and a 4K albedo, roughness, normal, and AO set consumes a large share of a standalone headset's texture budget on its own. The pragmatic split for real-time work: 2K head, 2K body, 1K for hands and accessories, with 4K reserved for cinematic close-ups.
| Use case | Head texture | Triangle budget | Notes |
|---|---|---|---|
| Standalone VR social avatar | 1K head, 1K body | 10,000 - 20,000 total | Hair cards mandatory, compressed textures, no strand grooms |
| PC VR telepresence | 2K head, 2K body | 30,000 - 70,000 total | Separate head material, screen-space subsurface, tear line |
| Playable game character | 2K - 4K head | 60,000 - 120,000 at LOD0 | Needs an LOD chain and corrective blendshapes |
| Cinematic close-up or previs | 4K plus detail normals | Subdivided, unbounded | Strand groom hair, full random-walk scattering |
| Web viewer or product page | 1K - 2K combined | 15,000 - 40,000 total | Keep the GLB under a few megabytes for load time |
Pores, Peach Fuzz, and Detail Normal Maps That Sell Close-Ups
At close range the eye starts hunting for micro-structure, and its absence registers as artificiality even when everything else is right. The efficient solution is a tiling detail normal map: a small, high-frequency pore and fine-wrinkle texture, typically 1K or 2K, tiled 8 to 20 times across the face UVs and blended on top of the base normal map. This gives you pore-scale detail without a 8K texture, and it is how most production characters achieve close-up believability.
Pore structure is not uniform, and reproducing that variation is what sells the trick. Pores are largest on the nose and inner cheeks, medium on the forehead, and very fine around the eyes and lips. Mask the detail normal accordingly: full strength on the nose, 60 percent on the cheeks, 20 percent around the eyes. Break the tiling too, since visible repetition across a cheek is worse than no detail at all.
Peach fuzz, the fine vellus hair covering most of the face, is the last five percent. It produces the soft luminous rim along the jaw and cheek when someone is backlit. Offline, add it as a sparse very short strand layer; in real time, approximate it with a subtle rim-light term or fresnel-driven brightening at the silhouette. It is the reason certain avatars feel photographed rather than rendered.
Likeness at Three Distances: Profile Photo Crop, VR Near-Field, and Full-Body
Realistic avatars are consumed at three very different scales, and each grades a different set of features. Most people tune at exactly one, the hero close-up, and the model then fails at the other two. Audit all three.
The profile photo crop is a small square, often 128 to 256 pixels, seen for under a second. At that size, texture detail is irrelevant and only large shapes register: face outline, hairline, eyebrow weight, and overall value contrast. The typical failure is an avatar that is technically excellent yet unrecognizable when shrunk, usually because the silhouette is generic. Test by exporting your render at 128 pixels and asking whether you would recognize it in a contact list.
The VR near-field is the hardest case, because a conversation partner in a headset sits between 0.5 and 1.5 meters away with stereo depth, where flat hair cards, incorrect eye geometry, and missing corneal bulge become obvious in a way no monitor reveals. This distance also exposes scale errors instantly, since a head even 10 percent oversized feels wrong the moment you stand next to it. Test in the actual headset, not in a viewport.
The full-body distance, roughly 2 to 5 meters, shifts the burden off the face entirely. Recognition comes from proportions, posture, shoulder width, and gait, and a face that took days is a few dozen pixels. What fails here is a mismatch between a detailed head and a generic body, or an idle pose that does not match how the person stands. Budget effort by where the avatar will really be seen.
Measuring Likeness: Landmark Comparison and Side-by-Side Render Tests
Stop judging likeness by feel, because you adapt to your own model within an hour of looking at it and lose the ability to see errors. Use a measurable procedure instead. The core method is landmark comparison: render your avatar in exactly the same camera position, focal length, and orientation as your reference photograph, overlay the two at 50 percent opacity, and mark corresponding points on both.
The landmark set that matters is small. Work through these and record the pixel offset for each:
- Pupil centers, both eyes, which fix interpupillary distance and eye height.
- Inner and outer eye corners, which define eye shape and canthal tilt.
- Nasion, nose tip, and both alar wings, which fix nose length, projection, and width.
- Mouth corners and the vermillion border midpoint, which fix mouth width and lip fullness.
- Chin point, both gonial angles, and the top of each ear, which fix the lower face and head proportion.
Set a tolerance and enforce it. If the render is 1,000 pixels across the face, aim for every landmark within roughly 1 percent of face width, about 10 pixels, with pupils and nose tip held to half that. Then run the test instruments cannot replace: show three people who know the subject a side-by-side and ask what feels off. They will say "the jaw looks heavy," which is the same information in usable form.
The 90 Percent Rule: Slight Stylization as an Uncanny Valley Escape Hatch
Sometimes the right answer is to stop short of full realism on purpose. If you cannot reach genuinely indistinguishable photorealism, and almost no real-time pipeline can, then deliberately pulling back to roughly 90 percent realism puts you on the near slope of the curve rather than in the trough. The result reads as a stylized portrait of a specific person, which viewers accept easily, instead of a failed replica, which they reject.
The stylization has to be applied consistently, not randomly. Effective adjustments include evening out pigment and blemishes, enlarging the eyes by 3 to 5 percent, simplifying the hair silhouette into readable shapes, and softening the deepest folds around the nose and mouth. Each is subtle enough that viewers cannot name what changed, yet together they signal "representation" rather than "reproduction."
What you must not do is stylize some features and not others. Enlarged cartoon eyes on a photoreal face is precisely the mismatch that triggers discomfort. Pick a level of abstraction and apply it uniformly across skin, hair, eyes, and proportions. Consider the audience too: telepresence usually calls for the 90 percent version, while a film stand-in needs full realism because it must match plate footage of the actual actor.
Run the deliberate mismatch test before you ship. Take your finished avatar and show it alongside a photo of the subject to someone who has never seen either. If their first reaction is a description of a person, you are fine. If their first reaction is a description of a rendering, you are still in the valley.
Where Are Realistic 3D Avatars Actually Used?
Realistic avatars are not a general-purpose replacement for stylized ones, and knowing where they genuinely earn their cost saves a lot of wasted work. They dominate in four contexts: immersive meetings where identity and trust matter, games that want the player's own face on a character, film and previs where a stand-in must match a real performer, and any application where a person needs to see themselves rather than a mascot. Everywhere else, stylized usually wins on performance, charm, and production speed.
The practical constraint that shapes all of these is platform acceptance. A photorealistic avatar generator can produce a gorgeous asset that a target platform simply refuses to load because of triangle limits, texture size caps, shader restrictions, or content policy. Check the destination's technical specification before you start optimizing, not after.
VR Telepresence and Meetings: Your Face in the Headset
Immersive meetings are the clearest commercial case for realistic avatars. When colleagues need to recognize each other, negotiate, or build trust, a cartoon torso undermines the interaction while a recognizable face restores the social signals video calls carry. This is where a digital double pays for itself.
The technical envelope is tight. Headset rendering means drawing the scene twice at high refresh rates, often 72 to 120 Hz, with multiple avatars present. That pushes each participant toward the standalone budget described earlier: roughly 10,000 to 20,000 triangles, 1K or 2K compressed textures, hair cards rather than grooms, and simplified scattering. Realism has to come from good authoring inside a small budget rather than from raw asset weight.
Two features matter more here than anywhere else. Gaze must be driven by real eye tracking where hardware supports it and plausible procedural behavior where it does not. And upper-body motion must be inferred sensibly from three tracked points, since visible elbow and torso errors distract more in a meeting than simplified skin. Get gaze and posture right and people forget they are looking at a model.
Digital Doubles in Games: MetaHuman-Class Player Characters
Games use realistic avatars in two distinct ways: as a player-created character that resembles the player, and as a scanned likeness of a real person such as an athlete or actor. Both demand more rig quality than telepresence, because game characters have to perform, not just talk. That means a facial rig with corrective shapes, a full LOD chain, and a body rig that survives aggressive animation.
Budgets are looser than VR but not unlimited. A hero head commonly sits between 25,000 and 60,000 triangles at LOD0, with a full body in the 60,000 to 120,000 triangle range, dropping through three or four LODs to a few thousand at distance. Textures run 4K for the hero head and 2K for body parts. Player-facing systems also need the mesh to accept hairstyles and clothing without interpenetration, which constrains head and shoulder topology from the start.
The integration path is straightforward: export FBX with a standard humanoid skeleton and ARKit-named blendshapes, import to Unreal or Unity, rebuild the skin material with the engine's subsurface profile, and retarget existing animation. Output from a lifelike 3d avatar maker slots into that pipeline exactly as a scanned or sculpted character does.
Film Previsualization and Actor Stand-Ins
In film and episodic production, realistic avatars show up long before any final frame is rendered. Previsualization uses rough digital doubles of the cast to block shots, test camera moves, plan lens choices, and time action sequences. At this stage likeness only needs to be good enough to identify who is who in frame, so an AI-generated head from a headshot is often entirely sufficient and dramatically faster than commissioning scans.
The requirements invert compared to real time. Polygon count barely matters because everything renders offline, so subdivided meshes and strand-based hair are normal. What matters instead is correct real-world scale, so the avatar's height matches the actor's and lens calculations hold, plus a skeleton that accepts motion capture cleanly. Previs assets also need to be produced fast and cheaply, since a production may need thirty of them in a week.
Stand-in doubles for stunt replacement or de-aging demand full photoreal fidelity and considerable manual artistry. Generated base meshes still shorten the front end there, giving artists a clean, correctly proportioned starting point instead of a raw scan, which is exactly the pattern behind Threedium's enterprise tier: automated generation plus human 3D artist refinement.
Which Social and Streaming Platforms Accept Realistic Avatars?
Platform support for realistic avatars varies more than people expect, and the constraints are both technical and editorial. Technically, most social VR platforms accept VRM or their own custom format and enforce hard limits on triangles, texture memory, material count, and shader complexity. Editorially, some platforms restrict realistic depictions of real people, especially where impersonation risk exists.
The practical grouping looks like this:
- Open social VR platforms generally accept realistic uploads via VRM or engine-native packages, with strict performance tiers that push you toward the 10,000 to 20,000 triangle band on standalone hardware.
- Enterprise meeting platforms often use their own avatar systems and may only allow photo-derived likenesses through their internal generator rather than arbitrary uploads.
- Streaming and VTubing tools accept VRM widely, and a realistic VRM works technically, though audiences in those spaces largely expect stylized characters.
- Game engines impose no format policy of their own, so FBX or GLB plus your own material setup works anywhere, subject to your project's performance target.
- Web and AR viewers take GLB and USDZ respectively, where total file size, not triangle count, is usually the binding constraint.
Should You Use an AI Realistic 3D Avatar Creator, Photogrammetry, or a MetaHuman Pipeline?
There are four legitimate routes to a photoreal digital double, and the right one depends on how exact the likeness must be, what you will spend, and whether platform lock-in is acceptable. AI photo-to-3D generation wins on speed and cost. Photogrammetry wins on raw geometric accuracy. A MetaHuman pipeline wins on rig quality inside its ecosystem. A commissioned sculpt wins when the result must be perfect and nothing automated is getting you there.
Most people overbuy. If your avatar will appear at conversational distance in a headset or as a game character, generated output plus careful texture and eye work will very likely satisfy you, and the money is better spent on hair and animation than on a more accurate scan.
AI Photo-to-3D Generation: Minutes Instead of Weeks
Generation from photos compresses a weeks-long pipeline into a session. You supply reference images, the model infers full 3D geometry including the parts your photos never showed, and you get back a textured, UV-unwrapped, rigged mesh with export options. Turnaround is typically minutes rather than weeks, and cost is a subscription rather than a per-asset commission, which changes what you are willing to iterate on.
The tradeoffs matter. Inferred geometry is a plausible reconstruction, not a measurement, so the back of the head, obscured ears, and exact feature depth are educated guesses. Likeness lands strong but imperfect: close enough that people recognize you, not close enough to survive a sub-millimeter landmark overlay. Distinctive features get regressed toward average, which is why the likeness pass is not optional.
What you get in exchange is the ability to iterate. Re-running with different references costs minutes, so you can test which capture setup yields the best base, then refine. Threedium's Julian NXT generator sits in this category and adds the production steps most generators skip: polygon optimization to a chosen budget, PBR texture sets rather than a single baked color map, automatic rigging with facial blendshapes where relevant, and export to GLB, USDZ, FBX, and VRM. On enterprise tiers, human 3D artists refine the output, which effectively bridges this route and the commissioned one.
Photogrammetry Scans: What $250 to $2,000 Services Actually Deliver
A photogrammetry avatar is built from measured reality: dozens to hundreds of synchronized photographs processed into a dense point cloud and then a mesh. Accuracy is the selling point, since the geometry is derived from your actual head rather than inferred. Studio scan booths with multi-camera rigs can resolve sub-millimeter surface detail including pores, and full-body rigs capture your real proportions rather than a fitted template.
Understand what price buys. Around $250 to $500 typically gets you a single-subject session and a raw or lightly cleaned scan: dense triangle soup, a photo-derived color texture with lighting baked in, no rig, and no usable topology. Around $800 to $2,000 generally adds retopology to an animation-ready mesh, delighted textures, a basic rig, and sometimes a blendshape set. Turnaround usually runs one to three weeks depending on the cleanup included.
The catch is that a raw scan is not an avatar: unusable UVs, millions of triangles, and studio lighting baked into the texture. If that cleanup is not in the quote, you are buying a starting point rather than a deliverable. Photogrammetry also cannot capture hair usefully, since fine strands defeat reconstruction, so hair is authored separately regardless of scan quality.
MetaHuman Creator and Mesh to MetaHuman: Power and Platform Lock-In
Epic's MetaHuman framework offers an extremely high-quality realistic human system with a sophisticated facial rig, layered skin shading, groom-based hair, and a full LOD chain, all authored to a consistent standard. Mesh to MetaHuman lets you drive that system from your own scan or mesh, which is the closest thing to a supported metahuman from photo workflow: you bring a scan or photo-derived head, it fits the MetaHuman topology and rig to your geometry, and you inherit the whole framework's quality.
The constraint is ecosystem gravity. MetaHuman assets are designed for Unreal, and their licensing and distribution terms are tied to Epic's framework, so exporting to a VRM social avatar or a lightweight web GLB is not the path of least resistance. Terms have evolved and continue to, so verify current licensing yourself before building a product around it. The rule: shipping in Unreal, this is excellent; needing one avatar that travels across web, iOS AR, social VR, and a game engine, a format-neutral generator exporting GLB, USDZ, FBX, and VRM causes far less friction.
| Route | Typical cost | Turnaround | Likeness accuracy | Best when |
|---|---|---|---|---|
| AI photo-to-3D generation | Subscription, effectively low per asset | Minutes | Strong, recognizable, not measured | You need speed, iteration, and multi-format export |
| Photogrammetry scan service | $250 - $2,000 | 1 - 3 weeks | Very high geometric accuracy | Exact proportions matter and cleanup is budgeted |
| MetaHuman pipeline | Free framework, your Unreal costs | Hours to days | High, plus a superior facial rig | The project ships inside Unreal Engine |
| Commissioned sculpted double | $1,500 - $8,000 and up | 3 - 8 weeks | Highest, artist-judged | Hero asset seen in close-up, no compromises allowed |
Commissioning a Sculpted Digital Double: When Manual Still Wins
A skilled character artist sculpting from reference still produces the best likeness available, and it is worth understanding exactly why. An artist does not reconstruct a surface; they interpret a face. They know which asymmetries carry identity and which are noise, how the underlying skull drives the surface, and how a face will read once it moves. That judgment is the product, and no automated pipeline replicates it yet.
Expect $1,500 to $4,000 for a realistic head with textures and a basic rig, and $4,000 to $8,000 or more for a full body double with groomed hair, a complete facial rig, and clothing. Timelines run three to eight weeks. Clarify up front what is included: topology standard, texture resolution, rig type, blendshape count, delivery formats, and whether you receive source files.
Commission when the asset is a hero: a brand's virtual spokesperson, a film-quality double, or any face seen at close range by a large audience. Do not commission for a personal VR avatar, a company-wide telepresence rollout, or a prototype, because generated output is good enough there at a fraction of the cost. The hybrid is often smartest: generate the base, then pay an artist for a targeted likeness and hair pass, which is precisely the model behind enterprise refinement tiers.
Frequently Asked Questions About Realistic 3D Avatars
Short, direct answers to the questions that come up most often when people start building a photoreal likeness of themselves or someone else.
Can I make a realistic 3D avatar of myself for free?
Yes, if you are willing to do the work manually or accept free-tier limits. Blender is free and fully capable of sculpting, texturing, rigging, and rendering a photoreal head, and MetaHuman Creator is free to use within Epic's framework. Most AI avatar platforms, including Threedium's avatar generation tools, offer free tiers with limits on resolution, exports, or commercial rights.
The real cost is time. A first photoreal head sculpted from scratch in Blender is a multi-week project covering anatomy, retopology, UV layout, PBR skin authoring, and rigging. Free tiers usually deliver a usable model but may watermark, cap resolution, restrict formats, or exclude commercial use, so read the terms before shipping anything.
How many photos do I need for an accurate likeness?
For AI generation, three well-shot photos at frontal, three-quarter, and profile give you most of the achievable accuracy, and five to eight adds refinement. For true photogrammetry, you need 60 to 150 overlapping images of the head, or several hundred for a full body, with roughly 60 to 80 percent overlap between adjacent frames.
Quality beats quantity decisively. Three sharp, evenly lit, neutral-expression photos outperform thirty phone snapshots with mixed lighting and beauty filters. If you can only shoot one, use the three-quarter angle, since it carries partial information about both frontal proportions and profile.
What is the most realistic 3D avatar creator?
It depends on your destination rather than on any single ranking. For raw rig and shading quality inside Unreal Engine, MetaHuman is the highest bar available. For geometric accuracy, a professional photogrammetry scan wins. For a realistic avatar that has to travel across web, AR, social VR, and game engines from one generation pass, a format-neutral platform like Threedium's 3D model generator is the pragmatic choice.
Judge candidates on four criteria: separate PBR maps rather than one baked texture, a rig including the 52 ARKit blendshapes, the export formats supported, and animation-ready topology with proper edge loops around eyes and mouth. A tool failing any of those costs more in cleanup than it saved in generation.
Can I use my realistic avatar in Unreal Engine or Unity?
Yes. Both engines import FBX and glTF directly, and a generated avatar with a standard humanoid skeleton and ARKit-named blendshapes will bind to their animation and face-tracking systems without custom work. Export FBX for the most reliable skeleton and blendshape preservation, and GLB when you want textures traveling inside a single file.
Plan on rebuilding the skin material in-engine. Neither engine reads an external subsurface setup automatically, so wire your albedo, roughness, normal, and AO maps into the engine's own skin or subsurface profile shader. Verify import scale too: a centimeter-versus-meter mismatch is why avatars arrive a hundred times too large.
How do I stop my 3D avatar from looking creepy?
Fix the eyes first, then roughness variation, then motion timing. Most creepiness traces to three specific defects: eyes that hold perfectly still with a flat pasted-on iris, uniform roughness that makes skin read as plastic, and mechanical animation with symmetrical timing and no idle motion. Those three account for the large majority of avatars people describe as unsettling.
If you have fixed all three and it still feels wrong, apply the 90 percent rule and stylize slightly but uniformly: even out skin tone, enlarge the eyes by 3 to 5 percent, simplify hair into readable shapes, and soften the deepest facial folds. That deliberate step back from full realism puts you on the comfortable side of the uncanny valley rather than in it.
What file format is best for a realistic VR avatar?
VRM is the best choice for social VR platforms, because it standardizes humanoid bone mapping, expression presets, spring-bone hair physics, and license metadata describing how your likeness may be used. For custom VR applications built in Unreal or Unity, use FBX instead and rely on the engine's own systems. GLB is right for WebXR and browser viewers.
Whichever container you pick, the settings matter as much as the format: real-world scale, feet at the origin, exact ARKit blendshape names, compressed textures sized for the headset, and a triangle count inside the platform's performance band. The full comparison of containers and compression options is in the 3D file format guide.
Is it legal to make a realistic avatar of someone else?
Generally no, not without their permission, and this is not legal advice. Most jurisdictions protect a person's likeness through right of publicity or personality rights, and creating a realistic 3D avatar of an identifiable person for commercial use without consent exposes you to real liability. Many jurisdictions have also added specific laws covering synthetic depictions of real people.
The safe practice is straightforward. Get written, specific consent covering intended uses, platforms, duration, and whether the likeness may be modified or animated. Never create a realistic avatar of a real person to make them appear to say or do things they did not, and never produce one of a minor or in a sexual context. For employees, clients, or performers, treat it as a formal release process; VRM's license metadata exists specifically so those permissions travel with the file.