How Do You Make a 3D Anime Avatar From Images?
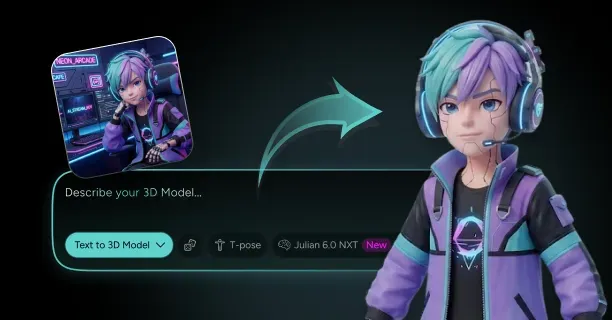
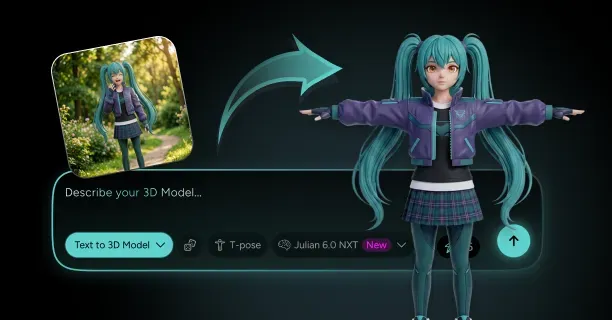
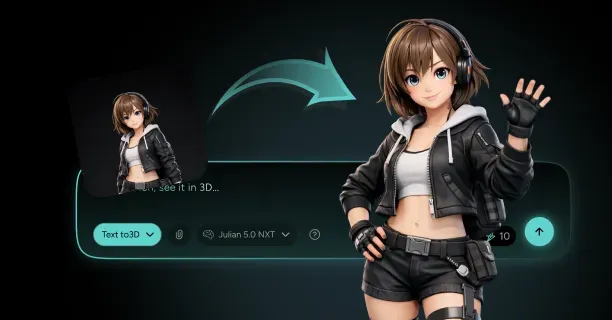
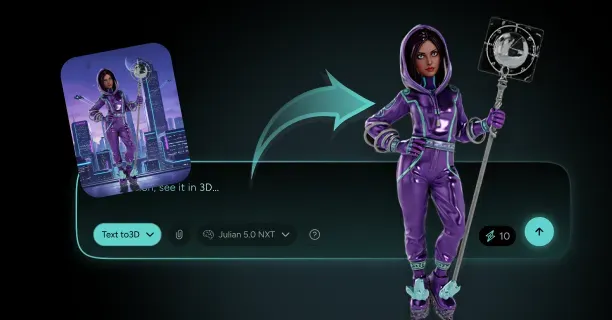
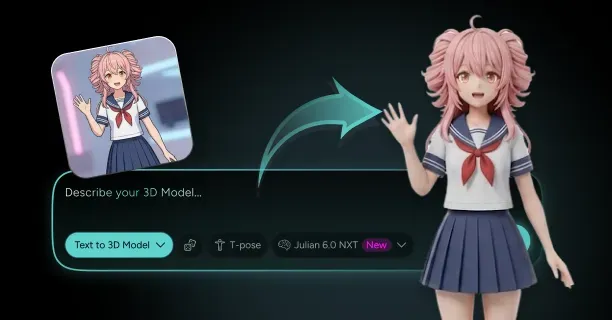
To make a cel-shaded 3D anime avatar from images, feed a character sheet or clean front-facing portrait into an image-to-3D generator, specify anime proportions in the prompt, then convert the resulting textures to flat toon materials with a shadow ramp and an outline pass. Threedium's avatar generator covers this path end to end: the Julian NXT engine reconstructs a watertight mesh from your reference art, produces PBR texture sets you can flatten into toon zones, auto-rigs a humanoid skeleton with 52 ARKit blendshapes, and exports to VRM, FBX, GLB, and USDZ. As a 3d anime avatar maker that starts from your own artwork rather than preset sliders, it produces a one-of-one persona instead of a recognizably templated body.
The rest of this guide follows that path in order: references, stylized anime proportions, face and eye geometry, chunked hair, cel shading, rigging, expression blendshapes, and export.
Choosing Reference Images: Character Sheets, Turnarounds, and Single Portraits
The quality ceiling of an image to 3d anime avatar conversion is set before you generate anything. Reconstruction infers volume from silhouette, shading, and contour cues, and anime art deliberately removes most of those: flat fills, no cast shadows, hair drawn as opaque shapes. That is workable, but your reference has to carry the information in outlines and views instead of in lighting.
- A full character sheet or turnaround (front, three-quarter, side, back, plus a hair inset) is the best input. Four views at 2048 px on the long edge resolve back-of-head hair, sleeve construction, and shoe shape without guesswork.
- A single full-body front portrait at 1024-2048 px produces a usable avatar, but expect to correct the back of the head, the hair interior, and any asymmetric accessory in a refinement pass.
- A bust or headshot only forces the generator to invent the entire body. Use it only when you will describe the body in text and treat the image as face reference.
Prepare images the way a modeller would want them handed over. Remove busy backgrounds so the silhouette is unambiguous, and avoid dramatic perspective and action poses: a relaxed A-pose reconstructs cleanly, a jumping pose bakes itself into the mesh and fights the rig later. Crop out speech bubbles, watermarks, and signatures, because a generator will read a corner watermark as a shoulder decal.
Spec warning: never use an image with baked rim lighting or a strong colored key light as your primary reference. Those highlights get read as albedo and end up permanently painted into your base color texture, which is very hard to remove once you flatten to toon zones.
Prompting for Anime Proportions: Head-to-Body Ratio, Eye Scale, and Silhouette
Anime is a proportion system before it is a shading system. Get the ratios wrong and no amount of toon shading will save it: you will have a realistic model with flat textures. Three numbers matter most, and you should state all three explicitly rather than hoping the word "anime" carries them.
Realistic figures run about 7.5 heads tall. Mainstream anime sits at 6 to 7 heads, moe and shojo styling drops to 5.5 to 6.5, and chibi collapses to 2 to 4. Eye height is the other giveaway: a realistic eye is roughly one tenth of face height, an anime eye occupies one quarter to one third.
| Substyle | Head-to-body ratio | Eye height (% of face) | Silhouette notes |
|---|---|---|---|
| Shonen action | 7 to 8 heads | 18-22% | Broad shoulders, angular jaw, spiky hair chunks |
| Shojo / moe | 5.5 to 6.5 heads | 28-33% | Narrow shoulders, soft jaw, large rounded hair volume |
| Seinen / josei | 7 to 7.5 heads | 15-20% | Closer to realistic mass, restrained hair chunking |
| Chibi | 2 to 4 heads | 30-40% | Head dominates silhouette, hands and feet simplified |
| General social VR avatar | 6.5 to 7 heads | 22-28% | Readable at 3 m, exaggerated hair volume |
A prompt that works reads like a spec: "anime-style character, 6.5 heads tall, oversized eyes occupying one third of face height, simplified nose with no nostril geometry, chunked hair in large separated clumps, A-pose, flat cel-shaded coloring, thick clean outlines, plain background." Naming negative space matters too: ask for a clear gap between hair clumps so the mesh does not fuse into a helmet.
Silhouette is the part people forget. Anime characters are designed to be identifiable as a black shape at thumbnail size, which is why spikes, coat tails, ribbons, and side-tails exist. Describe at least one strong silhouette breaker: an ahoge, a hood, a long asymmetric fringe, twin tails, or an oversized collar. A generic bob and a plain shirt generate cleanly and then vanish in a crowded social world.
Choosing a Substyle Before You Generate
"Anime" is an umbrella over several drawing conventions that resolve differently in 3D. Committing to one before you generate saves a full regeneration cycle, because substyle drives the proportion table above, the number of tone steps in your ramp, and how aggressively you simplify the face.
- Shonen: high contrast, angular hair chunks, strong jaw, wide ramp separation. Reads well at distance and tolerates a thicker outline.
- Shojo: tall eyes with heavy lash geometry, soft chin, delicate limbs, low-contrast pastel ramps. Needs a thinner outline or the face gets crowded.
- Seinen and josei: near-realistic proportion with anime face simplification. The hardest to execute, because it lives next to the uncanny middle ground discussed later.
- Chibi: extreme head dominance, no visible nose, minimal joint definition. Rigs differently, because limbs are too short for standard IK assumptions.
If you are building character assets for a project rather than a persona you wear, that substyle question is covered in depth on the dedicated anime character model hub, which treats shonen, shojo, seinen, josei, and chibi as production assets. This page stays on the wearable case, where the constraints are different: you need a rig, an expression set, and an export a social platform accepts.
Generating the Base Mesh From Your Reference With Threedium's AI
With references prepared and the spec written, generation is the fast part. Upload the sheet, paste the proportion prompt, and let the Julian NXT generator reconstruct. What comes back is a closed, UV-unwrapped model with a PBR texture set, a humanoid skeleton, and blendshapes where topology supports them. Turnaround is minutes, not the multi-week loop of a commission.
Judge the first result on four things, in this order:
- Silhouette match. Overlay a front screenshot on your reference at the same height. Head size, shoulder width, and hair volume should line up within a few percent. Fix this first, because it is structural and texture work cannot rescue it.
- Face landmark placement. Eye spacing, eye height, and mouth position determine whether the model reads as your character or as a stranger wearing their hair. Measure against the reference rather than eyeballing it.
- Hair separation. Check whether fringe, back mass, and tails came back as distinct volumes or one fused shell. Fused hair is far more painful to split later than to regenerate now.
- Topology density in deforming areas. Elbows, knees, shoulders, jaw, and the eye region need enough edge loops to fold without collapsing. This check predicts whether rigging and blendshapes go smoothly.
If a pass misses, change one variable and regenerate rather than rewriting the whole prompt: regeneration is cheap, and untangling a model built from a prompt you changed in six places at once is not. On enterprise tiers, human 3D artists refine a generated pass directly, which is the sensible route when an accessory must be built correctly rather than approximated.
Practical tip: generate at your target proportion, not at realistic proportion with a plan to scale the head up later. Scaling the head after rigging breaks skin weight falloff around the neck and shoulders, and the seam takes longer to fix than a regeneration takes to run.
Refining the Anime Face: Eye Geometry, Simplified Noses, and Mouth Topology
The anime face is a set of deliberate omissions: where a realistic head spends geometry on nostril flare, lip volume, and nasolabial structure, an anime head spends it on the eyes and removes nearly everything else. Eyes are built as separate objects, not as sockets carved into the head. The standard construction is a slightly convex disc or shallow dome carrying iris and pupil as a texture, sitting inside a concave cavity, with a separate lash and eyeline strip in front. Keeping them separate lets you scale, rotate, and offset the eye independently, and lets you drive gaze by rotation or UV offset rather than by deforming the head. Budget roughly 600 to 2,000 triangles per eye assembly including lashes.
The nose should be a suggestion: a small wedge or simple ridge with no nostril geometry at all, sometimes only a painted shading cue. If your model came back with a structurally correct realistic nose, flatten it, remove the nostril indentations, and let the outline pass draw the tick mark that reads as a nose. The same applies to the philtrum and chin crease.
Mouth topology needs the opposite treatment. An anime mouth looks simple but has to open wide for visemes and stretch for exaggerated reactions, so it needs radial structure: at least two concentric loops around the lips plus an interior cavity with tongue and upper teeth. A mouth modeled as a painted line cannot animate, and you discover that only when you wire visemes. Keep the mouth corners on their own loop so smiles pull sideways cleanly.
Building Anime Hair: Card-Based Meshes vs Sculpted Chunks
Hair is where most anime avatars are won or lost, and where realistic-model instincts actively hurt you. There are two viable constructions for an anime hair mesh, and they behave very differently in engine.
Hair cards are flat quad strips with a hair texture and an alpha channel, the standard for semi-realistic characters. They give strand detail and soft edges, and they introduce transparency sorting problems: alpha-blended cards render in a camera-dependent order, so layers flicker and pop as you move. In social VR, where dozens of avatars render at once, that is a visible cost.
Sculpted chunks are solid, opaque, closed volumes: the fringe as three or four wedges, the back of the head as a few large masses, a side-tail as a tapered tube. No alpha, no sorting, hard silhouette edges the outline pass draws crisply. This is what almost every published anime avatar uses.
Budget accordingly. Alpha-blended cards run 8k to 25k triangles and outline badly, since the inverted hull traces the card rectangle rather than the visible strands. Alpha-clipped cards land at 6k to 18k. Sculpted chunks come in lowest at 4k to 15k and outline cleanly, which is why they win for cel-shaded work.
If the generator returns hair as a single fused dome, split it: separate the fringe, then the back mass, then any tails or braids. Even if you never animate them independently, separated chunks let you assign different outline widths and avoid the artifact where one continuous normal field smears a soft gradient across what should be a hard-edged clump. Keep the underside of each chunk solid, because open-backed hair looks fine from the front and shows a hollow shell the moment someone circles you.
Hair Clump Silhouette Design: Bangs, Ahoge, Side-Tails, and How Many Chunks Read at Avatar Scale
Chunk count has a hard perceptual ceiling. At social VR viewing distance, typically 1.5 to 4 meters, the eye resolves large shapes and merges small ones: twenty delicate fringe strands collapse into a gray mass at 3 meters, while five bold ones read instantly.
- Fringe: 3 to 7 chunks. Odd numbers avoid a symmetric center split. Vary widths: one dominant chunk, two medium, the rest as accents.
- Side locks: 1 to 2 per side. These frame the jaw and signal face shape. Make them long enough to cross the jawline or they look like an afterthought.
- Back mass: 2 to 5 chunks. Fewer than two looks like a swim cap; more than five stops reading as separate shapes from behind.
- Ahoge: one, occasionally two. The stray strand is a strong identity marker costing under 200 triangles. Make it at least half a head height or it disappears against the back mass.
- Twin tails: 3 to 6 chunks each. Taper so the tip is about one third the base width, and vary chunk lengths so the end is ragged rather than blunt.
Test the silhouette the way character designers do: render the model as a solid black shape against white from front, three-quarter, and back, at roughly 128 px tall. If you cannot tell it apart from a generic bob at that size, the chunks are too small or too uniform. Push one noticeably larger and one noticeably longer, then re-test.
Depth layering matters as much as count. Offset each fringe chunk slightly in Z so they overlap in a readable stack rather than sitting coplanar, and rotate each a few degrees off the others: a 3 to 8 degree rotation variance plus a couple of millimeters of depth offset stops the fringe looking like a plastic wig. Leave a 1 to 2 cm gap between long hair tips and the shoulders, or the hair clips constantly once the avatar moves.
Applying Cel Shading: Flat Color Zones, Shadow Ramps, and Outline Passes
Cel shading is three things working together: flat albedo zones, a quantized shadow ramp, and an outline pass. Flat albedo alone looks untextured, a ramp without outlines is a soft toon render, and outlines without a ramp is a coloring book.
Start with albedo. Generated models arrive with PBR textures containing baked micro-detail, gradients, and lighting information, all of which fight cel shading. Flatten them into zones of solid color: one skin tone, one hair base, two or three fabric tones per garment, one metal tone for hardware. In practice, posterize the diffuse map, then hand-clean the boundaries so each zone has a hard edge. A face texture with five flat colors shades far better than one with a thousand.
Next, the ramp. Instead of the smooth Lambert falloff a PBR material uses, a toon shader (MToon) style material pushes lighting through a step function: above a threshold is base color, below is shade color, with a narrow blend band between. Two parameters control it: shading shift (where the terminator sits) and shading hardness (how abrupt the transition is). Anime avatars run a hard transition with a blend band of 0.02 to 0.08.
Then the outline. The dominant method for avatars is the inverted hull: a duplicate mesh scaled outward along vertex normals, front faces culled so only back faces render, shaded in a solid dark color. Choose the color carefully, because pure black looks harsh under bright lighting. Most polished avatars tint the outline toward a darkened version of the underlying albedo: sampling the base texture and multiplying by roughly 0.3 to 0.5 is a reliable starting recipe.
Texturing Outfits Without Losing the Illustrated Look
Clothing is where PBR habits leak back in. A generated jacket arrives with a normal map full of weave detail, a roughness map with wear patterns, and an albedo with baked ambient occlusion in every fold, all of which reintroduce the continuous gradients cel shading exists to remove.
Strip in order. Disable or heavily flatten the normal map first, since weave normals create noisy speckles under a hard ramp. Reduce roughness to a single flat value per material, or remove specularity entirely for cloth and keep a controlled highlight only on leather, metal, and eyes. Then remove baked ambient occlusion from the albedo, or lift it so folds are hinted rather than darkened.
Replace what you removed with drawn information. Anime clothing communicates form through painted fold lines: a few confident dark strokes at the elbow, under the bust, at the hip, and where a belt cinches, matched in weight to the outline pass.
A practical texture budget: a 2048 x 2048 atlas for body and outfit, 1024 to 2048 for face and eyes, and 1024 to 2048 for hair. Flat color compresses extremely well, so cel-shaded avatars usually land far under a realistic model at the same resolution, and rarely benefit past 2K where a photoreal avatar might need 4K for pore detail.
Keep material count low. Every distinct material is a draw call, and anime avatars accumulate them: skin, face, eyes, lashes, hair, top, bottom, shoes, accessories, plus an outline material for each. Merging outfit pieces onto a shared atlas is the highest-leverage optimization available, and matters most on platforms with strict limits, which the VRChat avatar guide covers in detail.
Rigging a Humanoid Skeleton for Stylized Anime Bodies
Rigging turns a still image into an avatar. The target is a standard humanoid skeleton that engines recognize automatically: Unity's Humanoid rig defines 15 required bones (hips, spine, chest, neck, head, upper and lower arms, hands, upper and lower legs, feet) and supports around 54 in total including fingers and optional shoulder, toe, and eye bones. The VRM humanoid specification maps onto the same structure, which is why a correctly rigged avatar retargets between applications without rebuilding.
Avatars from Threedium's avatar pipeline arrive with this skeleton fitted, removing the most error-prone manual step: placing joints inside a mesh you cannot see through. What still needs your attention is placement relative to the stylization. Verify that the elbow bone sits at the narrowest point of the arm silhouette and the knee at the visual knee, not at an anatomically derived position that lands slightly off.
Add auxiliary chains for anything that hangs. Skirts, coat tails, long sleeves, and scarves need their own chains, typically 4 to 8 chains around a skirt with 2 to 4 bones each, arranged radially so front, sides, and back move independently. Place the first bone at the waistband and weight the skirt so the top edge follows the hips rigidly and the hem is fully chain-controlled. How those chains get driven by secondary motion belongs to the format side; here the job is making sure the bones exist and are weighted sensibly.
Practical tip: test your rig with extreme poses before anything else. Raise both arms fully overhead, crouch, and turn the head 80 degrees. Shoulder collapse and neck candy-wrapping show up immediately in those three poses and are far cheaper to fix before blendshapes exist.
Adding Expression Blendshapes for Emotes, Visemes, and Anime Reactions
Expression separates an avatar from a statue, and three overlapping sets of shapes do the work. The first is the 52 ARKit blendshapes, the de facto standard for face tracking. They are anatomically named (browInnerUp, eyeBlinkLeft, jawOpen, mouthSmileRight, cheekPuff) so tracking hardware and software can drive any compliant model without remapping. Threedium generates these automatically where topology supports them, which matters because hand-sculpting 52 shapes is days of work.
The second is visemes, the mouth shapes for speech. Social platforms commonly use a 15-viseme set (silence, PP, FF, TH, DD, kk, CH, SS, nn, RR, aa, E, ih, oh, ou) driven by microphone input, while VRM defines a smaller preset group of aa, ih, ou, ee, and oh. Many can be derived from ARKit shapes, but purpose-built visemes read better, because anime mouths open wider and snap harder than real ones.
The third is anime reaction shapes, which have no anatomical equivalent and are pure style. This is the set people forget, and the one that makes an avatar feel genuinely anime:
- Cartoon eyes: swirl, star, heart, blank white, and vertical-line eyes. Usually a texture swap or UV offset rather than a shape, driven from the same expression menu.
- Shape-based mouths: the cat mouth, triangle mouth, and wide jagged shout mouth. These are true blendshapes and need the radial mouth loops described earlier.
- Face overlays: blush marks, sweat drops, anger cross, shadow-over-eyes. Typically small planes parented to the head with opacity driven by the expression.
- Combined presets: a "happy" preset firing eye squint, mouth smile, blush, and a brow raise together, so one button produces a complete expression instead of one isolated muscle.
Build combined presets last, after individual shapes are correct, and always test them alongside blinking. A common failure is an expression that looks perfect in isolation and then fights the blink shape, producing eyelids that punch through the eyeball. Check every preset at 0%, 50%, and 100% blink.
Exporting and Testing Your Avatar: VRM, FBX, and GLB
Export format follows destination. VRM export is the target for social VR and VTubing: a humanoid avatar container built on glTF that carries skeleton mapping, expression presets, secondary motion setup, and licensing metadata in one file, so an app can load it and know how to drive it without manual setup. FBX is what you want when the avatar goes into Unity for a platform-specific upload pipeline, since it preserves rig and blendshapes and lets you assign platform shaders yourself. GLB is the web format, for profile viewers and portfolio embeds that load in a browser.
Run a pre-flight before exporting. Apply all transforms so scale is 1.0 and rotation zero on every object. Confirm the avatar is 1.5 to 1.8 meters tall in world units with the origin on the floor between the feet, because a model authored at centimeter scale imports 100x too large and the fix propagates into every animation. Verify blendshape names survived, since exporters sometimes rename or drop them, and that humanoid bone mapping is complete.
Then test in the destination before polishing further. Load the file, walk the avatar, look in a mirror, and cycle every expression. You are looking for the problems that only appear in engine: outlines rendering at the wrong thickness, hair chunks sorting incorrectly, eyes disappearing behind bangs, and skin weights failing on a shoulder raise. Platform upload steps, performance ranking, and mobile builds are covered on the VRChat avatar page, and the tracking side on the VTuber model page.
Keep your source file. Export is lossy in non-obvious ways: material setups translate to the target format's approximations, custom shader parameters do not always survive, and some exporters bake modifiers. Always regenerate from a preserved master.
Why Cel Shading, Toon Hair, and Stylized Proportions Need Different Rules
Everything above works because anime avatars follow a different rule set from realistic ones, and most 3D advice online assumes the realistic case. Physically based rendering, anatomically derived rigging, and strand-based hair are all optimized for reproducing reality. Anime is a stylization built on reproducing a drawing. This section covers where the two diverge and what to do about each.
Why Standard PBR Lighting Breaks Cel Shading
Physically based rendering is an energy-conservation model. It computes how much light a surface reflects from roughness, metalness, and view angle, producing a continuous gradient from lit to unlit. That gradient is exactly what makes a render look real, and exactly what stops it looking like anime.
Cel shading replaces the continuous response with a quantized one. The lighting calculation still happens, but its result passes through a step function before reaching the pixel, so a surface is either in base tone or shade tone with a very narrow transition. That is the core principle: anime shading is a decision, not a measurement. The surface is not reporting how much light it receives, it is being told which state to display.
Three consequences follow. Specular highlights must be controlled or removed, since a PBR specular lobe is a soft gradient blob that reads as plastic on a flat-shaded face. Ambient and indirect light have to be clamped, because a physically correct ambient term lifts the shade tone until two-tone separation disappears and the character washes out in bright environments. And normal maps become a liability, because under a hard step function small normal variations produce noisy speckles at the terminator instead of subtle detail.
This is why the avatar ecosystem standardized on dedicated toon materials rather than tweaking PBR ones. The toon shader (MToon) defined in the VRM specification is the common denominator, since it ships with the format and every VRM-capable application implements it, so your shading survives the trip between applications. The principle to carry forward: you are authoring a drawing, so every lighting feature that adds continuous variation is working against you.
Two-Tone vs Three-Tone Shadow Ramps
Once you accept quantized shading, the next decision is how many steps to quantize into. This is a stylistic fork, not a technical detail, and it changes how your avatar reads at every distance.
Two-tone is base color plus one shade color. It is the classic TV anime look, cheapest to author, and most robust: with one boundary to place, there is exactly one thing that can go wrong. It reads perfectly at distance and never gets muddy. The tradeoff is that complex forms flatten, so a detailed outfit loses structure and you compensate with painted fold lines.
Three-tone adds a deeper core shadow beneath the main shade, confined to occluded areas: under the chin, inside the hair, under the bust, behind the knees. It gives more depth and is closer to what higher-budget productions use. The cost is authoring effort and fragility, since two boundaries means two chances to place a terminator badly, and at distance the two shade steps merge into a single ambiguous band.
| Ramp type | Steps | Recommended shade value | Best viewing distance | Authoring effort |
|---|---|---|---|---|
| Two-tone | Base + 1 shade | Shade at 70-80% of base luminance | Any, robust past 3 m | Low |
| Three-tone | Base + 2 shades | 75-85% then 55-65% of base | Close range, under 2 m | Medium |
| Two-tone plus rim | Base + 1 shade + rim | Shade 70-80%, rim 110-130% | Any, separates from background | Low to medium |
| Custom ramp texture | Authored gradient strip | Author as a 256 x 8 px strip | Any, style-dependent | Medium to high |
The value relationship is what people get wrong. Beginners set the shade as a desaturated gray of the base, producing a dead, dusty look. Real anime shading shifts hue as well as value: skin shadows move toward red or violet, white fabric toward blue, blonde hair toward orange. A shade tone at 70 to 80 percent of base luminance with a 10 to 25 degree hue shift is dependable. Use two-tone everywhere by default, with a third tone only on the face, hair, and one hero garment.
Shadow Ramps and Skin Gradients That Preserve the 2D Illustrated Feel
Step count is only half of it. The other half is where the shadow lands, and on a face that turns out to be a geometry problem rather than a shading one. A 3D head has a nose, and a nose casts a shadow: soft and unremarkable under PBR, but under a hard two-tone ramp it becomes a sharp black wedge across the cheek that no anime artist would draw. The same happens around eye sockets, mouth corners, and temples, where real geometry produces terminator lines the 2D convention forbids.
The standard fix is normal transfer, sometimes called sphere or ball normal transfer. Place a sphere roughly matching the head's volume, transfer its smooth normals onto the face mesh vertices, and the face shades as if it were a smooth ball while keeping its detailed silhouette. The terminator then sweeps across the face in a single clean arc, exactly as in 2D art, and the nose stops casting a wedge. Nearly every well-made anime avatar uses some version of this.
- Shade mask textures. A grayscale map forcing areas permanently into shadow (under the fringe, inside the ear, under the chin) and others permanently lit. This produces a consistent under-fringe shadow regardless of light direction, a signature anime cue.
- Controlled rim light. A thin bright edge at 110 to 130 percent of base luminance separates the avatar from the background. Keep it narrow and hard-edged, since a wide soft rim reads as PBR fresnel and undoes the flat look.
- Painted blush and gradient zones. A soft warm gradient across cheeks and nose bridge, baked into albedo rather than lit, is what gives anime skin life. One of the very few places a gradient belongs.
- Hair shadow onto the face. Cast a defined fringe shadow as part of the shade mask instead of relying on real shadow casting, which produces a jagged, resolution-dependent edge at avatar scale.
Outline Rendering Methods: Inverted Hull vs Post-Process Edges
Outlines are structural to the style, not decoration. Two methods dominate, and for avatars the choice is essentially made for you, but understanding why matters when diagnosing a bad result.
The inverted hull duplicates the mesh, offsets each vertex outward along its normal, renders only back faces, and colors the result. From camera, the enlarged shell peeks out around the real mesh silhouette and reads as a line. It runs per-object, so it works in any renderer, on any platform, in worlds where you do not control the post-processing stack. That is decisive: in social VR you cannot install a post-process effect on someone else's client, so an avatar outline must live in the avatar's own materials.
Post-process edge detection instead inspects the depth and normal buffers after the scene renders, finds discontinuities, and draws lines there. It produces uniform lines including interior detail edges at a fixed screen-space cost, which is right for a game you control end to end, and unavailable to an avatar author because it belongs to the renderer, not the model.
- Splitting at hard edges. Where vertex normals are split, the offset shell tears open and the outline shows gaps. Author a separate smoothed normal set for the outline pass, stored in vertex color or a secondary UV, so the hull expands as a closed shape.
- No interior lines. Inverted hull draws only the silhouette. A line where a sleeve meets a forearm does not appear unless the pieces are separate objects. Painting interior lines into the albedo is the standard workaround.
- Double geometry cost. The outline pass draws the mesh again, so a 40,000 triangle avatar effectively submits 80,000. Restricting outlines to head, hair, and outer garments while leaving small accessories unoutlined recovers a meaningful share.
Outline Width Scaling So Lines Do Not Thicken as Viewers Walk Toward You
This is the most common reason a cel-shaded avatar looks amateurish in a social world, and it is entirely fixable. An outline defined as a fixed offset in world units behaves like real geometry, so it occupies more screen pixels as the camera approaches. Someone across the room sees delicate lines; someone standing conversationally close sees your face wrapped in a thick black band.
- World-coordinate width. The hull is offset by a real distance, roughly 0.5 to 2 mm at avatar scale. Physically consistent, thins at distance, thickens up close. Good for close-up renders, bad for a walk-up avatar.
- Screen-coordinate width. The offset scales with distance so the line covers a constant fraction of screen height regardless of camera position. Stable apparent thickness at 5 meters or 0.5 meters. This is what you want for a wearable avatar in nearly every case.
Width should also vary across the model. A uniform outline makes eyelashes, fingers, and small accessories look clogged while leaving large forms under-defined. The standard control is an outline width multiply map or vertex color channel scaling the offset per vertex: full width on the body and hair silhouette, roughly 30 to 50 percent on the face, near zero on eyelashes, eye geometry, and thin accessory parts. Painting that mask takes twenty minutes and is the difference between a clean avatar and a smudgy one.
Spec warning: always test outline width at three distances (roughly 0.5 m, 2 m, and 5 m) and at both mirror scale and full-body scale. An outline tuned only in a close-up modelling viewport is almost guaranteed to be too thick in engine.
Keeping Oversized Anime Eyes Stable During Facial Animation
Anime eyes occupy a quarter to a third of the face, so every facial deformation moves a large amount of visually critical area. On a realistic head a 2 mm error in eyelid deformation is invisible. On an anime head the same 2 mm crosses a significant fraction of the iris and reads instantly as a glitch.
- Eyelid punch-through. When blink and expression shapes combine, lid geometry passes through the eyeball. Keep the eyeball surface slightly recessed and make the blink close the lids against a defined lid line rather than translating them down.
- Iris deformation. If face blendshapes influence the iris, squinting distorts the pupil into an oval. Weight the eye assembly only to eye and head bones, with zero blendshape influence, and drive gaze by rotation or UV offset.
- Bangs occlusion. Because anime eyes are drawn visible through the fringe, many avatars adjust depth testing so eyes draw over hair. Done carelessly the eyes also draw through the back of the head, so restrict the effect to eye and eyeline materials only.
- Highlight drift. The catchlight is usually a small plane or texture element. Parented to the head rather than the eye, it slides off the iris the moment the eyes rotate. Parent catchlights to the eye transform at a fixed offset.
Give the eye region real geometry density: three to four loops between the lash line and the brow is the workable minimum for a lid that folds rather than creases. It is tempting to under-build here, because the eyes look fine in the neutral pose and every deficiency shows up only once expressions exist.
Rigging Around Stylized Proportions: Big Heads, Thin Limbs, and Skirt Bones
Standard rigging assumptions are calibrated to human proportions, and stylized bodies violate them predictably. An oversized head means the neck carries an unusual mass ratio and shoulder clearance is tight. The head must rotate roughly 70 to 80 degrees to each side without the jaw intersecting the shoulder, which sometimes means narrowing the neck or lowering the shoulder line. Neck weighting also needs a longer falloff than a realistic model, blending across three or four loops rather than one, so the head does not shear off the body when it turns.
Thin limbs have the opposite issue: there is little volume to preserve, so a bend that looks fine on a thicker arm collapses the silhouette to almost nothing. Weight elbows and knees so the outer edge holds shape, and keep at least three edge loops through each major joint. Thin limbs also make the outline more visible relative to limb width, another reason to reduce outline width on small parts.
- Build radial skirt chains, typically 4 to 8, each with 2 to 4 bones from waistband to hem, so front, back, and sides move independently.
- Weight the waistband rigidly to the hips so the top edge never separates, then transition to full chain control by about a third of the way down.
- Do not weight the skirt to leg bones. Legs passing through a hip-weighted skirt is what causes a thigh to punch through fabric on every step.
- Keep 2 to 4 cm clearance between the leg surface and the skirt interior in the rest pose, giving the chains room before contact.
Avoiding the Uncanny Middle Ground Between Anime and Semi-Realistic
The worst-looking stylized avatars are almost never the ones that pushed too far. They are the ones that stopped halfway. Anime eye scale with realistic skin shading, or a stylized face on an anatomically correct body, sits in a middle zone where the viewer cannot decide which expectations to apply and registers everything as wrong.
Stylization works because it is a consistent system of exaggerations the viewer reads in the first half second. If the face says "drawing" and the shading says "photograph," neither interpretation resolves, and the result reads as an error rather than a style. Audit along four axes:
- Proportion. Head size, eye size, limb thickness, and hand size should sit at the same level of exaggeration. Anime eyes on a realistic head with realistic hands is the most frequent mismatch.
- Surface detail. If the face has no pores, no nostrils, and no lip volume, the hands must not have knuckle wrinkles and the clothing must not have fabric weave. Detail level has to be uniform.
- Shading. Cel-shaded skin with PBR-shaded boots is a common half-conversion. Every material should share the same shading model, with exceptions only for genuinely reflective elements like eyes or metal trim.
- Outline coverage. Outlining the character but not the accessories, or the body but not the hair, makes the unoutlined parts look pasted on. Outline everything or nothing.
Practical test: convert a render to grayscale and squint, or shrink it to 100 px tall. Consistent stylization survives both, while a mixed model falls apart once the eye stops being distracted by color. And when in doubt, push further into the style rather than back toward realism: larger eyes, flatter shading, bolder chunks, and stronger outlines almost always improve a model that feels unsettling.
Choosing Between a Generated Anime Avatar, VRoid, and a Commission
Once you know what a good anime avatar requires, the question becomes which production route gets you there. There are four real options: generate from your own art, build in a slider-based editor, commission an artist, or buy a premade model. They differ enormously in cost, turnaround, and distinctiveness, and the right answer depends on what you will actually do with the avatar.
Wearing Your Anime Avatar in VRChat, Resonite, and Other Social Worlds
Social VR is the primary home for wearable anime avatars, and platforms differ in how they ingest models. VRChat uses a Unity-based upload pipeline (import an FBX, configure the avatar descriptor, set up visemes, build), giving the most control and the most setup work. Resonite and several others accept VRM or glTF directly, so a well-formed export can be dragged in and worn with minimal configuration.
What a vrchat anime avatar needs beyond the model is mostly wiring: viseme mapping, an expression menu for emotes, eye movement, and secondary motion on hair and clothing. That is per-platform configuration layered on a correct model, which is why getting rig, blendshapes, and materials right first pays off across every destination.
- Model scale correct, roughly 1.5 to 1.8 m tall, feet at the origin, transforms applied.
- Humanoid bone mapping complete, with no missing required bones and no twist bones mapped to primary slots.
- Blendshape names intact after export, viseme set present and assigned.
- Materials consolidated onto as few atlases as possible, outline material assignments verified.
- No open-backed geometry visible from behind, no hair intersecting shoulders in the rest pose.
- Expressions tested in combination with blink, outline width verified at close range.
Using the Same Avatar for Streaming Overlays and Video Calls
An anime avatar built for social VR is already most of the way to a streaming rig, which argues for building one good model rather than several mediocre ones. The same VRM file you wear in a social world loads into desktop VTubing software and runs on a webcam, giving you a character for stream overlays without a second commission.
The technical bridge is the ARKit blendshape set. Webcam and phone-based trackers output the same 52 coefficients the model already carries, so tracking is largely plug and play when the shapes exist and are named correctly. That is the practical reason to insist on complete ARKit coverage even if you only care about VR today: it is the common protocol between social VR, phone tracking, and desktop capture.
Framing changes what matters. On stream you are visible from the chest up at much larger apparent size than in VR, so face quality dominates and body detail barely registers. Shift polish toward face texture resolution, expression variety, catchlight placement, and outline behavior at close range, and give the shoulders-up region your highest geometry density.
For video calls, the same model pipes through a virtual camera in place of your webcam feed. Use a plain or keyable background, and reduce expression sensitivity relative to streaming, since reactions that read as entertaining on stream read as distracting in a meeting. The full tracking workflow is on the VTuber avatar guide.
AI Image-to-Avatar Generation vs VRoid Studio's Slider Workflow
VRoid Studio, made by pixiv, is the reference point for free anime avatar creation: a free desktop application built specifically for anime-styled humanoids, with parametric sliders for face and body, a procedural hair editor, and direct VRM export. It is genuinely good and the correct first stop for many people. Its constraints are structural rather than qualitative.
The first constraint is the base. VRoid characters start from a fixed base mesh, and while the sliders move a lot, they move within a bounded space. Experienced users identify a VRoid model at a glance, because the underlying face structure, proportion range, and hair system produce a family resemblance. If your goal is a distinctive persona, that resemblance is the ceiling. The second constraint is input: VRoid works from sliders, so existing concept art has to be reverse-engineered by hand rather than converted.
An anime avatar creator working image-to-3D inverts that relationship. You provide the design and the generator reconstructs it, which makes an AI pipeline a genuine vroid studio alternative when you have artwork, want proportions outside the base range, or need something that does not read as a template. It also produces the full asset chain at once: mesh, textures, rig, blendshapes, and multiple export formats.
| Route | Typical cost | Turnaround | Input | Uniqueness |
|---|---|---|---|---|
| AI image-to-3D generation | Subscription or per-model credits | Minutes to hours | Reference images or text prompt | High, driven by your design |
| VRoid Studio | Free | Hours to days of manual work | Sliders and drawn textures | Moderate, recognizable base |
| Full custom commission | Roughly $500-$3,000+ | 3 to 10 weeks typical | Concept art plus a brief | Very high |
| Premade marketplace model | Roughly $20-$70 | Immediate | None, bought as-is | Low, shared by many users |
| Premade plus commissioned edits | Base price plus $80-$400 | 1 to 4 weeks | Base model plus a change list | Moderate |
These are not mutually exclusive. A common workflow generates a base from artwork, then takes it into a modelling application for hand adjustments. The 3D model generation platform sits at the start of that chain rather than replacing every step of it.
What Custom Anime Avatar Commissions Cost on VGen and Etsy
Commissioning remains the highest-quality route and the most expensive. Prices vary by artist reputation, complexity, and region, but the ranges are reasonably stable across the main commission marketplaces.
On VGen, oriented toward VTuber and avatar artists, a full custom 3D anime avatar built from your concept art typically runs from around $500 for a simpler model to $3,000 or more for a complex design with elaborate hair, layered outfits, extensive expression sets, and full rigging. Rigging-only services, where you supply the model, commonly sit in the $150 to $600 range, and turnaround is usually 3 to 10 weeks, longer for popular artists with a queue.
On Etsy, listings skew lower and more standardized: expect roughly $150 to $800 for a 3D anime avatar package, and considerably less for edits to an existing model. Structured listings make comparison easier, but the tradeoff is less bespoke work, since fixed-price sellers usually build from established base meshes.
- Concept art, if you do not have it, is a separate commission at $50 to $400 for a proper turnaround sheet. Most 3D artists require one.
- Revision rounds beyond the included allowance, typically billed hourly or as a percentage of base price. Two rounds is a common inclusion.
- Platform-specific setup, such as expression menus, toggles, and secondary motion tuning, is frequently a separate line item.
- Commercial usage rights, often not included by default in a personal-use commission and capable of adding a meaningful percentage.
Commission when you need something a generator genuinely cannot produce: a highly specific mechanical design or an unusual non-humanoid body plan. Generate when you want to iterate, need something quickly, or want to explore several directions before committing budget.
Premade Marketplace Avatars vs a Generated One-of-One Persona
Premade avatars sold on marketplaces such as Booth are the cheapest entry point, generally $20 to $70, and they are professionally made: correct topology, working expressions, platform-ready configuration, often with documentation. For getting into a social world this week with something that looks good, they are hard to beat.
The tradeoff is exclusivity, and it matters more than newcomers expect. Popular models sell thousands of copies, so in any busy social space you will meet people wearing your body with different textures. For a casual user that is fine and part of the culture. For anyone building an identity around the avatar, sharing a body with hundreds of others undercuts the point. Buying a premade base and commissioning edits (retextured outfits, swapped hair, adjusted proportions) is a common middle path, but check the license, since many permit personal edits while restricting commercial use of derivatives.
Generating your own sits elsewhere on the curve: closer to a custom model in uniqueness, closer to a premade in cost and speed. Because the input is your own reference art or written description, no two outputs converge on the same character, which is the right route when the avatar is meant to be you rather than a costume. For avatar options more broadly, including non-anime styles, the 3D avatar hub covers the full range.
Frequently Asked Questions About 3D Anime Avatar Makers
What is the best 3D anime avatar maker?
There is no single best 3d anime avatar maker, only the best fit for your input. If you have reference art or a clear description and want a distinctive character with a rig and multiple export formats in one pass, Threedium's image-to-3D generator is the fastest route from design to wearable model. If you want free software, enjoy manual control, and are happy working within a fixed base mesh, VRoid Studio is the standard choice.
Three questions decide it. Do you already have artwork, which a generator converts directly and slider tools make you rebuild by hand? How unique must the result be, given that slider tools and premade marketplaces both produce recognizable families? And how much time do you have: minutes for a generated base, a weekend for a hand-built VRoid character, weeks for a commission?
Can I turn a picture into a 3D anime avatar?
Yes. An image to 3d anime avatar conversion takes one or more reference images and reconstructs a textured 3D mesh, which you then convert to cel shading and rig. Results are best with a character sheet showing multiple views, acceptable with a single clean full-body front image, and weakest from a headshot alone, where the generator has to invent the entire body.
The picture works best if it is already in the target style. Converting existing anime artwork into 3D is a direct translation. Converting a photograph of a real person is a different operation, because it requires restyling the likeness first: reproportioning the head, enlarging the eyes, simplifying the nose, and replacing hair with chunked geometry. Both are viable, they just involve different steps.
Is VRoid Studio the only free way to make a 3D anime avatar?
No. VRoid Studio is the most convenient free option because it is purpose-built for anime avatars and exports VRM directly, but it is not the only one. Blender is free, fully capable of producing a professional anime avatar, and has community add-ons for VRM export and toon shading, at the cost of a much steeper learning curve.
Other free paths include editing a Creative Commons or free-to-use base model, checking licenses carefully, or using free tiers of avatar tools. The tradeoff is time versus money: every free route substitutes your hours for someone else's fee. Blender plus a VRM add-on is the most capable free stack available.
How much does a custom 3D anime avatar cost?
A full custom 3D anime avatar commission typically costs between $500 and $3,000 depending on complexity, with simpler packages on marketplaces like Etsy sometimes available from around $150 to $800. Turnaround is commonly 3 to 10 weeks. Premade marketplace models cost roughly $20 to $70 and are instant, while AI generation sits between the two on cost and takes minutes.
Budget beyond the headline price: concept art adds $50 to $400 if you do not have it, and extra revision rounds, platform setup, and commercial usage rights are frequently separate charges. Get the scope in writing before commissioning, including revisions included, file formats delivered, and commercial rights.
What file format does my anime avatar need for VRChat?
VRChat's upload pipeline runs through Unity, so the practical answer is FBX: import the FBX with its rig and blendshapes, configure the avatar descriptor and visemes, and build to the platform. VRM is not uploaded directly, though converter tooling exists to bring a VRM avatar into a Unity project as a starting point.
Export FBX with the humanoid skeleton intact, blendshape names preserved, and the model at roughly 1.5 to 1.8 meters tall with the origin at the floor. Other platforms differ: several accept vrm export directly, and web-based profile viewers generally want GLB. Keeping a master file you can re-export from means you are never stuck when a new platform wants a different container.
How do I get cel shading on my 3D anime avatar?
Cel shading comes from three things applied together: flat albedo textures with hard color zones, a toon material that quantizes lighting into two or three steps instead of a smooth gradient, and an outline pass, almost always inverted hull, drawn around the silhouette. Applying a toon shader to PBR textures that still contain baked gradients and normal detail is the most common reason a conversion looks wrong.
In practice: posterize your diffuse maps into flat zones, flatten normal and roughness maps, assign a toon shader (MToon) style material with a hard transition and a shade color at 70 to 80 percent of base luminance with a hue shift, then enable the outline with a screen-coordinate width and a per-vertex width mask. Apply normal transfer on the face so the nose stops casting a wedge-shaped shadow.
Can I use an AI-generated anime avatar commercially?
That depends on the terms of the platform you generated with and on what your reference material was. Read the license for the specific tool: some grant full commercial rights on paid tiers, some restrict commercial use to higher plans, and some limit it by output type. Check before you build a brand on the result.
The larger risk is the input, not the generator. Reference images of a copyrighted character, a purchased design you do not hold rights to, or artwork commissioned under a personal-use-only agreement all pass their restrictions to the output regardless of what the platform permits. Generating from your own artwork or your own written description is the clean path. If the avatar will represent a business, treat it the way you would treat a logo and confirm the chain of rights in writing.