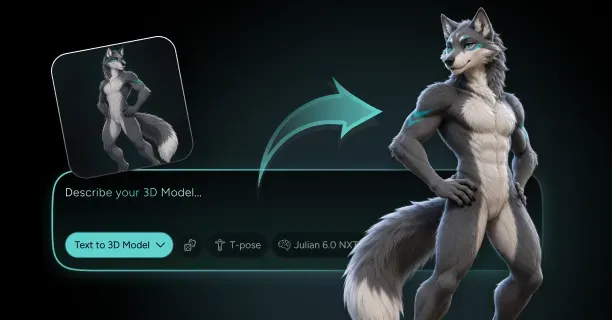
How Do You Make a Protogen 3D Model From Images?
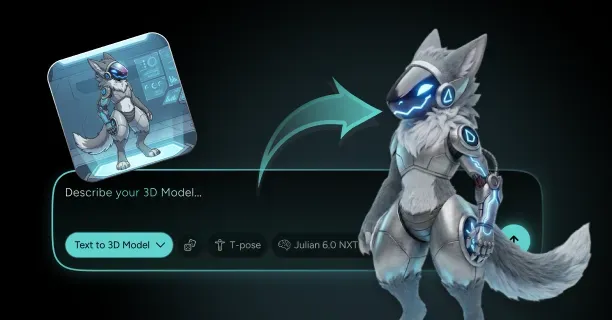
To make a protogen 3d model from images, feed a small set of orthographic reference drawings (front visor view, side profile, and close-up armor detail shots) into Threedium's Julian NXT generator, which reconstructs a rigged, textured mesh with PBR maps and skeleton in a single pass. The generated result gives you a hard-surface head shell, a flat or gently curved visor plane, a plated torso, and a fur-shelled chest region as separate material regions you can refine. From there you split the visor into its own material, paint an emissive face texture atlas, and export GLB, FBX, or VRM depending on whether the destination is VRChat, a VTubing app, or a game engine.
The reason protogens are worth generating rather than sculpting by hand is that they are a hybrid anatomy: a robotic head with an LED display face, mechanical plating over the limbs and torso, and organic fur across the chest, cheeks, and tail. Hand-modeling that mix means switching between hard-surface booleans and organic sculpting repeatedly. An image-to-3D pass gives you both halves in one topology, and the work that remains is the part that actually defines the character: the visor.
Gathering Reference Images: Front Visor View, Side Profile, and Armor Detail Shots
Reconstruction quality is driven almost entirely by whether the generator can read the visor silhouette and the plating breakup from your references. A single three-quarter illustration is not enough, because the visor's curvature is invisible from the front and its outline is invisible from the side. Supply at minimum three views.
- Front view at 0 degrees: the full visor face flat to camera, with the display graphics visible. This drives the atlas aspect ratio and the eye and mouth placement.
- Side profile at 90 degrees: shows visor rake angle, muzzle length, ear antenna sweep, and how far the chest fluff protrudes past the plating.
- Three-quarter view at 45 degrees: resolves the visor's compound curve, which is the single most common thing a two-view reference set gets wrong.
- Armor detail shots: cropped close-ups of shoulder plating, forearm segments, and nanite panel seams so the generator produces real geometric breaks instead of painted lines.
Export references at 2048 pixels on the long edge minimum, with flat, even lighting and no dramatic rim light, which gets baked into the albedo estimate and leaves you scrubbing a blue edge out of white armor plates later. If you are working from an artist's 2D ref sheet, ask for a version with flat colors and no shading layer. Keep the visor graphics in the reference simple: a basic pair of eyes and a mouth in a bright accent color against a dark screen is enough to tell the generator that the face is a flat, self-lit surface.
Generating the Base Mesh From Your Images With Threedium's AI
Upload the reference set to the avatar generation workflow and pair it with a text prompt that names protogen anatomy explicitly. The generator responds to structural nouns, not to fandom shorthand, so describe the parts rather than the species: a robotic canine head with a large curved display screen covering the face, segmented metal plating over the shoulders and forearms, a fur ruff at the chest and neck, tall antenna-like ears, and digitigrade legs with a raised hock joint.
Expect a first-pass mesh in the 40,000 to 120,000 triangle range before optimization. Julian NXT applies polygon optimization and produces a UV-unwrapped mesh with a full PBR texture set: base color, metallic, roughness, and normal. It also produces a humanoid-compatible skeleton, which matters because retargeting a hand-built protogen rig to a standard humanoid skeleton later is a genuinely annoying job.
Checking the Generated Visor: Why the Face Screen Needs Clean, Flat Geometry
The protogen visor cannot tolerate noisy topology, because it is not a shaded surface: it is a screen. Every bump or stray vertex becomes a visible distortion in the face graphics, and unlike a wrinkle in fur, a warp in a rendered eye reads immediately as a defect.
Open the generated model and inspect the visor with these checks before doing anything else:
- Quad grid, not triangle soup: the visor should read as a clean grid of quads, ideally 8x8 to 24x24 subdivisions. A triangulated blob produces visible diagonal seams when the emissive texture animates.
- Smooth curvature falloff: the curve should be monotonic from center to edge, with no inflection points or flat spots where an eye will sit.
- Separate island in the UV layout: the visor must occupy its own UV island, not share a shell with the surrounding helmet plating.
- No inherited normal-map detail: the visor should carry a flat normal, since panel-line normal detail baked onto a screen makes the glow look scratched.
Check the visor geometry before you texture, never after. Reshaping a screen surface invalidates its UV layout, and a face atlas painted against the old UVs will land with the eyes offset by several pixels in every expression cell at once.
Refining Armor Seams, Ear Antennae, and Tail Segments in the Refine Pass
The refine pass converts a generated approximation into a design that reads as intentional hardware. Three areas repay attention out of proportion to the time they cost: plate seams, ear antennae, and tail segmentation.
Plate seams should be actual geometric gaps, not creases. A generated model often gives you a continuous shell with a normal-mapped groove where plates meet, which looks correct in a still render and falls apart the moment the character moves under a rim light. Cut the shoulder, forearm, thigh, and chest plates into separate shells with a 1 to 3 millimeter gap at avatar scale, and bevel each plate with two segments so the edge catches a highlight.
Ear antennae come out of generation as solid fins: split each into an outer plate and an inner surface, and model any light strip as a recessed channel roughly 3 to 5 millimeters deep. The tail is the piece most often left as a smooth cone. If your design calls for a segmented mechanical tail, model discrete segments with a visible ring joint between each, tapering in both radius and length toward the tip: a common ratio is each segment measuring around 90 percent of the one before it, which produces a natural taper over eight to twelve segments. For fluffy organic tails and fur-shell techniques generally, the workflow on the fursona avatar page covers card placement and shell offsets in detail.
Splitting Materials: Separating the Visor, Metal Plating, and Fur Regions
A protogen needs three material behaviors that cannot be reconciled into one shader setup. The visor is unlit and self-emissive, the plating is metallic and specular, and the fur is diffuse, soft, and often alpha-cut. Serving all three from a single material means one of them looks wrong under every lighting condition.
The practical split for a VRChat-bound model is:
- Visor: the face screen surface only, unlit or emission-dominant with no shadow receive, on a 2048 x 2048 atlas.
- Body plating: head shell, limbs, torso armor, and tail segments under a metallic-roughness setup with full lighting, at 2048 x 2048.
- Fur: chest ruff, cheek tufts, tail fluff, and ear interiors, diffuse with alpha blend or cutout for shells, at 1024 to 2048.
- Accents: ear light strips, chest core, and joint glows, emissive and kept separate from the visor so they can be toggled, at 512 to 1024.
Keeping accent emissives on their own slot is worth it, because visor faces get swapped constantly while ear and chest glows stay static. Sharing a material between them means every face swap dirties the accent glow too.
Assign these splits before UV packing, not after. Each material gets its own 0 to 1 UV space, which means the visor atlas can use the full texture area for expression cells instead of fighting the body shells for room.
Painting the Emissive Face Texture: Eyes, Mouth, and Expression States
The emissive face texture is the character. Everything else on a protogen is chassis. Paint it as a set of high-contrast shapes on a black or near-black background, because the black is what will read as the unlit screen bezel and anything you leave dark effectively disappears when the emission drives the color.
Work at the cell resolution you will actually ship. A 512 x 512 pixel cell is the practical sweet spot: it holds a crisp eye shape with clean antialiased edges and survives being viewed from arm's length in VR.
Design rules that consistently produce readable protogen faces:
- Keep the mouth in a fixed horizontal band across all cells, so viseme animation does not make the mouth jump vertically between phonemes.
- Use two to three colors maximum per expression: a primary glow, an optional accent, and black. More reads as mush at distance.
- Give shapes a hard edge with one pixel of feather. The bloom pass supplies the softness, and pre-softened edges bloom into a smear.
- Leave a margin of 8 to 16 pixels inside each atlas cell so mipmapping and bilinear filtering cannot bleed a neighboring expression into the current one.
Export the atlas with no alpha channel unless you need cutout regions, and keep it in a non-lossy format at authoring time, since compression artifacts around a bright shape on black are extremely visible once emission multiplies them.
Texturing the Armor: Metallic-Roughness Maps for Plating and Nanite Panels
Protogen armor should not be uniformly shiny. The most common failure in a first texture pass is setting metallic to 1.0 and roughness to 0.15 across the whole plating material, producing a chrome mannequin that reflects the environment instead of showing its own color. Real painted armor is a dielectric coating over metal.
A defensible starting point for the plating material:
- Painted plate faces: metallic 0.0, roughness 0.35 to 0.50. The body color lives here, semi-gloss like automotive paint.
- Exposed metal at seams and joints: metallic 1.0, roughness 0.25 to 0.40, in narrow strips along plate edges only.
- Nanite panel tiles: metallic 0.6 to 1.0, roughness 0.20 to 0.35, varied per tile for a faceted, non-uniform read.
- Rubberized underlayer: metallic 0.0, roughness 0.70 to 0.85, for joint gaskets, sole pads, and the neck seal.
Break the roughness map with micro-scratches and a rougher band along the lower edges of plates where they would collect wear. Keep that variation in roughness rather than base color: color noise reads as dirt, roughness noise reads as material. Nanite plating is the other easy thing to overdo. Model the tiles as geometry only where they are large and silhouette-relevant, such as across the chest or the outside of the thighs, and handle finer tiling in the normal and roughness maps. A density of roughly 15 to 25 millimeters per tile at body scale reads as intentional hardware; smaller turns into visual static, larger reads as floor tile.
Do not bake ambient occlusion into your base color on a protogen. The plating regions get most of their form from specular response, and pre-darkened crevices in the albedo fight against the lighting in whatever engine you land in, especially under the flat toon shading common in VRChat worlds.
Rigging the Visor Head, Ear Antennae, and Segmented Tail
Threedium's automatic rigging produces a humanoid-compatible skeleton, and for a protogen the three additions that matter beyond that baseline are the visor head, the ear antennae, and the tail chain. The general approach to automatic rigging and skeleton setup applies as normal; what follows is what is protogen-specific.
The visor should be skinned to the head bone with rigid, single-bone weights. This is not the place for smooth falloff: blended weights across the head and neck will shear when you look down, and a screen that bends non-uniformly makes the face graphics ripple. Set every visor vertex to a weight of 1.0 on the head bone, then rotate the neck through its full range and watch for any deformation at all.
Ear antennae work best as two to three bone chains per ear: a base rotation plus a tip sway is enough for physics-driven motion to look like a mechanical antenna rather than a rubber tube. More than three bones per ear rarely reads at conversational distance and costs physbone transforms you will want elsewhere.
Segmented tails need one bone per visible segment if you want the mechanical joints to articulate correctly, which for an eight to twelve segment tail means eight to twelve bones. That is a real budget commitment. If you are targeting a tight performance rank, merge the last few tip segments onto a shared bone, since the tip has the least visible articulation. For digitigrade leg setups, tail chain weighting, and fur shell skinning, the fursona rigging workflow covers the standard approach and applies unchanged to a protogen's organic half.
Adding Visemes and Blendshapes That Drive the Visor Mouth Display
A protogen mouth does not deform. It is a graphic on a screen, so visemes have to be implemented as texture state changes rather than vertex movement, and this is where a protogen build diverges hardest from a conventional avatar pipeline. There are two approaches, and they are not equally good.
The first is UV-offset blendshapes: create a blendshape per viseme that shifts the visor's mouth-region UVs to a different atlas cell. It is compatible with VRChat's standard viseme system and requires no custom shader. The catch is that a blendshape interpolates linearly between two UV positions, so a partially-applied viseme lands halfway between cells and displays a slice of both. Drive them as effectively binary states to avoid it.
The second approach is shader-driven cell selection, where a single float parameter selects which atlas cell to sample and the shader snaps to the nearest cell. This is cleaner, it never shows a partial cell, and it is what most well-built protogens use. It requires a shader that supports UV tile selection, which the common VRChat avatar shaders provide, and it means your visemes drive a shader parameter rather than a blendshape.
Either way, plan for the standard 15 viseme set that VRChat and most VTubing runtimes expect: sil, PP, FF, TH, DD, kk, CH, SS, nn, RR, aa, E, ih, oh, and ou. You do not need 15 distinct mouth graphics. Most protogens map them onto four to six shapes (closed, slightly open, wide open, rounded, wide flat), which looks better than fifteen barely-distinguishable graphics flickering at speech rate. If you are also targeting face tracking, Threedium can produce a 52-blendshape ARKit set, and on a protogen you map those channels to visor atlas cells rather than to geometry.
Exporting GLB, FBX, or VRM for VRChat, VTubing, and Game Engines
Pick the export format by destination, not by habit. Threedium exports GLB, USDZ, and FBX, and VRM is the relevant target for avatar work headed to VTubing applications. Each carries a different subset of what a protogen needs.
| Format | Best for | Carries emissive maps | Carries blendshapes | Notes for protogens |
|---|---|---|---|---|
| FBX | Unity, Unreal, VRChat upload pipeline | Via material assignment in engine | Yes | The working format if VRChat is the destination; materials are rebuilt in Unity anyway |
| GLB | Web viewers, real-time preview, engine-agnostic handoff | Yes, native emissive support | Yes | Self-contained single file, textures embedded; best for sharing a WIP for review |
| VRM | VSeeFace, Warudo, and other VTubing runtimes | Yes, with MToon unlit and emissive | Yes, with preset expression mapping | The format for a protogen vrm avatar; expression presets map cleanly to visor states |
| USDZ | Apple AR viewing, quick spatial preview | Yes | Limited | Useful for checking real-world scale before a print or a fursuit build |
For a protogen vrm avatar, map each VRM preset expression to its visor atlas cell before export, because editing those bindings afterward risks losing your material settings.
Check scale on every export. Avatar-scale models should measure roughly 1.6 to 1.9 meters from foot to top of head in engine units, measured at the top of the skull rather than the top of the ear antennae, or your avatar gets scaled down until the body is comically short.
Uploading to VRChat: Unity Setup, Avatar Descriptor, and Physbones
Importing the FBX into Unity, adding the VRChat Avatar Descriptor, configuring the view position and lip sync, and converting bone chains to VRCPhysBone components follows the same sequence as any other avatar upload. The full step-by-step is covered on the VRChat avatar upload guide, and the protogen-specific parts (visor toggles, performance budgets, and Quest shader handling) are covered in the section below.
How Do You Build the LED Visor Face and Hybrid Protogen Materials?
You build the LED visor by treating the face as a display device: a low-curvature screen mesh with its own UV island, an unlit emissive material, and a texture atlas of expression cells that a shader or animation selects between. The hybrid material problem is solved by keeping plating and fur on separate material slots and hiding the transition under geometry rather than blending it in the texture.
How the Protogen Visor Works: Emissive Textures on a Curved Screen Mesh
Physically, the visor is meant to be an LED matrix behind a tinted transparent panel. Digitally, you get that read from three stacked properties on one material: a near-black base color, a bright emissive map carrying the face graphics, and an unlit shading model or a lit one with its shadow response heavily suppressed.
The near-black base color does real work. If it is mid-grey, the visor picks up environment lighting and the unlit areas of the screen turn grey-blue in a blue-lit world, destroying the illusion of a self-lit display. Author it at around 0.02 to 0.05 in linear terms: dark enough to read as an off pixel, light enough that a faint reflection still catches the panel.
Unlit shading is the last piece and the most debated. A fully unlit visor is immune to world lighting, so your face always reads correctly, at the cost of never picking up any environmental reaction and looking pasted-on in strongly lit scenes. The usual compromise is a lit shader with emission dominant and a small specular contribution: the graphics stay constant while a faint highlight sweeps across the panel as you turn your head.
Visor Screen Curvature and How UV Layout Controls Face-Atlas Distortion
Curvature decides whether your painted face looks the way you painted it. A face atlas is flat, the visor is not, and the mapping between them is the UV layout: if that layout comes from a default unwrap, curvature stretches your graphics non-uniformly.
The failure looks like this: you paint two identical circular eyes, and on the model the outer edge of each is wider than the inner edge. That is angle-based unwrapping distributing UV area in proportion to 3D surface area, which is wrong for a screen, because a real LED matrix has evenly spaced pixels in screen space.
The fix is to unwrap the visor with a planar projection along the face normal rather than an angle-based or conformal unwrap. Project the UVs from a camera directly in front of the face and the screen-space pixel grid becomes uniform: a circle painted in the atlas appears as a circle head-on, compressing only toward the outer edges where you see the surface at a glancing angle anyway. This is also how a physical curved LED panel behaves.
Keep total curvature modest, because planar projection compresses harder the more the surface turns away from the projection axis: past roughly 35 degrees of deviation from the face plane, texel density drops enough that outer-edge graphics go soft. If your visor wraps significantly around the sides of the head, split it into a front screen with planar UVs and separate side panels with their own projection.
Verify the unwrap with a checker texture before you paint anything. Load a 32x32 checkerboard onto the visor material and look at the model head-on: the squares should be visibly square in the middle 60 percent of the screen. If they are diamonds or trapezoids near the eyes, redo the projection.
Building a Visor Face Atlas Grid: Cell Count, Resolution, and Swap Animation Timing
The face atlas is a grid of expression cells packed into one texture, and the grid dimensions determine everything downstream: how many faces you get, how sharp each one is, and how much texture memory the visor costs. Pick the grid before you paint a single cell.
- 2 x 2, four cells: 1024 px per cell at 2048. Suited to a viseme-only atlas on a separate mouth region.
- 4 x 4, sixteen cells: 512 px per cell at 2048. The standard choice, covering a full expression set plus visemes.
- 6 x 6, thirty-six cells: 341 px per cell at 2048. A large expression library at the cost of softer edges.
- 8 x 8, sixty-four cells: 256 px per cell at 2048, so use a 4096 texture. Reserved for frame-by-frame animated sequences.
The 4x4 grid at 2048 x 2048 is the default recommendation for a reason. Sixteen cells covers a resting face, four to six viseme mouth states, and six to eight expressions, at a 512-pixel cell that stays crisp in VR, and it costs a single compressed texture in the low single-digit megabytes.
Swap timing matters as much as cell resolution. An instant snap reads as a glitch; half a second reads as sluggish. The range that reads as a display refreshing is 0.08 to 0.15 seconds per transition, implemented as a hard cut with a brief flicker frame between. For animated sequences such as a loading spinner or a scrolling error banner, step through cells at 8 to 12 frames per second: fast enough to read as motion, slow enough to look like a low-refresh LED panel.
Building a Face Expression Atlas: Happy, Angry, Error, and BSOD States
Once the grid is set, the question is which sixteen faces earn a cell. A protogen's expression set is its entire non-verbal vocabulary, and the cells that get used constantly are not always the ones people paint first.
A well-balanced sixteen-cell layout:
- Neutral: simple eye shapes, closed or slightly open mouth. This is what people see 80 percent of the time, so paint it last.
- Blink: eyes as thin horizontal lines. Triggered on a timer, this one cell does more for perceived liveliness than any other.
- Happy: upward-curved eye arcs, the classic caret-shaped protogen smile.
- Angry: downward-angled eye edges, often with a color shift toward red.
- Surprised and sad: enlarged circular eyes for one, downturned arcs and dimmer emission for the other.
- Error: X marks, a glitch bar, or scanline distortion. Nearly universal in protogen sets.
- BSOD: a solid blue field with white text or a sad-face glyph.
- Loading: a spinner or progress bar, animated across two to three cells.
- Mouth states: four to six cells for viseme mapping, sharing eye graphics with neutral.
Keep a consistent visual grammar across all cells: if your neutral eyes are hard-edged geometric shapes, every other expression should be too. Keep the emission color consistent except where a color change is the point (red for angry, blue for BSOD), since unmotivated hue shifts read as a bug rather than a mood. Reserve one cell for a fully black screen, which you will want for blinks and mode switches.
Animating the Visor With UV Offsets, Material Swaps, and Shader Panning
Three techniques get a face atlas moving, trading off differently between performance, flexibility, and required shader knowledge.
UV offset animation is the most portable. An animation clip drives the material's texture offset, stepping the visible window across the grid: with a 4x4 atlas each cell is a 0.25 step, so cell (2,1) sits at offset (0.5, 0.25). It modifies a material property rather than the mesh, so it works with almost any shader. Use constant (stepped) interpolation on the curves, never linear, or the texture slides continuously across cell boundaries.
Material swapping replaces the entire visor material with a different one. It is heavier than a UV offset because it can break batching, but it is the right tool when an expression needs a genuinely different shading setup, such as a transparent glitch state or a face that uses a different emission intensity. Reserve it for a handful of special states rather than using it for every expression.
Shader panning drives the UV coordinates inside the shader itself from a time input. This is how you get scrolling text, a scanline sweeping down the screen, a slow emission pulse, or a static-noise glitch overlay. Panning is continuous rather than stepped, which makes it complementary to cell swapping: the cell selects what is displayed and the pan adds motion on top. Layering all three cheap effects reads more like a real display than one expensive one.
Syncing Visor Mouth Movement to Your Voice With Visemes or AudioLink
Mouth sync separates a protogen that feels alive from one that feels like a mannequin wearing a screen. Two distinct systems solve different halves of the problem.
Visemes are voice-driven and personal. VRChat analyzes your microphone input and drives the 15-viseme parameter set in real time, so your visor mouth changes shape according to what you are actually saying. This is the system you want for conversation. Route the visemes to your atlas cells through either the blendshape or shader-parameter method described earlier, and map several visemes to each mouth graphic rather than trying to paint fifteen distinct mouths.
VRChat also offers a simplified Jaw Flap mode driven by microphone volume alone. For a mouth graphic with three states (closed, half, open), jaw flap looks nearly identical to full visemes at a fraction of the setup effort.
AudioLink is frequently confused with viseme sync and is a different thing entirely: an open-source system that exposes the audio spectrum of the world's music to avatar shaders, letting your visor pulse or scroll in time with whatever is playing in the room. If you want your visor to react to the beat, use AudioLink; if you want it to react to your voice, use visemes. Running both is common, with AudioLink modulating accent lights on the ears and chest while visemes drive the mouth.
Making Emissives Glow: HDR Emission Color, Masks, and Bloom-Friendly Values
A face that is bright is not the same as a face that glows. Glow comes from the emission value exceeding 1.0 in linear space, which is what pushes the pixel past the bloom threshold in a post-processing stack and produces the halo that reads as light rather than as paint.
Set emission using an HDR color picker with an intensity control, not by brightening the texture. The texture holds the shape and the hue; the intensity multiplier decides how hard it glows. This separation matters because it lets you dim the whole face for a sleep state or brighten it for an angry state without touching the artwork. Practical intensity values:
- Intensity around 1.0 to 1.5: a screen that is clearly self-lit but does not bloom. Correct for a subdued or "powered down" look.
- Intensity around 2.0 to 3.0: the standard operating range. Reads clearly as an LED display in both dark and bright worlds and produces a modest bloom halo.
- Intensity above 4.0: aggressive. The bloom starts eating the shape of the graphics and thin lines blow out into blobs. Use for a brief flash, not as a resting state.
Use an emission mask rather than relying on the base texture's darkness to control what glows. A dedicated mask channel lets you glow the eyes at full intensity while the mouth sits dimmer, and makes it trivial to animate one region independently. Remember that bloom belongs to the world, not your avatar: check your face in a bright unbloomed environment to confirm the graphics stay readable, and in a dark bloom-heavy world to confirm they do not smear.
Combining Hard-Surface Armor and Fur in One Optimized Material Setup
The protogen's defining budget problem is that it needs two texture strategies at once. Hard-surface armor wants high-frequency detail in the normal and roughness maps and can tolerate a lower-resolution base color, because painted plates are largely flat color. Fur wants the opposite: detailed base color with hair strand variation, a soft normal, and often an alpha channel for shell or card geometry.
Allocate resolution asymmetrically instead of giving every material the same texture size:
- Plating base color at 1024 is enough, since most of the surface is flat color. Push detail into the normal and roughness instead.
- Plating normal and roughness at 2048 is where perceived quality lives: panel lines, wear, and micro-scratches all read through these maps.
- Fur base color at 2048 for a full chest ruff, or 1024 for smaller tufts.
- Visor atlas at 2048, non-negotiable, since it is the focal point of the character.
Combine metallic, roughness, and ambient occlusion into a single packed texture using separate color channels. This turns three grayscale textures into one, cutting sampler count and memory footprint by roughly two thirds for those maps.
Keep alpha off the plating material entirely so it renders in the opaque queue, which is faster and free of the sorting artifacts transparent materials produce when they overlap.
Modeling the Robotic-Organic Transition: Where Metal Plating Meets Fur
The boundary between the mechanical and organic halves is the hardest thing on a protogen to make convincing, because a hard edge between metal plate and fur looks like two models intersecting unless something explains the junction. Do not attempt to blend it in texture space: a gradient from metal to fur in the base color never survives close inspection, because the specular response changes abruptly regardless of what the albedo does. Hide the junction with geometry that reads as a designed interface instead. Three approaches that work:
- A recessed lip: the plate edge tucks under the fur, overlapped by 5 to 15 millimeters, so it never terminates in open air.
- A gasket or trim ring: a narrow band of a third material (dark rubber, a metallic ring, an emissive strip) between plate and fur, which reads as a mechanical seal.
- Interlocking fingers: the plate edge cut into tabs that alternate with fur, common at shoulder and hip junctions and the most convincing of the three.
Keep transitions in anatomically plausible places. Fur reads correctly at the neck ruff, the cheeks framing the visor, the upper chest, the forearm and lower leg tufts, and the tail; plating reads correctly on the skull shell, shoulders, torso front, thighs, and shins. Transitions placed mid-forearm or mid-thigh, where nothing structural justifies a boundary, are what make an inexperienced protogen look assembled from parts. The neck deserves extra care since it deforms most: make the collar a floating ring skinned to the neck bone, or split it into overlapping segments that slide against each other.
Hitting VRChat Performance Ranks: Polygon, Material Slot, and Physbone Budgets
Protogens are structurally prone to poor vrchat performance rank results because they combine three expensive things: multiple material slots for the hybrid surfaces, fur shells that multiply triangle counts, and long bone chains in tails and ears. Knowing the thresholds before you build is the difference between a Good-rank avatar and a Very Poor one you have to rebuild.
| Rank (PC) | Triangles | Material slots | Skinned meshes | Bones | PhysBone components |
|---|---|---|---|---|---|
| Excellent | 32,000 | 4 | 1 | 75 | 4 |
| Good | 70,000 | 8 | 2 | 150 | 6 |
| Medium | 70,000 | 16 | 8 | 256 | 16 |
| Poor | 200,000 | 32 | 16 | 400 | 32 |
These are upper bounds per tier and VRChat revises them periodically, so confirm against the current published limits. The practical target for a protogen is Good: four to eight material slots is exactly what the hybrid surface split needs.
Where the budget goes on a typical protogen: roughly 6,000 to 10,000 triangles for the head shell and visor, 20,000 to 30,000 for the plated body and limbs, 15,000 to 25,000 for fur shells and cards, and 5,000 to 10,000 for the tail. Fur is the elastic item; dropping from four shell layers to two on the chest ruff can save 8,000 triangles by itself.
Bone and physbone budgets are the other pressure point. A humanoid rig uses around 55 to 60 bones before you add anything, and a twelve-segment tail plus two ear chains plus fur jiggle takes you past 75 immediately. Consolidate: run the tail as one physbone component covering the whole chain rather than one per segment, and skip physics on fur entirely if the shells are short.
Physbone components and transforms are counted separately, and the transform count is what usually breaks a protogen. One component on a twelve-bone tail is one component but twelve transforms.
Quest-Compatible Protogens: Baking Glow When Custom Shaders Are Blocked
On standalone Quest hardware, VRChat blocks custom shaders entirely and permits only its own mobile shader set. That removes UV tile discard, shader panning, AudioLink reactivity, and every other technique the PC visor pipeline relies on. A Quest protogen is a different build, not a downgraded one.
What survives the transition:
- Emission via the mobile lit shader: the mobile set includes options supporting an emission map, which is enough for a glowing visor. The unlit toon option does not, so pick the variant that provides it.
- UV offset animation: this drives a material property, not a shader feature, so cell swapping still works on Quest.
- Visemes and jaw flap: fully supported, since they are avatar-system features rather than shader features.
What does not survive: shader-driven panning, per-cell emission masks, transparent glitch overlays, and anything AudioLink-based. Rebuild those by baking the glow into the emission texture directly, accepting a fixed intensity, and baking any animated scanline into a sequence of atlas cells you step through with UV offsets.
The polygon situation is far tighter than on PC, with the Excellent tier around 7,500 triangles and the upload ceiling around 20,000. A protogen at that budget cannot carry fur shells at all: replace them with painted fur on the base color, use normal-mapped panel lines rather than modeled gaps, and reduce the visor to a simple curved plane. Material slots are the harshest constraint, often one or two, which forces you to atlas the visor and body onto a shared texture. Plan that at UV time, because retrofitting it means redoing the entire layout.
Toggle Systems: Switching Visor Faces From the VRChat Expressions Menu
The expressions menu is how a protogen vrchat avatar becomes expressive in use rather than in theory. Without a toggle system your visor shows one face plus visemes; with one you switch expressions on demand mid-conversation, which is the whole point of having a screen for a face.
The architecture that scales best uses a single integer parameter for face selection rather than a stack of booleans. One int with values 0 through 15 covers a full 4x4 atlas and costs 8 bits, whereas sixteen bools cost 16 bits and require mutual-exclusion logic. Build a menu of toggle buttons that each set the int, and drive the visor's UV offset from it in an animator layer.
A good menu structure for a protogen:
- Faces submenu: the expression set, driven by the face int.
- Visor options: emission intensity slider, on and off toggle, and a color override if your shader supports hue shifting.
- Accessories: plate toggles, wing or backpack mounts, and hardware that swaps in and out.
- Utility: an AFK state that dims the visor, and a reset to defaults.
Set parameters to not saved for anything transient like an error face, and to saved for persistent choices like accessory toggles. Watch the total cost as you go: VRChat allocates a fixed parameter budget per avatar, with bools costing 1 bit and ints and floats costing 8, so a face int plus several accessory bools plus an emission float already consumes a meaningful share of it.
Protogen Bases, Commissions, and Closed-Species Rules
There are four routes to owning a protogen model: buy a ready-made base and retexture it, commission an artist, download a free model under whatever license it carries, or generate one from your own reference art. They differ enormously in cost, turnaround, and how much of the result is genuinely yours.
What Popular Protogen Bases Like NKD Protogen Include and Cost
A protogen avatar base is a pre-built, pre-rigged model sold with the explicit right to modify and use it as your own character. The best-known example in the VRChat ecosystem is the NKD Protogen base, and the category as a whole typically sells in the $30 to $70 range for a fully featured base with a Unity package, though prices vary by creator and by what is bundled.
A well-made base generally includes:
- A Unity project or unitypackage with the descriptor set, visemes assigned, physbones placed, and expression menu wired.
- The source mesh as an FBX or Blender file, so you can modify geometry.
- Layered texture files so you can retexture rather than paint over a flattened image.
- A starter face atlas plus the animator setup that drives it.
- A license file stating what you may and may not do.
The advantage of a base is speed and correctness: visor UV projection, viseme mapping, physbone tuning, and performance-rank optimization are already solved. The disadvantage is recognizability, since a retextured base is identifiable as that base to anyone who has seen a few.
Read the license before you buy. Some bases prohibit redistribution of the modified avatar, some allow commissions built on the base only if the buyer also owns a license, and some restrict commercial use such as streaming monetization.
Commission Pricing: Custom Protogen Avatars and Visor Retexture Services
Commissioning produces exactly your character with none of your labor, at the highest cost and the longest wait. Prices vary widely by artist reputation, but the tiers are fairly consistent.
| Service | Typical price range | Typical turnaround | What you get |
|---|---|---|---|
| Visor face pack only | $20 - $80 | 3 - 10 days | A custom atlas of expressions for an existing model |
| Base retexture | $60 - $250 | 1 - 3 weeks | Your markings and colors applied to a base you own |
| Base edit with modeling | $200 - $600 | 2 - 5 weeks | Retexture plus new horns, plating, tail, or accessories |
| Fully custom protogen avatar | $500 - $1,500+ | 4 - 12 weeks | Model, texture, rig, and Unity setup built from your reference sheet |
Rush fees of 25 to 50 percent are common if you need something faster than the artist's standard queue, and most established avatar artists work from a waitlist, so the practical wait from first contact to delivery is often longer than the stated turnaround.
Get the deliverables in writing before paying: whether you receive source files (Blender or FBX) or only a compiled Unity package, whether the artist retains reuse rights, how many revisions are included, and what the performance rank target is. That last one matters more than people expect, because a beautiful custom protogen that ranks Very Poor is hidden by default for most people who encounter you.
Free Protogen Models on Sketchfab and Print Marketplaces: License Fine Print
Free protogen models exist in quantity on Sketchfab and on 3D printing marketplaces like Printables, Thingiverse, MyMiniFactory, and Cults3D. They are a legitimate starting point, especially for learning, and they come with license terms that people routinely violate by accident.
The Creative Commons variants you will encounter:
- CC BY: use it however you like, including commercially, but credit the creator visibly in your avatar description or listing.
- CC BY-NC: non-commercial only. Monetized streaming, selling prints, and paid content are prohibited. This trips up more people than any other clause.
- CC BY-SA: share-alike. Your modified version must also be freely available under the same terms.
- CC BY-ND: no derivatives. You may not modify it, which makes it useless as an avatar base by definition.
- Standard or editorial licenses: platform-specific terms that often prohibit redistribution and commercial use entirely.
Free models also carry a quality tax: uploads made for display are frequently unrigged, non-manifold, or textured with a single baked image that cannot be retextured. Print marketplace files have a parallel problem, since a protogen stl 3d print file is optimized for printing, not real-time use. STL carries no UVs, no materials, and no rig, only triangulated surface geometry, so converting one into an avatar means rebuilding the UVs, textures, and skeleton from scratch.
Protogen Species Rules: What Malice-Risu's Guidelines Let You Create
Protogens were created by the artist Malice-Risu as a semi-open species. In practice that means anyone may design and make their own protogen, free of charge, without buying a slot or asking permission, provided the design follows the published species guidelines. This is unusual and it is the main reason protogens became as widespread as they did.
The species guidelines constrain design rather than gate access. The broad shape of what is expected:
- The visor is required. A character with an organic muzzle and eyes in place of a screen is not a protogen.
- Mechanical and organic elements coexist. The character is a hybrid, not a pure robot and not an anthro in an LED mask.
- Certain traits are reserved for specific subtypes or for the closed sister species.
- Commercial use of your own design is generally acceptable; what is not yours is the species itself.
Because the guidelines are maintained by the creator and have been revised over time, check the current official species documentation before finalizing a design you intend to invest hundreds of dollars or dozens of hours into. Community wikis are helpful for orientation but are not authoritative, and a trait that was permitted in an older revision may have been reclassified.
The practical upshot for anyone generating a model: you can design a protogen from your own reference art and produce it however you like, including with AI generation, without acquiring anything from anyone.
Protogen vs. Primagen: Why One Is Open to Make and the Other Is Closed
The protogen vs primagen distinction is the single most common source of confusion for newcomers, and getting it wrong can mean designing a character you are not permitted to use.
Both species originate from the same creator, and they are visually related: both are mechanical-organic hybrids with display faces. The critical difference is access. Protogens are semi-open: make one whenever you like, following the guidelines. Primagens are closed: you must obtain the right to have one, typically through an approved make-your-own slot, a purchased design from the species owner, or a design gifted to you. Building a primagen without that authorization is not permitted regardless of how the model was produced.
- Species status: protogens are semi-open and anyone may create one; primagens are closed and require an approved slot or a purchased design.
- Cost to create a character: free for a protogen; variable for a primagen, since slots are limited and granted or sold by the owner.
- Face display: protogens use a broad curved screen visor; primagens use a display face with distinct species-specific shaping.
- Design freedom: wide for a protogen within the published guidelines; constrained for a primagen by both species rules and the specific approved design.
If you are unsure which one your reference art describes, default to building a protogen: the guidelines are permissive and nothing is lost by staying on the open side of the line. If you specifically want a primagen, obtain the design first and generate the model second, never the reverse.
When AI Generation From Your Own Images Beats Retexturing a Base
Generation and base-retexturing solve different problems, and the right choice comes down to how much your design deviates from what an existing base already is.
Retexturing a base wins when your character is a color and marking variation on a standard protogen silhouette. In that case a base gives you a technically correct, performance-optimized, VRChat-ready avatar for well under $100 and an afternoon of texture work.
Generating from your own images wins when any of the following are true:
- Your silhouette is non-standard: an unusual visor shape, extra limbs, wings, quadruped stance, or plating architecture no base provides.
- You have a finished reference sheet and want the model to match it rather than approximate it on someone else's mesh.
- You want a character nobody recognizes as a known base.
- You need multiple export targets: a VRChat avatar, a VRM for VTubing, and a mesh you can thicken for printing, from one source model.
- You are iterating on the design and want three silhouette variants before committing, which is minutes of generation versus weeks of commission revisions.
The honest middle path is that generation gets you the mesh and the rig, and you still do the visor by hand, because the visor is design rather than reconstruction. Let the generator handle topology, UVs, PBR maps, and the skeleton across a complex hybrid body, and spend your own hours on the twelve square centimeters of screen that is the actual character. On enterprise tiers, Threedium's human 3D artists can take the refinement pass further. For the broader workflow of generating any 3D model from images or text, the same pipeline applies with different anatomy prompts.
Frequently Asked Questions About Protogen 3D Models
Are Protogens a Closed Species, or Can Anyone Make One?
Protogens are a semi-open species, which means anyone can design and create one for free without buying a slot or requesting permission, as long as the design follows the guidelines published by the creator, Malice-Risu. There is no fee, no approval queue, and no restriction on making your own protogen character. The closed sister species, the primagen, is the one that requires an approved slot or a purchased design.
The guidelines govern which traits belong to which species rather than who may participate, so you can generate, model, commission, or print a protogen freely. They have been revised over the years, so check the current official documentation before finalizing an expensive build.
How Much Does a Protogen VRChat Avatar Cost?
A protogen vrchat avatar costs anywhere from nothing to over $1,500 depending on route. Buying a base and retexturing it yourself typically runs $30 to $70 for the base. A commissioned retexture of a base you own is usually $60 to $250. A fully custom protogen modeled, textured, rigged, and Unity-configured from your reference sheet generally starts around $500 and rises past $1,500 for established artists.
Generating the model yourself sits well below the custom tier in cost, since you pay for generation rather than for an artist's weeks. The hidden cost is the same on every route: your own time on the visor atlas, expression setup, and performance optimization.
What Is the Difference Between a Protogen and a Primagen?
The functional difference is permission: protogens are semi-open and free to create, while primagens are a closed species requiring an approved make-your-own slot, a purchased design, or a gifted one from the species owner. Both are mechanical-organic hybrids with display faces from the same creator, and they are visually related enough that people mix them up constantly.
Primagens carry species-specific traits in the face and body shaping, and using those on a character you present as a protogen falls outside the guidelines. Working from reference art of uncertain origin, the safe default is a protogen; if you want a primagen, secure the design rights first, then produce the model.
How Do You Make a Protogen Visor Display Animated Faces?
You make a protogen visor display animated faces by packing every expression into a texture atlas, typically a 4x4 grid on a 2048 x 2048 texture giving sixteen 512-pixel cells, then animating the material's UV offset to move the visible window from cell to cell. Each 0.25 step in the offset selects a different face. Use stepped, not linear, interpolation on the animation curves so the texture snaps between cells instead of sliding across them.
For runtime control, drive cell selection from a single integer avatar parameter exposed in the expressions menu. Visemes drive the mouth region independently from your microphone, and shader panning layers scanlines or a slow emission pulse on top of whichever cell is active. Transition timings of 0.08 to 0.15 seconds read as a display refreshing rather than as a glitch.
Can You 3D Print a Protogen Head From a Digital Model?
Yes. A protogen head 3d model prints well because the head is fundamentally hard-surface geometry, but the digital model needs preparation first: the mesh must be made watertight and manifold, given real wall thickness, and split into pieces that fit your printer's build volume. A protogen stl 3d print file carries geometry only, so textures and rigs are discarded at export.
Practical specifications for a wearable head: wall thickness of 2 to 3 millimeters for FDM printing in PLA or PETG, split into four to eight parts for a typical 220 x 220 x 250 millimeter build volume, with keyed joints at the seams. The visor is usually not printed; most builders cut it from acrylic or polycarbonate sheet and mount an LED matrix behind it. Print a 25 percent scale test first to check proportion before committing 40 hours of filament.
What File Format Does a Protogen VTuber Avatar Need?
A protogen VTuber avatar needs VRM for most 3D VTubing applications, including VSeeFace and Warudo. VRM bundles the mesh, materials, rig, and a standardized set of expression presets into one file, and it uses the MToon shading model, which handles unlit emissive surfaces well, making it a good fit for a protogen vrm avatar with a glowing visor.
Map your visor atlas cells to the VRM expression presets before exporting: the five vowel shapes drive mouth cells for lip sync, while blink, joy, angry, sorrow, and fun drive expression cells. If your workflow runs through a game engine instead, export FBX or GLB and handle expression mapping there.
Can a Protogen Avatar Meet VRChat Quest Limits?
Yes, but it requires a purpose-built Quest variant rather than an exported copy of the PC version. Quest blocks custom shaders and enforces far tighter budgets, with the Excellent tier around 7,500 triangles and an upload ceiling near 20,000, plus severe material slot limits. Fur shells, shader-driven visor effects, and AudioLink reactivity all have to go.
What survives is enough: emission through the mobile shader set keeps the visor glowing, UV-offset animation keeps the atlas swapping, and visemes work unchanged. Bake glow and animated overlays into the atlas cells, replace modeled panel gaps with normal-mapped detail, and replace fur shells with painted fur. Treated as a deliberate second target, the Quest build reads as a stylized variant rather than a broken one.