How Do You Capture Your Whole Body, Head to Toe, With a Full-Body 3D Avatar Creator?
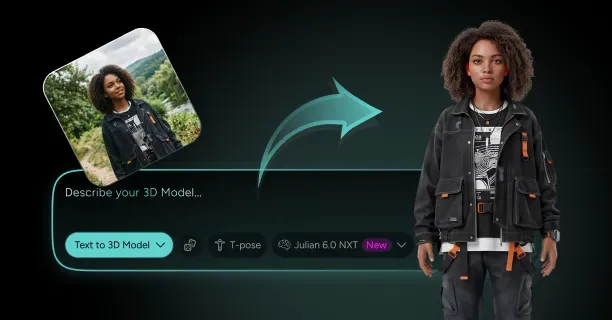
To capture your whole body into a trackable 3D avatar, you either shoot a multi-photo photogrammetry body scan of 60 to 150 images circling you at three heights, or you hand a single clean full-body photo to an AI reconstruction model that infers the hidden sides. A full body 3d avatar creator like Threedium takes the second path: its Julian NXT generator turns one or more reference images into a watertight body mesh with PBR texture sets, an auto-generated humanoid skeleton, polygon optimization, and export to GLB, FBX, USDZ, and VRM. The result is a rigged body you can drop into a VR runtime the same evening, not a raw point cloud you still have to retopologize by hand.
The rest of this guide walks the pipeline in the order you will perform it: choosing capture inputs, normalizing the scan into an A-pose or T-pose, correcting limb proportions, repairing artifacts, retopologizing, rigging a humanoid skeleton, weight-painting the three joints that ruin most bodies, exporting, and calibrating against real trackers. What this page does not cover: face-only likeness work, pore-level skin shading, and stylized transformations that change your proportions on purpose. Those belong to the realistic-avatar and turn-yourself-3D guides in the avatar generation hub. Here the subject is the body: its silhouette, its measurements, its skeleton, and whether trackers strapped to your real limbs line up with the virtual ones.
What Photos Do You Need To Capture Your Whole Body?
The minimum viable input for a full body 3d avatar from photo is one sharp, full-length frame with your feet and the top of your head both inside the crop. Shoot at the level of your own sternum, not your friend's eye level, because a raised camera foreshortens the legs by 8 to 15 percent and the model reproduces that distortion as short thighs. Use a tripod or shelf at 110 to 130 cm and a self-timer.
Resolution matters less than people assume once you clear a floor: anything from 2048 px on the long edge upward carries enough silhouette information. What actually destroys reconstructions is motion blur, rolling-shutter skew, and a background that shares color with your clothing. Stand 2.5 to 3.5 m from a plain wall so you are not casting a hard shadow onto it. The practical capture set, in increasing order of quality:
- One front-facing full-body frame in fitted clothing, arms held 30 to 45 degrees away from the torso so the armpit silhouette is visible. This is the floor.
- Front plus side plus back, same lighting, same pose, same distance. Three frames close most of the guesswork about belly depth, seat volume, and shoulder blade shape.
- Eight frames at 45 degree increments around you, feet marked with tape so you return to the same spot. This is the sweet spot for effort versus fidelity.
- Sixty to 150 frames for true photogrammetry, covering three orbit heights: knee, chest, and above head.
Whatever you shoot, keep exposure and white balance locked: auto white balance drifting between frames bakes color banding into the texture atlas.
Single-Photo AI Reconstruction vs Multi-Photo Photogrammetry: Which Should You Use?
Use single photo 3d body reconstruction when you want a usable, riggable body in minutes and you can tolerate the model inventing the parts it cannot see. Use photogrammetry when you need the geometry to be measured rather than inferred, and you are willing to spend an hour capturing and half an hour processing. The two approaches fail in opposite directions: AI reconstruction produces clean, plausible, slightly generic bodies, while photogrammetry produces accurate but noisy bodies full of holes wherever the camera never looked.
The technical difference is what fills the unseen volume. A photogrammetric solver only knows surfaces that appeared in at least three images with sufficient parallax, so the underside of the chin and the inside of the thighs simply do not exist. A generative model has a learned prior over human bodies and always closes those regions, using a statistically average human as the fallback.
| Method | Inputs | Typical time to riggable mesh | Silhouette accuracy | Main failure mode |
|---|---|---|---|---|
| Single-photo AI reconstruction | 1 full-body image | 2 to 10 minutes | Plausible, regresses toward average build | Invented back, softened body-shape extremes |
| Front plus side plus back AI | 3 images | 5 to 15 minutes | Good depth, correct torso profile | Seam mismatch if pose shifts between shots |
| Phone photogrammetry | 60 to 150 images | 45 to 120 minutes | High where covered | Holes, merged fingers, noisy hair |
| Multi-camera scan booth | 60 to 120 synchronized cameras | 10 to 30 minutes | Very high, sub-centimeter | Cost and access, still needs retopology |
For a full body avatar for VR, the tracking layer cares about proportions, not pore-level accuracy. A single-image reconstruction whose arm span you corrected to your real measurement tracks better than a beautiful scan you never scaled. Choose photogrammetry when the deliverable is a measurement; choose AI when it is a rig you will animate.
How Do You Shoot a Photogrammetry Body Scan With Just a Phone?
A solo photogrammetry body scan is awkward because you must hold still while something orbits you. The reliable setup is a helper walking a circle at steady pace, shooting bursts or 4K video you later decimate to frames. Plan three orbits: knee height angled up, chest height level, overhead angled down. Sixty frames per orbit gives 60 to 70 percent overlap between neighbors.
Lighting separates a clean scan from mush. You want flat, shadowless, ambient light: overcast outdoors, open shade, or a room with several bounced sources. Hard directional light bakes shadows into the texture and creates moving specular highlights the solver reads as surface detail.
Lock focus and exposure before the first frame and never let the phone re-focus mid-orbit. A focus hunt in the middle of a pass changes the effective focal length, and the solver will either reject those frames or align them into a slightly different body, producing a doubled surface at the seam.
Hold an A-pose with arms 30 to 45 degrees from the torso, palms facing your thighs, fingers splayed and not touching each other or your legs. Feet shoulder-width, weight even, eyes on a fixed point. A 90-second orbit is the edge of what most people hold without drifting, and drift over a centimeter shows up as ghosting on the shoulders.
How Do You Generate a Full-Body Avatar With Threedium's AI?
Upload your reference images to Threedium's 3D model generator and describe what the images do not show. The Julian NXT pipeline accepts either a text description or reference photographs, and the two together outperform either alone: the image fixes identity and silhouette, the prompt fixes the things a photo cannot express, such as "arms in A-pose, standing on ground plane, neutral expression, no held props, footwear included as part of the mesh."
Be explicit about the four things that most often come back wrong on a body generation:
- Pose. State A-pose or T-pose directly. If you leave it implicit the generator may return a contrapposto stance that is far more work to normalize.
- Footwear and hands. Say whether shoes are part of the body mesh and whether fingers should be separated. Merged fingers are the single most common repair job.
- Ground contact. Ask for the mesh to sit with soles at the origin plane. It saves a manual transform later and prevents floor-height calibration confusion.
- Clothing separation. Decide up front whether the outfit is a separate submesh or fused to the body. Fused is simpler to rig; separate is required if you ever want to swap outfits.
The generator returns a mesh with PBR material channels (base color, normal, roughness, metallic, ambient occlusion), an automatically fitted humanoid skeleton, and polygon optimization targeted at your intended platform. Where a face is present and legible, it also produces the 52 ARKit blendshapes used for facial capture, which matters because a full-body rig that lacks face tracking looks eerily inert once the limbs start moving correctly.
Enterprise tiers add refinement by human 3D artists, the pragmatic answer when the AI output is 90 percent right and the remaining 10 percent is what your project cannot ship without. Treat it as a targeted fix pass rather than a full commission: you are paying for correction hours, not modeling hours.
How Do You Normalize a Scanned Body Into an A-Pose or T-Pose?
A-pose normalization is the process of taking a body captured in whatever stance the person actually held and moving it into the canonical rest pose that skinning and retargeting expect. It matters because every animation retargeting system, every IK solver, and every VR calibration routine assumes the rest pose is a known configuration. A body frozen in a relaxed stance with one hip cocked will apply every animation on top of that asymmetry.
The two canonical options differ in where they hide deformation error. In T-pose, arms are horizontal with palms down and the shoulder sits at maximum abduction, so rotation from rest moves the arm into a range the deltoid weights handle well. In A-pose, arms hang at roughly 45 degrees, which stretches less at both extremes but complicates retargeting from T-pose animation libraries. Engines accept both, and most VR runtimes convert to T-pose for calibration regardless.
The practical normalization workflow is: build or fit a skeleton to the captured pose, skin the mesh roughly, rotate the joints into the canonical pose, then bake the deformed result as the new rest geometry. In Blender that is an Armature modifier plus Apply as Rest Pose. In Maya it is a skinCluster with the bind pose reset. The rough skin weights used for the move are throwaway; you rebind properly afterward on the corrected geometry.
Normalize before you retopologize, not after. Moving a 5-million-triangle scan into A-pose is slow but harmless, whereas moving a finished 30k-triangle game mesh through a large joint rotation with temporary weights will crease the elbows and shoulders permanently once you bake it.
How Do You Fix Limb and Torso Proportions After AI Reconstruction?
AI reconstruction regresses toward the mean of its training distribution, which means tall people come back shorter, short people come back taller, and everyone comes back closer to an eight-head figure than they really are. For a body you will only look at, this is fine. For a body you will drive with trackers, it is the root cause of most calibration misery, so fix it before rigging.
Measure four values on your real body and four on the mesh, then reconcile:
- Total height, floor to crown, shoes on if the avatar wears shoes. This sets global scale.
- Arm span, fingertip to fingertip. This is the single most important number for VR, because runtimes use it to place the virtual hands relative to your controllers.
- Floor to hip joint, roughly the greater trochanter. This decides where the avatar's pelvis sits when you crouch.
- Shoulder width, acromion to acromion. Wrong shoulder width shows up as elbows that bend outward when your real elbows are tucked in.
Keep the ratios credible while you do it. Realistic humanoid rig proportions put the hip joint at roughly 50 to 53 percent of total height, the shoulder at about 82 percent, the elbow at about 62 percent, and the knee at about 28 percent. Arm span for most adults sits within 3 percent of height. If your corrections push any of these more than a few percent outside those bands, you are probably compensating for a measurement error somewhere else, and the tracking layer will find it.
How Do You Repair Merged Fingers, Holes, and Clothing Artifacts in Body Scans?
Every capture-based body arrives with the same four defects, and they are worth naming because each has a different fix. Merged fingers happen when adjacent digits were within a few millimeters and the solver could not resolve the gap. Holes appear under the chin, in the armpits, between the thighs, and under long hair. Noise shows up as a bumpy, orange-peel surface on flat cloth. Floating fragments are stray islands from background objects or hair strands.
Work in this order, because each step makes the next cheaper:
- Delete loose parts and isolated islands below a triangle-count threshold. Most packages have a Select Linked plus Select by Size operation for exactly this.
- Close holes with a planar or curvature-aware fill, then relax the new patch. Do not use a fill that adds a fan of triangles around a single center vertex; it creates a pole that will pinch under deformation.
- Smooth noise selectively. A global smooth of 3 to 5 iterations kills fabric wrinkles and softens the nose. Mask the face and hands, then smooth the rest.
- Rebuild hands last. In practice, replacing scanned hands with a clean modeled or generated hand mesh and stitching at the wrist is faster and better than separating merged fingers by hand.
Clothing artifacts interact with rigging. Deep captured folds look great standing still and terrible in motion, since a static fold cannot open or close as the limb bends. Reduce them to gentle geometric undulation plus a normal map, and close hems and cuffs into loops with inward thickness rather than the paper-thin open edges scans produce.
Budget the time honestly: repairing a phone-photogrammetry body to animation-ready condition is typically 3 to 8 hours of hands-on cleanup for someone who has done it before.
How Do You Retopologize a Full-Body Scan for Animation?
Scan meshes are dense, uniformly triangulated, and completely indifferent to where your joints are. Animation needs the opposite: edge loops that follow muscle flow, concentrated resolution at the joints, and sparse resolution across flat spans like the back and shins. Retopology is how you get there, and it is the step that decides whether elbows crease or collapse.
Target budgets that hold up across current platforms:
- Standalone VR headset avatar: 15,000 to 30,000 triangles, one or two 1024 or 2048 texture sets, ideally a single material and no more than two draw calls.
- PC VR social avatar: 40,000 to 80,000 triangles with two to four 2048 sets, leaving room for separate hair and outfit materials.
- Real-time cinematic or engine hero: 90,000 to 150,000 triangles at 4096, with blendshapes and cloth simulation costed on top.
- Web and AR viewer: 20,000 to 50,000 triangles, KTX2-compressed 2048 textures, GLB under roughly 15 MB for fast load.
The loop layout that survives deformation is well established. Put three to four edge loops across each major joint: elbow, knee, shoulder, hip, wrist, ankle. Run concentric loops around the shoulder socket, and keep a continuous loop around the waist and each thigh at the crotch, the junction where automatic weighting most often fails. Quads everywhere.
You do not have to do this manually. Automatic quad remeshers produce serviceable topology in seconds, and a generator that outputs an already-optimized mesh skips the step entirely. For a personal full body tracking avatar you will iterate on, automatic topology plus targeted manual loops at the elbows and knees is the right cost balance. Afterward, project scan detail onto the new mesh as a normal map baked at 2048 or 4096 with a cage offset of 2 to 5 mm.
How Do You Texture Skin and Clothing Across a Full-Body Mesh?
Whole-body texturing is mostly a UV coverage problem, not an artistry problem. Skin shading quality, pore detail, and likeness fidelity are their own subject and belong with the realistic-avatar material in the avatar guides. What matters here is that a body has roughly 1.7 to 2.0 square meters of surface area to unwrap, and if you allocate it naively the face gets the same texel density as the soles of your feet.
Lay out UVs with deliberate priority: give the head and hands 30 to 40 percent of the atlas even though they are under 15 percent of the surface area. Feet, inner thighs, and armpits can run at half density without anyone noticing.
Place seams where clothing already breaks the surface: along the inside of the arm, down the inside of the leg, around the waistband, at the collar, and at the wrist and ankle cuffs. A seam that follows a real garment edge is invisible; a seam across the front of a thigh is a permanent visible line. Where a garment is a separate submesh, keep it on its own UV island set so you can swap or recolor it without rebaking the body.
Before calling texturing done, verify texel density is consistent with a checker pattern, and confirm that areas hidden in rest pose but exposed in motion, the armpit and the inner elbow, hold real texture data rather than stretched garbage.
How Do You Rig a Full-Body Avatar With a Humanoid Skeleton?
A full-body rig means a skeleton that maps cleanly onto the standard humanoid definition every engine and VR runtime expects. That definition is not arbitrary: it is essentially the same joint list across Unity's Humanoid avatar, the VRM specification, and the Mixamo naming convention, which is why an asset built to it can be retargeted rather than reanimated.
The required core is hips as the single root, then spine, chest, upper chest, neck, head, and two symmetric limb chains: shoulder, upper arm, lower arm, hand; upper leg, lower leg, foot, toes. That is 15 to 17 essential bones, plus 15 per hand if you want articulated fingers. Twist bones, hair chains, jaw and eyes are extras a humanoid retarget can safely ignore.
Automatic rigging solves the placement problem well when the mesh is in a clean rest pose, which is the strongest practical argument for doing A-pose normalization first. Threedium's automatic rigging fits the skeleton to the generated body and produces skin weights alongside it, and where the model includes a face it wires the ARKit blendshape set at the same time. Mixamo is a reasonable free alternative for a body-only humanoid rig, though it does not handle fingers on scanned hands well and imposes its own bone naming.
Place joints at the anatomical center of rotation, not the visual center of the limb. The knee axis sits slightly behind the middle of the leg, the elbow slightly behind the middle of the arm, and the shoulder joint is lower and more inboard than most people place it, roughly under the acromion rather than at the outer edge of the deltoid.
How Do You Weight-Paint Hips, Shoulders, and Knees for Natural Deformation?
Automatic weights get you 80 percent of the way and fail in exactly three places every time: the hip and crotch junction, the shoulder and deltoid, and the knee. These three regions are where the mesh has to slide over a large rotation while keeping volume, and where the default falloff produces either candy-wrapper twisting or a collapsed crease.
Start with a smooth baseline: normalize all weights so each vertex sums to 1.0, and limit each vertex to a maximum of 4 bone influences, which is what most real-time engines support anyway. Then fix each problem area with a specific approach.
- Hips and crotch. The transition from pelvis to upper leg should be gradual over 3 to 4 loops, and the innermost crotch vertices should be split evenly between left and right legs so the geometry does not tear when the legs part. Test by raising one knee to 90 degrees.
- Shoulder and deltoid. Weight the deltoid mass partly to the clavicle or shoulder bone, not entirely to the upper arm, or the arm will detach visually when raised. Test with the arm straight up and straight forward, not just straight out.
- Knee. A sharp transition creases, a soft one goes rubbery. Span the two loops immediately above and below the joint, and test at 120 degrees of flexion, because VR crouching hits it.
- Forearm twist. If your rig has no twist bone, half the wrist rotation will collapse the forearm. Either add a twist bone driven at 50 percent of the wrist roll, or accept the deformation and hide it with a long sleeve.
Test with real motion rather than static poses: load a walk cycle and a crouch and watch the silhouette from the side. When a fix keeps fighting you, the underlying problem is usually topology, not weights, and one added edge loop at the joint solves what an hour of painting could not.
Which Export Formats Preserve a Full-Body Rig: GLB, FBX, VRM, or USDZ?
All four carry geometry and materials; they differ sharply in what they preserve of the rig and the avatar semantics on top of it. Choose by destination, and expect to export more than one, because the same avatar usually needs a web version, an engine version, and a VR-platform version.
| Format | Skeleton and skinning | Blendshapes | Avatar semantics | Best for |
|---|---|---|---|---|
| GLB / glTF 2.0 | Yes, full skin and joints | Yes, as morph targets | None built in | Web viewers, engines, general interchange |
| FBX | Yes, plus full animation stacks | Yes, as blendshapes | None, relies on naming convention | Unity, Unreal, DCC round-trips |
| VRM | Yes, with a normalized humanoid bone map | Yes, plus named expression presets | Yes: look-at, spring bones, first-person, license metadata | VR social platforms and VTuber apps |
| USDZ | Yes, but tooling is uneven | Limited support in viewers | None | iOS AR Quick Look, Apple ecosystem preview |
The distinction that matters for a body you intend to track is avatar semantics. GLB and FBX describe a rigged mesh; VRM describes an avatar. VRM's normalized humanoid mapping means the receiving application knows which bone is the left upper leg without guessing from names, which is precisely what a tracking runtime needs. It also carries first-person settings, so your own head mesh is hidden from your own camera, and spring-bone definitions for hair and clothing. Threedium exports GLB, USDZ, and FBX directly, and VRM where the asset is an avatar; a deeper comparison of the containers lives in the 3D file formats reference.
Export checklist regardless of format: apply all transforms so scale is 1.0 and rotation zero, confirm meter units, embed textures for GLB and USDZ, and re-import your own export into a neutral viewer before uploading it anywhere.
How Do You Prepare a Full-Body Avatar for VR Full-Body Tracking?
Full-body tracking replaces the runtime's guesswork about your legs and hips with actual measured positions, and the avatar has to be built to receive them. That means a strict humanoid hierarchy, correct joint bend axes, proportions that match your real body within a few centimeters, and a rest pose the calibration routine can interpret. Everything in this section is about the gap between a rig that animates nicely and a rig that tracks your actual limbs, which is a different and stricter standard.
What Rig Requirements Does Full-Body Tracking Impose on Your Avatar?
A tracking runtime does not animate your avatar; it solves inverse kinematics against it. That imposes requirements a keyframe animation rig never has to meet. First, the hierarchy must be strictly humanoid: hips at the root, an unbroken spine chain to the head, and limb chains with exactly the expected number of segments. An extra bone spliced into the middle of the spine, or a leg chain with an extra segment between knee and ankle, will either be rejected or silently mismapped.
Second, the joints need pre-bent hinges. An IK solver deciding which way an elbow should fold looks at the current bend direction in the rest pose. A perfectly straight arm gives it no signal, and the solver picks arbitrarily, often differently on each side. Elbows and knees should carry 2 to 5 degrees of pre-bend in the intended direction even in T-pose.
Third, the rig must be free of non-uniform scale and baked-in rotations. Any bone with a scale other than 1.0 produces shearing when the solver rotates it. Apply scale before rigging, not after.
Finally, the avatar needs a sensible view point, since the runtime places your camera at the avatar's eye position. Set it at the midpoint between the eyes, roughly 8 to 12 cm above and 2 to 4 cm forward of the neck joint.
How Many Trackers Do You Need: 3-Point, 6-Point, or 11-Point Setups?
Point count refers to tracked rigid bodies, counting the headset and both controllers. 3-point is the baseline every VR system gives you: head plus two hands, with legs and hips inferred procedurally. 6-point adds hips and both feet, which is the threshold where sitting, kneeling, and leaning actually read to other people. 11-point adds knees, elbows, and often chest, which mainly buys you correct limb orientation for dance and martial arts.
| Setup | Tracked points | What it gains | Typical hardware cost |
|---|---|---|---|
| 3-point | Head, 2 hands | Baseline, legs fully procedural | Included with headset |
| 6-point | Plus hips, 2 feet | Real sitting, crouching, stepping, leaning | 3 additional trackers |
| 8-point | Plus 2 knees | Correct knee direction, kneeling accuracy | 5 additional trackers |
| 11-point | Plus chest, 2 elbows | Torso twist and elbow orientation | 8 additional trackers |
The honest recommendation for almost everyone is 6-point: the jump from 3 to 6 is the largest perceptual improvement in the progression, because hips and feet are what others read as a real standing body. The jump from 6 to 11 is refinement.
Diminishing returns arrive quickly past 11: each tracker adds a battery to charge, a strap to position identically every session, and another opportunity for calibration drift.
How Do You Calibrate Your Avatar in T-Pose for Full-Body Tracking?
Calibration is the moment the runtime learns the mapping between your real tracker positions and your avatar's bones, and it is worth doing slowly because everything downstream inherits its errors. The standard procedure: enter calibration mode, stand in a full T-pose with arms horizontal and level, feet flat and shoulder-width, look straight ahead, hold still, and confirm.
The details that separate a good calibration from a frustrating one:
- Stand on a flat, hard, level surface. Calibrating on a rug compresses under your feet and offsets the floor height by 1 to 2 cm, which propagates into every crouch.
- Get your arms genuinely horizontal. Most people hold them 5 to 10 degrees low, and the runtime interprets the shortfall as a shorter arm span, which pulls the virtual hands inboard of the controllers.
- Keep your head level and facing forward. Calibrating with your chin tipped down bakes a permanent forward head tilt into the avatar's neutral posture.
- Wear the trackers in the same position every session. Marking strap holes with a pen sounds trivial and eliminates the most common source of session-to-session variance.
Use a full calibration when you change avatars, tracker placement, or footwear, and a quick recalibration otherwise. Changing shoes genuinely matters: 3 cm of sole height moves your entire body up relative to the floor, and the runtime has no other way to know.
Why Do Avatar Proportions Decide Whether Trackers Align With Your Body?
A tracking runtime has to reconcile two skeletons: yours, which it samples through six to eleven rigid points, and the avatar's, which is fixed geometry. Where the two disagree, something has to give, and the solver's choice is usually to preserve the tracker positions and distort the avatar. That is why proportion mismatch does not show up as "the avatar looks a bit off" but as visible IK artifacts: floating feet, a stretched spine, or knees that snap.
Concretely: if the avatar's legs are 5 cm shorter than yours, its feet cannot reach the floor while its head reaches your head. The solver resolves this by lifting the feet, so the avatar hovers, or by stretching the legs, so it looks like it is on tiptoe. Both are the same error expressed differently.
Match your avatar to your real measurements before you blame the trackers. In practice most tracking complaints attributed to hardware are proportion errors of 3 to 8 cm in leg length or arm span. Trackers report positions accurately; they cannot report them into a body that is not shaped like yours.
This is the strongest reason to build a body from your own photos rather than adopt a stock model. A full body 3d avatar from photo starts at your real silhouette, and once you have corrected the AI's regression toward average proportions, you are within a couple of centimeters everywhere instead of adapting your posture to somebody else's skeleton.
Why Arm-Span and Floor-Height Calibration Drift After an Avatar Update
You fix a texture, re-export, upload the new version, and suddenly your hands sit an inch off and you are half-sunk into the floor. This is one of the most common and least explained frustrations in avatar work, and the cause is almost always that the export changed something the calibration depended on, even though the visible mesh did not change.
The usual culprits, in order of frequency:
- Unapplied or re-applied transforms. An armature scaled to 0.01 and then applied between versions changes every bone length by a factor the runtime does not expect.
- Rest pose changed. If you nudged the arms during editing and re-baked the rest pose, your avatar's T-pose is no longer the T-pose your saved calibration was measured against.
- Root or hips offset. Moving the armature object rather than the mesh shifts where the runtime thinks the floor is, typically by exactly the amount you moved it.
- Footwear geometry changed. Swapping barefoot for boots raises the mesh soles without changing the skeleton, so the ankle-to-floor distance the runtime assumed is now wrong.
The defensive practice is to freeze a calibration reference version of your avatar: the exact file whose proportions your saved calibration matches. Keep it, and when you make cosmetic changes, verify that total height, arm span, hip height, and ankle-to-sole distance are unchanged before you upload. A quick way to check is to measure the same four distances in your modeling software and compare against a note you keep with the file.
Hip and Chest Tracker Offsets When the Avatar's Proportions Differ From Yours
Hip and chest trackers are the two that most often need manual offsets, because they are strapped to soft tissue on a torso whose proportions rarely match the avatar's exactly. The hip tracker in particular sits on a belt that can ride 3 to 5 cm above or below the actual hip joint depending on your build and how tight you cinch it.
Symptoms map fairly reliably to causes. If your avatar leans backward when you stand straight, the hip tracker is reading forward of the avatar's pelvis center, usually because the belt sits on the front of the abdomen; offset the hip tracker backward by 2 to 4 cm. If the avatar's spine bends unnaturally when you twist, the chest tracker is too high or too low relative to the avatar's chest bone; move it toward the sternum center. If the hips sink when you sit, the hip bone height in the avatar is higher than the belt position on your body.
Set offsets in this order, because each depends on the previous: floor height, hips, chest, feet, knees.
For avatars whose torso proportions deliberately differ from yours, store a per-avatar offset profile. The more durable fix is upstream: adjust the avatar's hip bone height and chest bone position in the rig itself, re-export, and calibrate clean. A rig-level correction survives every future session.
How Do You Fix Spine Slack and Bent Knees in the IK Rig?
Spine slack is the drooping, over-curved back you see when the solver has more spine segments than it has information to constrain. With a hip tracker and a headset but no chest tracker, the runtime knows where the pelvis and head are and has to invent everything between, so it distributes the difference across all spine bones, which reads as a slouch that deepens whenever you lean.
Three fixes, cheapest first. Reduce your spine chain to three or four bones rather than the six or seven a cinematic rig uses, since fewer segments means less room for slack. Raise the spine stiffness or upper-body weight parameter most runtimes expose. Or add a chest tracker, which converts the guess into a measurement and eliminates the problem structurally.
Permanently bent knees have a different cause: the solver's leg length does not match yours, so it absorbs the excess by keeping the knees flexed. If the avatar stands with a 10 to 20 degree knee bend when you are standing straight, the avatar's legs are longer than yours relative to its hip height, or the floor calibration placed the floor too high. Check the ankle-to-hip distance against your real measurement before adjusting anything else.
A small amount of knee flexion in the neutral stance is correct and desirable. Perfectly straight legs at rest give the IK solver nowhere to go and produce a hyperextended snap the moment you shift weight. Aim for 3 to 7 degrees of flex in the calibrated neutral pose, not zero.
Which Direction Should Elbows and Knees Bend on a Full-Body Rig?
Knees bend backward, elbows bend backward relative to a body facing forward with palms down. Stated in rig terms: with the avatar facing positive Z in a Y-up world, the knee's local bend axis rotates the shin toward negative Z, and the elbow's rotates the forearm toward negative Z as well when the arm is in T-pose with palms down. Getting this wrong produces the unmistakable backward-bending leg that every VR user has seen on somebody else's avatar.
The mechanism is the pole vector or bend hint, and the rest pose tells the solver which way to point it. This is why 2 to 5 degrees of pre-bend at each hinge is not cosmetic: move the knee joint 1 to 2 cm forward of the line between hip and ankle, and the elbow 1 to 2 cm backward of the line between shoulder and wrist.
Verification is fast and worth doing every time. In your DCC, rotate each joint through its full expected range and watch:
- Knee from 0 to 130 degrees of flexion. It should fold like a knee, and the calf should not pass through the thigh.
- Elbow from 0 to 145 degrees. The forearm should approach the biceps, not swing outward.
- Both simultaneously with the limb rotated 90 degrees at the shoulder or hip, since bend direction errors often only appear once the parent has rotated.
- Ankle dorsiflexion and toe roll, which are the most commonly mis-oriented joints after the big two.
If a joint bends the wrong way and the geometry is correct, the bone roll is wrong rather than the position. Recalculate roll with the limb plane as reference, then re-verify. It is a 30-second fix that people spend hours working around.
How Do You Match Avatar Height and Arm Span to Your Real Body?
Take two real measurements properly. For height, stand against a wall without shoes, heels together, and mark the crown; add sole thickness separately if the avatar wears shoes. For arm span, stand with your back to a wall, arms out horizontally, and measure fingertip to fingertip. Write both down in centimeters. Nearly everyone estimates their arm span wrong by several centimeters when guessing.
Then measure the avatar the same way in your modeling software using the mesh bounding box for height and the distance between the two middle-fingertip vertices for span. Scale the avatar globally until height matches, then check span. If span is now off by more than about 2 cm, correct the arm bones specifically: lengthen or shorten the upper arm and forearm proportionally, then move the hand geometry with them, rather than scaling the whole avatar again.
Bear in mind what the runtime uses each number for. Height sets the eye position, so being 5 cm too tall makes every doorway feel low. Arm span sets the hand mapping, so a span 5 cm short means your hands hover inboard and you overreach for everything.
A deliberate mismatch is legitimate if you accept the consequences: playing a 150 cm avatar at 180 cm real height means the world scales up around you and your arms never quite reach where the avatar's do. Keep a correctly proportioned version around as a reference when diagnosing tracking problems.
Can You Run Full-Body Tracking With IMU Trackers Instead of Base Stations?
Yes. IMU-based systems infer body pose from orientation sensors rather than optical position, which removes the need for base stations entirely. SlimeVR trackers are the widely used open-source example: small strap-on modules containing an inertial measurement unit, reporting rotation over Wi-Fi to a server on your PC that solves a skeleton from those rotations plus your entered body proportions.
The tradeoff is straightforward. Optical systems measure absolute position, so a foot is where the base stations say it is. IMU systems measure only rotation, so position is computed from your declared limb lengths, which makes accurate body measurements mandatory rather than merely helpful. Enter your thigh, shin, and torso lengths carelessly and the solver will place your feet confidently in the wrong spot.
Practical differences worth planning around:
- Drift. IMUs accumulate yaw drift over time. Expect to reset yaw every 10 to 30 minutes with a quick standing reset. Optical setups do not drift.
- Occlusion. IMUs do not care about line of sight, so lying on the floor or sitting under a desk works. Optical trackers lose their feet in exactly those poses.
- Cost and setup. A DIY IMU set typically costs a fraction of an equivalent optical set, but requires assembly or a purchased pre-built kit, plus firmware and network setup.
- Proportion sensitivity. IMU solvers ask for measured limb lengths directly. This is where a measured avatar pays off immediately.
Either way the avatar requirements are identical: strict humanoid hierarchy, correct bend axes, proportions matching your body. A well-built rig works with both classes of hardware without modification.
How Accurate Are Body Measurements From Photo-Based Avatars?
Photo-based avatars can produce useful body measurements, but "useful" varies enormously by which measurement you want. Lengths and heights are reliable once scale is established; circumferences are inferred and therefore softer; and anything obscured by clothing is a guess dressed up as a number. This section covers what 3d body measurements from photo capture can and cannot deliver, and how to capture in a way that makes the numbers worth trusting.
How Close Do Single-Photo Body Scans Get to Tape-Measure Accuracy?
A single-photo reconstruction with a known scale reference typically lands within a few centimeters on major dimensions and drifts further on circumferences. Vertical measurements, height, inseam, torso length, are the most reliable because they are directly visible in silhouette. Circumferences such as waist, chest, and hip are inferred from a front-facing outline plus a learned prior about body depth, so they carry the error of that assumption.
The reason is geometric rather than a limitation of any particular model: from one viewpoint you see width but not depth. A waist of 80 cm could be a wide shallow ellipse or a narrower deeper one, and both project the same front silhouette. The model picks the depth-to-width ratio typical of bodies like yours, which is right on average and wrong for anyone who deviates from it.
Scale is the other half. Without a reference, a reconstruction knows shape but not size, so enter your real height and let everything else scale from it: height is easy to measure accurately at home and is the single most useful anchor.
Single-photo measurements are good enough for size recommendation, avatar proportion matching, and tracking dimensions. They are not good enough for tailoring or anything where a 3 to 5 percent girth error matters.
Do Front-Plus-Side Photos Beat a Single Image for Measurement Accuracy?
Yes, meaningfully, and the improvement is concentrated exactly where single images are weakest. Adding a side view gives the reconstruction direct evidence of body depth at every height, which converts inferred circumferences into measured ones. Waist, chest, hip, and thigh girth all benefit; height and limb lengths, already reliable, improve only marginally.
Shoot the pair correctly or you lose the advantage: same camera position, distance, lens, and lighting, with only you rotating. Rotate exactly 90 degrees using tape marks on the floor, because a 15 degree error turns a side profile into a three-quarter view and reintroduces the depth ambiguity you were eliminating.
Take the front and side shots within seconds of each other, in the same breath state. People instinctively inhale for a side profile and hold it, which can change waist depth by 2 to 4 cm and yields a front silhouette and a side profile describing two different bodies.
For avatar work specifically, the front-plus-side pair is the best effort-to-result ratio available. It takes two minutes longer than a single shot and removes most of the depth guessing, which is the difference between an avatar that is your shape and an avatar that is roughly your shape.
Which Body Landmarks and Girths Can Scanning AI Actually Measure?
Scanning systems detect anatomical landmarks first, then derive measurements as distances or cross-sectional perimeters between them. The landmark set is fairly standard: crown, cervical point at the neck base, acromion at each shoulder, axilla, bust or chest point, natural waist at the narrowest point, iliac crest, greater trochanter at the hip, knee center, ankle, and floor contact.
From those, the measurements a reconstruction can legitimately produce:
- Lengths and heights. Stature, cervical height, waist height, inseam, outseam, arm length, shoulder-to-wrist, shoulder width. Most reliable category.
- Girths. Neck, chest or bust, underbust, waist, high hip, hip, thigh, calf, upper arm, wrist. Reliability depends on view count and clothing fit.
- Derived values. Waist-to-hip ratio, body surface area, estimated volume, and size recommendations. These inherit the errors of their inputs and compound them.
- Posture indicators. Shoulder slope, forward head position, pelvic tilt. Directionally informative rather than clinically precise.
Two categories are systematically unreliable regardless of method: anything under compressed or loose clothing measures the garment rather than you, and any measurement following a path a surface scan cannot see is estimated from the outside and can be off substantially.
Can a Photo-Based Avatar Drive Virtual Try-On and Clothing Fit?
It can, with the caveat that fit is a function of measurement accuracy and garment simulation together, and the second half is where most systems are weakest. A photo-derived avatar with correct girths gives a size recommendation that beats a generic size chart, because a size chart knows only your stated measurements while the avatar knows your shape distribution across the whole torso.
What the avatar contributes well: silhouette and proportional shape. Whether a jacket will pull across your shoulders or a fitted shirt will gap at the chest are questions about proportion, and a reconstructed body answers them better than a set of three numbers.
What it contributes poorly: tension, stretch, and comfort. Whether a waistband will dig in depends on soft-tissue compression that no surface scan captures. Systems promising a precise fit verdict rather than a size suggestion are usually overpromising.
For production use, the practical setup is a body with clean UV coverage and a rigged humanoid skeleton, so garments can be fitted in a rest pose and then posed with the body. That is the same asset you built for VR, which is convenient: a well-constructed full-body avatar serves try-on, animation, and tracking from one file. Generating that base body from images through an AI 3D model generator and correcting its proportions against real measurements is generally faster than commissioning a bespoke body mesh for each use case.
What Should You Wear During Capture To Keep Measurements True?
Wear fitted, matte, plain clothing in a color that contrasts with your background. Athletic base layers, close-fitting leggings, or a plain t-shirt and shorts are ideal. The garment should follow your body without compressing it, because compression garments make you measurably smaller and the scan will faithfully record the compressed shape.
What to avoid, and why each one specifically hurts:
- Loose or flowing fabric. The reconstruction measures the garment's outline, adding several centimeters of phantom girth wherever it hangs away from you.
- Shiny, reflective, or sequined material. Specular highlights move with the camera and read as surface detail, producing noise and holes.
- Black, especially matte black. Dark fabric returns little detail. If you must wear dark clothing, raise the light level and avoid pure black.
- Fine repetitive patterns. Stripes and small checks confuse feature matching in photogrammetry and can create aliasing artifacts in AI reconstruction.
- Bulky hair down over the shoulders. Tie it up or back. Hair over the shoulders hides the shoulder line, which is a landmark several other measurements derive from.
Two variables quietly move the numbers: footwear and time of day. Bare feet give the truest floor contact, and most people's waist measurement varies by 2 to 4 cm across a day, so scan at the same hour if you are tracking change.
Frequently Asked Questions About Full-Body 3D Avatars
Can I make a full-body 3D avatar from just one photo?
Yes. AI reconstruction models infer the unseen sides of your body from a learned prior over human anatomy, so a single clear full-length photo is enough to produce a complete, watertight, riggable mesh. Expect the visible front to be accurate and the back, the sides, and any occluded detail to be plausible rather than measured. For a VR avatar this is usually acceptable, because correcting proportions afterward matters far more than capturing your exact shoulder blade contour.
The improvement from adding a second photo is worth the two extra minutes. A front-plus-side pair removes most of the depth ambiguity single images suffer from, tightening both the silhouette and any measurements derived from it. Beyond three views the returns shrink quickly until you reach full photogrammetry coverage.
What app scans your whole body into a 3D model?
Two categories exist. Dedicated photogrammetry applications such as RealityCapture, Metashape, and the open-source Meshroom reconstruct a mesh from dozens or hundreds of photos you capture yourself; on iOS devices with a LiDAR sensor, Apple's Object Capture pipeline underlies several scanning apps and handles the alignment for you. These produce accurate but raw geometry that still needs cleanup and rigging.
The other category is generative: you submit one or a few reference images and receive a finished, optimized, rigged model. Threedium works this way, producing a body with PBR textures, an automatic humanoid rig, polygon optimization, and GLB, FBX, USDZ, and VRM export. The choice is essentially between measured geometry that needs hours of work and inferred geometry that is ready to use, and for avatars intended for animation the second is usually the better trade.
How much does a custom full-body avatar commission cost?
Commission pricing for a custom full-body avatar generally runs from around 250 to 600 USD for a simple stylized character from an independent artist, 600 to 1,500 USD for a detailed realistic or heavily customized body with a full rig, and 2,000 USD and upward for studio-quality work with facial blendshapes, multiple outfits, and platform-specific optimization variants. Turnaround is typically two to six weeks depending on the artist's queue and how many revision rounds you use.
What you pay for is judgment and revision, not raw modeling hours. AI generation collapses the base mesh, texturing, and rigging into minutes, which changes where a commission makes sense: as a refinement pass on an already-generated body rather than a build from zero. Enterprise tiers with human artist refinement follow exactly that model.
What is the difference between a full-body and half-body avatar?
A half-body avatar models the head, torso, and arms and simply stops, usually fading out below the waist. It exists because 3-point tracking gives no information about the legs, so many social VR contexts historically showed floating upper bodies rather than procedurally guessed legs that would look wrong. A full-body avatar models the complete figure including hips, legs, and feet, and can therefore receive tracking data for them.
The consequences go beyond appearance. Full-body avatars need leg rigging, foot IK, ground contact handling, and proportion matching, all work a half-body avatar avoids. Half-body remains reasonable for seated experiences and web viewers, but if you intend to use trackers you need the full body.
Do I need a T-pose photo to create a full-body avatar?
No, but a pose close to A-pose makes everything downstream easier. What actually matters is that your limbs are separated from your torso and from each other, so a stance with arms held 30 to 45 degrees out and feet shoulder-width apart is ideal. A strict horizontal T-pose is uncomfortable to hold and is not required by the reconstruction itself.
A-pose is preferred for capture because of shoulder deformation: holding arms fully horizontal compresses the deltoid and raises the trapezius, so you capture a shoulder at maximum abduction rather than at rest. Capture in A-pose and let the pipeline handle A-pose normalization into whatever rest pose your target needs. Avoid arms pressed against the body, hands touching the thighs, and legs together, because those contacts fuse into single surfaces the reconstruction cannot separate.
Does full-body tracking work with any avatar rig?
No. Tracking requires a rig that conforms to the standard humanoid definition: hips as the root, an unbroken spine chain, and limb chains with exactly the expected segment counts. Non-humanoid rigs, quadrupeds, rigs with extra spliced spine bones, or rigs with unapplied non-uniform scale will either fail to map or map incorrectly and produce distorted motion.
Beyond the hierarchy, the rig needs correct bend axes with a few degrees of pre-bend at elbows and knees, applied transforms, meter scale, and proportions reasonably close to your own. T-pose rigging conventions exist precisely so that calibration has a known reference to measure against. An avatar that animates beautifully from keyframes can still track badly, because IK asks questions of a rig that playback never does.
How do I convert my full-body avatar to VRM for VR apps?
Export or import your rigged avatar into a tool with VRM support, most commonly Unity with UniVRM or Blender with the VRM add-on, then map each of your skeleton's bones onto the VRM humanoid bone slots, define expression presets, set the first-person view point, add spring bones for hair and loose clothing, fill in the license metadata, and export the .vrm file.
Three things trip people up. VRM requires meter scale and a specific coordinate convention, so apply all transforms first. The humanoid bone mapping must be complete: missing one bone, commonly the upper chest or a toe, blocks export. And VRM 0.x and VRM 1.0 are not interchangeable, so check what the target platform expects. Generating from a pipeline that already produces a normalized humanoid skeleton removes most of the mapping work, and the container tradeoffs are laid out in the file formats guide.