How Do You Make a Pokemon-Style 3D Model From an Image?
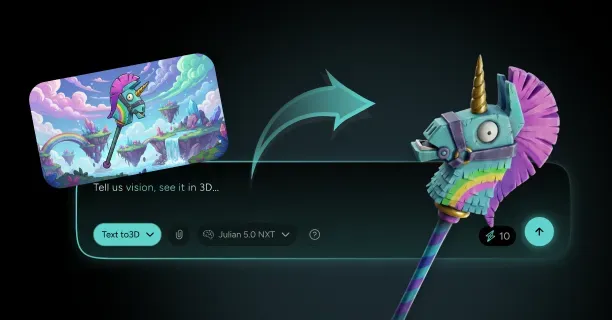
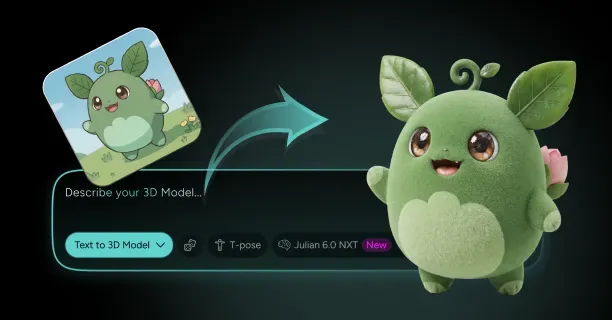
To make a pokemon 3d model from an image, upload a clean front-facing creature drawing to Threedium, prompt the Julian NXT generator for simplified shapes, oversized eyes, and a flat two-tone palette, then let it reconstruct a watertight mesh with textures baked from your reference. You clean the silhouette, swap the realistic PBR response for a cel-shaded toon material, decimate to a game-safe budget of roughly 8,000 to 15,000 triangles, and rig a short creature skeleton for idle and attack poses. Export to GLB, FBX, or USDZ and the same asset drops into Unity, Godot, an AR viewer, or a slicer for printing.
The hard part is never the geometry. It is the style. Creature-collector designs look simple because enormous amounts of detail have been deliberately removed, and image-to-3D pipelines default to adding detail back in. Everything below is about steering the generation toward less, then holding that discipline through texturing, topology, and rigging.
Pick the Right Reference: Fakemon Sheet, Fan Art, or a Pencil Sketch
Not all creature art converts equally. The best input is a flat-color reference sheet: front view, side view, ideally a three-quarter, all at the same scale, all on a plain background, all drawn with clean closed outlines. That is the format most fakemon artists already produce, and it is the format image-to-3D reconstruction handles best, because every ambiguous volume in the front view is resolved by the side view instead of guessed.
A single piece of finished fan art is the second-best input and still works well, provided the creature is not heavily foreshortened or half-buried in atmospheric effects. Dynamic action poses are the common failure: a creature lunging at the camera with one arm massively enlarged by perspective produces a mesh with one massively enlarged arm. If your only reference is an action pose, redraw the creature standing flat before you generate. Twenty minutes of tracing saves an hour of sculpt correction.
Pencil sketches convert surprisingly well because they carry clean line information, but they carry no color, so the generator invents a palette. Feed a sketch and then state colors explicitly in the prompt: "body in deep teal, belly and inner ear in cream, three orange stripes across the back." Naming the two-tone split in words is more reliable than hoping the model reads gray graphite as a design decision.
- Reference sheet, three orthographic views, flat fills: best possible input, minimal cleanup needed.
- Single front-facing illustration, plain background: reliable, expect to fix the back and tail root by hand.
- Pencil or ink sketch: good geometry, no color, describe the palette in the prompt.
- Dynamic action pose or extreme foreshortening: redraw flat first, do not generate directly.
- Rendered painting with heavy rim lighting: shadow bakes into base color, flatten the values first.
Prepare a Clean, Front-Facing Creature Image for AI Conversion
Prep is fifteen minutes and it changes the output more than any prompt phrasing. Start by isolating the creature on a pure white or transparent background at a minimum of 1500 px on the long edge, ideally 2048 px. Backgrounds with texture, gradients, or a signature watermark near the model's outline all get read as geometry. Crop tight but leave a small margin so no limb touches the canvas edge, because a clipped tail becomes a truncated tail.
Flatten your values next. Creature-collector art already uses limited shading, but fan art often adds a soft airbrush gradient across the body that the reconstruction interprets as a volume change. Reduce shading to two levels at most: base color and one shadow tone. If you have a layered file, hide the rendering layers and export just the flats plus line art. That single step is the difference between a crisp cel-shaded read and a lumpy surface you have to smooth by hand.
Finally, close every outline. Open gaps in line art, especially where an ear meets the head or a fin meets the back, cause the mesh to fuse or split unpredictably. Fill any transparent holes inside the silhouette. The creature should be one solid readable shape at thumbnail size before it ever reaches the generator, which is the same test the design itself has to pass later.
Export your reference at 2048 px with the creature occupying at least 80 percent of the frame. Small subjects in large canvases lose facial detail during reconstruction, and eyes are the one feature you cannot afford to lose on this style.
Generate the Base Mesh With Threedium's Image-to-3D Pipeline
With the reference prepared, run it through the 3D model generator and let Julian NXT build the base. The pipeline reconstructs a full closed mesh, projects and bakes PBR texture maps from the reference, and hands back an asset with usable UVs rather than a raw sculpt. For a creature this is the right starting point because you want a shape you can push, not a point cloud you have to retopologize from scratch.
Generate more than once. Image-to-3D reconstruction is probabilistic, and creature designs with unusual limb counts or large appendages benefit from three or four passes you then pick between. Judge each candidate on three things: does the head-to-body ratio match the drawing, is the silhouette closed and readable, and are the eyes positioned as separate readable shapes rather than dents. Surface polish is irrelevant at this stage since you are about to flatten it anyway.
Expect a first-pass mesh in the tens of thousands of triangles, dense and evenly distributed. That density is useful: it gives you material to sculpt into before you decimate. Keep the raw generation as your high-poly source and treat everything downstream as a derived, optimized copy, exactly as a studio would keep a sculpt separate from the shipped game-ready asset.
Prompt for the Pokemon Aesthetic: Simple Shapes, Big Eyes, Two-Tone Colors
Prompting for this style is subtractive. The generator's default instinct is realism: skin pores, muscle striation, fur detail, weathered materials. Your prompt has to actively suppress all of it. Words that work are simplified, smooth, rounded, toy-like, flat color, clean surface, and vinyl figure. Words that sabotage the look are detailed, realistic, textured, hyperrealistic, and photorealistic, even when you meant them as quality signals.
Be explicit about proportion, because proportion is the style. State the head-to-body relationship in plain numbers: "head roughly one third of total height, short stubby limbs, wide stable feet, large round eyes with a single white highlight." Naming the highlight matters. A creature-collector eye is not an eyeball, it is a graphic shape with a specific glint, and describing it directly gets you far closer than any adjective about cuteness.
Lock the palette to two or three colors in the prompt itself. "Two-tone body: primary color forest green, secondary color pale yellow on belly and inner ears, black eyes with white highlights, no other colors." Constraining color count in words prevents the generator from adding transitional hues that later fight your cel shading toon shader setup. A useful prompt for this genre reads like a spec sheet, not a description.
- Shape language: "simplified rounded forms, no anatomical detail, smooth continuous surfaces."
- Proportion: "oversized head, short thick limbs, low center of gravity, chunky silhouette."
- Face: "large glossy eyes, small simple mouth, no nostrils, no visible teeth unless specified."
- Color: "flat two-tone palette, hard edges between colors, no gradients, no grunge."
- Negative direction: "not realistic, no fur strands, no skin texture, no scratches or wear."
Check Silhouette Readability - the Rule Every Pokemon Design Passes
Fill the model solid black and shrink it to 64 pixels tall. If you can still identify the creature and tell it apart from your other designs, the silhouette works. If it collapses into an anonymous blob, the design fails regardless of how good the textures are. This is the single most important checkpoint in stylized creature design, and it is the test the entire creature-collector genre is built around, because these creatures have to be recognizable as tiny sprites, on merchandise, and in a crowded roster.
Run the test in your 3D viewport, not just on the concept. Set the material to flat black, put a white plane behind it, and orbit. A design can read perfectly from the front and vanish in profile, which is common when a creature's identity lives entirely in a chest marking rather than in its outline. Front, side, and three-quarter all need to survive the shrink.
When a silhouette fails, fix it with big moves, not small ones. Lengthen the ears, widen the tail fin, exaggerate the crest, change the leg stance from parallel to splayed. Adding surface detail never rescues a weak silhouette. The strongest creature designs typically carry one or two distinctive protrusions, an ear shape, a horn, a fin, a tail form, that do all the identification work by themselves.
Silhouette test at three distances: 256 px for the detail read, 128 px for the game-camera read, and 64 px for the icon read. Failing at 64 px is not a texture problem, it is a shape problem, and only shape changes will fix it.
Refine Stubby Limbs, Tails, Ears, and Fins Without Losing the Cute Factor
Generated meshes tend to soften exactly the features that matter. Ears round off, fins thin out, and stubby limbs drift toward realistic proportion because most of the world's 3D training data contains realistic proportion. Your refinement pass is mostly about pushing those features back past where they started. In practice that means a smooth or move brush on the limbs to restore thickness, and a firm re-establishment of the join between limb and body.
Keep limbs short and thick. A creature-collector limb is usually a tapered cylinder with a rounded cap, no elbow definition, no wrist, no visible digits unless the design calls for them. Where the arm meets the torso there should be a soft continuous blend, not a shoulder socket. The moment you can see a deltoid, the creature stops reading as a monster and starts reading as a small athlete in a costume.
Appendages need thickness for both printing and rigging. A fin or ear modeled as a paper-thin plane will vanish under toon shading, break in a slicer, and deform badly when skinned. Give every flat feature at least 2 to 3 mm of real thickness at print scale, with a rounded edge rather than a knife edge. Tails deserve extra attention because they carry a large share of the silhouette and are the most common place a generated mesh tapers to an unusable point.
The cute factor is measurable, and it is mostly geometry. Large cranium, low eye placement on the face, small mouth, short limbs, round body mass, and a wide stable base. If a refinement makes the creature look more capable or more anatomically correct, it is usually moving away from the style. Check every change against the original drawing at thumbnail size.
Texture With Flat Cel-Shaded Colors Instead of Realistic PBR Detail
The generated model arrives with a full PBR set: base color, normal, roughness, metallic. For a pokemon style 3d model you keep the base color, discard most of the rest, and rebuild the look with flat fills. Open the base color map, sample the dominant hues, and paint hard-edged regions instead of the softly blended reconstruction. The target is a texture that looks like a coloring book page: closed regions, uniform fill, crisp boundaries.
Roughness should be uniform and fairly high across the body, usually 0.6 to 0.8, so the surface reads as matte vinyl rather than wet skin. The two exceptions are eyes and any designed gloss feature such as a gem, a wet nose, or a metallic plate. Those get roughness in the 0.05 to 0.2 range so they pop as the only shiny thing on the creature. Metallic stays at 0 everywhere unless the design is explicitly a metal-type creature.
Delete or heavily reduce the normal map. Baked micro-detail is exactly what this style removes, and a normal map full of reconstruction noise will show up as dirt under a toon ramp. If you want surface breakup, put it in the base color as a deliberate marking, a stripe, a spot pattern, a color block, not as simulated bumpiness. Texture resolution of 1024 x 1024 is enough for most creature models at game scale; go to 2048 only if the creature has fine markings or you plan close-up hero renders.
Treat each map in the generated PBR set as a separate decision rather than shipping the whole stack:
- Base color: replace photographic variation, dirt, and subsurface tint with 2 to 4 flat fills and hard edges, because color blocking is the entire look.
- Roughness: drop the varied 0.3 to 0.9 range of a realistic creature for a uniform 0.6 to 0.8 body and 0.05 to 0.2 on eyes only, so the body reads matte vinyl and the eyes are the sole gloss.
- Normal: remove pores, scales, and wrinkles entirely, or hold strength under 10 percent, since micro-detail becomes visible noise once a toon threshold amplifies it.
- Metallic: keep at 0 across the creature unless the design is explicitly metal-typed, because a metallic response breaks flat shading outright.
- Ambient occlusion: skip it or keep it very light, as baked AO quietly reintroduces the soft gradients you spent the pass removing.
Keep Polycounts Game-Low: Why Official Creature Models Stay Under 15K Tris
Creature-collector games render a lot of creatures at once, on handheld and mobile hardware, with a full roster loaded in memory. That constraint produced a genre-wide habit of extremely lean models. Handheld-era creature meshes historically sat in the low thousands of triangles, and modern console entries generally land somewhere in the 8,000 to 15,000 triangle range for a battle-ready creature. That budget is not a limitation you are working around, it is part of why the style looks the way it does.
Your generated mesh will be far denser than that, so decimation is mandatory. Reduce with a quality-preserving decimation that respects UV seams, or better, retopologize the key areas by hand: the face, the limb joints, and any part that will deform. Watch the silhouette during reduction. Triangles spent on a smooth round head profile are worth more than triangles spent on a flat belly, because the round profile is what the outline shows.
Aim for even quad flow around anything that bends. A low poly creature model with four edge loops at the shoulder and three at the base of the tail will deform cleanly through a full animation set. A model with a single loop there will pinch on the first pose. Budget the polygons where the motion is, and strip them ruthlessly from static internal areas the camera never sees.
| Target | Triangle budget | Texture size | Notes |
|---|---|---|---|
| Mobile creature game | 3,000 to 8,000 | 512 or 1024 | Multiple creatures on screen, tight memory |
| PC or console indie | 8,000 to 15,000 | 1024 or 2048 | Matches modern official creature density |
| VRChat or social world avatar | Under 20,000 | 1024, single atlas | Fewer materials matters more than tris |
| AR viewer, USDZ | Under 15,000 | 1024, single material | File size drives load time on phones |
| 3D print master | 50,000 or higher | Not applicable | Density helps, watertightness is what matters |
| Hero render or cinematic | Unbounded | 2048 or 4096 | Keep the pre-decimation generation for this |
Rig a Simple Creature Skeleton for Idle, Walk, and Attack Poses
Creature rigs in this genre are short. A typical bipedal creature needs a root, hips, one or two spine bones, a neck, a head, two bones per arm, two per leg, and a two to four bone tail chain. That is roughly 18 to 30 bones total, far fewer than a humanoid character rig, because stubby limbs simply do not have the articulation to justify more. Adding bones a shape cannot use produces deformation artifacts, not better animation.
Threedium's automatic rigging handles the skeleton placement and skin weighting on generation, which removes the most tedious part of the job. Where creatures diverge from humanoids is limb count and body plan: a quadruped, a serpentine creature, or something with four wings will not accept a default biped skeleton. For those, describe the body plan in the prompt and expect to adjust the joint chain afterward, particularly at the tail root and any secondary limb pair.
Weight painting is where cute proportions bite back. Short thick limbs mean bone influence regions overlap heavily, so a bicep bone can drag the torso when it rotates. Check every joint at 90 degrees of bend before you call the rig done. Facial animation is usually simpler here than on humanoid avatars: many creature designs need only a jaw bone plus eye bones, though a face with a proper mouth can carry a full 52 ARKit blendshape set if you want expression-driven performance.
Test with three poses before export. An idle with weight settled and the tail slightly off center, a mid-stride walk with one leg forward and the opposite arm swung, and an attack pose with the torso twisted and the head thrown back. Those three cover almost every deformation problem a creature rig can have.
Export as GLB, FBX, or USDZ for Game Engines, AR, or 3D Printing
Format follows destination. GLB is the default for web, Godot, and any glTF-native pipeline: one self-contained file with mesh, materials, and animation. FBX remains the safest route into Unity and Unreal when you care about rig fidelity and animation clips. USDZ is what Apple's AR Quick Look expects, so it is the format for putting your creature on a table through an iPhone camera. Threedium exports all three, plus VRM when the target is an avatar platform.
Set scale before you export, not after. Decide on a canonical height for your creature, for instance 0.6 metres for a small starter and 1.8 metres for a fully evolved form, and build to it. Engines assume one unit equals one metre in glTF and USD; FBX defaults to centimetres and is the usual source of a creature arriving in Unity a hundred times too large. Apply all transforms, freeze scale to 1.0, and put the origin between the feet at world zero with the creature facing positive Z.
Printing is a separate export path with different rules. You want STL or a high-density OBJ, a single watertight manifold with no interior faces, no zero-thickness surfaces, and every appendage thick enough to survive both slicing and handling. Merge separate parts into one solid or plan deliberate cut points for multi-part printing. Textures do not export to STL, so any color has to come from filament changes or post-paint.
- GLB: web viewers, Godot, glTF pipelines, smallest self-contained file.
- FBX: Unity and Unreal, best rig and animation-clip fidelity.
- USDZ: iOS AR Quick Look, single material, keep under about 15,000 triangles.
- VRM: social VR and avatar platforms, expects a humanoid-compatible skeleton.
- STL: 3D printing, watertight manifold only, no textures, no materials.
Which Design Rules Define the Creature-Collector Look?
The creature-collector aesthetic is a set of enforceable constraints, not a vibe. Limited palettes, oversized graphic eyes, flat shading, smooth low-detail surfaces, exaggerated proportions, and a hard outline. Each one is a decision you can make explicitly in your model, and each one is a place a generated mesh will drift back toward realism if you are not watching. This section is the rule set, stated as things you can check.
Two-Tone Palettes: Why Fewer Colors Make a Creature Read Instantly
Almost every memorable creature-collector design runs on two dominant colors plus one accent. A body color, a contrasting belly or underside, and a small accent used for eyes, claws, or a marking. That constraint is doing real work: it makes the creature identifiable at sprite size, it makes merchandise reproduction cheap and consistent, and it stops any single design from competing with itself for attention.
Pick your two colors with meaningful value separation, not just hue separation. Two colors of the same brightness will merge into mush when the model is small or when a player has any degree of color blindness. A useful check is to desaturate your texture and confirm the body and underside still read as clearly different grays. If they do not, darken one or lighten the other until they do.
Use the accent color sparingly and with intent. Accent belongs on roughly 5 to 10 percent of the visible surface: the eyes, a chest gem, the tips of the ears, a stripe across the tail. Spread the accent across more than a quarter of the body and it stops being an accent and starts being a third body color, at which point the design gets noisier and the silhouette does less of the work.
Resist the urge to add color during texturing to fix a boring model. Boring usually means the shape is weak, and adding a fourth color hides that diagnosis rather than solving it. Go back to the silhouette instead.
Big Glossy Eyes Without Sliding Into Uncanny Detail
Eyes carry the personality and they are the easiest thing to get wrong. In this style an eye is a graphic shape: a large dark oval or circle, sometimes with a colored iris ring, plus one or two hard white highlights placed consistently. It is not a simulated eyeball with sclera, veins, wet caruncle, and a refracting cornea. The moment you add realistic ocular anatomy, a cute creature turns unsettling.
Scale matters as much as construction. Creature eyes in this genre commonly occupy 15 to 25 percent of the head width each, which is enormous relative to real animal proportion, and they sit low on the face, generally below the vertical midpoint of the head. High-set eyes read as adult and predatory. Low-set large eyes read as young and approachable, which is the entire emotional register the genre operates in.
Model the eye as slightly domed geometry or as a flat inset with an emissive-free glossy material. Two production approaches both work: a separate eye mesh with its own material, which makes the eye easy to animate and swap for expressions, or eyes painted directly into the body texture, which is cheaper and common on the lowest-poly creatures. Keep the highlight fixed in the texture rather than letting a specular calculation move it, because a highlight that slides around as the camera orbits destroys the illustrated feel.
If your creature looks creepy and you cannot say why, check the eyes first. Reduce the eye to a flat dark shape with one hard white dot and see if the problem disappears. It usually does, and the culprit is usually a realistic specular reflection.
Flat Toon Shading vs Realistic Materials: Choosing the Right Shader
A standard PBR material computes a smooth continuous falloff from lit to unlit. A cel shading toon shader takes that same lighting value and quantizes it into two or three hard bands, so the creature reads as painted regions rather than a photographed object. That quantization is what makes a 3D creature look like it came out of the same design language as the 2D art.
Two bands is the classic setting: base color and one shadow tone at roughly 75 to 85 percent of the base brightness, with a hard threshold between them. Three bands buys you a subtle mid-tone and works for larger, more detailed evolved forms. Beyond three bands you are back to a gradient and you have lost the effect. Keep the shadow tone hue-shifted slightly toward blue or purple rather than simply darker, which is a painting convention that keeps shadows from looking muddy.
Engine support differs and it is worth knowing before you commit. Unity's Universal Render Pipeline has a toon-capable shader graph, Unreal handles it through a post-process or custom material setup, Godot exposes a toon lighting mode directly, and Blender's Eevee does it with a shader-to-RGB node feeding a color ramp. glTF and GLB do not carry custom shaders, so a GLB export will arrive with flat base color and the receiving engine has to apply the toon material itself. Plan for that: bake your intent into the base color so the model still reads acceptably with a default material.
| Approach | How it works | Best for | Cost |
|---|---|---|---|
| Two-band cel shader | Lighting quantized to lit and shadow | Most creature designs, closest to source art | Very low |
| Three-band cel shader | Adds one mid-tone before shadow | Larger evolved forms with more volume | Low |
| Ramp texture shading | Lighting value samples a gradient strip | Art-directed per-creature control | Low, one extra texture |
| Fully unlit flat color | No lighting response at all | Sprite-like, mobile, guaranteed consistency | Lowest |
| Standard PBR | Continuous physical falloff | Not this style, use for realistic creatures | Moderate |
Smooth, Low-Detail Surfaces: No Pores, No Fur Cards, No Noise
The surface of a creature-collector model is deliberately empty. No skin pores, no scale tiling, no fur cards, no fabric weave, no procedural noise, no edge wear. Everything that a realistic creature artist spends days adding, you spend an hour removing. What replaces detail is clean form: a well-shaped head, a confident curve down the back, a crisp division between body color and belly color.
Fur is the biggest trap. A furry creature in this style is not modeled with strands or hair cards, it is modeled as a smooth solid with fur suggested by shape alone: a tuft that is a solid geometric wedge, a mane that is a ring of distinct pointed forms, a tail that is a single tapered volume rather than a bundle. Look at how a vinyl figure represents fur and copy that, because vinyl and this style solve the same problem the same way.
When you inspect a generated mesh, hunt for reconstruction artifacts specifically. Small dents around the eyes, a slightly rippled back, faint lumps where the reference had shading. Under a smooth PBR material these read as subtle realism. Under a hard toon threshold they read as blotches, because the shader amplifies any surface variation into a visible band edge. Aggressive smoothing on the body, with sharp definition preserved only at designed feature boundaries, is the correct treatment.
Exaggerated Head-to-Body Ratios and Chunky Proportions
Proportion is what separates a creature-collector design from a generic cartoon animal. Basic-stage creatures typically run a head-to-body ratio between 1:2 and 1:3, meaning the head is a third to a half of total height. Limbs are short relative to torso, feet are wide, and the mass sits low. The whole figure reads as stable, rounded, and a little top-heavy, which is exactly the geometry that triggers a protective, affectionate response.
Evolved forms lengthen out. A middle stage often shifts to roughly 1:4 and a final stage to 1:5 or beyond, with longer limbs, a narrower waist, more angular features, and a raised center of gravity. That progression from round and stable to tall and angular is one of the most consistent design conventions in the genre, and it is a strong template for anyone designing an original line.
When you refine a generated mesh, measure rather than eyeball. Drop a reference cube at the creature's total height, mark thirds, and check where the chin lands. Reconstruction pipelines pull proportions toward statistical averages, so a creature that started at 1:2.5 in your drawing frequently emerges at 1:3.5, which is not obviously wrong until you compare it to the original and the cuteness has quietly drained out. Push the head back up in scale and the design snaps back into place.
Outline Effects: Inverted Hull vs Shader-Based Cartoon Edges
The dark outline around a creature is the last piece of the illustrated look, and there are two practical ways to get it. The inverted hull method duplicates the mesh, flips the normals, scales it slightly outward, and assigns a solid dark unlit material with front-face culling. The result is a clean constant outline that works in any engine, costs one extra draw call and a second copy of the geometry, and is the approach most anime-styled games ship with.
The shader-based method detects edges in screen space, usually by comparing depth and normal buffers, and draws a line where they change sharply. It costs no extra geometry, catches interior edges the hull method misses, and lets you vary line weight by distance. The trade-off is that it lives in a post-process pass, so it affects the whole frame and needs engine-specific setup that does not travel with your exported file.
For a portable creature asset, inverted hull is usually the better bet, because it is baked into the geometry and survives export to GLB or FBX intact. Keep the offset small, on the order of 1 to 2 percent of the model's height, and use a dark desaturated version of the body color rather than pure black, which tends to look harsh on light-colored creatures. Remember to exclude the hull copy from your triangle budget accounting when you compare against official model densities, since it effectively doubles the count.
- Inverted hull: portable, per-object control, doubles geometry, misses interior lines.
- Screen-space post-process: no extra geometry, catches interior edges, engine-specific.
- Texture-painted lines: zero runtime cost, fully art-directed, fixed to the surface.
- No outline: valid for softer designs, relies entirely on strong color separation.
Type Cues: Making a Fire, Water, or Grass Creature Obvious at a Glance
Elemental identity in this genre is communicated through a consistent visual vocabulary that players learn in minutes and then read automatically. Fire creatures get warm reds and oranges, flame-shaped protrusions, pointed angular forms, and often a visible flame element. Water creatures get blues and cyans, smooth streamlined bodies, fins, and rounded droplet forms. Grass creatures get greens with a contrasting cream or brown, leaf shapes, petals, and bulbs or vines integrated into the body.
Deliver type through shape first, color second. A creature that is merely painted orange reads as an orange creature, not a fire creature. Give it a flame-shaped tail tip, a crest that resembles rising heat, or ear shapes that echo a fire's licking edge, and the type becomes legible in silhouette, which is where the genre wants all its information to live anyway. This is also what makes shiny recolors possible later: if type is carried by shape, a palette swap does not destroy readability.
Avoid the trademarked shorthand. Official games use specific type icons and symbols that are protected marks, and putting them on your creature converts an original design into an infringement risk for no design benefit. Build your own elemental vocabulary instead: your own flame shape, your own leaf silhouette, your own way of showing electricity. It is more distinctive and it keeps the model safe to publish and sell.
Evolution-Line Thinking: Designing a Creature That Can Grow in Stages
Designing a single creature is easier than designing a line, and a line is what makes original creatures feel like they belong to a real world. The convention is three stages, with one or two motifs carried through all of them. A stage-one design with a leaf on its head, a stage-two with a larger leaf and a sprouting stem, a stage-three with a full canopy. The motif is the thread; everything else can change.
Plan the progression along four axes: proportion (round to tall), complexity (few forms to many), color (light and soft to deep and saturated), and attitude (open and passive to angular and assertive). Keep one anchor constant, usually an eye shape, a marking, or a distinctive appendage, so players can see the family resemblance without being told.
From a production standpoint, an evolution line is where AI generation compounds. Once the stage-one model exists you can generate the later stages from new reference art while reusing the same rig structure, the same material setup, the same texture conventions, and the same export presets. A three-stage line built by hand is three full sculpts; built through an image-to-3D pipeline it is three generations plus a shared refinement workflow, which is what makes a full original roster feasible for a solo developer at all.
Shiny Variants: Building Recolor-Friendly Texture Maps From Day One
Alternate-color variants are a genre staple and they are almost free if you plan for them, expensive if you do not. The requirement is a texture built from discrete flat color regions rather than blended paint. If your base color map is five solid fills with hard boundaries, a recolor is five hue adjustments and takes minutes. If it is a painted map with soft transitions and baked lighting, a recolor is a repaint.
The cleanest production method is a mask-driven setup. Author a single ID map where each design region gets a flat, unique, fully saturated color, red for body, green for belly, blue for accent, and so on. Your material then looks up each region and assigns a color from a small palette. Swapping variants means swapping the palette, not the texture, and the same ID map serves the base creature, the shiny, seasonal variants, and any per-player customization you add later.
Follow the genre's own recolor logic when picking variant palettes. Effective alternates either shift hue substantially while keeping the same value relationships, so the silhouette and readability survive, or invert the relationship between body and accent for a striking contrast. Avoid variants that reduce value separation, since a shiny that reads as a single flat mass at sprite size defeats the purpose of having a recognizable design in the first place.
Sequence matters here more than technique. Build the ID mask before you build the final texture, not after: retrofitting region masks onto an already painted map means re-authoring UV regions by hand, and on a creature with overlapping color areas that can take longer than the original texturing pass took in the first place.
Can You Turn a Fakemon Design Into a 3D Model?
Yes, and it is one of the strongest use cases for image-to-3D generation, because fakemon creators already produce exactly the reference format the pipeline wants: clean, flat-colored, front-facing creature sheets. The obstacles are practical rather than technical. Reference quality, cost against commissioning an artist, intellectual property discipline, and where the finished model actually goes.
What Your 2D Fakemon Reference Sheet Needs Before Going 3D
A sheet that converts well is not the same as a sheet that looks good on social media. You need a front view at minimum, a side view strongly preferred, and any detail callouts for features the main views hide: the underside of a tail, the inside of a mouth, the pattern on a back. Draw all views at identical scale and align them on a shared baseline, so the generator and any human artist can cross-reference heights directly.
Keep the sheet flat. Line art plus flat fills, no rendering, no gradients, no drop shadows, no background scene, no decorative border. Put the character on white or transparent. If you want to keep your rendered showcase version, that is fine, just export a separate production version with the rendering turned off. This is the same file discipline a professional character artist uses when handing a design to a modeler.
Add written notes to the sheet or to your prompt covering anything the drawing cannot show. Approximate real-world height, which parts are hard and which are soft, whether an appendage is rigid or floppy, what material a chest gem is meant to be, and which features must survive simplification. A fakemon 3d model generated from a sheet with those notes lands substantially closer to intent than one generated from art alone.
- Front view, orthographic, symmetric, on a clean background.
- Side view at matching scale on a shared baseline.
- Back view or rear detail if the design has markings behind.
- Flat fills only, no rendering, no gradients, no cast shadows.
- Written notes: real-world height, material intent, rigid versus soft parts.
Fakemon Commissions Run $75-$150: Where AI Generation Fits In
Commissioning a 3D artist to turn a fakemon design into a model typically runs somewhere around $75 to $150 for a straightforward untextured or lightly textured creature, with rigged and animation-ready versions commonly landing in the $200 to $500 range depending on complexity and the artist's experience. Turnaround is usually one to three weeks, longer during busy periods, and revisions beyond an agreed number are billed separately. Those numbers are entirely reasonable for the labor involved, which is why they exist.
The problem is not the price of one model, it is the price of a roster. A creature-collector project needs dozens of creatures, often organized into three-stage lines, which turns a fair per-model rate into a budget most independent developers and nearly all hobbyists cannot reach. This is the specific gap AI generation fills: it makes the first version of every creature cheap enough that you can build a whole roster and find out which designs actually work before committing money to any of them.
The sensible workflow is hybrid rather than either-or. Generate every creature in your line, playtest with the generated assets, identify the handful that carry the project, and then invest human artist time in those. Threedium's enterprise tiers include refinement by professional 3D artists on top of the generated base, which is a middle path: the generation does the volume work and a human handles the polish where polish pays off. Working as an ai pokemon generator for prototyping and reserving commissions for hero assets is how most small teams should be allocating budget.
| Route | Typical cost per creature | Turnaround | Best for |
|---|---|---|---|
| AI generation | Subscription or credit based | Minutes to a working session | Full rosters, prototyping, iteration |
| Freelance commission, static | $75 to $150 | 1 to 3 weeks | A single showcase piece |
| Freelance commission, rigged | $200 to $500 | 2 to 5 weeks | Hero creature with animation |
| DIY Blender sculpting | Free software, 10 to 40 hours | Days to weeks per creature | Learning, total creative control |
| Generation plus artist refinement | Mid range | Days | Shipping quality at roster scale |
Staying IP-Safe: Original Style Homage vs Ripping Game Assets
This is the section that determines whether your work is publishable, and it deserves precision. Pokemon is the intellectual property of Nintendo, Creatures Inc., and Game Freak, administered through The Pokemon Company. The individual creature designs are protected by copyright, the names and logos are registered trademarks, and the rights holders are historically active about enforcement. None of what follows is legal advice, but the practical boundaries are well understood by anyone who has published fan work at scale.
The line that matters most is between style and expression. A visual style, flat cel shading, two-tone palettes, big eyes, chunky proportions, is not itself protectable. Specific creature designs are. You can build a creature that unmistakably belongs to the same design language and sell it. You cannot build a recognizable existing creature, rename it, and sell that. If a reasonable player would look at your model and name an official creature, you have crossed the line regardless of how much you changed the colors.
Ripped game assets are a separate and much clearer problem. Extracting model files from a purchased game and using them as a base, a reference for retopology, or a source for textures is copyright infringement in its most direct form, and it is trivially detectable because the topology, UV layout, and bone naming are fingerprints. Do not use asset rips as generation input, do not use them as a proportion reference you trace, and do not redistribute them under any framing. Build from your own drawings.
Trademark is the second trap and it catches people who got the creature design right. Avoid official type symbols, the Poke Ball geometry and its distinctive two-tone sphere with a center band and button, official region names, the franchise name and logo in your product titles or file names, and any official creature names including near-miss spellings. Name your creature something entirely original. Describe your project as a creature-collector or monster-taming design, not as a Pokemon model, on any page where you are selling something.
Practical rules that keep a project clean:
- Use original species names with no phonetic resemblance to official creatures.
- Never import, trace, retopologize, or redistribute extracted game assets.
- Avoid trademarked type symbols, capture-device geometry, region names, and logos.
- Do not use the franchise name in product titles, store listings, or file names you distribute.
- Keep dated sketches and layered source files proving independent creation of every design.
- Treat fan work of existing creatures as non-commercial and personal, never as inventory.
Non-commercial fan work of existing creatures occupies a tolerated gray zone: widely made, occasionally taken down, never actually licensed. If you are modeling a beloved official creature for your own shelf, you are in that zone and the risk is a takedown notice. The moment money, ad revenue, marketplace listings, or a commercial game is involved, the calculus changes completely, and the only durable answer is original designs in a shared style.
The single most reliable safety test: could you describe your creature to someone in full detail without ever mentioning an official creature by name? If the description only makes sense as "like that one but blue," redesign it before you publish.
Where Fakemon Creators Share Work: Sketchfab, DeviantArt, and TikTok
The fakemon community is large and spread across platforms with different norms. Sketchfab is where 3D versions live, with embedded viewers that let people orbit your creature in a browser, and it is the closest thing to a portfolio standard for creature modelers. Upload a GLB with a clean turntable-friendly orientation, a single material, and a triangle count under about 20,000 so the web viewer stays responsive on phones.
DeviantArt remains the deepest archive of 2D fakemon design work and is where most reference sheets originate. It is also where you find collaborators: many fakemon illustrators are actively interested in seeing their designs realized in 3D and will discuss terms. If you generate a model from someone else's fakemon design, get their permission first and credit them prominently. Community goodwill in this space is built on that courtesy, and losing it is far more costly than any single model.
TikTok, YouTube Shorts, and Instagram Reels reward the transformation itself. A fifteen-second clip showing a drawing on the left and a rotating 3D creature on the right performs consistently, because the before-and-after is legible without narration. Reddit communities focused on fakemon and creature design are useful for critique but tend to be sensitive about AI-assisted workflows, so read each community's rules and disclose your process honestly rather than discovering the norm after a post is removed.
Using Your Creature Model in Indie Games, VRChat Worlds, or Prints
In an indie game, your creature needs to survive the actual build. Confirm the triangle count against your platform budget, atlas your textures so each creature costs one material and one draw call, and check that the rig imports with correct bone orientation. Test a full animation cycle in engine before you build twenty more creatures on the same template, because a rig problem discovered at creature one is an hour and at creature twenty is a week. The game asset generation workflow is built around exactly this loop.
Social VR platforms have their own constraints. VRChat and similar worlds enforce performance rankings based on polygon count, material count, and skinned mesh count, and a creature avatar that blows past those limits gets hidden by default for other users. Keep the creature under roughly 20,000 triangles, use one or two materials total, and export to VRM if the platform expects it. Non-humanoid creature avatars often need a humanoid-compatible skeleton mapped underneath, which is worth planning for at rig time rather than retrofitting.
Printing is the most forgiving destination for geometry and the least forgiving for structure. A 3d printed pokemon stl needs to be watertight and manifold, with no internal faces, no non-manifold edges, and no zero-thickness geometry. Check minimum feature thickness against your printer: roughly 1.5 to 2 mm for FDM and 0.8 to 1 mm for resin. Thin ears, antennae, and tail tips are the usual casualties. Thicken them, or split the creature into parts with locating pegs and print separately. Add a small base or plan supports for any overhang past 45 degrees.
- Game engine: atlas textures, one material per creature, verify rig import orientation.
- Social VR: under 20,000 triangles, minimal materials, VRM export where required.
- AR viewer: USDZ, single material, real-world scale set correctly before export.
- 3D print: watertight STL, 1.5 mm minimum FDM thickness, split fragile appendages.
Borrowing Creature Design Theory From Monster Modeling
The deeper theory behind creature silhouettes, invented anatomy, and animal mash-up logic applies here but belongs to a different page. For that groundwork, see the guide to monster 3D model creation, then bring those principles back and simplify them hard for this style.
Frequently Asked Questions About Pokemon 3D Models
Short answers to the questions that come up most often when creators start turning creature art into 3D, covering legality, cost, software, technical budgets, and what AI generation can and cannot do for you.
Is it legal to make and sell Pokemon 3D models?
Selling models of actual Pokemon is not legal. The creature designs are copyrighted and the names and logos are trademarked by Nintendo, Creatures Inc., and Game Freak, and commercial use without a license is infringement. Making a model of an existing creature for personal, non-commercial use sits in a tolerated gray area where takedown notices are the realistic worst case. Original creatures designed in a similar visual style are yours to sell, because style is not protectable, only specific expression is.
The practical version of this rule: if your listing needs to mention the franchise to make sense, do not list it. Build original species, give them original names, avoid trademarked symbols and the capture-device geometry, and describe the work as creature-collector or monster-taming design. That reframing costs nothing creatively and moves your project from unpublishable to sellable. This is general information rather than legal advice, so consult a qualified attorney before building a commercial product on the boundary.
How do I make my own Pokemon-style 3D model for free?
The fully free route is Blender, which costs nothing and does everything: sculpting, retopology, UV unwrapping, texture painting, rigging, animation, toon shading through the shader-to-RGB node, and export to every format you need. Expect a genuine learning curve of a few weeks to reach a competent first creature, and roughly 10 to 40 hours per model after that depending on complexity and how much animation you need.
Most AI platforms including Threedium offer free tiers or trial credits, which is enough to test whether image-to-3D suits your art before you spend anything. The realistic free workflow to make your own pokemon 3d model is a combination: generate a base to skip the sculpting stage, then use Blender for cleanup, cel shader setup, and export. That splits the work along the lines where each tool is genuinely strongest.
How much does a fakemon 3D model commission cost?
Independent artists commonly charge around $75 to $150 for a static textured creature model and $200 to $500 for a rigged, animation-ready version, with turnaround usually running one to three weeks. Highly detailed designs, full evolution lines, or print-prepared files with hollowing and support planning push higher. Rates vary widely with the artist's experience and region, so treat these as a market range rather than a fixed price.
Those rates are fair for the hours involved, which is exactly why a full roster is unaffordable at commission pricing. Most creators building more than a handful of creatures use generation for the bulk of the line and reserve commissions for the two or three designs that carry the project's identity.
What software do people use to make Pokemon-style models?
Blender dominates the hobbyist and indie space because it is free and covers the entire pipeline, and pokemon blender sculpting tutorials are the most common entry point for anyone learning this style. ZBrush is the professional sculpting standard, Maya and 3ds Max are the studio norms for rigging and animation, and Substance 3D Painter is the common texturing tool though its strengths lean toward realistic materials rather than flat fills.
For this specific style, tool choice matters less than usual. Flat colors and simple forms do not demand a high-end sculpting package, so the free option is genuinely sufficient. A practical modern setup is an AI generator to produce the base mesh, Blender for refinement and the cel shading toon shader, and the target game engine for final look development.
How many polygons does a Pokemon game model have?
Handheld-era creature models were extremely lean, often in the low thousands of triangles, and modern console-generation creature models generally sit somewhere in the 8,000 to 15,000 triangle range, with textures typically at 512 or 1024 pixels. Those budgets exist because these games load and render many creatures simultaneously on modest hardware.
For your own project, match your platform rather than the franchise. Mobile wants 3,000 to 8,000 triangles per creature, PC and console indie can comfortably run 8,000 to 15,000, and web or AR viewers should stay under about 15,000 for load-time reasons. If you use an inverted hull outline, remember it roughly doubles the rendered triangle count.
Can I 3D print my Pokemon-style creature model?
Yes, and this style prints unusually well because smooth simplified forms have no fine detail to lose at typical layer heights. Export STL or a dense OBJ, confirm the mesh is watertight and manifold with no internal geometry, and check that every appendage clears your printer's minimum feature size: roughly 1.5 to 2 mm for FDM and 0.8 to 1 mm for resin.
Thin ears, antennae, whiskers, and tapered tail tips are the parts that fail. Thicken them, or split the model into separate pieces with alignment pegs and glue after printing. Add a base for stability, plan supports for overhangs beyond 45 degrees, and remember that STL carries no color, so a painted result means either filament swaps or hand painting after the print. Keep printed creatures of existing franchise designs personal rather than for sale.
Can AI turn my fakemon drawing into a 3D model?
Yes. A clean front-facing drawing with flat colors on a plain background is close to ideal input for image-to-3D reconstruction, and a fakemon maker workflow built on Threedium's Julian NXT pipeline will return a textured, riggable mesh in a single working session. Add a side view and the accuracy improves substantially, because the generator no longer has to invent depth.
What you should expect is a strong base, not a finished asset. Plan on a refinement pass to restore stubby proportions the reconstruction softened, replace the PBR materials with flat cel shading, decimate to your triangle budget, and verify the rig deforms cleanly. That pass is typically an hour or two rather than the days a sculpt from scratch would take, which is the actual value on offer.