How Do You Make Monster 3D Models From Images?
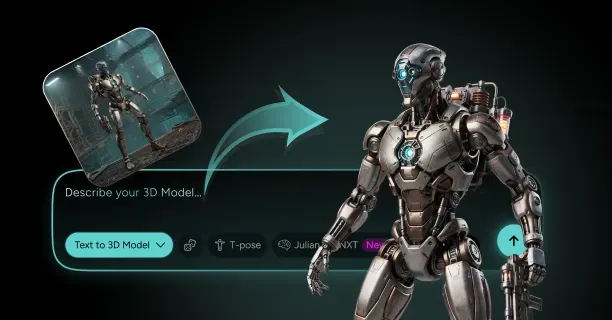
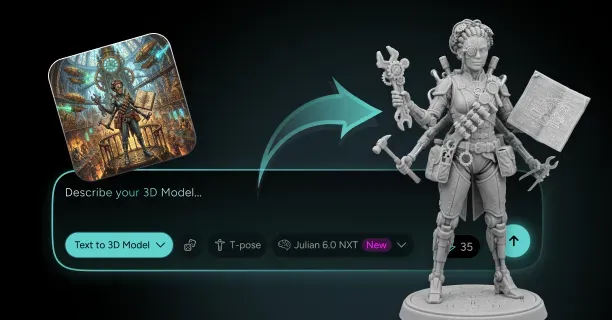
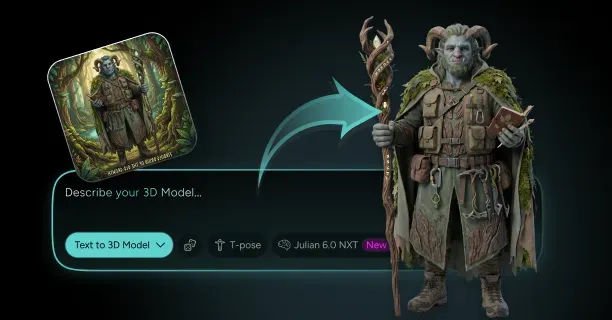
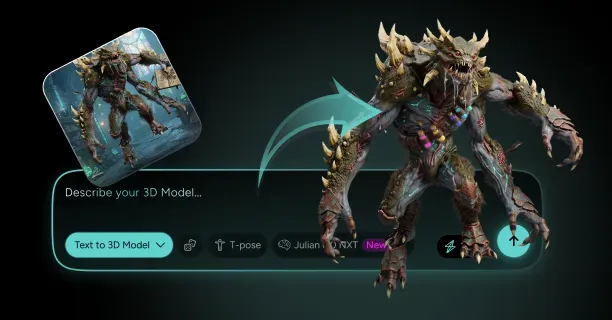
To make monster 3D models from images, upload your creature concept art or photo reference to an AI monster 3d model maker like Threedium, write a prompt that locks the body plan and limb count, and let the Julian NXT generator reconstruct a full mesh with PBR textures baked from your reference. You then inspect the topology around the jaw and any extra limbs, rig the skeleton to match the creature's actual anatomy rather than a default biped, and export to GLB, FBX, or USDZ with the rig intact. A first usable pass takes a single working session instead of the two to six weeks a commissioned creature sculpt typically runs.
What follows is the working pipeline, not a feature list. Creatures break differently than humanoids do: the silhouette carries more of the design load, the anatomy is invented, and the skeleton rarely matches anything a standard auto-rigger expects. This page covers all of it, from picking references to the final engine check.
Choose Reference Images Where the Monster Reads From Every Angle
The single most useful input is a set of images of the same creature that agree with each other. A front-facing full-body view is the highest-value single image, a three-quarter view is second, and anything showing the back, the tail root, or the underside of a jaw resolves geometry the generator would otherwise have to invent. Concept sheets that artists call turnarounds, three or four orthographic views on one canvas, are the ideal input and the format most professional creature designers already work in.
Resolution beats polish. A clean 2000 px flat-value drawing outperforms a 900 px heavily rendered painting, because dramatic rim lighting bakes shadow into what the reconstruction reads as base color. If your art is lit from behind with the creature mostly in shadow, say so in the prompt and describe the true colors in words. Monster art in particular tends to be atmospheric, which is exactly the lighting condition that misleads image-to-3D reconstruction.
Photo reference is legitimate and underused. If your creature is an anatomy mash-up, feed it the actual source animals: a crocodile skull photo, a mantis foreleg macro, a bat wing membrane close-up. You can combine those with a single concept drawing that establishes the overall proportion, and the result reads far more grounded than concept art alone. This is the fastest route from monster concept art to 3d when your concept exists mostly as a mood rather than a finished illustration.
- Best case: a 3 to 4 view turnaround at 2000 px or higher, neutral lighting, flat or lightly rendered values.
- Good: one full-body front view plus one three-quarter, plus close-ups of the head and any weird limb.
- Workable: a single strong illustration, plus a written description of everything the image hides.
- Weak: tiny thumbnails, in-game screenshots at low resolution, heavily posed art where limbs cross the body and occlude each other.
Upload Your Creature Concept Art or Photo Reference to Threedium
Uploading is where you set the terms of the reconstruction. Load every reference you have into a single generation rather than running separate jobs per angle, because the platform's 3D model generation pipeline resolves conflicts between views by cross-referencing them. Two images that disagree about how many horns the creature has will produce an average that satisfies neither, so cull references that contradict the design before you upload rather than after.
Crop deliberately. If your reference is a full illustration with a rider, a background, and environmental effects, crop to the creature or the reconstruction will attempt to interpret the smoke plume as geometry. Remove overlaid VFX, energy glows, and motion blur wherever you can. A flat background of any single color is preferable to a painted scene.
Strip alpha channels and drop shadows before upload. A transparent PNG with a soft ground shadow baked into the alpha frequently produces a phantom slab of geometry under the creature's feet that you then have to delete by hand.
Write a Prompt That Locks In Body Plan, Limb Count, and Menace
Creature prompts fail differently than character prompts. A humanoid prompt can be vague about anatomy because the model has a strong prior for two arms and two legs. A creature prompt cannot. State the body plan explicitly and numerically: "quadruped, six limbs total, four walking legs plus two forward-facing grasping arms, single long prehensile tail, no wings." Count everything. Ambiguity here is the number one cause of a generated creature 3d model arriving with five legs, or with a pair of arms fused into the ribcage.
Describe the head as its own object. Skull shape, jaw type, whether the mouth is a hinged mandible or a splitting radial maw, eye count and placement, horn count and direction. "Elongated crocodilian skull, lower jaw splits into two lateral mandibles, six eyes in two rows of three above the snout, four backswept horns" gives a reconstruction something to hold onto. "Scary monster head" does not.
Menace is a proportion problem, not an adjective. Rather than asking for "terrifying," specify the cues that read as threat: forward-set predatory eyes, an oversized head relative to the torso, hunched shoulders that sit above the skull line, exaggerated forelimb mass, digitigrade rear legs coiled under the hips. Those are geometric instructions the generator can actually satisfy, and they are the same cues creature designers use deliberately.
Finally, name the intended use. "Game-ready enemy asset, mid-poly, symmetric enough to mirror" produces different output than "cinematic hero creature, dense detail." The character generation pipeline adjusts density and topology strategy based on that stated target.
Generate the Base Creature Mesh and Compare Silhouette Variations
Generate more than one candidate. Any ai monster generator is sampling from a distribution, and creature designs sit in a much wider region of that distribution than human characters do, which means variance between runs is high. Three to five generations from the same prompt and reference set will give you meaningfully different interpretations of the same brief, and the useful comparison is not detail quality but silhouette.
Judge silhouette the way a creature art director does: fill each candidate to solid black and look at it at roughly 100 pixels tall. If two candidates are indistinguishable as black shapes, they are the same design regardless of how different the surface detail is. Pick the one whose black shape is most legible, most asymmetric in an intentional way, and most distinct from the other enemies in your project. This is the entire premise of creature design silhouette thinking, and it costs you two minutes.
Also check proportional consistency across the candidate set. If four out of five generations gave the creature a much smaller head than your concept art, your prompt is underspecifying head scale, and you should fix the prompt rather than fixing the mesh. Regenerating with a corrected prompt is cheaper than sculpting a head back up to size.
Refine Horns, Fangs, Claws, and Skin Detail in the Editor
Hard, pointed features are where generated creature meshes most reliably need work. Horns, fangs, claws, spines, and bone plates are high-frequency shapes attached to soft low-frequency bodies, and reconstruction tends to soften the transition. The fix is straightforward: sharpen the tips, tighten the base where the horn meets the skull, and make sure the horn actually intersects the skull volume rather than floating a millimeter off it. Floating horns are invisible in a static render and obvious the moment the head turns.
Fangs need real length and real occlusion. Model the tooth root as if it continues into the gum, because when the jaw opens in an animation, a tooth that was modeled as a surface-mounted cone will visibly pop out of the gum line. Give the upper and lower teeth a deliberate interlock pattern instead of a uniform sawblade, which is both more anatomically credible and cheaper in polygons.
Skin detail is where you decide the creature's material story. Decide up front whether the body is a single surface treatment or a layered one: bare hide on the flanks, keratin plates on the shoulders and spine, wet membrane in the mouth and around the eyes. Layered surfaces read as biological. A creature covered uniformly in one scale pattern from snout to tail tip reads as a texture swatch wrapped around a shape.
Watch scale on the small stuff. Claws that look right in a close-up are frequently 2 to 3 times too large when the creature is seen at gameplay distance. Check every hard detail against a reference human silhouette at your creature's intended height before you commit.
Inspect the Generated Topology Around Extra Limbs and the Jaw
Two regions carry almost all the topology risk on a creature: limb junctions and the jaw hinge. Everywhere a limb leaves the torso, you want a clean radial loop wrapping the shoulder or hip socket. On a six-limbed creature, the mid-torso limb pair frequently generates as a surface bump rather than an articulated joint, because there is no biological precedent for the reconstruction to lean on. Look for whether the mesh actually has geometry that can bend there.
The jaw hinge needs at least two to three edge loops running along the mandible line and a loop wrapping the corner of the mouth. Without them, opening the jaw past about 30 degrees tears the cheek. If the mouth is modeled shut with the lips fused, decide immediately whether this creature ever opens its mouth. If it roars, bites, or breathes anything, you need interior geometry: a tongue, a throat cavity that closes off, and a defined gum line. Adding that later means redoing the head UVs.
Run a basic mesh audit before you go further. Check for non-manifold edges, flipped normals on any part that was generated as a separate shell, interior faces left inside limb intersections, and n-gons sitting on a deformation area. Good creature topology is not about a perfect all-quad mesh; it is about quads in the places that bend and no hidden garbage anywhere.
- Limb sockets: radial loops around each shoulder and hip, including on non-standard limb pairs.
- Jaw: 2 to 3 loops along the mandible, one wrapping the mouth corner, interior mouth geometry if it ever opens.
- Tail and neck: evenly spaced loops along the length, roughly one per intended bone.
- Digits: at least two loops per finger or toe segment if the claws ever flex.
- Everywhere else: triangles are fine; do not spend polygons quad-ifying a rigid bone plate.
Texture Scales, Slime, Fur, and Battle Damage With PBR Maps
Creature surfaces live or die on the roughness map. Base color does less work than most people expect, because the difference between a dry keratin horn, a wet mucous membrane, and a dusty hide is almost entirely a roughness difference. Push the range hard: horn and claw around 0.25 to 0.35 roughness, dry hide around 0.6 to 0.8, eyes and the interior of the mouth down near 0.1. A creature textured with a flat 0.5 roughness across the whole body reads as plastic no matter how good the color is.
Scales, plates, and pores belong in the normal and height maps rather than in geometry. A tiled scale pattern driven through the normal map, masked so it only appears on the flanks and the tail, costs nothing and survives at any distance. Painting scale shapes into the base color instead produces a creature that looks scaly in a screenshot and completely flat under real lighting.
Battle damage is what sells a creature as a living thing that exists in a world. Chipped horn tips, a torn ear, scar tissue that reads as a smooth low-roughness patch on otherwise rough hide, discoloration around old wounds. Keep it asymmetric and keep it sparse: three or four deliberate marks read as history, while damage everywhere reads as noise. Subsurface scattering, where your engine supports it, is worth enabling on ears, membranes, and thin fins.
Rig the Creature Skeleton for Its Body Plan: Biped, Quadruped, or Multi-Limb
Rigging is the step where creature work diverges hardest from character work. Standard auto-riggers are trained on humanoids and will attempt to map a six-limbed insectoid onto a biped hierarchy, which produces a skeleton where two of the legs are parented to the spine as decorative appendages. The correct approach is to choose the skeleton template that matches the body plan first, then let the automatic rigging system place and weight the joints inside that template.
Bipedal monsters, meaning the ogre and troll family, can use a humanoid hierarchy with modifications: extra spine joints for a hunched posture, a wider clavicle span, and usually a tail chain. Quadrupeds need a distinct hierarchy with a chest and pelvis that move semi-independently, front limbs attached through a floating scapula rather than a rigid clavicle, and digitigrade rear legs with an extra joint. Multi-limb and serpentine plans need custom hierarchies outright.
Keep the root at the ground plane between the load-bearing feet, with a separate hip or pelvis control above it. Animators need to move the whole creature without moving the pelvis, and they need to drop the pelvis without the creature sinking through the floor. Getting this wrong is the single most common complaint about a rigged monster 3d model that otherwise looks perfect.
| Body plan | Typical bone count | Key structural requirement | Common failure |
|---|---|---|---|
| Bipedal humanoid monster | 60 to 90 | Extra spine joints for hunch, tail chain | Shoulders clip into an oversized head |
| Quadruped | 70 to 110 | Floating scapula, digitigrade rear legs | Front legs pivot from a fixed clavicle |
| Multi-limb (6 or 8 limbs) | 90 to 150 | Independent limb roots on the thorax | Mid limbs parented to spine, not sockets |
| Serpentine / no limbs | 40 to 80 | Even joint spacing, spline or FK chain | Uneven spacing causes kinking mid-body |
| Amorphous / blob | 20 to 50 plus blendshapes | Shape keys carry most deformation | Overbuilt skeleton fights the shape keys |
Test Idle, Lunge, and Roar Poses Before You Commit to Export
Three test poses catch nearly every rigging defect that matters. The first is a neutral idle with weight settled onto the legs and the head slightly lowered, which reveals whether the rest pose is usable at all and whether the creature's center of mass sits somewhere plausible. The second is a full lunge with the body extended, one limb fully forward and one fully back, which stresses every hip and shoulder to the limit of its intended range.
The third is a roar: jaw open to maximum, neck extended, chest expanded. This is where creature rigs break most spectacularly. Watch for the cheek tearing at the mouth corner, teeth pushing through the lips, the tongue intersecting the palate, and the throat opening into a hole with no interior geometry behind it. If the creature has mandibles, check whether they collide with each other at full spread. Push each pose 20 percent past what your animations will actually use, and test the tail through a full S-curve.
Test poses at the creature's real in-game scale, not at unit scale in the viewport. Deformation problems that look like minor pinching on a 1-unit-tall preview are enormous, visible seams on a 6-meter boss standing in front of the camera.
Export Your Monster as GLB, FBX, or USDZ With the Creature Rig Intact
Pick the format from the destination rather than from habit. FBX is the default for Unity and Unreal pipelines and carries complex skeletons, multiple UV sets, and animation clips reliably. GLB is the right choice for web, WebXR, and anything running through three.js or a real-time viewer, and it is the most portable single-file option. USDZ exists for Apple AR Quick Look and iOS-native AR placement.
Export settings matter more on creatures than on props because of the bone counts. Confirm that the exporter is writing skin weights with enough influences per vertex: 4 influences is the standard real-time limit and is generally sufficient, but a creature with overlapping mandible, tongue, and jaw weights can need the full four in the head alone, so do not let an exporter silently truncate to two. Confirm the skeleton exports as a single hierarchy rather than as separate armatures per limb.
Check scale and orientation at export. Unreal expects centimeters and Z-up, Unity expects meters and Y-up, and glTF is meters and Y-up by definition. A creature that arrives 100 times too large or lying on its side is almost always a units-and-axis problem at export, not a mesh problem. Bake the transform, freeze the scale to 1.0, and orient the creature facing forward along the axis your engine expects before you write the file.
Drop the Creature Into Unity, Unreal, or Blender for Final Checks
The engine check is the only test that counts, because it exercises the shader, the lighting, the animation system, and the LOD system at once. Import the creature, place it next to your player character mesh for scale, and light it with your project's actual lighting rather than a studio HDRI. Monsters designed under neutral studio light routinely disappear into dark environments, and the fix is usually a value adjustment to the base color rather than anything structural.
Verify the material assignments survived the trip. Metallic-roughness workflows generally transfer cleanly, but any creature using subsurface scattering, transmission on membranes, or a second UV set for a detail tile will need those hooked up by hand in the engine's material graph. Check that the normal map's green channel is oriented correctly for your engine, since a flipped green channel makes every scale and pore read as an indentation instead of a bump.
Then run the creature through an actual animation. Idle to walk to attack, with a full turn in between. Watch the areas you already know are risky: mouth corner, limb sockets, tail root, the point where the neck meets the chest. Play it at three distances: close-up, mid, and at maximum draw distance, because a deformation flaw that is unacceptable in a cutscene may be entirely invisible in gameplay, and knowing which is which is how you decide where to spend your remaining time.
What Makes Monster and Creature Modeling Technically Different?
Creature work differs from character work in four concrete ways: the silhouette carries the design instead of the face, the anatomy has to be invented and then justified, the topology and rigging have no humanoid template to fall back on, and the optimization budget varies by an order of magnitude depending on whether the creature is a boss or a mob. Everything below is about those four problems.
Why Silhouette-First Design Decides Whether a Monster Reads On Screen
Players identify enemies from the outline before they process any surface detail. In practice that means a creature is recognized at roughly 60 to 120 pixels of screen height, in motion, often partially occluded, and frequently in low light. Under those conditions, texture detail, color variation, and small anatomical features contribute almost nothing. The black shape is the design.
Test this the way studios do. Render your creature to a solid black fill against white, scale it to 100 pixels tall, and put it next to every other enemy in the project at the same size. If a player could not name which is which, the roster has a readability problem regardless of how distinct they look in the model viewer. A strong creature design silhouette has a dominant shape idea that survives at that scale: one enormous asymmetric claw, a hunched spine that breaks the head line, a segmented insect abdomen that hangs behind the legs.
Silhouette also has to survive animation. A shape that reads beautifully in the A-pose can collapse into an ambiguous blob mid-attack when limbs cross the torso. Check the silhouette at the extremes of every animation, especially the telegraph frame of an attack, since that is the single frame players use to decide whether to dodge. If the telegraph pose has the same outline as the idle, your creature is unreadable in combat no matter how good the model is.
How Anatomy Mash-Ups Splice Insect, Reptile, and Mammal Parts Believably
Most memorable monsters are recombinations. The technique that separates a convincing mash-up from a costume is committing to one dominant source and treating the others as accents. Pick the animal that provides the skeleton and the movement logic, typically 60 to 70 percent of the design, and let the other sources contribute specific features rather than whole regions. A mammalian predator body with insect mandibles and reptilian scaling works. Equal thirds of all three reads as an incoherent pile.
Transitions are where believability is won. Where fur meets chitin, where hide meets bone plate, where a mammalian shoulder meets an arthropod limb, you need a transition zone rather than a hard edge. Real biology handles these with graduated changes: fur thinning into bristle into bare skin, scales shrinking as they approach a joint, keratin plates emerging from thickened hide. Model or texture two to four centimeters of transition and the splice stops reading as a seam.
Respect the mechanical logic of each borrowed part. Insect limbs are exoskeletal, which means they articulate at discrete hinges and cannot bulge or flex along their length. Mammalian limbs are endoskeletal and deform continuously through muscle. If you attach an insect foreleg to a mammal torso, the joint where they meet has to resolve that difference, usually with a socket, a collar of hide, or a bone plate that covers the junction. Ignoring it produces the specific uncanny quality of a creature that looks assembled rather than grown.
A useful rule from creature design practice: every borrowed feature should answer "what does this creature eat, and how does it catch it?" Mandibles imply grasping and shearing. Digitigrade legs imply sprinting. Forward-set eyes imply predation. Features that answer no functional question are the ones that read as arbitrary.
Grounding Invented Creatures in Real Muscle, Bone, and Weight Distribution
An invented creature still has to obey mass. The fastest way to make a fictional anatomy credible is to place the center of mass deliberately and then make sure the limbs that carry it are proportioned for the load. A creature with a massive head and thin forelegs needs either a counterweight tail, a hunched posture that shifts weight rearward, or visibly overbuilt shoulder musculature. Without one of those, the design reads as unstable even to viewers who cannot articulate why.
Bone should be visible at the landmarks where it is visible on real animals: the point of the shoulder, the elbow, the hip, the ridge of the spine, the brow, the jaw angle, the knuckles. These landmarks are what tell the eye there is a skeleton under the surface. A creature modeled as a smooth volume with muscles suggested only by shading looks inflated. Push the hard landmarks and let the soft masses sit between them.
Muscle should follow plausible attachment logic, running from one bony landmark to another and bulging perpendicular to its line of pull. You do not need to model an anatomically correct myology, but the big masses should point the right way: a shoulder mass that runs diagonally from the spine to the upper arm, a thigh mass that wraps from the hip to below the knee, a neck mass that fans from the skull base to the shoulders. Three or four correctly oriented masses do more for credibility than twenty vaguely placed bumps.
Topology Rules for Non-Humanoid Bodies: Multi-Limb, Serpentine, and Amorphous Meshes
Humanoid topology has settled conventions: loops around the shoulders, hips, elbows, knees, and a face loop layout that everyone agrees on. Non-humanoid bodies have no such consensus, so the rule to fall back on is functional rather than conventional: edge loops perpendicular to the axis of bend, at least three of them at every joint, and denser loops where the bend is tighter.
Multi-limb bodies need each limb socket built as an independent radial loop system rather than as a shared band around the thorax. If two limb pairs share loops, deforming one limb drags the other. Build each socket as a pole-free ring, connect the rings to the torso grid with quads where you can, and accept triangles in the flat regions between sockets. Insectoid thoraxes in particular benefit from being modeled as separate segments joined by a membrane ring, which is both anatomically correct and far easier to deform.
Serpentine bodies are the simplest topology and the easiest to get subtly wrong. Use evenly spaced loops along the entire length, typically one loop per intended bone or one per half-bone for tight coils, and keep the loop count consistent so the body does not kink where density changes. Taper the loop spacing gradually toward the tail rather than in steps.
Amorphous creatures, meaning oozes, swarms, and shifting masses, should be built as a moderately dense uniform grid with no directional loop structure at all, because their deformation is driven by shape keys, noise-based displacement, or simulation rather than by a skeleton. Loop structure that assumes a bend axis actively fights that kind of motion.
Rigging Tails, Tentacles, and Extra Arms Without Broken Deformation
Appendage rigging is the core of non-humanoid rigging, and each appendage type has a bone-count sweet spot. Tails generally want 8 to 14 joints depending on length: fewer than 8 and the curve looks segmented, more than 14 and the animator is fighting the rig for no visible gain. Space the joints evenly and scale them down progressively toward the tip so weight falloff tapers naturally. Add a control for the tail root that is independent of the pelvis, because a tail that only ever moves when the hips move looks dead.
Tentacles need more: 12 to 20 joints for anything that coils, and ideally a spline or IK-chain control rather than pure FK, since posing twenty FK joints by hand for every frame is not a workable animation task. Tentacles also need consistent twist handling, because a long chain that accumulates roll along its length will produce a visible corkscrew in the mesh. Distribute twist across the chain rather than concentrating it at the root.
Extra arms are deceptively difficult. The problem is not the arms themselves but the shared shoulder region: two arm pairs mounted on one thorax means two clavicle systems competing for weights on the same trapezius area. Solve it by giving each arm pair its own scapula bone with a clearly bounded weight territory, and put a hard falloff between the upper and lower shoulder masses. Blend them and you get a chest that collapses inward when both arms raise.
Wings are their own discipline: patagium membranes, finger-driven wing structures, and the folding logic of a large flight surface justify a dedicated setup, which is covered on the dragon model guide rather than here.
Weight Painting Jaw Hinges, Mandibles, and Digitigrade Legs
The jaw is the highest-value weight painting target on any creature, because players look at the head. The jaw bone should own the lower lip, the chin, the floor of the mouth, and the lower teeth at full weight, with a falloff band of roughly one to two loops at the mouth corner where the skull and jaw blend. Extend the falloff too far and the cheek stretches like taffy; make it too tight and the corner tears open at wide angles.
Mandibles, meaning the lateral splitting jaws of insectoid and abyssal creature designs, need each mandible fully isolated with zero shared weights between the pair. Any bleed between left and right mandible weights causes them to drag each other, which looks like the creature is chewing when it should be spreading. Give each mandible a base joint and one or two segment joints if it curves, and keep the surrounding face weights locked to the skull.
Digitigrade legs, where the animal effectively walks on what would be human toes, add a joint compared to a plantigrade leg: hip, knee, ankle raised high up the leg, then a long metatarsal, then the toes. The common weight painting error is treating the raised ankle as a knee, which produces a leg that bends the wrong way under load. Weight the metatarsal segment as its own rigid unit with tight falloffs at both ends, since it is effectively a bone with very little muscle over it.
Designing Asymmetry: Off-Center Eyes, Lopsided Horns, and Mutated Limbs
Bilateral symmetry reads as healthy and designed. Asymmetry reads as damaged, mutated, or wrong, which is exactly the emotional register most monsters are aiming for. But asymmetry has to be deliberate and structural, not random noise, or it just looks like a modeling mistake.
The most effective creature asymmetries are large and singular: one massively overdeveloped forelimb, one eye significantly larger or displaced from its socket line, a horn broken on one side, a tumor-like growth on one shoulder. One strong asymmetric feature changes the silhouette and gives the design a memorable hook. Five small asymmetries change nothing at silhouette scale and cost you the ability to mirror your mesh and UVs.
That mirroring cost is the practical constraint. Model and UV the creature symmetrically, then break symmetry as a final pass in specific bounded regions. This keeps your UV layout efficient, since the symmetric portion can share texture space, while the asymmetric regions get their own dedicated UV islands. It also means a single generated base mesh can spawn multiple enemy variants by applying different asymmetric mutations to the same symmetric core.
Boss vs Mob Budgets: Polycount, Bone Count, and Texture Limits by Enemy Tier
Enemy tier determines budget, and the spread is wide. A trash mob that spawns thirty at a time and a single boss that fills the screen are separated by roughly an order of magnitude in every metric. Deciding the tier before you model is what prevents the common failure of building every enemy to hero quality and then discovering the encounter runs at 22 frames per second.
The driving constraint on mobs is not polygon count in isolation but total draw calls, skinned vertex count, and unique bone matrices being pushed per frame. Thirty mobs at 6,000 triangles each is 180,000 triangles, which is trivial for modern hardware, but thirty mobs at 90 bones each is 2,700 bone matrices per frame plus thirty separate skinned mesh evaluations, which is not trivial at all. Cut bones before you cut triangles when a horde encounter is struggling.
Texture budget follows the same logic. Mobs should share an atlas wherever possible so the whole group draws in one or two material batches. A boss monster polycount can afford 4K maps and three or four material slots because there is exactly one of it. Use the table below as a starting point and adjust to your platform.
| Enemy tier | Triangles | Bones | Texture resolution | LOD levels | Typical on-screen count |
|---|---|---|---|---|---|
| Swarm / trash mob | 2,000 to 6,000 | 25 to 45 | 1K shared atlas | 3 to 4 | 20 to 60 |
| Standard enemy | 8,000 to 20,000 | 45 to 75 | 2K, 1 to 2 materials | 3 | 4 to 12 |
| Elite / mini-boss | 25,000 to 60,000 | 70 to 110 | 2K to 4K, 2 materials | 2 to 3 | 1 to 3 |
| Boss | 60,000 to 150,000 | 100 to 180 | 4K, 3 to 4 materials | 2 | 1 |
| Cinematic / pre-render | 500,000 plus | 200 plus | 4K to 8K per region | none | 1 |
| Mobile / web (any tier) | 1,500 to 15,000 | 20 to 60 | 512 to 2K | 2 to 3 | varies |
Baking High-Detail Sculpt Data Into Normal Maps for Game-Ready Creatures
The entire premise of a game ready creature model is that surface detail lives in textures and only structural form lives in geometry. Scales, pores, wrinkles, fine bone texture, and scar detail all bake into a normal map. Only silhouette-affecting features, meaning horns, spines, plates that break the outline, and anything the camera sees against sky, need real geometry.
The bake itself has a few reliable failure points on creatures. Cage distance has to be large enough to enclose horns and spines but small enough not to capture the opposite side of a narrow limb, which usually means baking limbs and head as separate bake groups with their own cage settings. Long thin appendages like tentacles and tails should always be baked separately. Use a matching low-poly and high-poly naming convention so the baker pairs them correctly rather than projecting a tail onto a horn.
Bake in tangent space for anything that deforms, which on a creature is nearly everything. Object-space normals bake more cleanly but break under skinning. Also bake an ambient occlusion map and a curvature map at the same time: AO grounds the crevices between scales and plates, and curvature drives edge wear and dust masks in a smart material setup for almost no extra effort.
LODs and Draw-Distance Planning When Your Monster Spawns in Hordes
If your creature ever appears in numbers, LODs are not optional. A workable default is a four-level chain: LOD0 at full budget, LOD1 at roughly 50 percent of the triangles, LOD2 at 25 percent, and LOD3 at 10 percent or an imposter card. Transition distances depend on your camera, but a common starting point for a human-scale enemy is LOD1 at 10 meters, LOD2 at 25 meters, and LOD3 at 50 meters, scaled up proportionally for larger creatures.
Bone count should drop with the LOD, not just triangles. At LOD2 and beyond, collapse the finger, toe, and facial joints into their parents. A creature that is 25 meters away does not need individually animated claws, and removing 30 bones from the horde LOD is often a bigger performance win than removing 3,000 triangles.
Watch for silhouette popping. The most jarring LOD transition on creatures is when horns, spines, or a fin collapse between levels, because those are exactly the features the eye uses to track the enemy. Preserve silhouette-defining geometry through LOD2 even at the cost of interior detail, and only simplify it at the last level where the creature is a few dozen pixels tall.
- Reduce bone count alongside triangle count at every level past LOD1.
- Keep horns, spines, and other outline features until the final LOD.
- Drop secondary materials and merge to the atlas at LOD2 to cut draw calls.
- Disable cloth, hair simulation, and any physics-driven appendage past LOD1.
Creature Facial Setups: Roars, Snarls, and Blendshapes Without a Human Face
The standard 52 ARKit blendshape set assumes a human face: eyebrows, lips capable of forming vowels, a nose, cheeks. Most creatures have none of those, so applying the full ARKit set to a beast produces dozens of shapes that do nothing and a handful that deform incorrectly. Creatures with humanoid faces, meaning ogres, trolls, and beast-men, can use the full set productively. Everything else needs a custom, smaller shape set.
A practical creature facial set runs 10 to 20 shapes rather than 52. Prioritize: jaw open, jaw thrust forward, snarl or lip curl (if there are lips), nostril flare, brow ridge lower and raise, eye squint, eye wide, ear back and forward, throat expand, and one or two shapes for whatever is unique to the design such as mandible spread or gill flare. That set covers essentially every expression a beast actually needs.
Bone-driven facial rigs are often better for creatures than shape keys. A jaw hinge, two mandible joints, an ear pair, and a brow ridge joint give you continuous control and combine freely, whereas blendshapes have to be authored for every combination you want to hit. A hybrid works well: bones for the large mechanical motion of the jaw and ears, blendshapes for the soft tissue detail like the lip curl and the wrinkle above the snout.
Should You Use an AI Monster 3D Model Maker, Sculpt From Scratch, or Commission an Artist?
The honest answer depends on how many creatures you need, how distinctive each one has to be, and whether you can do 3D work yourself. Generation is fastest and scales; sculpting gives total control at high time cost; commissions buy expertise but not speed; marketplaces are cheapest but generic. Most real projects use a mix, and the sections below are about matching the method to the asset.
What AI Monster 3D Model Makers Automate (and Where You Still Refine)
AI generation reliably automates the parts of creature work that are laborious rather than creative: blocking out the base form from reference, generating a first-pass UV layout, producing a coherent PBR texture set, retopologizing to a target density, and placing a skeleton on a recognizable body plan. Those steps represent the bulk of the hours in a traditional creature pipeline and very little of the artistic decision-making.
What still needs your judgment is the design itself and the hard edge cases. Silhouette selection is yours. Deliberate asymmetry is yours. The topology around unusual limb junctions usually needs a pass. Weight painting on mandibles and digitigrade legs usually needs a pass. And any creature with a genuinely novel body plan, meaning something with no analogue in the training distribution, will need more correction than one built from recognizable animal parts.
The practical way to use a monster 3d model maker is as a very fast blockout and texturing stage, not as a finished-asset button. Generate five candidates, pick the strongest silhouette, then spend your remaining hours on the specific problems that matter for your use case. On enterprise tiers, Threedium also offers refinement passes by human 3D artists, which covers the correction work for teams that would rather not do it in-house.
Budget your review time by asset importance. A trash mob is done when it reads correctly at 80 pixels and does not tear when it walks. A boss deserves the full inspection pass: topology, weights, bake artifacts, LOD silhouette, and facial setup.
How Long a ZBrush or Blender Creature Sculpt Actually Takes
For an experienced creature artist working in ZBrush or Blender, a game-ready mid-tier enemy from concept to rigged export is typically 25 to 60 hours: roughly 8 to 15 for the sculpt, 4 to 8 for retopology, 3 to 6 for UVs and baking, 6 to 12 for texturing, and 5 to 15 for rigging and weight painting. A hero boss with a custom facial rig, multiple material regions, and a full LOD chain runs 80 to 200 hours.
Those numbers assume competence with the tools. For someone learning, multiply by three to five and expect the rigging stage to consume most of the difference, because non-humanoid rigging is where beginners hit the steepest wall. Sculpting a decent-looking creature is achievable in a few weeks of practice; making one deform correctly is a longer road.
The case for sculpting from scratch is control and originality. If your creature is the visual centerpiece of a project, if it needs a body plan nothing in any dataset resembles, or if you already have the skills and the design in your head, sculpting is still the right answer. The case against it is arithmetic: if you need twenty enemies for a game, 25 hours each is 500 hours of work before a single animation exists.
What Custom Creature Commissions Cost: $40 Fiverr Gigs to $5,000 Game-Ready Rigs
Commission pricing for creature work spans two orders of magnitude, and the price is almost entirely a function of what is included beyond the mesh. Entry-level gigs on freelance marketplaces start around $40 to $150 and generally deliver an unrigged, sometimes untextured mesh at unspecified topology quality, often turned around in three to seven days. That tier is usable for static props, background creatures, and 3D printing, and rarely usable as a game asset without rework.
The mid tier, roughly $300 to $900, buys a textured game-ready creature with clean topology, a sensible UV layout, and often a basic rig, with a turnaround of one to three weeks. Above that, $1,500 to $5,000 is the range for a fully rigged hero creature with custom facial setup, multiple LODs, and revision rounds, typically taking three to eight weeks. Studio-level creature contracts for AAA work go higher still.
What commissions genuinely buy you is judgment. A good creature artist will fix your design's weight distribution, tell you the silhouette is unreadable, and build a rig that an animator can actually use. What they cannot buy you is speed or iteration volume: every revision is a round trip measured in days.
| Method | Typical cost | Time to first usable asset | Design control | Best fit |
|---|---|---|---|---|
| AI generation | Subscription tier | Minutes to a few hours | High via prompt and refinement | Volume, iteration, mobs and variants |
| Self sculpt (ZBrush / Blender) | Your time, 25 to 200 hours | Days to weeks | Total | Hero creatures, novel body plans |
| Budget commission | $40 to $150 | 3 to 7 days | Low, limited revisions | Static props, print, background |
| Mid-tier commission | $300 to $900 | 1 to 3 weeks | Good | Named enemies with a rig |
| Hero commission | $1,500 to $5,000 | 3 to 8 weeks | Total, with revision rounds | Boss creatures, cinematics |
| Marketplace purchase | $0 to $200 | Immediate | None | Prototypes, filler, greybox |
When Marketplace Monster Models From TurboSquid or Sketchfab Are Good Enough
Marketplaces like TurboSquid, Sketchfab, CGTrader, and the Unity and Unreal asset stores carry enormous creature libraries, and for certain jobs they are the correct answer. Prototyping is the clearest case: if you are testing whether an encounter is fun, a purchased goblin at $25 tells you that just as well as a bespoke one, and you can replace it later. Background creatures that never come close to the camera are another.
The limits are recognizability and fit. Popular marketplace creatures appear in hundreds of projects, and players who play a lot of indie games do notice. More practically, a purchased model rarely matches your project's art direction, polycount conventions, rig standard, or material setup, so integration work often eats the time you thought you saved. Check the topology and the rig before buying, not after.
Licensing deserves attention. Marketplace licenses vary widely on whether you may modify the asset, use it in a commercial product, include it in a game sold on multiple platforms, or redistribute it inside a mod kit. Read the specific license on the specific listing. "Royalty free" is not the same as "unrestricted," and editorial-only licenses exist on creature assets more often than people expect.
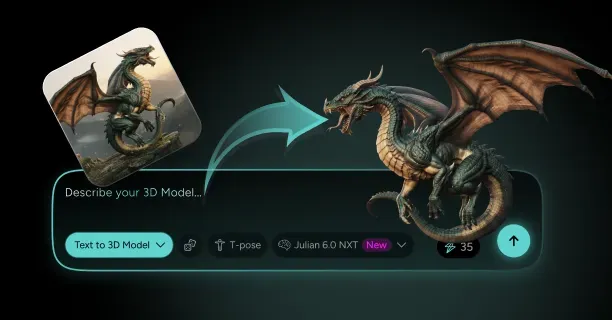
Why Dragons Get Their Own Pipeline: Wings, Breath VFX, and a Dedicated Guide
Dragons are technically a separate discipline from general creature work, which is why they get their own pipeline rather than being treated as a large lizard. The wing is the reason. A functional wing is a modified forelimb with a membrane stretched between elongated digits, and rigging it means solving membrane deformation, fold logic, and the relationship between the wing finger chain and the surface between the fingers. None of that has an analogue on a limbless or four-legged creature.
Breath weapons add a second layer of complexity that is more VFX than modeling: emitter placement inside the throat, a mouth interior built to accommodate a particle source, material setup for glow at the jaw, and often a separate blendshape or bone chain for the throat swell that telegraphs the attack. Dragon rigs also tend to need flight cycles, which means a root motion setup that works in three dimensions rather than on a ground plane.
Scale is the third factor. Dragons are usually the largest creature in a project, which means LOD planning, texture density per square meter, and animation root handling all need different treatment than a human-sized enemy. If a dragon is what you are building, work from the dedicated dragon 3D model guide, which covers wings, patagium rigging, and breath setups in the depth they require.
Matching the Method to the Monster: Throwaway Mobs vs Hero Creatures
The decision rule that works in practice is to sort your creature roster by how long the player looks at each one. Anything the player sees for under two seconds at a distance is a volume asset: generate it, spend twenty minutes on cleanup, ship it. Anything the player fights for five minutes with the camera locked on it is a hero asset that deserves either a full manual pass or a commission.
Variant strategy sits in between and is where generation pays off most. One generated base creature can produce a whole family: a base mob, a larger elite with an extra limb pair, a corrupted retexture, a juvenile with different proportions. Sharing the skeleton across the family means sharing the animation set, which usually costs more than the models themselves.
A reasonable allocation for a small team building twenty enemies: generate all twenty as a first pass through a game-ready model workflow, ship fourteen of them with light cleanup, hand-refine four mid-tier enemies, and either sculpt or commission the two bosses. That distribution puts your expensive hours where players actually look, which is the whole point of tiering in the first place.
- Under 2 seconds of screen time: generate, light cleanup, ship.
- Recurring named enemy: generate, then a full topology and weighting pass.
- Boss or cinematic creature: generate for blockout, then sculpt-level refinement or commission.
- Variant family: one generated base, shared skeleton, mutated meshes and retextures.
Frequently Asked Questions About Monster 3D Models
What Is the Best Monster 3D Model Maker?
The best tool depends on whether you want to generate or sculpt. For turning concept art or reference photos into a textured, rigged creature quickly, Threedium and its Julian NXT generator handle the image-to-mesh, PBR texturing, and rigging steps in one pass with GLB, FBX, and USDZ export. For sculpting from scratch, ZBrush is the industry standard for creature work and Blender is the strongest free alternative.
Most creature artists end up using both categories. Generation handles the blockout, the texture pass, and the volume work; a sculpting package handles the specific refinements that need hand control. The choice is less "which tool" than "which stage of the pipeline are you trying to accelerate."
Can AI Generate a 3D Monster From a Picture?
Yes. Image-to-3D reconstruction takes one or more images of a creature and produces a textured mesh, and the results are strongest when you supply multiple angles of the same design rather than a single illustration. A front view plus a three-quarter view plus a head close-up will produce a substantially better result than any single image, however good that image is.
The quality ceiling is set by what the images actually show. Anything hidden in the reference, meaning the back, the underside, the inside of the mouth, has to be inferred, so those regions are where you should expect to do correction work. Describing the hidden parts in the prompt materially improves the outcome.
How Much Does a Custom Monster 3D Model Cost?
Custom creature commissions typically run $40 to $150 for a basic unrigged mesh, $300 to $900 for a textured game-ready model with a basic rig, and $1,500 to $5,000 for a fully rigged hero creature with facial setup, LODs, and revision rounds. Turnaround scales with price, from a few days at the low end to six or eight weeks at the top.
Cost drivers beyond the mesh itself are rigging complexity, number of material regions, LOD chain requirements, and revision rounds. A creature with tentacles, mandibles, and six limbs costs more to rig than one with a standard quadruped plan, and rigging is often the largest single line item on a creature quote.
How Many Polygons Should a Game-Ready Monster Have?
Budget by enemy tier. Trash mobs sit around 2,000 to 6,000 triangles, standard enemies 8,000 to 20,000, elites and mini-bosses 25,000 to 60,000, and bosses 60,000 to 150,000. Mobile and web targets should stay under about 15,000 triangles even for important creatures.
Bone count matters as much as triangle count for creatures that appear in groups, since each skinned mesh carries per-frame skinning cost independent of its density. If a horde encounter is dropping frames, reduce bones and merge materials before you reduce triangles. Keep silhouette-defining geometry, meaning horns and spines, and spend your cuts on interior detail that a normal map can carry instead.
How Do You Design a Monster That Reads as Threatening at Silhouette Size?
Design the black shape first. Fill the creature to solid black, view it at roughly 100 pixels tall, and check that it is instantly distinguishable from every other enemy in your project at that size. Threat cues that survive at silhouette scale are structural: an oversized head, shoulders that rise above the skull line, one massively overdeveloped limb, coiled digitigrade rear legs, and a strong asymmetric feature that breaks the outline.
Detail that does not change the outline contributes nothing at gameplay distance. Fangs, claw texture, scale patterns, and eye color all matter in a close-up and are invisible at 100 pixels, so do not rely on them to communicate danger. Put your threat signals into proportion and posture instead.
Test the silhouette in motion, not just in the A-pose. The frame that matters most is the telegraph pose at the start of an attack, since that is what players read to decide whether to dodge. If the telegraph silhouette matches the idle silhouette, the creature is functionally unreadable in combat.
Where Can You Download Free Monster 3D Models?
Sketchfab hosts a large library of downloadable creature assets under Creative Commons licenses, and sites like Poly Haven, Open3DModel, and the free sections of TurboSquid and CGTrader carry additional options. Blender's community repositories and various game-jam asset packs also distribute creature meshes at no cost.
Expect variable quality when you look for free monster 3d models. Free assets commonly arrive without rigs, with triangulated topology that does not deform well, with mismatched scale, or with textures at inconsistent resolutions. They are excellent for greyboxing and prototyping and usually need rework before shipping.
Check the license on every download individually. Creative Commons attribution terms, non-commercial restrictions, and no-derivatives clauses all appear in free creature libraries, and a non-commercial asset in a shipped game is a real legal problem rather than a technicality.
Can You Use AI-Generated Monster Models in a Commercial Game?
Generally yes, subject to the specific terms of the platform you generate on. Commercial usage rights on AI 3D generation platforms are set by the subscription tier, so confirm what your plan grants before you ship. Read the terms rather than assuming, and keep a record of which tier each asset was generated under.
The bigger practical risk is your input, not your output. If you upload reference images you do not own, meaning another artist's concept art, a screenshot from a released game, or a licensed character design, the resulting model inherits that problem regardless of what the generation platform's terms say. Use your own art, commissioned art you own the rights to, public domain reference, or photographs you took.