How Do You Make Custom 3D Printed Miniatures From Images?
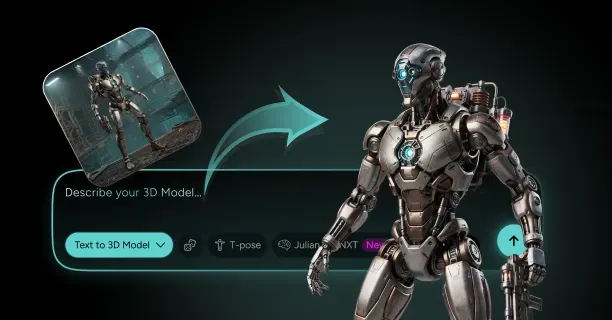
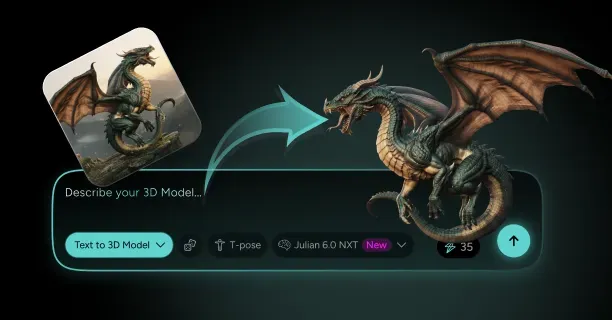
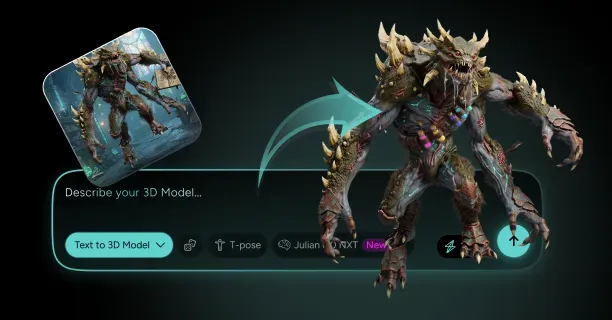
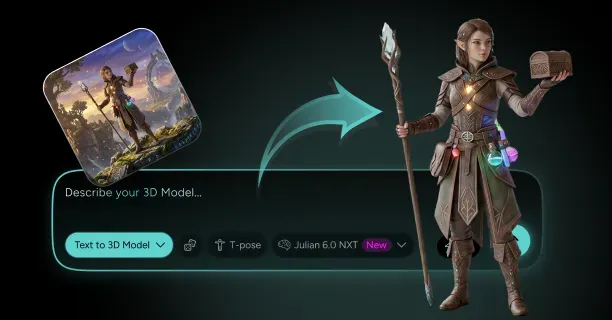
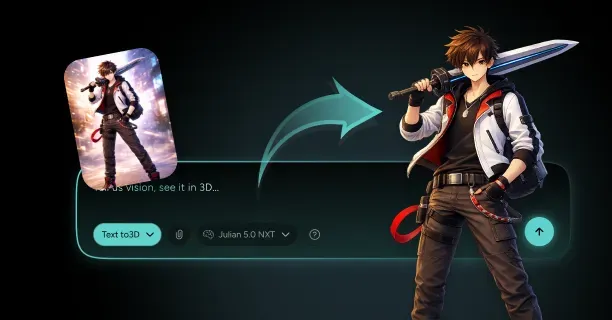
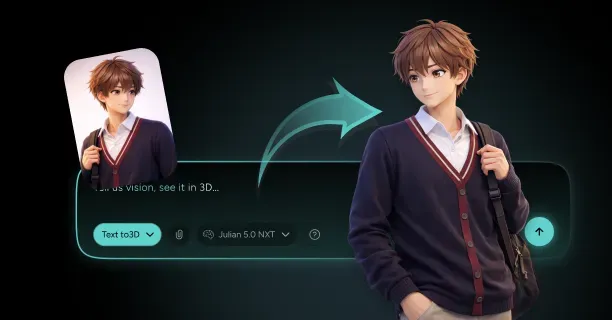
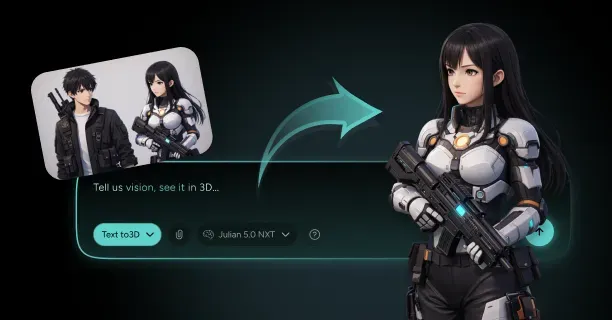
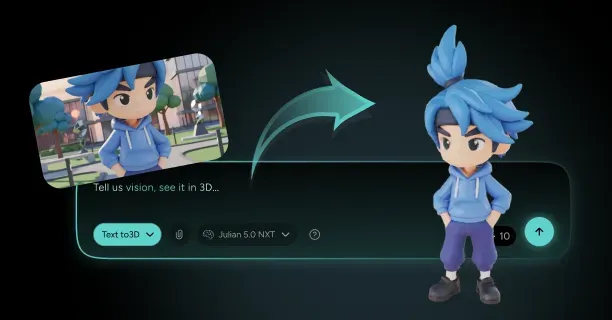
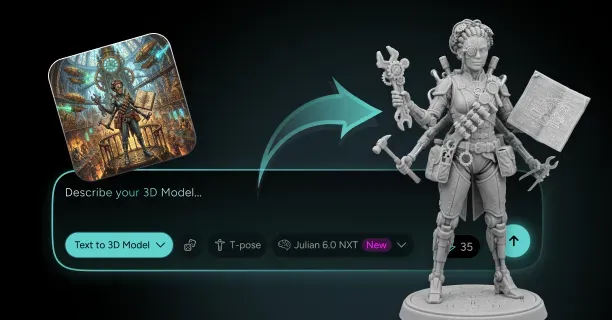
To make custom 3d printed miniatures from images, feed clean reference art into an image-to-3D generator, export the result as GLB, convert it to a solid watertight STL in Blender, scale it to your table standard, then slice and print it on a resin or FDM machine. Threedium handles the modelling half of that pipeline: its Julian NXT generator turns a photo, a piece of character art, or a written description into a closed mesh with PBR textures, polygon optimization, and export to GLB, USDZ, and FBX. Everything after export is print preparation, and that is what this page covers in full.
The physical side is where most people lose a mini. A model that looks perfect in a viewport can arrive at the slicer with non-manifold edges, a 0.3 mm sword blade, and an unhollowed torso that will suction-cup itself off the build plate.
Print preparation is destructive editing. Keep the original GLB and a working .blend untouched, and do all thickening, hollowing, and scaling on duplicates. You will reprint the same character at a different scale sooner than you think.
What Reference Images Produce the Cleanest Tabletop Miniature Meshes?
Image-to-3D reconstruction infers volume from silhouette and shading, so the quality ceiling of your mini is fixed before you generate anything. The single most useful input is a full-body character sheet with front, three-quarter, and back views at 2048 px or larger on the long edge, drawn or photographed with the whole figure inside frame and nothing cropped at the feet. A lone front view will work, but expect to rebuild the back of the cloak and any asymmetric shoulder pad yourself.
Lighting matters more for miniatures than for game assets because you are not going to keep the texture. Flat, even, diffuse lighting with soft shadows lets the generator read actual geometry instead of baking a specular highlight into a bump. Hard rim lights and heavy rendered bloom tend to produce inflated, soapy surfaces where the armour plates should have crisp edges.
- Isolate the figure on a plain background so the silhouette reads as one closed shape. Busy environment art bleeds terrain into the mesh.
- Use a 50 to 85 mm equivalent framing. Wide-angle photos exaggerate hands and heads, and that distortion survives all the way to the print.
- Give any weapon, tail, or banner its own clear profile view. Long thin objects are the first thing reconstruction guesses wrong.
- Avoid motion blur, depth-of-field, and heavy anime-style flat shading with no visible form. Cel-shaded art with zero shading cues gives the generator nothing to work with on limb depth.
- Keep the costume readable at thumbnail size. If a detail vanishes when you shrink the reference to 200 px tall, it will vanish at 28 mm as well.
How Do You Prompt Threedium for a Print-Friendly Grounded Pose?
A print-friendly pose is not the same as a good render pose. For a mini you want the figure grounded on both feet or on a clear contact point, weight centred over the footprint, limbs held reasonably close to the body, and no part of the model floating far out over empty air. Describe that explicitly in the prompt rather than hoping for it: state the stance, the weapon position, and the fact that the character stands flat on a small circular base.
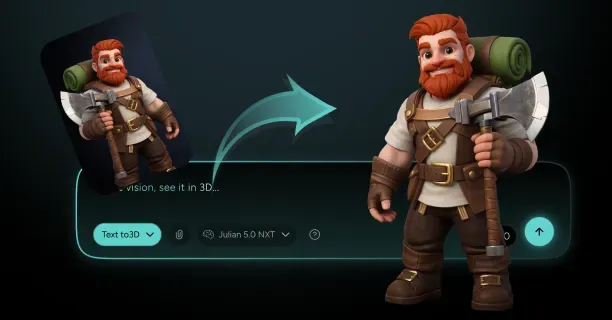
Useful phrasing patterns when you generate through Threedium's 3D model generator include naming the silhouette you want, then constraining it. For example: "armoured dwarf warrior standing squarely, both feet flat and shoulder width apart, axe held vertically against the right shoulder, cloak falling straight down the back, standing on a flat round base, symmetrical, no floating elements." That reads as fussy, and it is, but each clause removes one class of print failure.
Worth banning in the prompt: mid-air jumps, one-foot lunges, long trailing scarves, thin chains, wind-spread capes, and wispy spell effects. Each is printable with enough support work, and each turns a 20 minute prep job into a 90 minute one. If the concept genuinely needs a flying pose, design a 3 to 4 mm flight stand socket under the model from the start.
How Do You Generate the Miniature 3D Model From Your Image?
Upload your reference set, add the pose and construction notes described above, and generate. Julian NXT reconstructs the figure as a textured mesh with PBR maps, applies polygon optimization, and offers export to GLB, USDZ, and FBX. For printing you want the highest polygon density the platform will give you, which is the opposite of what you would choose for a game engine. A real-time character might ship at 15,000 to 40,000 triangles; a print master benefits from 300,000 triangles or more, because facets that are invisible on a screen at 1080p become visible flat spots on a 6 mm face.
Generate more than one candidate. Reconstruction is stochastic, and it is normal for one seed to nail the armour but soften the face while another does the reverse. Two or three generations cost minutes and give you the option of kitbashing the best head onto the best body in Blender, which is exactly what a professional sculptor would do. On enterprise tiers, human 3D artists can refine the sculpt directly, which is the cheapest route when a specific face or heraldry has to be exact.
If the character concept itself is not settled yet, do not solve it here. Work the design out first with the guidance on the 3D character generation page, then come back with locked reference art.
How Do You Refine the Sculpt So Details Read at 28mm Scale?
Scale reduction is a brutal low-pass filter. A belt buckle that is 40 mm across on a 1.8 m character becomes 0.62 mm at 28 mm scale, which is right at the edge of what a consumer resin printer can express and well below what a brush can pick out. The rule that professional miniature sculptors work to is simple: exaggerate depth, then exaggerate it again.
Work in Blender's sculpt mode with the model already scaled to final print height, so you judge every cut at the size it will exist. The edits that pay off most are recut panel lines, deepened cloth folds, sharpened armour edges, and separated fingers.
- Deepen recessed lines to at least 0.3 mm at final scale. Anything shallower fills with primer and disappears.
- Raise proud details such as rivets, gems, and buckles by 0.3 to 0.5 mm so they catch drybrushing.
- Merge details that will never resolve. Chainmail rings, individual hair strands, and stitched seams read better as a stylized repeating pattern than as literal geometry.
- Widen the gaps between fingers, between arm and torso, and between cloak and back. Gaps under 0.5 mm cure shut on resin and bridge over on FDM.
- Flatten the underside of every foot and give the model a genuinely flat contact plane. Curved soles cause rocking on the table.
Faces deserve a dedicated pass. At 28 mm the head is around 6 mm tall and the eye socket is under 1 mm, so sculpt eyes as a recessed almond under a defined brow ridge and give the nose and chin more projection than looks correct at full size.
How Do You Convert Threedium's GLB Export Into a Printable STL?
GLB is a rendering format and STL is a manufacturing format, and the gap between them is the single most common stumbling block in this workflow. GLB carries meshes, materials, UVs, textures, node hierarchy, and animation in a binary glTF container. STL files for miniatures carry an unstructured soup of triangles with no colour, no units, no hierarchy, and no material. A correct glb to stl conversion therefore has to flatten hierarchy, discard materials, and impose a physical scale that STL cannot itself record.
The reliable route is Blender, which is free and gives you control over every step. The sequence:
- File, Import, glTF 2.0, and select your .glb. Delete the default cube, camera, and light so nothing extra ends up in the export.
- Select every mesh object and apply all modifiers, then join them with Ctrl+J into a single object. STL has no concept of separate parts, and unjoined pieces export as loose shells.
- Apply all transforms with Ctrl+A, All Transforms. Un-applied scale is the most common cause of a model that slices at the wrong size.
- Set the scene units to millimetres and resize the object to its target print height, measured with the N-panel dimensions readout.
- File, Export, STL. Export selection only, binary format, and check the scale field before you commit.
The unit trap deserves its own warning. Blender's default unit is the metre, and most slicers interpret one STL unit as one millimetre. A 1.8 metre tall character exported at scale 1.0 therefore appears in your slicer as a 1.8 mm speck. Either set the export scale to 1000, or, cleaner, resize the mesh inside Blender so its dimensions read 32 mm on the Z axis before export. Then the number in Blender and the number in the slicer agree, which saves you from the classic mistake of printing an army at 1/1000 scale.
Consider exporting 3MF instead of STL where your slicer supports it. 3MF stores real units, is a compressed XML package rather than raw triangles, and cannot suffer the millimetre-versus-metre ambiguity that ruins so many first prints. Chitubox, Lychee, PrusaSlicer, Cura, and Bambu Studio all accept it.
How Do You Make the Mesh Watertight and Manifold Before Slicing?
A slicer converts a mesh into filled areas by testing, for every scanline of every layer, whether a point is inside or outside the solid. That test only has a defined answer if the surface is watertight and manifold: no holes, no edges shared by more than two faces, no duplicate or interior faces, and consistent normal orientation. Break any of those and you get missing layers, inverted shells, or a slicer that silently drops geometry.
In Blender, the checks are: Mesh, Clean Up, Merge by Distance to weld coincident vertices; Mesh, Normals, Recalculate Outside; then Select, All by Trait, Non Manifold to see what is left. Enable the bundled 3D Print Toolbox add-on and run its full check, which reports non-manifold edges, zero-area faces, thin walls under a threshold you set, sharp overhangs, and intersecting faces in one pass.
- Run Merge by Distance at 0.0001 m first. Many apparent holes are simply unwelded duplicate vertices along a seam.
- Use Select, All by Trait, Interior Faces to find and delete internal geometry left over from overlapping parts.
- If a repair is stubborn, run the STL through a dedicated repair tool such as Microsoft 3D Builder, Autodesk Netfabb, or the repair function inside PrusaSlicer. They rebuild the shell rather than patching it.
- Voxel remeshing at a 0.1 to 0.15 mm voxel size on a 32 mm model is the nuclear option: it guarantees a manifold result, at the cost of softening the sharpest edges. Do it only after your detail pass, never before.
How Do You Thicken Swords, Spears, and Banner Poles That Are Too Thin to Print?
Long thin appendages are where generated miniatures fail most often. A greatsword scaled to a 32 mm figure might come out as a blade 0.35 mm thick and 20 mm long. That will print on a good resin machine, and it will then bend, curl during cure, and snap the first time you pick the mini up. The practical floor for a free-standing weapon on resin is 0.8 to 1.0 mm minimum cross-section; on FDM it is closer to 1.5 mm.
Fix it in the mesh, not in the slicer. The three techniques, in ascending order of control:
- Select the blade or pole geometry and scale it on its two thin axes only. Fast, and preserves the silhouette from the front, which is the view that matters.
- Apply a Solidify modifier with even thickness offset to a duplicated flat blade, then union it back. Good for banners and flat-plate weapons.
- Sculpt with the Inflate brush at low strength along the length of the object, then smooth. Slowest, but the only one that lets you taper a spear correctly, thicker at the base and thinner at the tip.
Tie the thin part into the silhouette wherever you can: a spear that also touches the shoulder or ground becomes a braced beam rather than a cantilever and stops flexing entirely.
How Do You Scale the STL to 28mm, 32mm Heroic, or 54mm Height?
Miniature scale is quoted in two incompatible ways and this causes constant confusion. The traditional definition of 28mm miniature scale measures from the sole of the foot to the eye line, not to the top of the head. A true 28 mm figure of an average human therefore stands roughly 31 to 33 mm to the crown, and taller again with a helmet crest. Modern manufacturers increasingly quote total height instead, which is why two boxes both labelled 28 mm can differ by 4 mm.
32mm heroic scale is not simply 32 mm tall. Heroic proportion means the head, hands, and weapons are deliberately enlarged relative to true anatomy, typically a head that is one seventh of body height rather than one eighth, with hands around 20 percent oversized. A 32 mm heroic human usually measures 34 to 38 mm to the top of the head and looks noticeably bulkier beside a true-scale 28 mm figure of the same nominal size.
The practical method is to scale by a measured landmark rather than by a percentage. In your slicer or in Blender, place the model with its feet at Z=0, then use the measure tool to find the eye height and the crown height, and scale until the landmark you care about matches your existing collection.
- 28 mm true scale, approx 1/60: 28 mm foot to eye, 30 to 33 mm total height. Classic wargaming and historical ranges.
- 32 mm heroic, approx 1/56: 30 to 32 mm foot to eye, 34 to 38 mm total height. Modern fantasy skirmish and current plastic ranges.
- 54 mm, 1/32: 54 mm foot to eye, 58 to 62 mm total height. Display figures, busts, and competition painting pieces.
How Do You Attach an Integrated Base or Fit a Standard Round Base?
You have two options and they behave very differently. An integrated base is sculpted as part of the model, printed with it, and cannot be swapped. A slotted or pinned figure prints with bare feet plus a small tab or pin and drops into a separately printed or commercially bought base. For a personal display piece, integrated is simpler. For anything going on a wargaming table where base size is a rules-relevant measurement, print the figure and the base separately.
To build an integrated base in Blender, add a cylinder, set its diameter to your target base size and its height to 2.5 to 3 mm, position the model's feet so they sink 0.2 mm into the top face, and boolean-union the two. Add a slight bevel or chamfer to the top rim so paint does not chip off a sharp edge, and consider texturing the top with rubble or flagstones sculpted at 0.4 mm relief.
Do not sculpt the base texture so tall that the model's eye line rises above the rest of your collection. A 3 mm base plus a 3 mm rock pile puts a 32 mm figure at 38 mm and it will look out of place next to the unit it is meant to lead.
How Do You Run a Final Printability Check in Meshmixer or Blender's 3D Print Toolbox?
Before the file touches a slicer, run one structured check so you are not diagnosing problems from a failed print. Blender's 3D Print Toolbox is bundled with the program, free, and sufficient for almost every case. Enable it under Preferences, Add-ons, then open the sidebar in the 3D viewport and work down the analysis list.
- Solid check: reports non-manifold edges and bad contiguous edges. This must return zero before anything else matters.
- Intersections: finds self-intersecting faces, which usually means two body parts overlapping without a boolean union.
- Degenerate faces: zero-area triangles and zero-length edges. Set the threshold to 0.0001 and delete what it finds.
- Thickness: set to your printer's structural minimum, typically 1.0 mm for resin. This is your minimum wall thickness for miniatures audit and the one that saves the most reprints.
- Overhang: set to 45 degrees to preview where supports will be mandatory. Useful, though your slicer will make the final call.
- Statistics: confirms real-world volume in cubic centimetres, which is what you use to estimate resin cost before printing.
Autodesk Meshmixer remains widely used for the same job and has the better automatic repair. Its Analysis, Inspector tool flags holes, non-manifold regions, and disconnected components with coloured pins and offers a one-click auto-repair, and Analysis, Thickness produces a heat map that is easier to read at a glance than Blender's highlight overlay. The software is no longer actively developed, so treat it as a mature utility rather than a long-term dependency.
How Do You Print an AI-Generated Miniature Cleanly on Resin or FDM?
Print an AI-generated mini cleanly by choosing the right process for the detail level, orienting the model to move layer lines and support scars away from the face and chest, hollowing anything with a solid cross-section over about 15 mm, supporting from below with light tips, and post-processing carefully enough that you do not snap what you just made. Resin will out-resolve FDM on faces and fine trim by a wide margin; FDM is cheaper per model, tougher, and entirely viable for chunky armoured figures and terrain-scale pieces.
Everything here applies equally to a mini generated on Threedium or sculpted by hand.
Should You Print Your Miniature on a Resin or FDM Printer?
The honest answer for character miniatures is resin, and it is not close on detail. The resin vs fdm miniatures comparison comes down to how the two machines define a feature. An MSLA resin printer cures a whole layer at once through an LCD mask, so its horizontal resolution is fixed by pixel pitch, currently around 17 to 24 microns on a 10 inch 8K or 12K panel. An FDM printer draws each layer with a nozzle, so its horizontal resolution is bounded by the extrusion width, typically 0.4 mm with a stock nozzle and 0.2 mm with a fine one. That is an order of magnitude difference in the axis where facial features live.
FDM has real advantages, though, and dismissing it is a mistake. Filament costs roughly 20 to 30 USD per kilogram against 25 to 60 USD per litre for standard resin, prints are tough rather than brittle, there is no isopropyl alcohol, no nitrile gloves, no uncured monomer to dispose of, and no wash-and-cure station to buy. For 60 mm and larger display figures, vehicles, monsters, and terrain, a well-tuned FDM machine with a 0.2 mm nozzle at 0.08 mm layers produces results that paint up perfectly well.
| Factor | MSLA resin | FDM filament |
|---|---|---|
| Practical XY feature limit | 0.15 to 0.30 mm | 0.4 mm nozzle: 0.8 mm. 0.2 mm nozzle: 0.4 mm |
| Typical layer height for minis | 0.02 to 0.05 mm | 0.08 to 0.12 mm |
| Consumable cost | 25 to 60 USD per litre | 20 to 30 USD per kg |
| Material per 32 mm figure | 3 to 8 ml hollowed | 4 to 9 g |
| Print time per figure | 1.5 to 4 hours, batchable at no extra time | 1.5 to 5 hours per figure, additive |
| Post-processing | IPA wash, UV cure, support removal | Support removal, optional sanding and filler primer |
| Durability | Brittle. Standard resin snaps at thin points | Tough. PLA survives drops and transport |
| Safety burden | Gloves, ventilation, chemical waste handling | Ventilation advisable, no chemicals |
| Best suited to | Faces, fine trim, 28 to 54 mm characters | Bulk terrain, vehicles, 54 mm and up, chunky armour |
What Layer Height Do Miniature Details Actually Need on Each Printer Type?
On resin, 0.03 mm is the sensible default for 28 to 32 mm figures and is where most hobbyists live. Dropping to 0.02 mm produces a marginal, mostly invisible improvement on a painted model while adding 50 percent to print time and increasing the number of layers where something can go wrong. Going up to 0.05 mm is entirely usable for larger figures and terrain and roughly halves your print time.
Z resolution is rarely the binding constraint anyway. Exposure time and XY pixel pitch matter more: an over-exposed print at 0.02 mm looks worse than a correctly exposed one at 0.04 mm, because excess cure bleeds light sideways and swells every fine detail by tens of microns. Run an exposure calibration test for each new bottle.
On FDM, layer height directly controls how visible the stair-stepping is on sloped surfaces, and minis are mostly sloped surfaces. Use 0.08 mm layers with a 0.2 or 0.25 mm nozzle for character work, or 0.12 mm with a 0.4 mm nozzle for larger pieces. Below 0.06 mm on FDM you usually get inconsistent extrusion rather than better detail, because the flow rate becomes too low for the extruder to modulate reliably.
Slow the FDM print down before you lower the layer height. Dropping outer wall speed to 20 to 25 mm/s and enabling a minimum layer time of 10 to 15 seconds does more for miniature surface quality than any layer height change, because it gives each layer time to solidify before the next lands on it.
How Do You Orient a Miniature on the Build Plate to Hide Layer Lines?
Orientation is the highest-leverage decision in the entire print. On resin the standard is to tilt the figure 20 to 35 degrees back and 10 to 20 degrees to one side, leaning away from the viewer, so that supports land on the back and the underside rather than the face, chest, and shield. That tilt also reduces the cross-sectional area peeled from the FEP film on each layer, which lowers peel forces and dramatically improves reliability on tall models.
The specific goal is to keep three surfaces support-free: the face, the chest or tabard, and the front of any shield or weapon. Those are the surfaces a viewer looks at and the ones where a support scar is unrecoverable without filling and resculpting. Everything else is fair game. Rotate the model in yaw as well as pitch, since turning the figure 30 degrees off the plate's X axis breaks up long straight layer transitions across flat armour plates.
On FDM you cannot tilt without creating heavy support contact on a soft plastic surface. Print figures upright, feet down, on the integrated base, and cut the model at natural seams if it has extended arms.
- Never print a resin mini flat on the plate. Direct plate contact deforms the first layers under peel force and destroys the base.
- Lift the model 5 to 8 mm above the plate on a support raft so peel forces act on the supports, not the model.
- Orient so no large flat area is exactly parallel to the plate. Parallel flats create suction and layer banding simultaneously.
- Point cloaks, capes, and backpacks downward. They are the ideal sacrificial surface for support tips.
Where Should Supports Touch a Mini to Avoid Scarring Faces and Armor?
Getting miniature supports resin printing right is mostly about where you allow contact, not how many supports you use. Manual support placement beats automatic generation on character models every time, because the auto-generator has no idea that one of those surfaces is a face. The workflow that works: run auto-generation on light or medium settings to get a scaffold, then delete every support touching a front-facing detail surface and hand-place replacements underneath.
Support tip geometry is the second variable. For 28 to 32 mm figures use a 0.2 to 0.35 mm tip diameter with a 0.1 to 0.2 mm contact depth and a small contact plate. Thicker tips hold better and leave craters that need filling; thinner tips leave almost nothing but fail on heavy overhangs. Mix them: heavy supports on the raft and main body mass, light supports on cloth edges and finger tips.
- Good contact zones: soles of feet and base underside, back of the cloak, undersides of arms and weapons, inside surfaces of hollowed shells, and the rear of the head below the hairline.
- Never contact: the face, the front of the torso, the front face of shields, weapon edges, and any lettering or heraldry.
- Island rule: every isolated island the slicer detects needs a support. Unsupported islands cure loose in the vat, fall onto the FEP, and cause the next layer to fail.
- Density guide: aim for a support roughly every 2 to 3 mm across broad downward faces, tightening to every 1 to 1.5 mm at the leading edge of a cape or an outstretched arm.
- Reinforce the tall thin parts: a spear tip or banner pole wants a support every 4 to 5 mm along its length or it will curl during the print.
Should You Hollow Your Miniature, and Where Do Drain Holes Go?
Hollow anything with a solid cross-section larger than roughly 15 mm. For a standard 28 to 32 mm infantry figure the torso is usually under that, and many people print them solid without issue: the resin saving is small and a solid mini is stronger. For 54 mm figures, busts, monsters, mounts, and anything with a chunky integrated base, hollowing miniatures for resin printing is close to mandatory, because a thick solid section shrinks unevenly as it cures and will crack or warp days after printing.
Use a 2 to 3 mm wall. Thinner than 1.5 mm and the shell can implode under suction. Both Chitubox and Lychee hollow non-destructively in the slicer, which keeps your solid master file intact.
Drain holes are not optional on a hollowed model. A sealed hollow shell traps liquid resin, which creates a vacuum against the FEP on every peel, and later leaks uncured resin out through a pinhole onto your paint job. Use a minimum of two holes, 3 to 4 mm in diameter: one at the lowest point in the print orientation and one high up to admit air. Vacuum is the enemy, and one hole alone does not break it.
- Place holes on the underside of the base, inside a cloak, or under an arm where they will never be seen.
- Hollow before adding supports, then regenerate supports. Hollowing creates new islands on the interior that need supporting.
- Enable the slicer's interior support or infill lattice at low density on any hollow taller than about 40 mm to stop the shell collapsing.
- After curing, plug the drain holes with green stuff or a drop of thick CA glue if the mini will be handled a lot.
Uncured resin trapped inside a poorly drained model is the single most common cause of a mini that mysteriously develops sticky patches weeks later. Wash the interior, not just the exterior: squirt IPA through the drain holes with a syringe and shake it out before curing.
What Wall Thickness and Minimum Feature Size Can Your Printer Resolve?
There are two separate limits and people conflate them constantly. Resolution is the smallest feature the machine can form. The structural minimum is the smallest feature that survives washing, support removal, priming, and handling, and it is always the larger of the two, often by a factor of three.
On a modern 8K resin printer with a roughly 19 micron pixel, you can technically resolve a 0.06 mm raised line. You cannot handle it. In practice, the working numbers for a resin miniature are: 0.4 mm minimum supported wall such as a cape edge, 0.8 to 1.0 mm minimum free-standing element such as a spear shaft, 0.25 to 0.3 mm minimum engraved detail depth, and 0.3 mm minimum gap between two surfaces before they fuse.
On FDM, the binding constraint is the nozzle. You cannot print a wall thinner than one extrusion width, and a single-extrusion wall is weak, so the real minimum wall is two perimeters: 0.8 mm with a 0.4 mm nozzle or 0.4 mm with a 0.2 mm nozzle. Engraved detail shallower than one layer height simply does not exist in the sliced output, so at 0.08 mm layers your minimum meaningful recess is around 0.16 mm and your minimum meaningful raised detail around 0.4 mm in XY.
Minimum Printable Feature Sizes by Printer Type: Quick Reference
Use this table as the reference when you run your thickness audit in Blender or Meshmixer. Every figure is in millimetres, measured at final print scale, and represents a conservative value that survives handling rather than the theoretical machine limit.
| Feature | MSLA resin, 4K panel | MSLA resin, 8K or 12K panel | FDM, 0.4 mm nozzle | FDM, 0.2 mm nozzle |
|---|---|---|---|---|
| Native XY resolution | 0.035 to 0.050 | 0.017 to 0.024 | 0.400 | 0.200 |
| Minimum supported wall | 0.50 | 0.40 | 0.80 | 0.40 |
| Minimum free-standing element | 1.00 | 0.80 | 1.60 | 1.00 |
| Minimum hollow shell wall | 2.00 | 1.50 | 1.20 | 0.80 |
| Minimum engraved line depth | 0.30 | 0.25 | 0.60 | 0.30 |
| Minimum raised detail height | 0.30 | 0.20 | 0.60 | 0.35 |
| Minimum gap between parts | 0.40 | 0.30 | 0.60 | 0.40 |
| Minimum pin or peg diameter | 1.20 | 1.00 | 2.00 | 1.50 |
| Minimum text height, legible | 2.50 | 2.00 | 5.00 | 3.50 |
| Minimum drain hole diameter | 3.00 | 3.00 | not applicable | not applicable |
Two caveats. Resin chemistry shifts these numbers: a tough or ABS-like resin needs slightly thicker walls than a standard brittle one but survives handling far better, and a flexible resin blend lets thin blades bend instead of snapping. And exposure calibration shifts them again, since over-exposure fattens every feature by 20 to 60 microns and closes small gaps.
How Do You Slice a Custom Mini in Lychee, Chitubox, or Cura?
For resin, Lychee Slicer and Chitubox are the two standard choices and both do the job. Lychee has the stronger automatic support generation and a better island detector; Chitubox is lighter and its manual support editing is faster once you know the shortcuts. The sequence is identical in both: import the STL, select your exact printer profile, orient and tilt, hollow if needed, punch drain holes, generate supports, inspect layer by layer, then slice.
Do not skip the layer-by-layer inspection. Scrub the sliced preview from the bottom up and watch for orphan islands with no material beneath them, sudden jumps in cross-sectional area that spike peel force, and any layer where the raft has not fully merged.
For FDM, use Cura, PrusaSlicer, or Bambu Studio. The settings that matter most for minis:
- Layer height 0.08 mm, initial layer 0.2 mm, line width matched to your nozzle.
- Wall count 3 or more, and enable the slicer's small-feature or thin-wall detection so single-extrusion details are not dropped.
- Outer wall speed 20 to 25 mm/s, with a minimum layer time of 10 to 15 seconds and part cooling at 100 percent for PLA.
- Infill 15 to 20 percent gyroid. Solid infill on a mini wastes filament and adds nothing.
- Tree supports with a low interface density, which peel off a figure far more cleanly than grid supports.
- Enable ironing only on the base top surface, never on the figure itself.
How Do You Wash, Cure, and Remove Supports Without Snapping Fine Details?
Order matters enormously here, and the correct order is counter-intuitive: wash first, remove supports second, cure last. Freshly washed resin is still slightly soft and rubbery, so supports snip away cleanly and leave smaller nubs. Fully cured resin is brittle, and pulling a support off cured resin takes a chunk of the model with it. Almost every snapped spear in the hobby comes from curing before de-supporting.
Wash in 99 percent isopropyl alcohol for 3 to 5 minutes in an ultrasonic or spinning washer, or two-stage by hand in a dirty bath followed by a clean bath. Water-washable resin needs the same two-stage discipline, and its waste water must never go down a drain. Dry the model with compressed air; residual IPA under a cape leaves a milky bloom when cured.
Cure with UV at 405 nm for 2 to 6 minutes in a turntable curing station. Over-curing is real and makes standard resin noticeably more brittle, so start at the low end and stop when the surface loses its tack. Curing underwater in a clear container is a useful trick: water blocks oxygen inhibition and gives a more even, less tacky surface.
- Use flush side cutters, not fingers, and cut 1 mm away from the surface first, then trim the remaining nub in a second pass.
- Warm the print gently with a hairdryer or a bath of warm water before de-supporting a stubborn area. Warm resin flexes instead of shattering.
- Support the part you are cutting with your other hand. Unbraced spears and outstretched arms snap from the leverage of the cutter, not the cut.
- Sand remaining nubs with a 600 to 1000 grit sanding stick after curing, and always wear gloves until the model is fully cured.
How Do You Fix Warped Spears, Suction Cups, and Other Common Mini Print Failures?
Most miniature print failures have one of four causes: too much peel force, insufficient support, wrong exposure, or trapped volume. Diagnose by looking at where in the print the failure happened, not just at what it looks like.
- Warped or curled spear: the thin part cured unsupported and shrank asymmetrically. Add supports every 4 to 5 mm along its length, thicken to 1 mm, or print it separately and pin it. A curled part can often be straightened by holding it in hot water at around 60 degrees Celsius and letting it cool held straight.
- Suction cup failure: a hollow model with one drain hole or none has pulled itself off the supports. Add a second hole to admit air, reduce the lift speed, and increase the tilt angle.
- Layer shift or ledge halfway up: peel force exceeded support strength at the point where cross-sectional area jumped. Retilt, add heavier supports to the mass above that layer, and slow lift speed to 50 to 60 mm/min.
- Missing or blobby fine details: exposure is off. Under-exposure loses detail and causes layer separation; over-exposure fills recesses and bloats edges. Run a calibration test print such as a Cones of Calibration or a validation matrix.
- Elephant foot on FDM: first layer squished too far or bed too hot. Raise Z offset slightly and reduce initial layer temperature by 5 degrees.
- Stringing and blobs on FDM minis: retraction or temperature. Lower nozzle temperature by 5 to 10 degrees and enable combing to avoid travelling over the figure's face.
Keep a short log of every failure with the orientation and settings used. A pattern usually emerges within three or four entries, and it is almost always orientation.
How Do You Prep the Surface for Priming and Tabletop Painting?
Resin prints need a wash before priming even after curing, because a thin residue of uncured monomer and IPA on the surface stops primer from keying. Scrub the cured model with warm water and a drop of dish soap using a soft toothbrush, rinse, and let it dry completely for at least an hour. Skip this and the primer will peel off in sheets the first time you handle the model.
Sand remaining support nubs with a 600 to 1000 grit stick. On FDM prints, knock down layer stepping on shoulders and helmets with sanding or two coats of filler primer.
Prime with a thin coat of dedicated miniature primer, either from a rattle can at 20 to 25 cm distance in several light passes or airbrushed at low pressure. Grey primer is the safe general choice, black for models you plan to drybrush and zenithal-highlight, white for bright colour schemes. Two thin coats beat one heavy coat every time: a thick coat fills exactly the 0.3 mm panel lines you worked to preserve.
Do a zenithal prime before you paint anything: black base, then white sprayed from directly above at roughly 45 degrees. It instantly reveals whether your generated sculpt's forms actually read at scale, and it is much cheaper to discover a flat, undefined face at that stage than after four hours of painting.
What Scale, Basing, and Cost Standards Matter for Tabletop Miniatures?
Scale and basing are not aesthetic preferences on a game table, they are compatibility requirements. A figure that stands 6 mm taller than its unit or sits on a 40 mm base where the rules expect 32 mm will look wrong and, in some systems, will actually change how the model plays. This section covers the standards, how to match an existing collection, and what custom 3d printed miniatures genuinely cost against the alternatives.
What Is the Difference Between 28mm, 32mm Heroic, and 54mm Scale?
The difference is both size and proportion. True 28mm miniature scale is a measurement convention: 28 mm from the sole of the foot to the eye line, roughly 1/60 of a 1.75 m human, with broadly realistic anatomy. It is the historical wargaming standard and remains the norm for historical ranges and many older fantasy lines.
32mm heroic scale is a style as much as a size. Heroic proportion enlarges the head to roughly one seventh of body height, oversizes hands and weapons by 15 to 25 percent, and thickens armour plates. This exists because miniatures are viewed at arm's length: exaggerated features read clearly at 60 cm where realistic ones turn to mush. A 32 mm heroic figure typically stands 34 to 38 mm overall and sits noticeably chunkier beside a true 28 mm one.
54 mm, or 1/32 scale, is display territory. At 58 to 62 mm total height the head is around 12 mm tall, the eyes are 1.5 mm wide, and you can paint an actual iris. Detail that is a stylized suggestion at 28 mm becomes literal at 54 mm: individual chainmail rings, buckles with visible tongues, freehand heraldry. If your generated sculpt has a soft face, 54 mm will expose it mercilessly, while 28 mm will forgive it.
The same STL is therefore not interchangeable across scales. Scale a 54 mm sculpt down to 28 mm and the detail drops below the resolution floor; scale a 28 mm sculpt up and the exaggerations look crude. Refine at the size you intend to print.
What Base Sizes Do D&D, Pathfinder, and Warhammer Tables Expect?
Grid-based roleplaying games key base size to creature size category, because the base has to occupy the correct number of squares. Both fifth edition D&D and Pathfinder use a 1 inch grid, so a Medium creature needs a base no wider than 25.4 mm, which is why 25 mm rounds are the default. Wargames instead specify base sizes per unit for measurement and coherency reasons.
| System and unit type | Base size | Notes |
|---|---|---|
| D&D 5e / Pathfinder, Small and Medium | 25 mm round | One 1 inch grid square |
| D&D 5e / Pathfinder, Large | 50 mm round | Two by two squares |
| D&D 5e / Pathfinder, Huge | 75 mm round | Three by three squares |
| D&D 5e / Pathfinder, Gargantuan | 100 mm round | Four by four squares |
| Modern sci-fi wargame infantry | 32 mm round | Current standard for most plastic infantry ranges |
| Elite infantry and characters | 40 mm round | Heavier armoured troops, some heroes |
| Cavalry and beasts | 60 x 35 mm oval | Oval bases are standard for mounted models |
| Large monsters | 50 to 60 mm round, or 90 x 52 mm oval | Check the current rules for the specific unit |
Print your own bases 0.2 mm undersize rather than exact. A base that measures 32.3 mm will not fit a movement tray cut for 32 mm, and undersizing costs nothing visually.
How Do You Match a Custom Mini to Your Existing Army's Proportions?
Do not match by nominal scale label, match by measurement. Take a figure from the unit the new model will join and record three numbers with digital calipers: total height from base top to crown, eye line height from base top, and shoulder width. Then scale your STL so eye line and shoulder width both agree, accepting whatever total height falls out. Eye line is the landmark the human visual system actually uses to judge whether two figures are the same size.
Proportion matching is harder than size matching and is where generated models most often betray themselves. If the surrounding range is heroic-proportioned and your generated figure is anatomically realistic, matching the height will still leave it looking like a different game's model: smaller head, thinner arms, undersized weapon. Fix that in the sculpt pass: enlarge the head by 8 to 12 percent about the neck pivot, scale hands and weapon up 15 to 20 percent, and thicken the limbs.
Print a cheap test slug and a scaled-down bust before committing to a full print. A five minute test at final scale tells you more about whether details will read than any amount of viewport inspection.
How Much Does a Custom 3D Printed Miniature Cost vs Hero Forge or a Commission?
Material cost per figure is almost negligible and the real cost is equipment, time, and design. A hollowed 32 mm resin figure consumes roughly 3 to 8 ml of resin. At 30 to 50 USD per litre that is about 0.15 to 0.40 USD of material per mini. The FDM equivalent, 4 to 9 g of PLA at 25 USD per kilogram, is about 0.10 to 0.25 USD. Add supports, failures, IPA, and gloves and a realistic all-in consumable figure is well under a dollar.
Equipment is the actual barrier. An entry-level MSLA printer runs roughly 180 to 350 USD, a higher-resolution 8K or 12K machine 300 to 600 USD, and a wash-and-cure station another 100 to 180 USD. A capable FDM machine sits in the same 200 to 400 USD range with no ancillary gear. Amortised across a hundred models the hardware adds a few dollars per figure; across five, it dominates.
- AI generation plus your own printer: under 1 USD in material, same day for the model, total design control.
- AI generation plus a print service: roughly 5 to 20 USD per figure, 3 to 10 days including shipping.
- Hero Forge STL download: around 8 USD per file, immediate, limited to the parts in their library.
- Hero Forge physical print: from roughly 20 to 30 USD upward by material, 1 to 3 weeks.
- Commissioned digital sculpt: roughly 150 to 600 USD, 1 to 4 weeks, executed by a professional.
- Subscription STL patreon: roughly 8 to 20 USD per month for a themed set, no design control.
The decision logic is straightforward. If you need one specific character exactly right and have budget, a commissioned sculptor still produces the best result. If you need a character that is genuinely yours, quickly, and are willing to do a print prep pass, a tabletop miniature maker pipeline built on AI generation plus your own printer is dramatically cheaper and faster. Parametric configurators like Hero Forge sit between them: fast and reliable, but you are assembling from their library rather than making something new.
Where Should You Design the Character Concept Before Printing It?
Concept work belongs upstream of everything on this page. Settle the character's silhouette, gear, and proportions first, then bring finished reference art back here for the print pipeline.
For campaign characters, party members, and class-specific gear, work from the D&D character model guide. For broader fantasy archetypes, races, and stylistic direction, start with the 3D character generator overview.
Can You Legally Print and Sell Minis Generated From Your Own Character Art?
This is general information, not legal advice, and the answer varies by jurisdiction. In broad terms: an original character you designed, generated from your own art, and printed for your own use sits on solid ground. Printing a recognisable copy of a commercially sold miniature, or a figure that reproduces a rights holder's distinctive trade dress and named characters, does not, whether or not you generated it through an AI tool.
The distinction that matters in practice is between generic elements and protected expression. A skeleton warrior with a rusty sword is a generic fantasy trope that nobody owns. A named character, a distinctive badge or iconography, and a company's specific stylistic execution are protected expression. Selling is where exposure sharpens: personal-use printing carries a very different risk profile from listing prints on a marketplace.
- Safe: printing an original character you designed, for yourself or your gaming group.
- Generally fine: selling prints of designs licensed for commercial use, where the STL creator has granted a commercial licence. Many designers sell exactly this tier explicitly.
- Risky: selling prints of any file whose licence is personal use only, which is the default on most subscription STL services.
- Do not: reproduce and sell copies of a commercial miniature, or use a company's trademarks, names, and logos on or around your product.
Check the licence on any reference art you did not create. Using someone else's commissioned character art as your input does not transfer their rights to you.
Frequently Asked Questions About Custom 3D Printed Miniatures
Is Resin or FDM Better for 3D Printing Miniatures?
Resin is better for character miniatures at 28 to 54 mm because its horizontal resolution is roughly ten times finer: a modern MSLA panel resolves features around 0.02 mm where a 0.4 mm FDM nozzle cannot go below 0.4 mm. FDM is better for terrain, vehicles, large monsters, and anything above about 60 mm, and it is cheaper, tougher, and chemical-free. Most people who regularly 3d print miniatures end up owning both machines.
The practical test is whether the model has a face you intend to paint. Faces, hands, and fine trim at 30 mm need resin. Everything else is a judgement call about cost and convenience, and a well-tuned FDM printer with a 0.2 mm nozzle closes more of the gap than its reputation suggests.
How Much Does It Cost to 3D Print a Custom Miniature?
Materially, almost nothing: a hollowed 32 mm resin figure uses 3 to 8 ml of resin, which is about 0.15 to 0.40 USD at typical prices, and an FDM equivalent uses 4 to 9 g of filament for around 0.10 to 0.25 USD. The real cost is equipment, at 180 to 600 USD for a printer plus 100 to 180 USD for wash and cure gear on the resin side.
Using a print service instead typically costs 5 to 20 USD per figure depending on size and finish, which is the cheaper route if you print fewer than about forty miniatures a year. Above that volume, owning a machine pays for itself quickly.
Can You 3D Print a Miniature From a Photo or Drawing?
Yes. An image-to-3D generator reconstructs a mesh from your reference, and you then convert that mesh to a printable STL, thicken thin parts, scale to your table standard, and print. The whole loop from a single piece of character art to a physical figure on the desk is realistically a few hours, most of which is printing and curing rather than modelling.
Quality tracks input quality closely. A clean full-body character sheet with front, three-quarter, and back views, flat lighting, and a plain background produces a dramatically better mesh than a single dramatic render. Expect to do a manual pass on the face, the back of anything the reference did not show, and every thin weapon before it is print-ready.
What Is the Best Scale for D&D Miniatures?
For fifth edition D&D on a 1 inch grid, print Medium characters at 28 to 32 mm to the eye line, giving 30 to 38 mm total height, on a 25 mm round base. That is the size that reads well against the grid and matches most commercially available pre-painted and plastic figures.
If your group already owns a collection, match that instead of matching a standard. Measure an existing figure's eye line with calipers and scale to it. Consistency across the table matters far more than which nominal scale you picked, because the eye compares figures to each other and never to a specification.
Do 3D Printed Miniatures Need to Be Hollow?
Not always. A standard 28 to 32 mm infantry figure with a solid cross-section under about 15 mm prints fine solid, and solid is stronger. Hollow anything with a thicker cross-section: 54 mm figures, busts, monsters, mounts, and chunky integrated bases, where the thick solid mass shrinks unevenly during cure and can crack or warp days after printing.
When you do hollow, use a 2 to 3 mm wall and always add at least two drain holes of 3 to 4 mm: one at the lowest point in print orientation and one higher to break the vacuum. A hollow shell with a single hole or none will suction-cup against the FEP and tear itself off its supports.
Can a Budget FDM Printer Like an Ender 3 Print Good Minis?
Yes, with three changes: fit a 0.2 or 0.25 mm nozzle, drop to 0.08 mm layers, and slow outer walls to 20 to 25 mm/s with a 10 to 15 second minimum layer time. With those settings a well-maintained budget FDM machine produces perfectly paintable figures, particularly chunky armoured designs and anything at 40 mm and above.
What it will not do is match resin on faces at 28 mm, because 0.2 mm extrusion width is simply larger than the features involved. Design around the limitation: exaggerate the sculpt, avoid ultra-fine trim, and lean toward larger scales. Also make sure the machine itself is tight, since belt slack and Z wobble show up far more at 0.08 mm layers than at 0.2 mm.
Is It Legal to 3D Print Warhammer or D&D Style Miniatures?
Printing original figures in a general fantasy or sci-fi style for your own use is broadly fine, since nobody owns the idea of an armoured knight or a laser-armed soldier. Reproducing a specific commercial miniature, or using a company's trademarked names, logos, and distinctive iconography, is not, and selling those prints raises the exposure substantially. This is general information rather than legal advice, and specifics vary by country.
The practical rules of thumb: design your own characters, do not copy protected silhouettes and badges, check the licence on any STL you did not make yourself, and only sell prints where the file's creator explicitly grants a commercial licence. If you want to go deeper on how the underlying assets and exchange formats work, the 3D file formats reference covers what each format actually carries, which is useful context when a licence talks about derivative files.