How Do I Turn My OC Into a 3D Model?
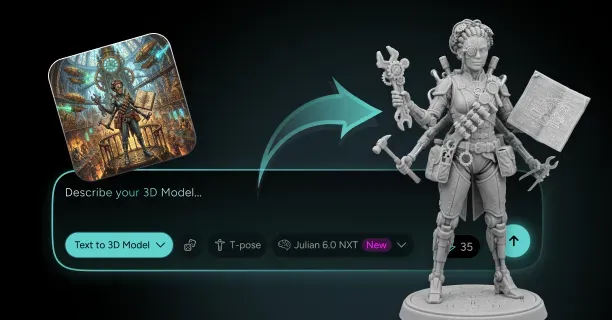
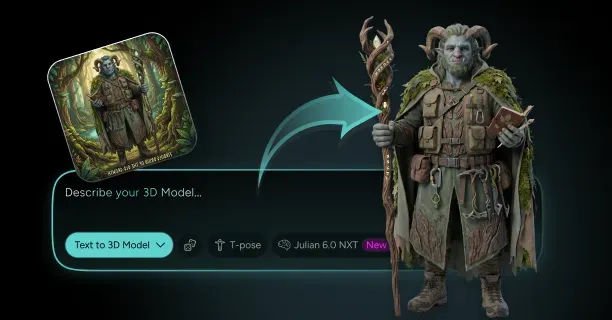
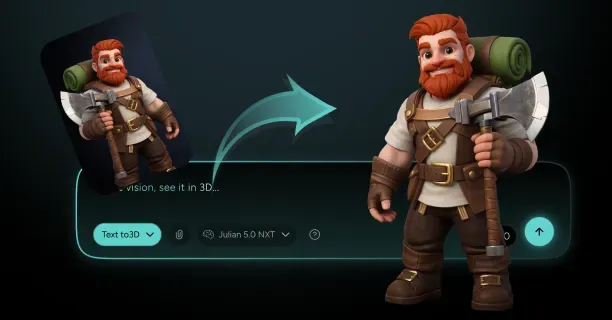
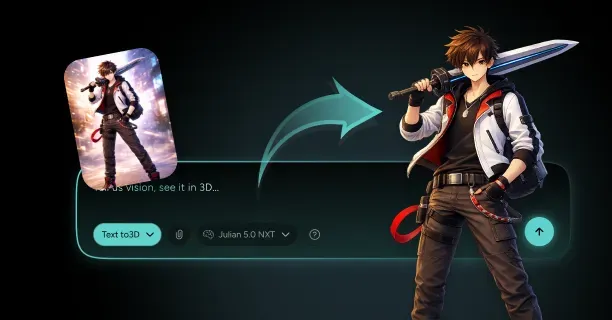
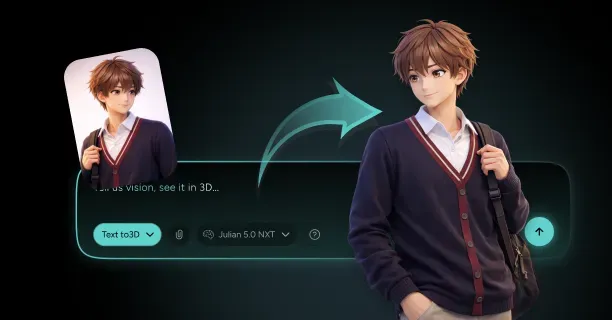
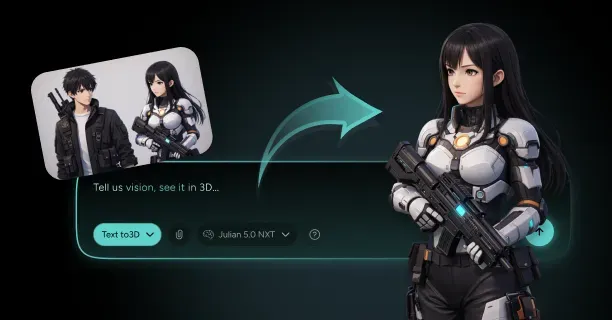
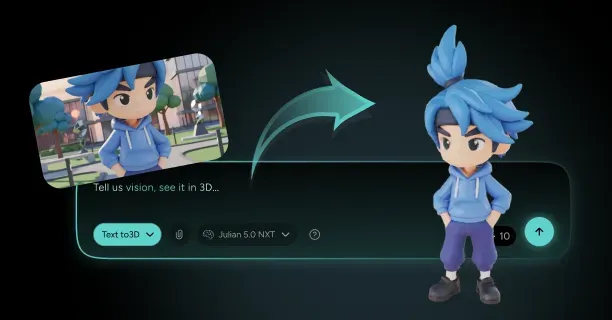
To turn my OC into a 3D model, gather every usable drawing you have of the character, pick a clean front, side, and back set, upload them to Threedium with a written description of species, palette, outfit, and markings, and let the Julian NXT generator reconstruct a textured mesh from those views. You then compare the result against your reference sheet angle by angle, regenerate or refine until the silhouette and face read as your character, and export to GLB, USDZ, or FBX for whatever you actually want to do with it. The difference between this and a generic image-to-3D job is that your OC already exists: there is a canonical design, and the whole workflow is about protecting it.
Most guides treat character generation as a blank-page problem. This one does not. You have years of art, ref sheets that contradict each other, a marking pattern you have redrawn a hundred times, and a very specific idea of what the face should look like. The workflow below is built around that constraint.
Gather Your OC's Reference Sheet, Turnarounds, and Cleanest Full-Body Art
Before you upload anything, do an inventory pass. Open every folder, every Toyhouse gallery slot, every old commission file, and pull out everything that shows the character clearly. You are looking for four categories: an official reference sheet with a palette, any turnaround or multi-view art, full-body illustrations in a readable pose, and clean face-focused pieces such as headshots or bust portraits.
Sort what you find by usefulness rather than by how much you like the piece. The most beautiful painting of your OC is often the worst input: dramatic lighting bakes shadow into the color, a dynamic pose hides proportions, and heavy rendering makes it impossible to separate paint from form. A plain flat-color turnaround you sketched in ten minutes usually outperforms a two-hundred-dollar illustration.
- Tier one: a reference sheet or character turnaround sheet with front, side, and back at matching height, flat lighting, and visible color swatches
- Tier two: two or three full-body pieces in similar standing poses by the same artist, so the proportions agree with each other
- Tier three: clean headshots that establish eye shape, face markings, and hair parting, used as face-only support
- Do not upload: chibi versions, expression sheets, heavily shaded pin-ups, anything with a filter or texture overlay, anything where the character is holding a prop across the body
Also collect the written material. Your character's bio, the notes in the ref sheet margins, the DM you sent an artist explaining that the horns curve backward and not sideways: all of that becomes prompt text later. A reconstruction engine cannot infer the story behind a scar, but it can use the sentence "a thin vertical scar crossing the left eyebrow" as a constraint.
Pick the Views That Matter: Front, Side, Back, and 3/4 Angles
Not all views carry the same information, and knowing which view resolves which part of the model tells you where to spend effort. The front view defines width: shoulder span, hip width, head width, symmetry of markings, and the horizontal placement of eyes. The side view defines depth, which is the axis AI reconstruction is weakest at: nose projection, chest depth, how far the hair sticks out behind the skull, whether the tail attaches high or low. The back view exists almost entirely for markings, hair mass, and anything mounted on the spine such as wings, capes, or a bag.
A three-quarter view is the tiebreaker. It shows how the front and side reconcile at the cheekbone and the deltoid, which is exactly where flat orthographic art tends to lie. If you can only produce one extra drawing, make it a 3/4 head at eye level.
- Front orthographic, essential: resolves width, symmetry, chest marking placement, and eye spacing. Resolves no depth at all, so a flat face and a projecting muzzle look identical
- Side orthographic, essential: resolves nose and brow profile, chest and back curvature, hair volume, and tail root height. Cannot show left-right marking differences
- Back, strongly recommended: resolves dorsal markings, hair silhouette from behind, wing or cape attachment, and heel shape. Carries nothing facial
- Three-quarter head, high value: resolves the cheekbone, jaw corner, and how the eye sits in its socket, which is where front and side views usually disagree
- Detail insets, optional: hands, accessories, boot design, horn cross-section, and marking close-ups. Useful as texture and prop reference, not structural
If your existing art does not cover these angles, draw the missing ones yourself even if you are not confident. Stick-figure-accurate is fine. A crude but correct side profile beats no side profile, because it stops the system from guessing. You can also trace over a generated first pass to produce a better side view, then feed that back in on the second attempt.
Prep Your Ref Sheet for AI: Flat Colors, Neutral Pose, No Watermarks or Text
Going from OC reference sheet to 3D model works best when the sheet is stripped down to pure design information. Reference sheets are made for human artists, so they are full of things a reconstruction engine will misread: labeled arrows, hex swatch squares, the character's name in a decorative font, a signature in the corner, alternate outfit thumbnails, and a chibi in the bottom right.
Open the sheet in any editor and produce a clean version. Crop each view into its own image on a plain white or transparent background. Delete text, arrows, watermarks, borders, and swatch blocks. Remove drop shadows under the feet. If the sheet has heavy cel shading, consider flattening it: reducing the art to flat base colors removes lighting information that would otherwise be baked into the model's albedo texture as permanent painted-on shadow.
Anything painted into your reference will be treated as surface color, not lighting. A rim light on the shoulder becomes a permanent bright stripe in the texture. Blush becomes a fixed pink patch. Strip lighting effects before upload, or expect to remove them from the texture afterward.
Pose matters as much as color. A neutral A-pose with arms 30 to 45 degrees from the body, feet slightly apart, palms inward, and the head level is ideal. A T-pose is acceptable and slightly better for rigging, but it distorts shoulder mass in art. Crossed arms, a hand on the hip, dramatic hair, or a weapon held across the torso all force the reconstruction to invent what is hidden. Use at least 1500 to 2000 pixels per view, and prefer PNG over JPEG, since compression artifacts around line art turn into noise in the mesh.
Upload Your OC Art to Threedium and Generate the First Base Mesh
With clean views ready, upload them as a batch rather than one at a time. A multi-image upload lets the system triangulate: front plus side plus back gives it three constraints on the same volume, and the more consistent those constraints are, the less it has to invent. Feeding a single image is possible and often works surprisingly well for simple designs, but for an established OC with specific proportions it is the fastest way to get a model that is technically fine and recognizably not your character.
The first generation is a blockout pass, and you should read it as one. What you are checking at this stage is not whether the eyelashes are right. You are checking gross proportion: head-to-body ratio, limb length, torso width, hair volume, and whether the species-defining features exist at all. A first pass that has the right silhouette and wrong details is a success. A first pass with beautiful details on the wrong body is a failure, and no amount of refining will fix it.
The platform generates the mesh with PBR texture maps rather than flat vertex color, which matters more than it sounds. A base color map plus normal, roughness, and metallic channels means you can adjust materials later without regenerating: making a metal pauldron read as metal is a texture edit, not a new model. Any glowing element should live in an emissive channel.
Expect three to six generations before you commit to one, and save every result including the bad ones. A generation that got the tail perfect and the face wrong is still useful, because comparing failures tells you which part of your prompt is being ignored.
Write the Prompt Like a Commission Brief: Species, Palette, Outfit, Markings
The single biggest quality jump in any AI 3D OC maker workflow comes from writing the prompt the way you would write a commission brief to a human artist who has never seen your character. Vague prompts produce generic output. "My OC, a cool demon girl" gives the system nothing to hold onto. A structured brief gives it a checklist.
Use a fixed order so nothing gets dropped: species and body type first, then proportions, then palette, then outfit, then markings, then the two or three details that make the character identifiable at a glance.
- Species and build: "adult humanoid, lean athletic build, broad shoulders, narrow waist, slightly elongated limbs"
- Proportions: "seven-and-a-half heads tall, stylized but not chibi, head slightly larger than realistic"
- Palette: "cool desaturated purple skin, silver-white hair, deep teal accents, muted gold hardware"
- Outfit: "high-collared black coat to mid-thigh, open front, fitted sleeveless top beneath, wide belt, tall laced boots"
- Markings: "symmetrical teal stripes down both forearms, a single crescent mark on the right cheek only, freckles across the nose"
- Identity anchors: "heterochromia, left eye gold and right eye violet; a chipped left horn"
Write asymmetry explicitly and repeat it. If a marking exists on one side only, name the side twice in different words: "scar on the LEFT cheek, right cheek clean." Reconstruction defaults hard toward bilateral symmetry, so asymmetric details are lost first. Negations help too: "no wings," "no glasses," "no shoulder armor" stop the system adding fantasy furniture it has seen on similar characters.
Check the Generated Model Against Your Ref Sheet, View by View
Review the result the way you would review a commission WIP: methodically, against the sheet, one angle at a time. Orbit the model to the exact camera angle of each reference view, screenshot it, and set the screenshot beside the drawing. Do not judge the model from a pretty three-quarter turntable with nice lighting, because that view flatters everything.
Work through the angles in a fixed order and score each before moving on. Front first, since width errors cascade. Then side, where reconstruction most often fails. Then back. Then a top-down look at the head, which catches hair mass collapsed into a flat pancake. Then a close orbit of the face at eye level.
- Front: shoulder width relative to head width, hip width, arm length against mid-thigh, marking symmetry
- Side: nose and brow profile, chin projection, chest depth, back curve, hair volume behind the skull, tail root height
- Back: dorsal markings, hair silhouette, any spine-mounted element, heel and calf shape
- Top of head: hair parting, horn or ear placement and angle, crown volume
- Face at eye level: eye shape and spacing, eye color per side, mouth width, jaw corner, any face marking
Write down what is wrong in plain language as you go, because that list becomes your next prompt. "Head too small, hair flat at the back, left eye wrong color, coat collar too short" is directly actionable. "Doesn't look like her" is not.
Regenerate Until Silhouette, Colors, and Face Read as Your Character
There is a decision point after every generation: regenerate, or refine. Get this wrong and you will waste hours refining a model that was never going to work. The rule is structural: regenerate for anything that is wrong about the form, refine for anything that is wrong about the surface.
Regenerate when the head-to-body ratio is off, when limbs are the wrong length, when the hair has the wrong shape at the silhouette level, when a species feature is missing entirely, when the body type is wrong, or when the face has the wrong underlying structure. These are volume problems, and pushing texture around will not fix them.
Between attempts, change one variable at a time. Rewrite the whole prompt and swap every reference at once and you learn nothing from the difference. A productive sequence looks like this: attempt one establishes the general read, attempt two fixes proportion with explicit head-count language, attempt three fixes hair by swapping in a better back view, attempt four fixes palette by naming colors precisely.
Use the squint test between generations. Shrink the render to 200 pixels tall or blur it heavily. If the character is still identifiable at that size, the silhouette and palette are correct and you should move to refinement. If it turns into a generic figure, no amount of detail work will save it: regenerate.
Three to six attempts is normal. If you pass ten with no improvement, the problem is the input, not the model: go back and draw a better side view.
Fix Small Design Details in the Refine Pass Instead of Rerolling Everything
Once the form is right, stop rerolling. Every full regeneration is a new random draw, and the thing you liked has an excellent chance of disappearing. This is the most common self-inflicted wound in AI character work: someone gets a 90 percent model, rerolls for one detail, and never gets back to 90 percent.
Refinement handles surface and detail: marking placement, color correction, small accessory adjustments, texture sharpness, the exact hue of an eye. Threedium's refinement pass targets these locally, and on enterprise tiers a human 3D artist can take the pass, which is the right call for details that are load-bearing to your character's identity and stubborn to describe: an intricate chest emblem, unusual horn geometry, a specific tattoo.
| Problem | Regenerate | Refine | Fix in a texture editor |
|---|---|---|---|
| Head too large or small | Yes | No | No |
| Missing tail, horns, or ears | Yes | Sometimes | No |
| Hair silhouette wrong | Yes | No | No |
| Marking in the wrong place | No | Yes | Yes |
| Color slightly off from the palette | No | Yes | Yes, fastest option |
| Eye color swapped left and right | No | Yes | Yes |
| Coat length or collar height | Yes if severe | Yes if minor | No |
| Baked shadow or rim light in the texture | No | Sometimes | Yes |
Keep a versioned save at every stage, named plainly: oc_v3_good_face_bad_coat beats final_FINAL_2. When you decide the third attempt's hair was better, you want to be able to go back.
Decide the Destination: Display Render, Game Asset, VR Avatar, or 3D Print
Where the model is going determines what "finished" means, and the requirements diverge sharply. Decide before you start optimizing, because the same mesh cannot be simultaneously ideal for a 4K portfolio render and for a mobile VR headset.
A display and render model is the least constrained: keep the polygon count high, use 4096 x 4096 texture maps, and do not decimate anything. A game asset needs clean topology and a budget: a stylized character for a hobby project typically lands between 15,000 and 50,000 triangles with 2K textures. A real-time avatar is the strictest, with standalone headset budgets around 7,500 to 10,000 triangles for the top performance ranks and much more room on PC. A print model ignores polygon count entirely and cares only about being watertight, manifold, and thick enough to survive.
| Destination | Triangle target | Texture size | Format | Critical requirement |
|---|---|---|---|---|
| Portfolio render, ref sheet, print art | 200,000 or more | 4K | FBX or GLB | Silhouette and material quality |
| Hobby game asset | 15,000 to 50,000 | 2K | FBX or GLB | Clean deforming topology, sane UVs |
| PC social VR avatar | 32,000 to 70,000 | 2K, few materials | FBX or VRM | Humanoid rig, visemes, blendshapes |
| Standalone headset avatar | 7,500 to 10,000 | 1K, one or two materials | FBX or VRM | Aggressive material and bone limits |
| Web and AR viewer | 30,000 to 100,000 | 2K compressed | GLB, USDZ | File size, correct real-world scale |
| Resin 3D print figurine | Irrelevant | None needed | STL or OBJ from a solid mesh | Watertight, manifold, minimum wall thickness |
If you want more than one destination, produce a high-detail master and derive the others from it. Never optimize the master. Polygon optimization is a one-way door: you can always go down from 200,000 triangles, but you cannot recover detail after decimating to 8,000.
Export Your OC as GLB, USDZ, or FBX Without Losing Its Textures
Export is where most first-timers lose their textures, and the cause is almost always the same: FBX references textures as external files rather than embedding them. If you export FBX and move the file without its texture folder, the model opens grey. GLB and USDZ are single-file container formats that pack geometry, materials, and textures together, which is why they travel well.
Pick the format by target, not by habit. GLB is the general-purpose answer: it opens in web viewers, Blender, Godot, most engines, and Discord previews, and it carries PBR materials natively. USDZ is for Apple AR, so this is the format you use to place your OC on your desk through an iPhone camera. FBX is what Unity, Unreal, and Maya pipelines expect, and it is the required intermediate for most avatar upload flows. VRM matters if the destination is a VTuber or social VR application, since it standardizes the humanoid bone map and expression set into the file itself.
- Check scale on import: engines disagree about units. A model that arrives 100 times too large or too small has a centimeter versus meter mismatch, not a modeling error
- Check the up axis: Y-up is standard for GLB and most engines, Z-up for Blender's native view. A character lying on their back is an axis problem
- Open the export in a second application before you consider it done. What looks right in the exporter can lose emissive or transparency in the target
- Keep the source master plus the highest-resolution textures separately, so you can re-export at a different budget without regenerating
Transparency is the most common material casualty. Alpha-cutout hair strands, sheer fabric, and glowing overlays translate inconsistently between formats, and a coat that reads as chiffon in one viewer can render opaque in another. If your OC depends on a transparent element, test it early.
Where 2D Character Designs Fight Back Against 3D
When you turn a drawing into a 3D model, you are negotiating rather than translating. A 2D character design is allowed to cheat: the artist redraws the same character slightly differently every time, hides awkward angles, and lets hair obey narrative gravity rather than actual gravity. A 3D model cannot cheat, because it exists from every angle at once. The sections below cover where that collision happens and what to do about each case.
Reconciling Contradictions Between Old and New Art of the Same Character
Pull up art of your OC from three years apart and you will find contradictions everywhere: the hair got longer, the eyes got smaller, the outfit gained a belt, the horn curve changed, and at some point you quietly stopped drawing the freckles. This is normal and healthy for a character, and it is poison for a reconstruction system, which will try to average the versions into a mush that matches none of them.
The fix is editorial, not technical. Before you generate, declare a canonical version and write it down. Pick one drawing as the design authority, then list every deviation you are accepting from other pieces. If the 2023 design has the hair you want and the 2026 design has the outfit you want, say so explicitly and only upload images consistent with that combination.
- Write a one-page canon note: hair length and shape, eye shape, height and build, outfit pieces, markings, accessories, and the exact palette
- Retire conflicting references from the upload set rather than including them for completeness
- Note which changes were deliberate redesigns versus drift you never intended, since drift is the thing you probably want to correct anyway
Building the model is often the moment you finally settle a design question you have avoided for years. Treat that as a feature: a 3D model forces you to decide whether the coat is knee length or mid-thigh, because it cannot be ambiguously both.
Multi-View Consistency: Making the Face Match From Every Camera Angle
Multi-view consistency is the core technical problem in image-to-3D. The system sees a handful of 2D projections and must infer a single 3D volume that explains all of them. When your reference views disagree, the reconstruction has to pick a compromise, and compromises show up as a face that looks correct from the front and wrong from every other angle.
The classic failure is what artists call the flat-face problem. Front-facing art is drawn with the nose implied by a line and the cheeks implied by blush, so a naive reconstruction builds a face that is essentially a painted plane. From the front it looks fine. From 30 degrees off-axis the nose has no projection, the brow has no shelf, and the whole head reads as a sticker on a ball.
Two things fix it. First, always include a genuine side profile, the only view carrying nose and chin projection. Second, check your views for height alignment: eyes, chin, shoulders, waist, knees, and feet should sit at the same vertical positions across all of them. Drawn turnarounds drift, with the side view's head slightly larger or the back view's legs slightly longer, and that drift becomes asymmetric bloat in the mesh.
Drag horizontal guide lines across your front, side, and back views at the eye line, chin, shoulder, waist, and knee. If a landmark is more than a few percent out of alignment between views, fix the drawing before uploading. Misaligned turnarounds produce warped heads, and no prompt wording will correct it.
Preserving Heterochromia, Scars, and Asymmetric Markings AI Tends To Lose
Asymmetry is the first casualty of generative reconstruction, and it hurts because asymmetry is usually where a character's identity lives. Heterochromia, a scar over one eye, a single earring, one mechanical arm, a chipped horn, a marking that only wraps the right leg: these are exactly the details that make an OC theirs, and exactly the details a system trained on mostly symmetrical characters will quietly average away.
Fight it on three fronts. In the references, make sure at least one image shows the asymmetric feature unobstructed and from the side it lives on. In the prompt, state the side explicitly, repeat it, and add a negation for the other side: "left eye gold, right eye violet, do not mirror." In review, check asymmetric features first, before anything else, since they are the most likely to be missing.
When generation still refuses to cooperate, move the fix downstream. Flat markings such as scars, tattoos, freckles, and color patches live in the texture, so they can be painted directly onto the albedo map in any 2D image editor once you understand the UV layout. Eye colors are usually separate small texture regions or separate materials, making a per-eye recolor a two-minute job. Geometric asymmetry such as a broken horn or a missing ear tip is harder and is the strongest argument for using a refinement pass with a human artist on the enterprise tier.
Verify asymmetry survives every export. Some optimization steps mirror UVs to save texture space, which is efficient for a symmetrical character and catastrophic for yours: a mirrored UV island means a scar painted on the left cheek appears on both.
Translating Stylized 2D Proportions Into 3D Without Going Uncanny
Stylized proportions that read as charming in 2D can read as unsettling in 3D, and the reason is that a drawing is a single fixed projection while a model is a real volume you can walk around. Large eyes on a drawn face occupy a flat plane. Large eyes on a 3D head are actual spheres that must fit inside an actual skull, and if they are drawn at anime scale, the eyeballs geometrically overlap each other and exit the back of the head.
Practical solutions are established. Stylized character models rarely use full spheres for large eyes: they use flattened or partial-sphere eyes, sometimes with the iris painted on a curved plane, so the eye reads huge from the front without breaking the skull. The same logic applies to a small chin, a tiny waist, or a hand drawn at three-quarters of realistic size: each one needs a deliberate 3D solution rather than a literal extrusion.
- Head-to-body ratio: decide a number and state it. Realistic is 7.5 to 8 heads, stylized-heroic around 7, anime-adjacent 6 to 6.5, chibi 2 to 4
- Eyes: flattened geometry, not spheres, whenever the eyes exceed realistic scale
- Nose: a stylized 2D face often has no drawn nose. In 3D it still needs a small volume, or the face collapses in profile
- Hands and feet: stylized art shrinks them; in 3D undersized hands look like an error rather than a style
The uncanny zone sits between styles, not at either end. A fully stylized model reads as intentional and a fully realistic one reads as a person, but a model that is 70 percent realistic with anime eyes reads as wrong. Pick a coherent stylization level and hold it across the whole character.
Handling Impossible 2D Features: Gravity-Defying Hair and Floating Accessories
Every OC design has at least one element that only works because the artist decides where the lines go. Hair that spikes upward with no support, a scarf permanently caught in wind that does not exist, floating runes orbiting a hand, a cape that fans outward while the character stands still, hair that reads as one shape from the front and a completely different shape from the side.
In 3D you have three options for each of these, and choosing consciously is the whole skill. You can make it solid, sculpting the shape as literal geometry so the spikes really do stand up. You can make it float, keeping the element as a separate object with no physical connection, which is standard practice for orbiting props and works fine visually but needs a rig constraint to follow the character. Or you can redesign it for 3D, accepting a version that behaves physically.
Hair is the recurring case. Solid sculpted hair is the default for stylized characters and is what almost every anime-style 3D model uses: it is cheap, it never clips, and it holds the drawn silhouette exactly. The cost is that it does not move, so a character with iconic flowing hair will look stiff in motion unless you later split it into physics-driven strands or bone chains. Decide which matters more, silhouette fidelity or motion, before you commit.
Floating accessories also need a parent. An orbiting crystal that is not constrained to a bone will stay behind at the world origin the moment the character moves, so either attach it to a bone or accept that it only works in still renders. Capes, long coats, and skirts are the other trap: a cape modeled in a dramatic flare is permanently flared, which looks great in a portfolio render and absurd when the character sits down. For anything animated, model cloth in its resting shape and add motion through simulation or bones.
Keeping the Exact Hex Palette From Your Reference Sheet
Color is the detail OC owners are most protective of and the one that drifts most reliably. You know your character's hex codes. The generated model comes back with something adjacent: the purple slightly bluer, the teal slightly greyer, the hair a touch warm. This drift happens partly because generation infers color from art that was drawn under implied lighting, and partly because a PBR material rendered under a light is never the flat swatch value.
Start by naming colors precisely in the prompt. Hex values sometimes help, but descriptive color language is more reliably interpreted: "muted dusty lavender, low saturation, slightly cool" carries more usable information than a raw code. Then fix the remainder in the texture rather than through more generations, because direct correction is exact and regeneration is a lottery.
The reliable method is a flood-fill or selective hue correction on the base color map. Open the albedo texture in any image editor, sample the generated color, and shift it toward your target with a hue-saturation adjustment restricted to that range. Because PBR separates color from lighting, the corrected albedo will render correctly under any light, which is exactly why baked shading in your reference is so damaging: painted-in shadow makes clean color replacement impossible.
Account for color space too. Base color maps are stored in sRGB while normal and roughness maps are linear, and importing an albedo as linear washes everything out. If the model looks faded or oddly bright after import, check the color space flag before repainting anything.
Line Art vs Painted Art: How Rendering Style Changes the 3D Output
How your reference is rendered changes what the reconstruction can extract from it, and the two extremes fail in opposite directions. Clean flat-color line art gives sharp, unambiguous boundaries: the system knows precisely where the jacket ends and the shirt begins, so color separation comes out crisp. What it does not give is any volume information, because a flat cel-shaded drawing contains almost no cue about how round a surface is.
Painted or rendered art gives the opposite. Soft shading tells the system a great deal about form: where a surface turns away from the light, where an ambient occlusion crease sits, how the cheekbone catches light. That produces better volume. The cost is that the lighting gets baked into the albedo, so your character arrives with a permanent highlight down one arm and a dark side that no relighting will remove.
- Flat color with clean lines: exact color boundaries, almost no volume information. Add a side view and describe volumes in words such as "full rounded cheeks, deep chest"
- Cel shaded, two tones: a good balance, but the shadow tone can be read as a second material color. Flatten or reduce the shadow layer before upload
- Soft painted: strong volume cues, lighting permanently baked into the albedo. Even out the lighting first, or correct the texture afterward
- Heavily rendered with effects: glow, bloom, and grain all become surface texture. Use as a secondary style reference only, never as primary input
- Sketch or rough lines: ambiguous edges and a noisy silhouette, but perfectly usable for supplementary views if the outline is clean
The practical sweet spot is flat or lightly cel-shaded art with clean edges and even, diffuse lighting, supported by prompt language that describes volume. That combination is why a plain reference sheet outperforms a gallery piece.
What To Do When the AI Ignores Your OC's Species or Body Type
Sometimes generation simply overrides you. You asked for a lanky seven-foot demon and got an average-build human with horns. You asked for a plus-size character and got a slim one. You asked for a lizard-person and got a human in a scaly bodysuit. This happens because generative systems regress toward the statistical center of what they have seen, and character art skews heavily toward a narrow band of body types.
The counter is specificity and repetition. Describe the body in structural terms rather than adjectives: "wide ribcage, thick waist, heavy upper arms, full thighs, soft belly" gives geometry to build, while "plus size" is a label the system may treat as optional. For non-human species, lead with the skeleton: "digitigrade legs with a raised hock," "elongated muzzle occupying 40 percent of head length," "no external ears, frilled crest instead."
- Front-load the critical trait in the prompt. Elements described first tend to survive; elements buried in clause five get dropped
- Repeat it in different words across the prompt so it is reinforced rather than mentioned once
- Add explicit negations: "not human proportioned," "no human nose," "not slim"
- Change the reference, not just the prompt. If the images show an ambiguous build, wording will not override them
If your OC is an anthro or furry character, this fight is common enough that it deserves a dedicated workflow. The species-specific mechanics of muzzles, paws, digitigrade legs, and tail rigs are covered in depth on the fursona 3D model guide, which starts from the same reference-sheet prep described here and then goes species by species.
Iterating With an Artist's Eye: Silhouette, Palette, and Expression Checks
The last skill is knowing what to look at, and it is borrowed directly from character design practice. Three checks catch almost everything, in this order: silhouette, palette, expression.
The silhouette check is the strongest single test in character design. Render the model as a pure black shape against white from front, side, and back. A well-designed character is recognizable from silhouette alone, because the distinctive elements, the hair shape, the coat flare, the horns, the tail, break the outline in a memorable way. If your silhouette turns into an anonymous blob, the model has lost the design even if the textures are perfect. Compare it against a silhouette of your reference art to see exactly which shape got softened.
The palette check means viewing the model in flat, neutral lighting and comparing the colors side by side with your reference swatches, ideally as literal squares next to the render. Judge color under neutral light only: a warm three-point studio setup will make every comparison lie.
The expression check is about the resting face, because neutral is not the same as blank. If your character reads as smug, tired, or friendly in your art, the model should carry a hint of it in the brow angle, eyelid position, and mouth corners. A dead-neutral face on a character known for a permanent smirk will feel wrong without you knowing why.
Iterate in that order and stop when all three checks pass. There is a point where you are no longer improving the model, only changing it, and recognizing that moment saves hours.
What Can You Do With a 3D Model of Your OC?
A finished OC 3D model is a reusable asset rather than a single deliverable, and most of its value shows up in your 2D work. It renders new reference sheets on demand, solves poses you have avoided drawing for years, prints as a physical figurine, and drops into engines. If your destination is a social VR or streaming avatar, rigging for VRChat, VTubing, or a game engine is a separate technical job with its own performance rules, and it starts from the model this page produces.
Pose and Render New Reference Sheets for Toyhouse and DeviantArt Profiles
The most immediately useful application is generating your own reference art. Once your OC exists as a posable model, a full turnaround is a matter of rotating a camera and hitting render. You can produce a perfectly aligned front, side, back, and 3/4 set in minutes, at any resolution, with consistent lighting and zero proportion drift between views.
That solves a real problem for anyone who commissions art. Handing an artist a clean turnaround with matching heights eliminates the back-and-forth about what the design actually is, and it answers questions your drawn sheet never did, such as what the back of the outfit looks like or how the hair sits from above.
- Orthographic turnaround: four or six views at identical camera distance for a commission-ready sheet
- Expression and pose sheets: the same character in a grid of poses, all perfectly on-model
- Profile art: a lit hero render for a Toyhouse or DeviantArt header
- Detail crops: close renders of accessories, boots, or emblems that are tedious to redraw
Use flat, even lighting for reference renders and save dramatic lighting for showcase pieces. A reference sheet exists to communicate design, and a strong key light hides half of it.
Use Your 3D OC as a Drawing Reference for Foreshortening and Hard Angles
Every artist has angles they avoid: extreme foreshortening, a face tilted up and away, a hand reaching toward the viewer, the character seen from below. Those avoidances become visible over a gallery, the same three-quarter view repeated for years. A 3D model of my OC removes the excuse, because you can rotate the exact character into the exact angle and draw from observation instead of guessing.
The workflow is simple. Pose the model roughly, set the camera angle and focal length, and render a flat clay version with no textures. Import that as a bottom layer, drop the opacity, and draw over it. You are not tracing a finished image, you are using a construction underlay the way artists have always used wooden mannequins and photo reference, except this mannequin is your actual character with the right proportions and hair mass.
Camera focal length controls how much foreshortening you get. A long lens around 85mm flattens the figure and flatters portraits, while a wide 24 to 35mm lens exaggerates whatever is closest to the camera, which is exactly what a punch toward the viewer needs. Matching the lens to the drama you want fixes a stiff composition faster than redrawing it.
The learning benefit is real: drawing your own character from unfamiliar angles over a correct underlay trains the spatial understanding that eventually lets you draw those angles without one.
3D Print Your OC as a Figurine, Charm, or Convention Badge
Physical merch is the payoff most people want. To 3D print your OC, the model has to satisfy a completely different set of requirements from a render or a game asset, and none of them involve polygon count.
The mesh must be watertight, meaning no holes, and manifold, meaning every edge is shared by exactly two faces with no internal geometry or self-intersections. Separate objects that merely overlap, which is normal and fine in a render, must be booleaned into a single solid or the slicer will produce nonsense. Free tools and most slicers include a mesh repair step that handles common cases automatically.
Then there is physical survivability. Anything thinner than the printer can produce will fail or snap. On a typical FDM printer with a 0.4mm nozzle, keep walls at 1.2mm or thicker. Resin SLA printers resolve far finer detail, commonly 0.02 to 0.05mm layers, but a part below roughly 0.6 to 0.8mm is still fragile. The sword, the antenna, the thin tail tip, and the hair spikes all need thickening, and long thin elements are often printed separately and attached.
- Display figurine, 75 to 150mm: resin SLA for detail. Watch thin limbs, unsupported overhangs, and center of gravity
- Chibi or desk figure, 40 to 75mm: resin or fine FDM. Simplify face detail before printing, since it disappears at small scale
- Charm or keychain, 25 to 50mm: needs a reinforced loop, and any feature below 1mm will vanish
- Convention badge, 60 to 100mm low relief: FDM with color changes or a flat print. Plan relief depth, weight, and a mounting point
- Full-color print, any size: binder jetting through a print service. Costs more, and the texture prints exactly as-is so it must be clean
Hollow anything larger than about 50mm and add at least two drain holes of 3mm or more if you print in resin. A solid resin figurine wastes a large amount of material and can trap uncured resin inside, which causes the model to crack or deform days after printing.
Without a printer, upload to a print service and let them handle material and supports. Expect roughly 20 to 60 US dollars for a small resin figurine printed and shipped, and more for full-color prints.
Furry and Anthro OCs: When the Fursona Workflow Fits Better
If your OC is a furry, anthro, or otherwise non-human character, most of this page still applies, but several steps change enough to be worth handling separately. The reference-sheet prep, multi-view consistency, and marking-preservation work above are identical. What differs is anatomy, and anatomy drives everything downstream.
Anthro characters bring problems humans do not have: muzzles needing mouth geometry built around a projecting jaw rather than flat lips, digitigrade legs where the backward-bending joint is an ankle rather than a reversed knee, paw pads and claws, tails requiring a bone chain, ear bones, and fur faked with painted texture and alpha cards rather than simulated strands. Each has a standard solution, and none is guessable from a human-character workflow.
The signal that you should switch guides is simple. If your character has a muzzle, a tail, digitigrade legs, paws, or a full coat of fur, work from the fursona model workflow instead, and treat this page as the upstream reference-prep step. If your character is essentially human with animal ears and a tail added, stay here and describe the additions explicitly in the prompt.
Anime-Style OCs: Pairing This Guide With the Anime Character Pages
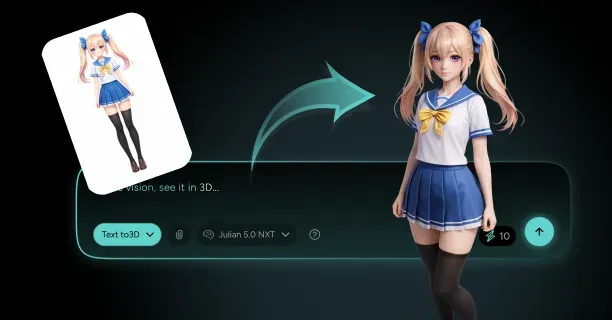
Anime and manga styling is common enough among OCs that it has its own technical vocabulary, and the specific challenges are proportional and shading-related rather than anatomical. Large stylized eyes need flattened geometry and often a dedicated shader trick so the highlight stays readable from every angle. Hair is built as solid interlocking clumps rather than strands. The face uses a deliberately simplified nose. And the whole thing usually wants a cel or toon shader, since a standard PBR render makes an anime character look like a plastic doll.
Those topics are covered on the anime 3D character guide, which goes into eye construction, hair clump topology, and toon shading setup properly. Use this page for the OC-specific problems, reconciling your art history and preserving your palette and markings, then apply the anime-specific construction there.
It is worth noting where anime-style OC creation overlaps with existing free tooling. VRoid Studio is a well-known free application for building anime-style humanoid characters from parametric presets, and it is genuinely good at what it does. The tradeoff is that it builds characters from its own component library, so your OC ends up expressed in VRoid's vocabulary of face shapes and hair presets. That is a fine outcome for a generic anime character and a frustrating one for a specific existing design with unusual features. Image-to-3D generation goes the other way: it starts from your art rather than from a preset library.
AI Generation vs a $200-600 Commission: When Each Makes Sense
An OC 3D model commission from a freelance character artist typically runs 200 to 600 US dollars for a stylized character with textures, with the range widening in both directions: simple chibi or bust work can land near 100, while a fully rigged, game-ready or avatar-ready character with blendshapes commonly runs 400 to 1,500 or more. Turnaround is usually two to six weeks, and revision rounds are typically capped at two or three.
What you buy at that price is judgment. A human artist reconciles your contradictory references by asking you which one is canon, understands that the horn silhouette is the thing you actually care about, builds clean topology that deforms properly at the shoulder and hip, and lays out UVs sensibly. Those are exactly the decisions that are hard to specify in a prompt.
What AI generation buys is iteration speed and cost. You can produce a dozen interpretations of your character in an afternoon, test whether the design even works in 3D, and settle design questions before spending money. That makes the two approaches complementary rather than competing.
| Approach | Typical cost | Turnaround | Iterations | Best for |
|---|---|---|---|---|
| AI generation | Subscription or credit based | Minutes per attempt | Effectively unlimited | Exploration, renders, print masters, drawing reference |
| AI generation plus human refinement | Mid range | Days | Many, then targeted fixes | Getting stubborn identity details exactly right |
| Freelance commission | 200 to 600 typical, 1,500 or more when rigged | 2 to 6 weeks | 2 to 3 revision rounds | Production assets, complex rigs, exact design fidelity |
| Learning to model it yourself | Free software, large time cost | 100 to 300 hours for a first character | Unlimited | People who want the skill, not just the model |
The pragmatic path for most OC owners is a hybrid: generate to explore and to answer design questions, refine what is close, and commission only the specific piece that generation cannot deliver. Starting a commission from a generated blockout also tends to reduce the artist's time, since the proportion and silhouette conversation is already settled. Whichever route you take, the underlying 3D model is the asset you keep and re-export forever.
Frequently Asked Questions About How To Turn My OC Into a 3D Model
Can AI really turn my OC into a 3D model from one drawing?
Yes, modern image-to-3D reconstruction can produce a complete textured model from a single image, and the result is usually a reasonable interpretation. The catch is that everything the drawing does not show gets invented: the back of the head, the depth of the face, the parts hidden behind an arm. For a generic character that is fine, but for a specific OC it usually means the model is plausible rather than accurate.
Adding a second and third view changes the outcome substantially, because each additional angle replaces guesswork with a constraint. If you only have one drawing, make it a clean full-body front view in a neutral pose, and compensate with a detailed prompt describing what the front view cannot show: nose profile, hair volume from the side, back markings, and how the outfit closes.
How can I turn my OC into a 3D model for free?
Free routes exist and they involve trading money for time or for control. Blender is free and fully capable, but modeling a character from scratch is a genuine skill with a long learning curve. VRoid Studio is free and produces anime-style humanoids quickly, though your character is assembled from its preset library rather than reconstructed from your art. Free tiers and trial credits on generation platforms let you test the workflow before committing.
The honest tradeoff is this: free tools that are fast constrain what your character can look like, and free tools that are unconstrained require you to learn to model. If your OC has an unusual body type, species, or design that no preset library covers, expect either a paid generation workflow or a real investment in learning Blender.
How much does it cost to commission a 3D model of an OC?
A stylized character model with textures typically costs 200 to 600 US dollars from a freelance artist. Simple busts or chibi versions can be found near 100, and a fully rigged avatar-ready or game-ready character with facial blendshapes commonly runs 400 to 1,500 or more. Turnaround is generally two to six weeks depending on the artist's queue.
Price scales with rigging, complexity, and how many pieces the outfit has, not with how much you like the character. Ask explicitly what is included: source files, texture maps, rig, blendshapes, commercial usage rights, and the number of revision rounds. Two included revisions is common, and additional rounds are usually billed separately.
Can I turn my OC into a 3D model without learning Blender?
Yes. Generation platforms handle mesh creation, texturing, rigging, and export without you opening a 3D application at all, and for renders, drawing reference, and web or AR viewing you can go from art to finished file entirely in the browser. Threedium's pipeline covers PBR texturing, automatic rigging, polygon optimization, and export to GLB, USDZ, and FBX as part of the same flow.
Where a little Blender knowledge still pays off is in the last ten percent: repositioning a marking, thickening a thin part before printing, merging objects into a solid, or checking scale before an engine import. None of that requires learning to model. If you plan to publish avatars to a platform with strict performance rules, budget some time for the platform's own upload tooling, which is generally the harder part.
How do I keep two of my OCs looking like they come from the same world?
Consistency across characters comes from locking shared parameters before you generate any of them, then reusing those parameters verbatim. The three that matter most are stylization level, proportion system, and shared palette rules. If character A is seven heads tall with flattened stylized eyes and character B is realistically proportioned, they will never look like they belong together no matter how well each one is made individually.
Write a short style bible and paste the same block into every prompt: head-count ratio, eye style, level of surface detail, material language such as "matte fabrics, brushed metal, no glossy plastic," and a set of shared accent colors or shared metal tones that recur across the cast. Generate a single character first, get it right, and treat it as the anchor that every subsequent character is compared against.
Finish with a group check. Render all the characters side by side at the same scale under the same neutral lighting, in silhouette as well as in color. Height relationships, weight of detail, and palette temperature all become obvious in a lineup and nearly invisible when you look at each model alone.
Can I 3D print a model of my OC?
Yes, with preparation. A print-ready mesh must be watertight and manifold, exported as STL or OBJ, with every separate part merged into one solid rather than left as overlapping objects. Polygon count does not matter for printing, but wall thickness does: keep features above roughly 1.2mm for FDM and above 0.6 to 0.8mm for resin, and thicken any thin tails, weapons, or hair spikes first.
Scale and stability are the other two considerations. A common display size is 75 to 150mm tall, and anything smaller starts losing facial detail. Watch the center of gravity, since a dynamic pose usually needs a base or a support pin, and hollow larger resin prints with drain holes to save material and avoid trapped uncured resin. Most print services will flag these problems for you before printing if you ask.
Will the 3D model keep my OC's exact colors and markings?
Close, usually not exact on the first pass. Generation infers color from art that carries implied lighting, so expect a small drift in hue and saturation, and expect asymmetric markings to be the most fragile element. Symmetrical markings and large color blocks survive reliably; a scar over one eye or mismatched eye colors need explicit prompting and often a manual correction afterward.
The good news is that color and flat markings live in the texture, which makes them fully correctable without regenerating the model. Open the base color map in any image editor, shift hues to your exact palette, and paint markings directly where they belong. Because PBR keeps color separate from lighting, a corrected albedo renders accurately under any light setup, and this is exactly why stripping baked shading out of your references before upload pays off later. For identity-critical details that resist both prompting and texture edits, a refinement pass with a human 3D artist on the enterprise tier is the reliable answer, and the same principle applies to any 3D character model built from 2D art.