How Do You Make a D&D Character 3D Model From Images?
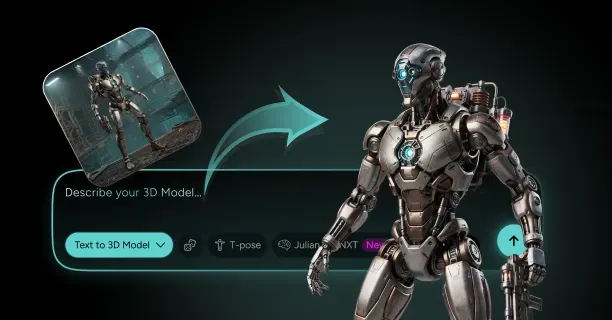
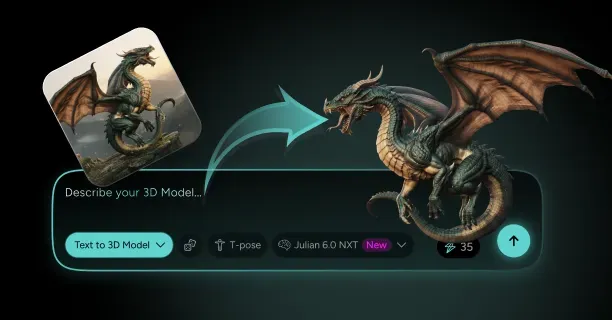
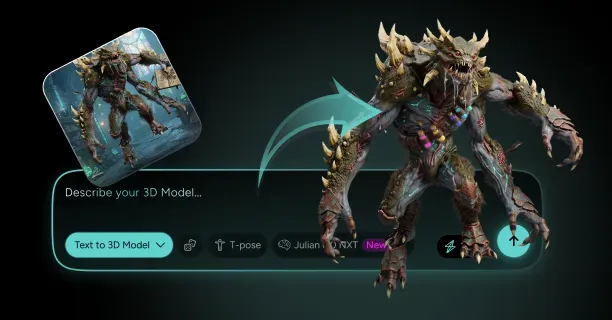
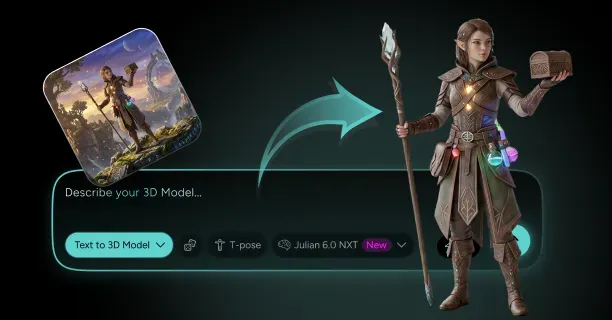
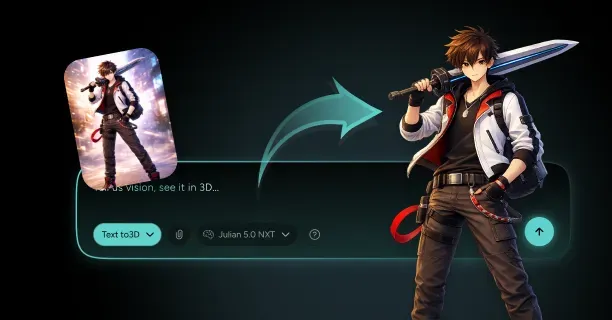
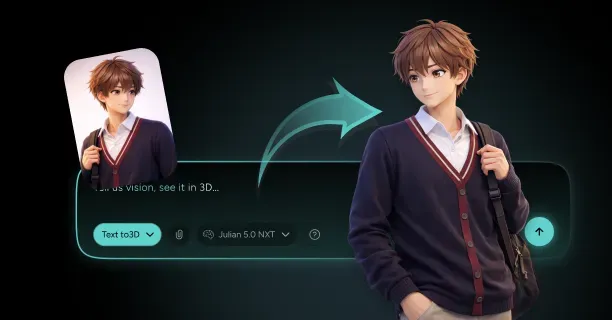
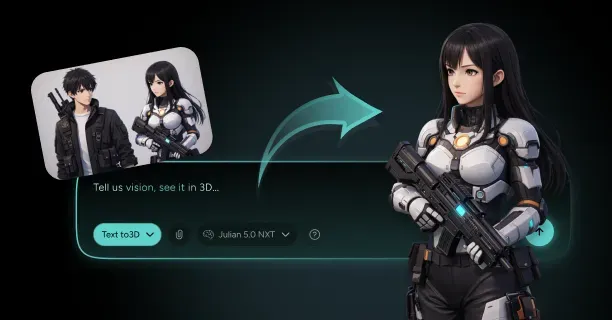
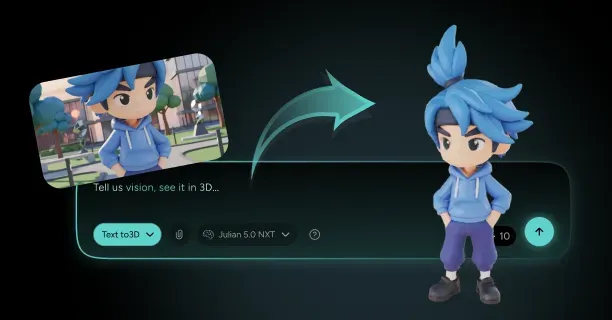
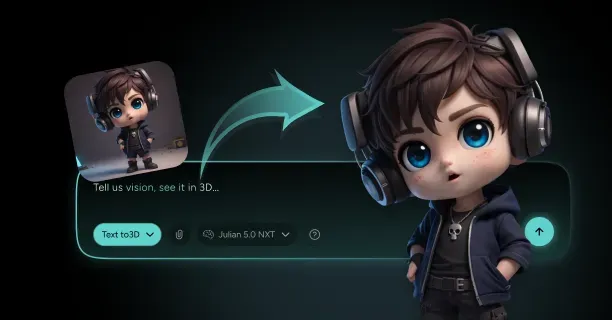
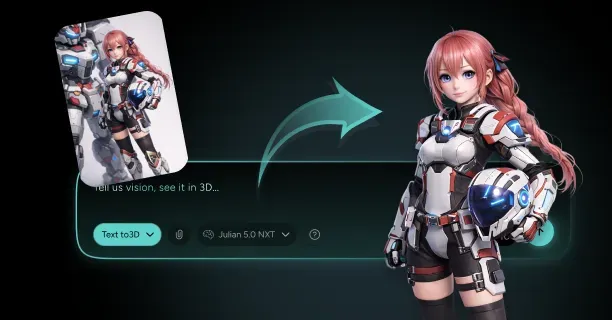
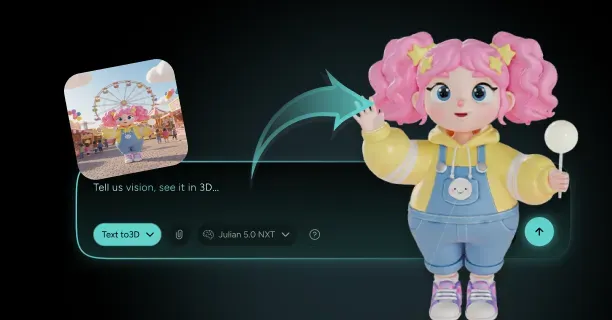
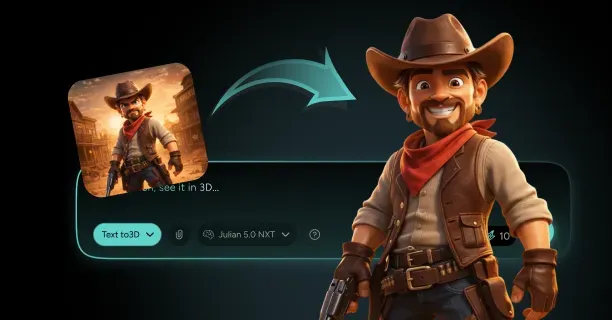
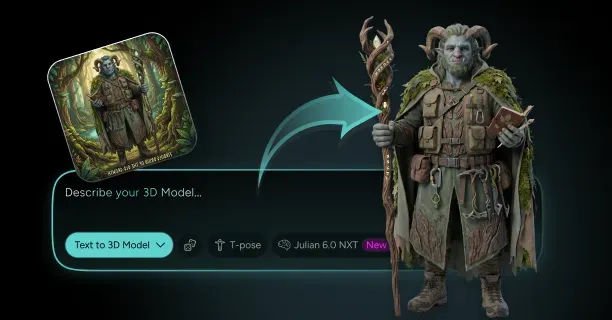
To make a D&D character 3D model from images, upload your commissioned art, VTT token, or party portrait to Threedium's character generator, write a prompt that names the race, class, and signature gear from your character sheet, and let Julian NXT reconstruct a full-body mesh with PBR textures baked from your reference. You then check the racial anatomy, horns, tails, ears, digitigrade legs, against the art, correct the armor type, choose a pose, and export to GLB, USDZ, or FBX. The entire loop takes a single sitting rather than the two to six week queue a custom sculpt commission usually runs, which is the practical reason people look for an ai dnd character generator in the first place.
What follows is the working process, not a feature tour: what to feed the generator, what to write in the prompt, which parts of a fantasy PC reliably break, and what to inspect before you drop the model into a virtual tabletop or send it downstream for printing.
Gather Character Art, Commission Pieces, and VTT Tokens as References
The single best input is a set of images of the same character that agree with each other. If you have commissioned art, gather every piece you own, including the sketch stages the artist sent you, because early turnarounds and orthographic construction lines are often more useful to a reconstruction than the polished final render. A front-facing full-body piece is the highest-value single image. A three-quarter view is the second. Anything showing the back, the tail attachment point, or the reverse of a cloak clasp resolves geometry the generator would otherwise have to invent.
VTT tokens are the most common asset players actually have on hand, and they are also the weakest input on their own. A 280 px circular token cropped to the shoulders gives the reconstruction a face and a helmet and nothing else. Use it as a face and palette reference, then pair it with a written description of the body, or with a second image, even a rough one, that shows the full silhouette. If your token came from a commissioned full illustration, go find the uncropped original.
Resolution matters more than polish. A clean 2000 px flat-color piece beats a 900 px heavily rendered painting, because dramatic lighting bakes shadow into what the generator reads as base color. If your art is moody and backlit, describe the true colors in words: "skin is deep crimson, not the brown it appears under torchlight."
- Ideal: two to four full-body views of the same character at 1500 px or larger, flat or evenly lit, neutral standing pose
- Strong: one full-body front piece plus a bust or portrait for facial detail, plus a written gear list
- Workable: a single dynamic action illustration, supported by a detailed prompt covering everything the pose hides
- Weak alone: a cropped circular VTT token, a party group shot where your PC is 200 px tall, or a heavily filtered AI portrait with inconsistent gear between generations
No Art Yet? Turn Your Character Sheet Into a Visual Description
Plenty of players have a level 7 character with 40 hours of table time and zero artwork. A character sheet to 3D model workflow is entirely viable, it just moves the work from image parsing into prompt writing. The sheet already contains most of what a generator needs; it is stored as mechanics rather than as visuals, and your job is to translate it.
Walk the sheet top to bottom and convert each block into something a renderer can draw. Race and subrace become anatomy and proportion: a mountain dwarf is 4'6" with a barrel chest and thick forearms. Class and subclass become silhouette and material: a Circle of the Moon druid is layered hide and linen with an antler headpiece. The AC line becomes an armor category with real thickness. The equipment list becomes literal geometry. Background becomes small props and wear patterns, so a soldier gets unit insignia on the pauldron and scuffed leather. Physical description fields, height, weight, age, eye color, become proportions and palette.
Write it out as a paragraph rather than a bulleted stat block. Generators respond better to connected description than to a comma-separated dump of forty adjectives. Aim for 80 to 150 words that read like an artist brief: who they are, what they are wearing from the ground up, what they are holding, and what one detail matters most to you. That last part is worth stating explicitly, because it tells you what to check first when the result comes back.
Upload Your Reference Images to Threedium's AI Generator
Once your references are collected, open the 3D model generator and start a new character job. Both paths are available in the same place: you can run image-to-3D by uploading your art, text-to-3D by writing the description alone, or combine both, which is what most players with partial reference should do. The combined path is the strongest for TTRPG characters because your art rarely shows everything and your prompt can fill the gaps.
Prepare the files before you upload. Crop out backgrounds, other party members, name plates, watermarks, and any UI chrome from a VTT screenshot, because anything left in the frame is a candidate for reconstruction. Save as PNG or high-quality JPG, and keep any existing transparent background, since a clean alpha channel is a strong silhouette hint.
Strip your reference to the character only. A 1500 px image where your PC occupies 400 px of frame is effectively a 400 px reference. Crop tight to the silhouette with a small margin, and upscale nothing, adding fake pixels does not add real detail and can introduce texture noise that gets baked into the albedo.
Write a Prompt That Locks In Race, Class, and Subclass
The prompt is where a generic fantasy figure becomes your specific PC. The failure mode of every dnd character creator 3d workflow is producing a competent, generic adventurer: a human-ish person in vaguely medieval leather holding a sword. You avoid that by being aggressively specific about the three things that define a tabletop character, race, class, and subclass, and by describing what they look like rather than naming the mechanic.
Race first, because it determines the skeleton and the head. Do not just write "tiefling." Write the anatomy: "tiefling with deep red skin, solid gold eyes with no visible sclera, two ram-style horns curling back and down past the jaw, a long thin tail with a spaded tip, and small pointed ears." A generator that has to guess what a tiefling looks like will produce a horned human. A generator handed six concrete anatomical facts produces something recognizably yours.
Class second, expressed as material and silhouette. "Wizard" is a job title; "long layered robe with a wide collar, an open belted overcoat, a component pouch on the hip, a leather-bound spellbook chained to the belt" is a silhouette. Subclass is what makes it distinct from every other wizard: a School of Necromancy wizard reads differently from a School of Evocation wizard only if you describe the difference in materials, bone toggles and dark charcoal linen versus scorched hems and brass focus rings.
- Weak: "dragonborn paladin with a sword and shield, fantasy style"
- Strong: "bronze dragonborn paladin, 6'4", broad-shouldered, blunt draconic snout with short frills sweeping back from the jaw, no external ears, four-fingered clawed hands, digitigrade legs; wearing polished half-plate over a knee-length crimson tabard, a heavy kite shield strapped to the left forearm, a longsword in the right hand held point-down at rest"
- Add the anchor: "the most important details are the bronze scale color and the shape of the snout, match those to the reference image before anything else"
Specify Signature Equipment From Your Inventory List
Equipment is where a custom dnd character model earns its keep. Anyone can generate a fantasy fighter; only you know that your fighter carries a notched family greatsword, wears his dead brother's cloak pin, and has a lantern hooked on the pack because he refuses to go underground without light he controls himself.
Work from the actual inventory block on the sheet and pick the four to six items that are visible and meaningful. More than that and the model becomes a cluttered adventurer-shaped shelf. Every item you name should carry three attributes in the prompt: what it is, where it sits on the body, and roughly how big it is relative to the character. "Longbow" is ambiguous. "A recurve longbow as tall as her shoulder, slung diagonally across the back, string running over the right shoulder" is buildable.
Scale statements prevent the most common gear errors. A greatsword blade should be roughly chest height with a hilt that clears the shoulder, a kite shield covers shoulder to mid-thigh while a buckler is forearm-width, a quarterstaff stands a head taller than its owner, and a pack rides high on the back without clipping the head or the cloak clasp.
Magic items deserve a line each if they change the look. A +1 flame tongue is a normal sword until you say the fuller glows with contained fire and the crossguard is blackened. Boots of elvenkind are just boots unless you specify soft-soled, seamless, wrapped to mid-calf. If a magic item is invisible in fiction, leave it out entirely rather than letting the generator interpret the name. And do not ask for a spell effect, a held weapon, a familiar, and a floating shield in the same generation, since each detached element is another chance for a floating artifact.
Generate Variations and Pick the One That Feels Like Your PC
Generate a batch rather than a single model. Reconstruction is probabilistic, and running three to five variations from the same prompt and reference set gives you a spread to choose from instead of a single roll of the dice. Variations typically differ in the places your reference was ambiguous: horn curvature, cloak drape, exact jaw width, how much the armor flares at the hip. That is diagnostic information. If all five variations disagree wildly on the same feature, your prompt was silent about it.
Judge the batch on structure, not on polish. Textures and small surface detail are fixable in refinement; a mesh with the wrong body proportions or a fused arm is not worth rescuing. Work through a fixed checklist so you are not just picking the prettiest thumbnail:
- Silhouette match: squint at the model and at the reference side by side. Do the two black shapes read as the same character?
- Proportion: head-to-body ratio, shoulder width, leg length. Fantasy art often uses an 8 head ratio; realistic reconstruction defaults closer to 7.5
- Racial features present and correct: horns, tail, ears, snout, claws, fur, and the count and orientation of each
- Limb and digit integrity: five fingers per hand unless the race says otherwise, no fused wrists, no merged weapon-hand geometry
- Gear placement: weapons and pouches where you said, not floating or half-buried in the torso
Refine Horns, Tails, Ears, and Other Racial Features
Racial features are the highest-error region on any ttrpg character 3d model, because they are the parts furthest from the human bodies most reconstruction is trained on. Budget a dedicated refinement pass for them rather than treating them as touch-ups.
Horns fail in three predictable ways: wrong count, wrong curvature direction, and wrong attachment point. Tiefling horns emerge from the frontal or upper temporal region, not from the crown, and they should feel structurally continuous with the skull rather than glued to the hair. Check symmetry from directly overhead in the viewer, which is the one angle that makes an asymmetric pair obvious. If your character canonically has one broken horn, say so explicitly, otherwise a refinement pass will "fix" it back to a matched set.
Tails need a visible attachment at the base of the spine and a taper that reads across the whole length. The failures to look for are a tail that starts as a separate cylinder floating a centimeter from the body, a tail that clips through the back of a cloak or the hem of a robe, and a spaded or tufted tip that got smoothed into a plain point. Tails are also where the rig matters: a tail with a bone chain of five to nine joints animates convincingly in a virtual tabletop, and one modeled as a rigid stub does not.
Ears vary by race and by table convention, so say which you mean. Elf ears range from a subtle two-centimeter point to a dramatic swept blade, tabaxi ears sit high on the skull and should rotate on their own bones, and dragonborn typically have no external ears at all, only a small aural opening and frills.
Check horn, tail, and ear geometry from the top-down and rear orthographic views before you accept a model. Three-quarter hero angles hide asymmetry, and asymmetry that is invisible in a render becomes glaring the moment the model rotates in a VTT or sits on a shelf.
Correct the Armor Type: Robes, Leather, Chain, or Full Plate
Armor is a mechanical fact on your sheet and a material fact on the model, and generators regularly get the second one wrong even when the first is stated. The most common failure is what you might call armor drift: you asked for studded leather and got a hybrid with plate pauldrons and chain sleeves, because "adventurer" in the training distribution trends toward mixed fantasy armor.
Fix it by naming the category and then the specific parts. Each of the five broad categories has a distinct read that you should be able to identify at a glance from ten feet away, which is exactly the test that matters for tabletop use.
| Armor category | Reads as | Prompt language that holds | Common drift to correct |
|---|---|---|---|
| Cloth and robes | Soft vertical folds, no hard edges | "Layered linen robe, wide sleeves, corded belt, no metal" | Decorative shoulder plates appearing on a wizard |
| Leather and studded | Fitted panels, visible stitching, matte finish | "Fitted brown leather cuirass with rivets, bracers, soft boots" | Turning glossy and reading as lacquered plate |
| Hide | Irregular, fur-trimmed, asymmetric | "Layered hide and pelt, bone toggles, uneven hem" | Becoming a neat tailored jerkin |
| Chain shirt and mail | Fine repeating texture, drapes like heavy cloth | "Riveted mail hauberk to mid-thigh, split at the sides" | Mail rendered as a flat gray texture with no drape |
| Half plate and plate | Hard articulated shells, strong highlights | "Articulated steel plate, layered lames at the waist, sabatons" | Smooth single-shell armor with no joints or straps |
Pay attention to how armor meets the body at the joints. Real plate has overlapping lames at the elbow, knee, and waist, and their absence is what makes generated armor look like a costume shell. Also confirm the armor matches the class fiction and not just the AC number: a monk with an unarmored defense build belongs in wrapped cloth and a sash, not a breastplate.
Choose a Pose: Idle Guard, Mid-Spell, or Battle-Ready
Pose is a decision with downstream consequences, so make it deliberately rather than accepting whatever the reference art implied. The core tradeoff: a neutral pose is versatile and riggable, a dynamic pose is expressive and locked in.
If you intend to animate the model, use it as an avatar, or drop it into a virtual tabletop that supports movement, generate in a relaxed A-pose with arms roughly 45 degrees from the body and feet shoulder-width apart. A-pose is easier to auto-rig cleanly than a strict T-pose because the shoulder deformation is closer to its rest state, and it avoids the stretched armpit geometry that T-pose bakes in. From an A-pose you can drive any pose you want later; from a dynamic pose you cannot go back.
If the model is a display piece or a portrait render, a static character pose reads far better. Three that work reliably for TTRPG characters:
- Idle guard: weight on the back foot, weapon lowered but held, shoulders squared. Neutral enough to suit almost any martial class and it still reads as ready
- Mid-spell: one hand raised with fingers spread, weight forward, cloak trailing. Excellent for casters, harder to keep clean because the raised arm invites clipping with hood and shoulder geometry
- Battle-ready charge: low stance, weapon back and loaded, strong diagonal. The most dramatic and the least forgiving; a small proportion error becomes very visible in a wide stance
Whatever you choose, keep the head level and forward-facing, since a dramatically tilted head looks great in one render and wrong from every other angle. If you want both a display pose and a rigged version, generate the A-pose first as your master, then produce the dynamic version from the same reference set.
Preview the Model in the 3D Viewer From Every Angle
Before you export anything, orbit the model in the viewer and inspect it systematically. Most defects that ruin a character model are invisible from the front three-quarter angle the thumbnail uses, and entirely obvious from directly behind or below. Run six views in order: front, back, both profiles, top-down, and a low angle from roughly knee height. The rear view catches cloak geometry, backpack placement, tail attachment, and hair that terminates in a flat plane. The top-down catches horn asymmetry. The low angle catches the underside of the chin and the gap where a robe hem should close, which is where reconstruction most often leaves an open shell.
Then zoom in on the five regions that carry the character's identity and are also the hardest to reconstruct:
- Face: eye alignment and depth, whether the mouth is a real feature or a painted line, symmetry of the brow and jaw
- Hands: digit count, whether fingers are separated or fused into a mitten, and how they meet the weapon grip
- Weapon and hand junction: the classic failure, where hand geometry and hilt geometry merge into a single blob
- Where gear meets body: belt intersecting the torso, pauldron floating off the shoulder, strap that stops at the edge of the chest
- Hair and cloth edges: whether they have thickness or read as zero-thickness cards that vanish edge-on
Check the texture separately from the geometry by switching to a flat or unlit view. Baked-in shadow is the most common texture problem when the reference was dramatically lit, and it shows up as dark smears that do not move when you rotate the light.
Export as GLB, USDZ, or FBX
When the model passes inspection, export it in the format your destination actually wants. The three that cover nearly every TTRPG use case are GLB, USDZ, and FBX, and the choice is determined entirely by where the file is going next.
Use GLB for anything web or VTT related. It is a single self-contained binary that packs mesh, PBR textures, and skeleton together, which means no missing-texture problems when you upload it to a platform or hand it to a fellow player. Most modern virtual tabletops and web 3D viewers accept GLB or its uncompressed sibling glTF directly, and it is the default you should reach for unless you have a specific reason not to. A practical target for a VTT-bound character is 15,000 to 60,000 triangles with a 2048 px texture set.
Use USDZ for AR preview on Apple devices, keeping the file under about 25 MB for smooth handheld loading. It is the format that lets you place your character on your actual table through an iPhone or iPad camera, which is a genuinely useful way to sanity-check scale and read before committing to a physical print. Use FBX when the model is headed into a DCC application or a game engine, Blender, Maya, Unity, or Unreal, because FBX carries skeleton and animation data through those pipelines with the fewest surprises, and it is the right container for a full-resolution mesh with 4096 px maps. If you are unsure which format suits your target, the 3D file format guide lays out what each one carries and what it drops.
Physical printing is its own discipline: a dnd character stl needs a watertight manifold mesh, thickened thin elements, supports, and a scale decision, and none of that is the same job as exporting a real-time GLB. The full pipeline for converting your character into a printable file, including base sizing, wall thickness, and slicer setup, is covered on the miniature 3D model guide; export your character here, then take it there.
Why Tieflings, Dragonborn, and Layered Gear Trip Up Generators
Tabletop characters are harder to reconstruct than almost any other character type, and it helps to know why before you start blaming the tool. Two structural reasons dominate: the anatomy is frequently non-human in ways that have no single canonical reference, and the gear is layered, meaning three or four separate surfaces occupy nearly the same space at the shoulders, waist, and forearms. Add a weapon the model has to grip convincingly, and you have stacked most of the known hard problems into one figure.
Non-Human Anatomy: Tieflings, Dragonborn, Tabaxi, and Aarakocra
A tiefling dragonborn 3d model request is really a request for a human skeleton with substantial modifications, and each race modifies it differently. The reason this is hard is not that the anatomy is complex; it is that no two sources agree. Tiefling horn shapes vary across editions, artists, and tables. Dragonborn have been drawn with digitigrade legs and with plantigrade legs. Tabaxi range from lightly feline humans to full anthro cats. Your prompt has to pick a side.
Handle each race by naming the three or four specific deviations from human baseline rather than trusting the race name to carry them:
- Tiefling: horn count, shape, and attachment point; tail length and tip; solid-colored eyes; skin hue; optionally hooves or clawed feet
- Dragonborn: snout length and bluntness, frill or crest shape, scale pattern and size, absence of external ears, four-digit clawed hands, plantigrade or digitigrade legs, presence or absence of a tail
- Tabaxi: muzzle length, ear placement high on the skull, fur pattern, digitigrade stance, tail length, retractable claws
- Aarakocra: the hardest of the group, wings attached at the shoulder blades, feathered forearms, a beak replacing the mouth and nose, and talons instead of feet
- Goliath, orc, and firbolg: not exotic anatomy so much as scale and mass, which is a proportion problem rather than a feature problem
Wings deserve a specific warning. Aarakocra and winged tieflings are the most failure-prone characters to generate, because wings are large, thin, and they intersect the back exactly where a cloak, pack, or weapon usually sits. Generate with the wings folded tight against the back rather than spread, which halves the surface area competing for space.
Making Class Identity Readable: Wizard Robes vs Warlock Pacts
Class is communicated through material, silhouette, and prop, and two classes that share a mechanical role can look nothing alike. A wizard and a warlock are both robed casters on paper. In practice a wizard reads as scholarly and prepared, ink-stained fingers, a chained spellbook, tidy layered fabric, a component pouch, while a warlock reads as marked, an asymmetric silhouette, a patron sigil worn somewhere visible, something slightly wrong about the eyes or one hand.
Write the class as a visual thesis in one sentence before you write the details. "This is a scholar who has never been in a real fight" produces different geometry than "this is someone who made a bad deal and it shows." Then support the thesis with three concrete props, or you get a character wearing a bag of unrelated fantasy accessories.
The classes with the weakest default read are the ones where mechanics do not imply a look: sorcerer, bard, and artificer in particular. A sorcerer has no required equipment at all, so the entire silhouette has to come from you, usually via bloodline cues such as draconic scale patches at the temples and forearms.
Fighters, barbarians, paladins, and clerics have the strongest defaults, which is its own problem: they generate competently and generically. For these, invest the prompt budget in the specific rather than the categorical. Not "cleric with a mace and holy symbol," but "a war cleric of a storm deity, mail under a rain-stained gray tabard, a hammer with a copper head gone green, the holy symbol tattooed on the throat rather than worn."
Layered Gear: Armor Over Clothing Without Clipping
Clipping is the defining technical problem of TTRPG character models. A fully-equipped adventurer wears, from the skin outward: an undershirt or gambeson, the armor proper, a tabard or surcoat, a belt, a cloak, and then straps for pack and weapons. That is six surfaces competing for a few millimeters of space at the shoulder and the waist, and reconstruction has to decide which one is on top at every point.
Three regions fail most often: the shoulder, where pauldron, cloak, and pack strap converge; the waist, where belt, tabard, mail hem, and pouches stack; and the forearm, where bracer, sleeve, and glove cuff overlap. Inspect those three first, looking for surfaces poking through each other or for layers fused into one undifferentiated shell.
You can prevent a lot of this at the prompt stage by stating the layer order explicitly, outermost to innermost, and by naming what fastens each layer. "A dark green wool cloak over articulated steel pauldrons, pinned at the right shoulder with a bronze brooch, with the pack straps running under the cloak, not over it" gives the reconstruction a resolution rule instead of a guess. It also helps to prefer real fastening over floating: every strap should visibly terminate in a buckle, knot, or pin, because a hovering pouch is far more noticeable in a rotating viewer than in a static illustration.
If a model keeps failing at the shoulders, drop one layer. A cloak plus pauldrons plus a slung greatsword plus a backpack is four things fighting for the same 10 cm of geometry. Generate without the pack, confirm the rest is clean, and treat the pack as a separate detail pass. Fewer competing layers is almost always the fix.
Weapon Scale and Grip: Greatswords, Dual Wielding, and Shields
Weapons fail on scale and on grip, and both are worth checking separately. Scale errors come from the fact that fantasy art routinely draws weapons larger than life for drama, so a reconstruction trained on that art tends to inherit oversized proportions. If your reference art shows an anime-scale greatsword and you want something plausible, say so numerically: "the greatsword blade is roughly 110 cm, about chest height on a 6-foot character, with a 25 cm grip."
Grip is the harder problem. The hand and the hilt occupy the same space, and reconstruction frequently merges them into a single mass with no visible fingers, or leaves a visible gap so the weapon hovers in the fist. Neither is fixable by texture. Two things reduce the failure rate: describing the grip specifically ("fingers wrapped around the grip with the thumb overlapping the index finger, pommel visible below the little finger"), and choosing a resting pose where the weapon is held loosely at the side rather than clenched in a dramatic mid-swing.
Dual wielding doubles every one of these problems and adds a symmetry constraint, since two matched weapons that are not actually matched look wrong immediately. If your rogue fights with two identical daggers, check that they match in length, blade profile, and guard shape; if they are deliberately mismatched, say which is in which hand.
Shields have their own failure mode: they are large flat surfaces held close to the body, so they clip the forearm, the torso, and the cloak all at once. Specify the type by name and coverage, buckler, heater, kite, or tower, and how it attaches. If the shield carries a heraldic device, describe it as a flat design rather than expecting embossed geometry, and check that it did not get mirrored or smeared across the curve.
Spell Effects, Familiars, and Magic Item Details
Spell effects are tempting and genuinely difficult, because most of what makes a spell read visually is not geometry at all, it is light, transparency, and motion. A ball of fire rendered as opaque orange polygons looks like a pumpkin. If you want a caster mid-spell, the reliable approach is to ask for the pose and the hand shape and a subtle emissive glow at the fingertips or along a rune, and to add the actual effect later as a particle system or shader in whatever engine you are using.
Where emissive detail works well is on surfaces: glowing runes carved into a staff, a blade with a lit fuller, a sigil on an armor plate, eyes with a faint internal light. These are texture and material features rather than free-floating volumes, so they survive reconstruction and export intact. Ask for them as emissive material on named surfaces and specify the color and intensity in plain terms, "a cool blue glow at about a quarter the brightness of the surrounding metal."
Familiars and companions should almost always be separate generations. A wizard and their owl, a ranger and their wolf: generating them as one model produces a fused mass at the point of contact and no ability to move them independently in a VTT. Generate each, then compose them in your scene.
Staying True to the Character Sheet Instead of Generic Fantasy
The gravitational pull of every generative system is toward the average, and the average fantasy adventurer is a brown-leather-clad human with a sword. Fighting that pull comes down to one habit: for every attribute, state the specific value instead of letting the default fill in.
Go through the sheet and identify what makes your character not the average. Usually it is three to five things: an unusual height for the race, a distinctive scar or prosthetic, a color choice that breaks the class convention, an item nobody else carries, an age that shows. Those are the details worth spending words on.
Then use negative constraints for the defaults you do not want. Explicitly ruling something out is often more effective than describing the alternative, because it removes the strongest attractor. Useful ones for TTRPG characters:
- "No cape or cloak" when the character does not wear one, since cloaks appear by default on almost every fantasy prompt
- "No shoulder armor" for casters and unarmored classes, which otherwise acquire pauldrons
- "No glowing effects" for a mundane character, since magical glow is a strong fantasy prior
- "Not muscular, average build" for characters who are not physically imposing, since heroic musculature is the default read
- "No helmet" when the face matters, which is most of the time for a character you want to recognize
Size Categories: Halflings and Gnomes Next to Goliaths
Every generated model comes out at whatever scale the reconstruction chose, which is fine for one character and a problem the moment you have a party. Height differences between D&D races are large, a 3'2" gnome next to a 7'6" goliath is more than a two-to-one ratio, and if you generate each character independently they will all arrive at roughly the same size.
The fix is to set a reference height for each model and scale them into a common world unit after export. Decide on a canonical height per character from the sheet, then scale uniformly so that a shared metric holds across the party. Most 3D applications work in meters, so scaling a 5'6" human to 1.68 units and a 3'2" gnome to 0.97 units in the same scene gives you an accurate group.
| Race | Typical height range | Meters (mid-range) | Proportion note |
|---|---|---|---|
| Gnome | 3'0" to 3'6" | 0.99 | Larger head relative to body, about 6 heads tall |
| Halfling | 2'11" to 3'4" | 0.95 | Child-like ratio but adult facial structure |
| Dwarf | 4'0" to 5'0" | 1.37 | Broad chest and shoulders, short limbs, wide stance |
| Human, elf, tiefling | 5'0" to 6'4" | 1.73 | Baseline 7.5 to 8 heads tall |
| Dragonborn | 6'2" to 6'8" | 1.98 | Longer torso, snout adds forward length not height |
| Goliath | 7'0" to 8'0" | 2.29 | Heavier mass, roughly 8 heads, thicker limbs |
Small races need proportion work, not just shrinking. A gnome is not a scaled-down human; the head is proportionally larger and the limbs shorter relative to the torso, so state the ratio in the prompt: "approximately 6 heads tall, with a proportionally large head and short limbs." The reverse is true for goliaths and half-orcs, where the fix is mass rather than height: thicker forearms, a broader ribcage, a wider neck, and a heavier brow.
Multiclass and Homebrew Characters With Mixed Visual Cues
Multiclass characters break generation because they contain contradictory visual instructions. A paladin 6 / warlock 4 is simultaneously a holy knight in plate and a pact-marked caster, and if you list both, the generator averages them into a muddle: half-plate with vaguely spooky trim, reading as neither.
The solution is hierarchy. Pick one class as the dominant visual identity, usually the one with more levels or the one that fits the fiction of who the character believes they are, and let the other class contribute exactly two or three accent details. The paladin/warlock becomes "a paladin in dented half-plate" with two warlock accents: a patron sigil burned into the breastplate and one eye that has gone entirely black. Now it reads instantly and still tells the whole story.
Homebrew races need a different approach, since the name carries zero information outside your table. Describe it from scratch as if the reader has never heard of it: "a construct-descended humanoid with warm brass skin, seams visible at the joints, glowing amber lines along the forearms, and no hair" works where a homebrew label does not.
The same applies to reflavored equipment. If your warlock's pact weapon manifests as a scythe rather than a blade, that reflavoring exists only in your session notes; put it in the prompt as literal description and it becomes geometry. Order matters too: lead with the dominant identity and the racial anatomy, then the accents.
Keeping Faces Consistent With Commissioned Artwork
If you paid an artist for a character portrait, the face is the part you care about most and the part most likely to drift, because reconstruction reads a stylized 2D face and has to infer a 3D skull from it.
Give the face the highest-resolution reference you have, even if it comes from a different image than the body. A tight portrait crop at 1200 px or more, ideally close to front-on and evenly lit, is worth more for facial fidelity than a full-body piece at the same total resolution. Then name the two or three features that make the face recognizable, because those are the ones to protect: usually a specific eye shape, a nose profile, and one distinguishing mark. Write them as instructions, "narrow upturned eyes with heavy lower lashes, a straight nose with a slight break at the bridge, a vertical scar through the left eyebrow." Everything else can drift a little without anyone noticing; those three cannot.
Expect some translation loss and decide in advance how to resolve it. Stylized art with very large eyes will produce either an uncanny realistic face or a stylized one, so pick by saying so. Ambiguity here is what produces the unsettling middle ground.
If the model is destined for animation, an avatar, or an expressive VTT portrait, the enterprise tiers can apply a facial rig with the standard 52 ARKit blendshapes, which gives you a face that can actually emote rather than a static bust. That is worth considering if your character will appear in a streamed campaign, since a face that reacts is a different asset from a face that just exists.
Posing for Shelf Display vs Tabletop Readability
A model that looks superb as a 4000 px render can be illegible at 32 mm or as a 200 px token, because the two use cases have opposite requirements. Display rewards detail, drama, and open compositions. Tabletop rewards silhouette, compactness, and mass.
Readability at small size is almost entirely a silhouette problem. A character with arms tight to the body and a cloak hanging straight reads as a blob; the same character with one arm out and the cloak swept to one side reads instantly. The test is easy: render the model as a solid black shape at 100 px tall and see if you can tell who it is.
The practical compromise for tabletop use is moderate extension: limbs clearly separated from the torso but not fully extended, weapon angled rather than raised overhead, cloak with visible movement but ending close to the body. Anything that extends far from the body is more readable and more likely to clip in a rotating viewer.
Generate one master and derive both uses from it. Keep a full-resolution A-pose master with 4096 px textures as your source of truth, then produce a decimated 15k to 40k triangle version with 2048 px maps for VTT use and a posed variant for display. Regenerating from scratch for each use case is how you end up with three characters who do not look like the same person.
How Does AI Generation Compare To Hero Forge and Commissions?
There are three real routes to a dnd character 3d model today: a parts-based character builder such as Hero Forge, a custom sculpt commissioned from a human artist, and freeform AI generation. They are genuinely different products with different tradeoffs, and the honest answer is that which one suits you depends on how unusual your character is and what you plan to do with the file.
Hero Forge's Parts Library vs Freeform AI Generation
Hero Forge is a well-built parts-based character creator: you assemble a figure from a large curated library of heads, bodies, armor pieces, weapons, and poses, with sliders for proportion and color. Its strength is reliability. Everything in the library was modeled by professionals, fits together, and is guaranteed printable. You will never get a fused hand or a floating pouch, because those combinations were authored, not inferred.
Its constraint is also the library. If your character's look exists inside the catalog, the result is excellent. If it does not, a specific homebrew race, an unusual prosthetic, a piece of armor with a distinctive silhouette, a very particular helmet, you approximate or you go without. This is the exact gap that sends people looking for a hero forge alternative: not because the builder is bad, but because their character is not in the parts list.
Freeform generation inverts the tradeoff. There is no catalog, so nothing is out of reach in principle, and a dnd miniature from character art workflow can match an existing illustration rather than approximate it from stock components. The cost is variance: you generate several attempts, you inspect, and some come back wrong. You are trading guaranteed-clean-but-bounded for unbounded-but-needs-checking.
| Factor | Parts-based builder | AI generation | Commissioned sculpt |
|---|---|---|---|
| Time to first result | 20 to 60 minutes of assembly | Minutes per generation | 1 to 6 weeks including revisions |
| Match to existing art | Approximate, bounded by library | Direct, driven by your reference | Highest, an artist interprets it |
| Unusual or homebrew designs | Limited to catalog parts | Unbounded, described in prompt | Unbounded, at artist rates |
| Result consistency | Very high, authored assets | Variable, inspect and iterate | Very high, with revision rounds |
| Typical cost per character | Roughly 8 to 40 USD depending on file or print | Subscription or credit based | Roughly 60 to 400 USD |
| Best suited to | Standard races and classes, fast turnaround | Matching specific art, odd anatomy, many characters | One hero piece where nothing may be wrong |
What Etsy Commissions and Custom Sculpts Actually Cost
Commissioned custom sculpts are the premium option and they are priced accordingly. A digital sculpt from an experienced miniature artist commonly runs somewhere in the range of 60 to 400 USD depending on complexity, with simple humanoid figures at the low end and multi-part characters with mounts, wings, or elaborate bases at the high end. Turnaround is usually two to six weeks, longer during holiday season, and most artists include one or two revision rounds in the quoted price.
Printed-and-delivered is a separate line item. An unpainted resin print of a single character commonly lands in the 15 to 45 USD range, and a professionally painted display piece frequently runs 80 to 250 USD or more depending on the painter.
What you are buying at those prices is judgment. A human sculptor will notice that the pose does not work, that the cloak needs thickening to survive printing, that the sword grip does not close. They will also interpret your character, which cannot be prompted. What you are not buying is volume: six party members at commission rates is a four-figure project and a two-month calendar, and that arithmetic drives most people toward generation for anything other than a single hero piece.
Owning Your Files: GLB, FBX, and STL Downloads
File ownership is the least glamorous and most consequential difference between these routes, and it is worth understanding before you invest time in a platform. The question to ask of any character creator is simple: at the end, do you get a file you can open in Blender, or do you get an image and a print?
Some builders sell you the printed figure or a render while keeping the model itself inside the platform, or offer a downloadable file as a separate paid tier. That is a legitimate business model, but if the mesh stays on their servers you cannot repose it, retexture it, load it into a game engine, or hand it to a printer of your choosing.
- GLB: web viewers, VTT upload, sharing with the party. Self-contained, textures included
- FBX: Blender, Unity, Unreal, Maya. Carries the skeleton and animation, best for anything you intend to modify
- USDZ: iOS AR preview, quick scale checks on the actual table
- STL or 3MF: the printing pipeline, produced from a solidified and repaired version of the mesh
Using Your Model in Talespire, Foundry, and Other Virtual Tabletops
A 3D character model earns most of its value in play, and the path into a virtual tabletop depends on whether the VTT is 2D or 3D. For 2D tabletops such as Foundry VTT and Roll20 in their standard configuration, you do not upload the model at all. You render it and upload images: a top-down or slightly angled token at 512 px on a transparent background, plus a portrait crop for the character sheet.
For 3D tabletops, the model goes in directly, and the constraint becomes performance. A scene with six player characters, a dozen NPCs, and terrain has a total budget, so an individual character wants to sit in roughly the 15,000 to 60,000 triangle range with a 2048 px PBR texture set. Polygon optimization at export handles this; the mistake is uploading the full-resolution master and wondering why the table stutters.
Some 3D tabletops accept common interchange formats directly while others use their own asset pipeline or a modding workflow, so check what your specific platform ingests before you export. GLB is the most widely supported starting point, with FBX as the fallback for anything that expects a DCC-style asset.
Rendering Portraits and Turnarounds for Session Zero
A 3D asset is also a portrait generator, and unlike commissioned art, additional angles are free once the model exists. For session zero, a turnaround is the highest-value output: render the character at 0, 45, 90, 180, 270, and 315 degrees on a neutral background, arrange them in a strip, and your table has an unambiguous record of what your character looks like from every side.
Useful renders to produce from the same asset:
- Six-angle turnaround: neutral lighting, flat background, consistent camera distance across all frames
- Portrait crop: head and shoulders, three-quarter angle, for the VTT character sheet and party wiki
- Top-down token: straight overhead or slightly angled, 512 px, transparent background
- Hero shot: dramatic three-quarter with rim lighting, for a campaign banner or a party group image
- Scale comparison: the whole party rendered together at correct relative heights, which is often the first time a group sees how their sizes actually compare
Party group renders are worth the coordination effort. Import every character model into one scene, scale each to its canonical height, light them with a single setup, and render. You get a group portrait with consistent style and correct proportions, which is difficult and expensive to commission and nearly free once the models exist. Choose one character workflow for the whole party and the results stay coherent; the character model generator is where that consistency is easiest to maintain across a set.
When To Move On to 28mm or 32mm Miniature Printing
Once your character reads correctly in the viewer and you want a physical figure at 28mm or 32mm miniature scale, that is a separate pipeline with its own requirements, watertight geometry, thickened thin parts, base sizing, and supports, all of which are covered in the miniature model guide.
Frequently Asked Questions About D&D Character 3D Models
Can AI Turn My D&D Character Art Into a 3D Model?
Yes. Upload your character art to Threedium, add a prompt describing race, class, and gear, and the Julian NXT generator reconstructs a full-body mesh with PBR textures derived from your reference. The quality of the result tracks the quality and quantity of your input art: two or three consistent full-body views at 1500 px or larger produce a far closer match than a single cropped token.
What it will not do is read your mind about the parts the art does not show. If your only reference is a front-facing bust, the back of the cloak, the boots, and the tail are inferred rather than reproduced, and you should describe them in the prompt if you care about them. Plan on generating a small batch and choosing, rather than expecting the first output to be final.
What Is the Best Hero Forge Alternative for Custom D&D Characters?
The best alternative depends on why you are looking for one. If your character is unusual enough that a parts library cannot represent it, a homebrew race, a specific prosthetic, armor with a distinctive silhouette, or an existing commissioned design you want matched, freeform AI generation is the closer fit because nothing is bounded by a catalog.
If your reason is that you want engine-ready files rather than a printed figure, check export terms first: the practical difference between platforms is whether you leave with a GLB and an FBX you can open in Blender, or with a render and a shipping confirmation. If your character is a standard race and class and you mainly want speed, a parts-based builder does that job well; the categories are complementary rather than strictly competitive.
How Much Does a Custom D&D Character Model or Mini Cost?
Costs vary widely by route. A commissioned digital sculpt from a miniature artist commonly runs 60 to 400 USD with a two to six week turnaround. An unpainted resin print of a single character typically lands between 15 and 45 USD, and professional painting frequently adds 80 to 250 USD or more depending on the painter's level.
Parts-based builders generally sell either a downloadable file or a printed figure at roughly 8 to 40 USD per character. AI generation platforms are usually subscription or credit based, so the marginal cost of the fourth party member is much lower than the first, which is the number that matters if you are outfitting a whole group.
Can I Use My D&D Character 3D Model in a Virtual Tabletop?
Yes, in two different ways. For 3D tabletops that accept custom assets, export as GLB, keep the model in the 15,000 to 60,000 triangle range with 2048 px textures, and upload it directly. For 2D tabletops such as Foundry VTT or Roll20, render the model instead and upload a 512 px top-down token on a transparent background plus a portrait crop for the character sheet.
Check your platform's supported formats before exporting, since some 3D tabletops use a proprietary asset pipeline rather than accepting an interchange file directly. Rendering your own tokens is the underrated benefit here: from one model you can produce a standing token, a prone token, and a bloodied variant with consistent lighting.
How Do I Make the Model Match My Character Sheet Exactly?
Translate the sheet into visual language before you prompt, then verify against the sheet after each generation. Convert race and subrace into anatomy, class and subclass into silhouette and material, the AC line into a specific armor category, and the inventory list into four to six visible items with stated placement and scale.
The verification step is the one people skip. After a generation, read down the sheet line by line with the model open next to it, rather than looking at the model and deciding whether you like it. That is how you catch the missing shield, the wrong eye color, and the pauldrons that appeared on your unarmored monk.
How Do I Keep a Party of Six Characters Looking Like One Set?
Lock three variables across all six generations: stylization level, lighting condition, and scale reference. Use the same phrasing for style in every prompt, generate everyone with the same neutral flat lighting, and after export scale each model to its canonical height in meters so the party stands at correct relative sizes in a shared scene.
Generate the whole party in one working session if you can. Prompt phrasing drifts between sessions, and a character generated three weeks later with slightly different wording tends to read as belonging to a different set even when nothing obvious changed. Standardize the small things too: same pose family, same texture resolution, same base treatment for renders, same export settings.
Can I Generate a Model for an NPC or a Villain, Not Just My PC?
Yes, and DMs often get more value from it than players do. The workflow is identical: describe the NPC's race, role, and distinguishing gear, add reference art if you have it, generate, inspect, export. The difference is volume, since a campaign needs far more NPCs than PCs, which favors an approach where the marginal cost of the twentieth character is low.
For recurring villains, invest the same effort you would in a PC: strong reference, careful anatomy, a silhouette that reads at token size. For one-session NPCs, a short prompt and a single generation is enough. Large creatures need explicit scale statements, because a generator has no inherent sense of how big an owlbear should be relative to a halfling.
If you are building an ongoing library of campaign characters, keep them all in one place with consistent settings using the character generation workflow, and export a matched set rather than a pile of one-off files. A campaign with a coherent visual roster feels considerably more designed than one assembled from scattered sources.