

How Do You Make a Dragon 3D Model From Images?
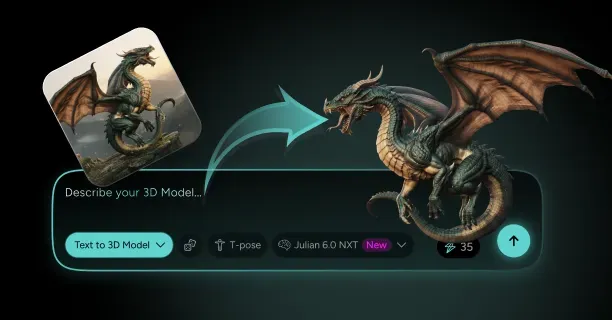
To make a dragon 3d model from images, gather reference art covering the side profile, the full spread wingspan, and the head, commit to a body plan before you generate, then feed those references through an image-to-3D engine and rebuild the parts the reconstruction could not see. Threedium handles the generation half with its Julian NXT engine, which converts concept art or a written description into a textured mesh with PBR maps, polygon optimization, automatic rigging, and export to GLB, USDZ, and FBX. Everything dragon-specific, the wing membrane, the scale zones, the six-limb skeleton, and the fire breath sockets, is work you do on top of that first mesh.
Dragons combine four problems that never appear together in any real animal: a stretched skin membrane spanning elongated finger bones, an armoured scale surface, an optional extra pair of limbs, and an emissive effect originating inside the head. General creature design theory lives on the monster and creature modeling page; this one stays on dragons.
Decide before you generate whether the dragon will be animated, printed, or both. A print-oriented dragon wants fused geometry, thick membranes, and a closed mouth. An animated one wants open topology, a separated jaw, and thin wings. Retrofitting one into the other costs more time than generating twice.
Gather Reference Images: Side Profile, Full Wingspan, and Head Close-Ups
Image-to-3D reconstruction infers volume from silhouette and shading, so the quality ceiling is fixed before you upload. The minimum useful set is three images: a clean side profile with the wings folded or cropped out, a front or three-quarter view with the wings fully spread, and a head close-up at 2048 px or larger showing the horn arrangement, brow ridge, and jawline. The spread-wing shot is the one people skip, and it determines whether the generator builds a membrane at all or just fuses a lumpy cape to the shoulders.
Lighting should be flat and diffuse. Dragon concept art is usually lit dramatically, with rim light along the spine and bloom from the mouth, and every one of those choices gets baked into the reconstruction as geometry. A hot specular streak down a flank becomes a raised ridge; a dark underbelly becomes a hollow. Flatten the contrast with a levels adjustment before uploading finished render art.
- Isolate the dragon on a plain white or mid-grey background. Environment art, smoke, and fire effects bleed into the mesh as floating geometry.
- Show the wings in a flat spread, not a dramatic curl. A curled membrane gives the generator no information about the finger bone spacing underneath.
- Include one image with the mouth open if you plan to animate a jaw. It signals that the jaw is a separate volume rather than a solid block.
- Keep horns, spikes, and tail spades clear of the body outline. Overlap is where fused geometry comes from.
- Avoid extreme perspective. A 50 to 85 mm equivalent framing keeps the head from ballooning relative to the hindquarters.
Pick a Body Plan Before You Generate: Quadruped, Wyvern, or Serpentine
Limb count is the most consequential decision and it must be made before generation, because it changes the skeleton, the polygon budget, and the animation cost. The three dominant plans are the Western quadruped (four legs plus two wings, six limbs), the wyvern (two hind legs with the forelimbs replaced by wings, four limbs), and the serpentine or Eastern lung (a long tubular body, four small limbs, no wings). Getting dragon vs wyvern anatomy right decides whether your creature walks on its wing knuckles like a pterosaur or strides on four legs like a big cat.
Most modern game dragons are wyverns whether the fiction says so or not, because a four-limbed skeleton reuses a theropod animation foundation and avoids six limbs sharing one shoulder girdle. Six-limbed Western dragons read better in stills but need a widened rib cage and an invented scapular arrangement to keep the wing roots clear of the front leg sockets.
| Body plan | Limbs | Typical rig bones | Ground movement | Best for |
|---|---|---|---|---|
| Wyvern | 2 legs, 2 wings | 85 to 120 | Bipedal stride or wing-knuckle walk | Games, fast animation turnaround |
| Western quadruped | 4 legs, 2 wings | 120 to 170 | Four-beat walk, wings folded over the back | Film, statues, heraldic designs |
| Serpentine / lung | 4 short legs, no wings | 90 to 140, long spine chain | Undulating slither or air swim | Stylised Eastern designs, VFX ribbons |
| Drake / wingless | 4 legs, no wings | 70 to 95 | Standard quadruped gaits | Mobile games, tight budgets |
| Amphithere | 2 wings only | 60 to 90 | None, permanently airborne | Flight-only stylised creatures |
Pick one and make every reference image agree with it. Mixed references produce a mesh with four legs plus a vestigial third pair of stumps buried in the shoulder, which is harder to fix than modelling the shoulder from scratch.
Write a Prompt That Locks In Silhouette, Scale Color, and Horn Shape
A useful dragon prompt has four layers: body plan, silhouette proportions, surface treatment, and head detail. Write in declarative noun phrases rather than atmospheric adjectives, because "majestic ancient wyrm" carries no geometric information while "wyvern, wingspan three times body length, deep chest, short neck" does. Express proportions as ratios: neck at 1.5 times torso length, tail at twice the torso, wingspan at 2.5 to 3.5 times body length.
- Body plan: "six-limbed western dragon" or "wyvern, forelimbs are wings" stated explicitly in the first clause.
- Silhouette: neck length, chest depth, tail taper, leg thickness, and whether the spine arches or runs level.
- Surface: "fine overlapping scales, 3 cm scale on a 7 m body, gunmetal to copper gradient" rather than just "green scales".
- Horns: count, sweep direction, and whether they are ribbed, smooth, branched, or bladed. Horn shape is the fastest read of a dragon's personality.
- Wing membrane: number of visible finger struts, three or four being standard, and whether the trailing edge is smooth, scalloped, or torn.
If you are using an ai dragon generator for a batch of variants rather than one hero, keep the body plan and proportion clauses fixed and vary only the surface and horn clauses. That gives you a family sharing proportions closely enough for one rig to drive all of them, which is how a small team ships five dragons for the cost of one. Broader prompt patterns are covered on the 3D character generation page.
Upload Your Dragon Concept Art to Threedium's Image-to-3D Engine
Upload the side profile as the primary image and the spread-wing and head shots as supporting views, then let Julian NXT reconstruct the volume. The output arrives as a textured mesh with base colour, normal, roughness, and metallic channels assigned, plus automatic rigging if you flagged the asset as a character rather than a static prop.
Set your intent at generation time rather than after. A model targeted at real-time engines should come out polygon-optimized in the tens of thousands of triangles with clean UVs, while one destined for sculpting or printing wants the densest mesh available. Asking for a low poly dragon and then trying to add scale relief is the wrong order of operations, because there is nothing left to displace.
Expect the first result to be 70 to 85 percent there for the body and considerably less for the wings. The torso, neck, legs, and tail are volumetric forms that reconstruction handles well; the membrane is a near-zero-thickness surface that most pipelines either thicken incorrectly or partially miss. Enterprise tiers add refinement by human 3D artists, which is worth it for hero assets. For everything else the cleanup below is under an hour inside any standard 3D modeling pipeline.
Inspect the Generated Mesh for Wing Membrane Gaps and Fused Horns
Run a structured inspection before investing in refinement. Dragons fail in the same five places every time, and finding all of them in one pass is cheaper than discovering the third after you have rigged. Open the mesh with backface culling on and a matcap or clay shader applied so you are looking at geometry rather than texture.
Start with the wings. Set the viewport to wireframe-on-shaded and look for holes where the reconstruction lost the thin surface, usually near the trailing edge and in the deepest scallop between finger struts. Then determine whether the membrane has thickness at all: select a boundary edge and see whether it loops around a rim or terminates in an open border. Both are workable, but you need to know which you have before you rig or thicken.
- Membrane holes and slivers: gaps, disconnected islands, and single-triangle spikes along the trailing edge.
- Fused horns: horns melted into the skull or into each other with no crease where they emerge.
- Webbed limbs: membrane bridging between wing and flank, or hind leg and tail, where none was intended.
- Sealed mouth: a jaw that is a solid extension of the skull, with no interior cavity, teeth, or tongue.
- Non-manifold spikes: stray vertices at the tail tip, horn tips, and claw points, the classic artefacts of thin conical geometry.
Refine the Head: Jaw Split, Teeth Rows, and Eye Socket Depth
If you only have time to hand-refine one region, make it the skull, because viewers read a dragon's character from the brow, the jawline, and the eye. Separating the jaw means cutting a clean edge loop along the mouth line from chin to jaw hinge, then extruding the interior inward to form a throat cavity. A tapered tube running 2 to 3 head-lengths deep, closed at the back, sells an open jaw at any camera distance and gives you somewhere to place the fire breath emitter. Give the tongue a separate 400 to 1,200 triangle object so it weights independently.
Teeth work best as instanced geometry rather than sculpted detail. Build two or three tooth shapes, scale and rotate them along the gum line, then merge at the end. A dentition of 28 to 44 teeth at 60 to 150 triangles each adds only a few thousand triangles and reads far better than a serrated ridge. Keep the largest canines at the front of the upper jaw and let them protrude past the closed lip line.
Eye sockets are the last fix. Reconstruction almost always leaves eyes flush with the skull or slightly bulging. Push the socket in by 15 to 25 percent of the eyeball radius, add a brow ridge overhanging the socket, and place a separate sphere for the eyeball with its own material so pupil and emissive glow are drivable independently.
Clean Up Topology Around Wing Joints, Neck Curve, and Tail Taper
Generated meshes tend toward isotropic topology: an even polygon distribution that ignores where the model needs to bend. For a static render that is fine; for anything animated it is not, because deformation quality depends on edge loops running perpendicular to the axis of rotation.
The neck needs 18 to 30 evenly spaced loops from skull base to shoulders to hold an S-curve without faceting, biased toward the base where the widest bend happens. The tail wants 20 to 36 loops, tapering in spacing toward the tip. The wing shoulder and elbow want three to four loops each, tightly grouped, so the membrane crease has somewhere to fold into. Retopology is worth the effort only if the dragon will be animated or subdivided; for a static print, decimate and move on.
- Run a symmetry check and re-mirror the body before adding asymmetric details. Generated meshes drift off-axis almost every time.
- Delete interior shells hidden inside the torso. They add weight and break boolean operations later.
- Merge vertices by distance at roughly 0.0001 of the bounding box, then recalculate normals outward.
- Keep UV seams along the belly midline, behind each limb, and at the wing leading edge so visible surfaces stay unbroken.
Add Scale Detail With Normal Maps Before Committing to Sculpted Geometry
Scales are the most expensive detail on a dragon and the one most often over-invested in. The default answer for almost every use case is a tiling normal map plus matching height and roughness maps, applied through a second UV set with its own tiling rate. Sculpted geometry belongs only on surface area that will appear larger than about a quarter of the frame.
Build the dragon scale texture at 2048 by 2048 for a tile repeating 4 to 8 times across the flank, which puts individual scales at a believable 2 to 5 cm on a creature 6 to 12 m long. Author it once procedurally and reuse it across every dragon in the project. Then test at final camera distance before escalating: render a turntable at shipping resolution, and if the normal map holds up you are done. Only scales that silhouette against a bright background need real geometry.
Never sculpt scales before you have finalised the silhouette. Scale detail locks the mesh: any subsequent proportion change means re-projecting or redoing millions of small forms. Silhouette first, then anatomy, then surface, in that order, without exception.
Rig the Skeleton: Spine Chain, Neck, Tail, and Wing Finger Bones
A rigged dragon 3d model needs far more joints than a humanoid, and the count concentrates in the neck, tail, and wings. A production skeleton for a winged dragon lands between 95 and 150 bones, well above the 60 to 70 of a standard biped. Threedium's automatic rigging system places a base skeleton, and the dragon-specific additions go on top.
The spine gets 4 to 6 joints from pelvis to chest. The neck gets 7 to 12 on a spline IK so an animator shapes the whole curve with three controls instead of twelve rotations. The tail gets 12 to 20 on a spline IK for the same reason. Each leg gets a hip, knee, hock, ankle, and two to three toe chains. Each wing carries a scapula, humerus, radius, and wrist, then three or four finger chains of two to three joints each plus a thumb claw: 14 to 20 bones per wing before helpers.
- Name bones with a consistent side suffix such as _l and _r so mirrored weights and retargeting work without manual mapping.
- Orient every joint with one consistent primary axis down the bone. Inconsistent orientations are the top cause of wings folding the wrong way.
- Hinge the jaw bone at the true jaw joint behind the eye, not at the corner of the mouth, or the chin swings through the throat.
- Include an aim or look-at control on the head so flight animation can hold the gaze on a target independently of body banking.
Test Wing Fold and Flap Poses Before Finalizing Skin Weights
Skin weights on a dragon are validated by pose, not by inspection. Build a test animation cycling five extreme poses and scrub it while you paint: wings fully spread level, wings folded tight against the body, full downstroke, full upstroke with wrists above the shoulders, and neck curled back so the head touches the flank.
The folded pose is the brutal one. When a wing folds, the membrane between struts must compress into pleats without intersecting the flank, and the propatagium has to collapse into a fold at the wrist. Weights that look perfect spread will show membrane punching through the ribs when folded. Tighten the falloff on flank-adjacent membrane vertices so they follow the body rather than the wing arm, then blend across four or five vertex rings.
Keep influences per vertex at four or fewer for glTF or mobile targets and up to eight for desktop engines. Higher counts smooth the membrane but cost skinning performance on a mesh where a large fraction of vertices live in the wings and animate every frame.
Attach Fire Breath VFX Sockets at the Jaw and Throat
A fire breathing dragon animation is mostly a VFX problem, but the model supplies the attachment points, and adding them at rigging time costs minutes while adding them later costs a re-export. The first socket sits inside the throat, roughly one head-length behind the teeth, parented to the skull rather than the jaw. Particles then travel forward through the mouth opening and emerge past the teeth, and a partly open jaw partly occludes the flame, exactly as it should.
The second socket sits at the tip of the lower jaw, parented to the jaw bone, driving dripping embers, heat shimmer, and muzzle light. Orient both so their forward axis points down the throat and out through the mouth, because most particle systems emit along a local axis and a mis-oriented socket fires sideways into the skull.
- Set the emitter cone half-angle between 8 and 20 degrees. Wider reads as a gas cloud rather than a directed breath weapon.
- Add a third socket at the chest or throat exterior if the design includes vents that light up during a charge cycle.
- Keep socket names stable across every dragon variant so one VFX graph binds to all of them without rework.
- Export sockets as named empties in FBX or extra nodes in GLB. Neither format loses them if they sit inside the skeleton hierarchy.
Export GLB or FBX for Engines, USDZ for AR, or STL for Printing
GLB is the right default for web and cross-platform delivery: mesh, textures, skeleton, and animation in one binary file. Its constraint is four bone influences per vertex, which bites on wing membranes more than anywhere else. FBX remains the workhorse for Unreal and Unity because it carries up to eight or twelve influences, named sockets, and multiple takes. Export binary FBX 2018 or 2020, bake the scale in, and confirm the up-axis before building a hundred animations against a rig that turns out to be lying on its side.
USDZ serves iOS AR Quick Look: keep it under about 25 MB and collapse texture sets to one or two materials. STL is the printing format and the one you do not export directly from the generator. Export GLB, bring it into Blender, make the mesh solid and watertight, then write out a dragon stl file. STL carries no colour, no UVs, and no rig, which is exactly what a slicer wants.
- Bake the transform: apply scale and rotation before export, or the wing finger chains inherit a non-uniform scale that skews the membrane in-engine.
- Export a T-pose-equivalent neutral (wings spread level) as frame zero so the engine has a clean bind pose to fall back to.
- Verify the socket transforms survived by re-importing your own export before you hand it to a VFX artist.
- For STL, run a manifold check and close every hole. Horn tips, claw points, and the trailing edge of the membrane are where leaks hide.
Wings, Scales, and Six-Limb Skeletons: The Dragon-Only Problems
Everything above applies in some form to any creature. What follows does not. These are the problems that appear only when the subject has a stretched skin membrane, an armoured surface with distinct zones, more limbs than any vertebrate, and fire originating inside its own skull. Solve these and the dragon works; skip them and it looks convincing in a T-pose and falls apart the moment it moves.
Wing Membrane Topology: Modeling the Patagium So It Stretches, Not Tears
The wing membrane, properly the patagium, is a skin sheet stretched between elongated finger bones, the forearm, the flank, and sometimes the hind leg. Bat anatomy names its regions and borrowing that division is the fastest route to topology that behaves: the propatagium runs from shoulder to wrist along the leading edge, the dactylopatagium spans between adjacent fingers, and the plagiopatagium connects the arm and last finger back to the body and leg.
Topology must follow stress direction. Run the primary edge flow along the finger struts, from wing root out toward each fingertip, with cross loops running perpendicular from leading edge to trailing edge. That grid stretches along one axis and compresses along the other, exactly like real membrane tissue. Randomly oriented topology produces the classic failure where the wing tears into faceted shards mid-flap. Give each dactylopatagium panel 5 to 9 cross loops between its bounding fingers, and 12 to 20 loops along the span from root to tip.
Thickness is a genuine decision, not a default. A single-sided membrane with a two-sided material is cheapest and looks correct in engines supporting backface rendering and translucency, but it casts wrong shadows in some renderers and cannot be printed. A solidified membrane of 1 to 3 cm at creature scale doubles the wing polygon count, catches rim light properly, and is mandatory for printing. Real-time projects go single-sided; film and print go solid.
Model the wing flat and spread, always. Modelling a folded wing and trying to unfold it with a rig is the most common way people end up rebuilding a dragon from scratch. The neutral pose should be wings spread level with a slight downward camber, arms roughly 15 degrees forward of the shoulder line.
Rigging Wing Fingers: How Bat-Style Bones Drive Membrane Deformation
Dragon wing rigging works because the membrane is never rigged directly; it is dragged into shape by the bones at its boundary. Each panel is weighted primarily to the two finger chains that bound it, with a smooth gradient across the span so the panel centre sits at roughly a 50/50 blend. Get that gradient right and the membrane stretches and pleats convincingly with no simulation at all.
Model the finger chain on bat and pterosaur logic: a metacarpal at the wrist followed by two or three phalanges, with each joint limited to bend in a single plane so folding stays predictable. The leading-edge finger is short and thick, and successive fingers lengthen toward the trailing edge, which produces the characteristic swept shape when the wing is partly folded. Add helper joints at the centre of each panel driven at half the rotation of the bounding fingers, plus corrective blendshapes triggered by joint angle to restore volume at the wrist and elbow creases past 90 degrees of fold.
- Limit each finger joint to a realistic range, typically 0 to 120 degrees of fold, and lock the other two axes to prevent membrane twisting.
- Drive the whole fold with a single 0 to 1 attribute wired to every finger joint at proportional ratios. Animators should never hand-key twelve joints to close a wing.
- Weight the propatagium leading edge to a blend of shoulder, humerus, and wrist so it stays taut through the stroke instead of sagging at mid-elbow.
- If you plan to add cloth simulation, still build the skinned version first. Simulation is a polish layer, not a substitute for correct weights.
Tiling Scale Textures vs Sculpted Scales: Choosing by Render Distance
The choice between texture and geometry is a distance question with a clean answer. Beyond roughly two body-lengths of camera distance a normal map holds up completely. Between one and two body-lengths, a normal map plus a parallax or height component is enough. Closer than that, or wherever scales cross the silhouette against a bright background, you need real geometry, because a normal map cannot alter the outline of the model.
Tiling is dramatically cheaper in every dimension: one 2K tile serves an entire dragon and every variant, authors in an afternoon, and costs nothing at runtime beyond a texture sample. Sculpted scales mean a high-poly source in the millions, a bake, and a mesh that can no longer be freely reproportioned. Sculpt only what silhouettes.
| Camera distance | Scale approach | Texture resolution | Added triangles | Typical use |
|---|---|---|---|---|
| Full-screen close-up | Sculpted geometry plus baked detail | 4096 body, 2048 wings | 50,000 to 250,000 | Cinematics, hero renders |
| Half to full body in frame | Sculpted spine and edge scales only | 4096 body | 8,000 to 40,000 | Boss creatures, cutscenes |
| Two to four body-lengths | Tiling normal plus height map | 2048 | 0 | Gameplay range, third person |
| Distant or airborne | Tiling normal only | 1024 | 0 | Flying enemies, background |
| Mobile and AR | Baked normal, no height | 1024 to 2048 | 0 | Phone and headset delivery |
One hybrid is worth knowing: sculpt a single strip of large scales along the spine ridge, the brow, and the wing leading edge, and leave everything else to the tiling map. Those are the three places a viewer's eye lands and the three places the silhouette is broken by scale relief.
Blending Scale Zones: Belly Plates, Flank Scales, and Soft Wing Skin
A dragon that reads as a real animal has at least four distinct surface zones: belly plates (large, wide, transverse, smooth), flank and back scales (small, overlapping, directional, higher roughness), facial and limb scales (finest, tightly packed, following muscle flow), and wing membrane skin (nearly scaleless, leathery, with visible vein detail). Uniform scaling across the whole body is the clearest tell of a rushed asset.
Blend them with a mask rather than a hard seam. Paint a grayscale zone mask, blur the transitions over 3 to 8 percent of the surface width, and use it to interpolate between tiling maps. The belly-to-flank transition should never be a straight line; on real reptiles it undulates along the rib cage, and copying that undulation instantly raises believability. Direction matters too: scales overlap pointing backward along the body and downward along the limbs, so lay out UV islands with their vertical axis running head-to-tail.
- Give belly plates a distinctly lower roughness than the back, around 0.35 to 0.5 against 0.6 to 0.8. Underbellies polish smooth from ground contact.
- Add wear and edge damage to horns, claws, and the wing's leading finger. Undamaged extremities look computer-generated.
- Give the membrane a subsurface or translucency contribution so backlighting shows vein structure. This one setting does more for a flying dragon than any amount of scale detail.
- Vary colour subtly per zone rather than using one flat albedo. Even a 10 percent hue shift between back and belly reads as biology.
Horn and Spike Variation: Breaking Symmetry Without Breaking the Rig
Perfect bilateral symmetry is another instant tell. Real horned animals have asymmetric horns: different lengths, different ring counts, chips on one side only. The rule for introducing that without wrecking your pipeline is to keep the skeleton perfectly symmetric and put all asymmetry into the mesh and textures. Mirror the rig, mirror the weights, and only then move geometry.
A horn 12 percent longer on the left, chipped at the tip, with an extra growth ring, still deforms with the same symmetric skull bone and costs nothing in rigging complexity. For spine spike rows, generate a base row symmetrically then randomise each spike by plus or minus 10 to 20 percent in scale and plus or minus 5 to 12 degrees in rotation, which breaks the mechanical repeat without reading as damage.
Horn count and sweep are the fastest way to differentiate variants sharing one skeleton. Two swept-back horns read noble, a crown of six or more reads demonic, forward-curving horns read aggressive, and a single central horn reads mythic. Swapping horn meshes on a shared skull socket ships five distinct creatures for the cost of one rig and one animation set.
Quadruped vs Wyvern Skeletons: Six Limbs or Four, and What Each Costs
The six-limb problem is structural. No vertebrate has six limbs, so there is no reference anatomy for a shoulder girdle anchoring both a foreleg and a wing. The workable solution is a stacked girdle: wing scapula high and slightly posterior on the rib cage, foreleg scapula low and anterior, separated by at least one and a half rib widths, with the chest widened by roughly 15 to 25 percent over a comparable quadruped. That is why convincing Western dragons share a deep barrel-chested profile, and it is not a stylistic accident.
The wyvern sidesteps all of it by making the wings the forelimbs, exactly as happened in real evolution with bats, birds, and pterosaurs. The cost is that a wyvern cannot walk on four legs unless it folds its wings and walks on the wing knuckles, the way pterosaurs are thought to have done. That knuckle-walk is distinctive and very animatable, but it means wrist and finger joints carry body weight and need weights that survive compression, not just extension.
- Animation cost: a six-limbed dragon needs a four-beat gait plus a separate wing idle. Budget roughly 40 to 60 percent more animation time than a wyvern.
- Rig cost: two extra IK limb chains, two extra foot rolls, and a wider spine solve, adding 25 to 45 bones.
- Retargeting: wyverns borrow theropod and biped locomotion libraries. Six-limbed dragons borrow nothing and need bespoke animation.
- Silhouette payoff: the six-limbed form is more distinctive in stills and statues, which is why display prints and film designs lean that way.
Fire Breath Attachment Points: Jaw Sockets, Particle Origins, and Cone Direction
Fire breath is where a lot of otherwise good dragons fall apart, and the failure is almost always geometric rather than artistic. Particles spawn from a point in the wrong place, oriented on the wrong axis, or parented to the wrong bone, and the result is flame clipping through teeth, firing at the floor when the head tilts, or detaching from the mouth entirely mid-animation.
Direction should be driven by a separate aim transform rather than the head's own orientation. A dedicated breath_aim node parented to the skull and offset forward down the throat axis gives your VFX system a stable forward vector regardless of how the head banks or how far the jaw opens, and animators can key the aim independently for a sweeping attack that tracks across a group of targets.
Time the effect against the animation, not a wall clock. Standard practice is a three-phase notify structure: a charge of 0.4 to 0.8 seconds where the throat glow ramps, a sustain of 1 to 3 seconds where the cone is active, and a recovery of 0.5 to 1 second with residual embers and smoke. Wire each phase to an animation notify so visual and pose never drift out of sync at different playback rates.
Emissive Maps for Mouth Glow, Chest Vents, and Fire-Lit Underscales
Emissive maps are what make a dragon look like it contains fire rather than merely emitting it. Author a dedicated emissive texture at 1024 or 2048, painted mostly black with bright zones in four places: the throat interior, any chest or neck vents, the eyes, and thin cracks between belly plates where inner heat would show through.
Drive intensity with a material parameter rather than baking it at full strength, so one texture serves a dormant dragon, a charging dragon, and a firing dragon. In Unreal, emissive multipliers of 5 to 50 push the glow into bloom territory; in Unity's HDRP the equivalent is emissive intensity in nits, typically a few thousand. And do not forget the reciprocal effect: when a dragon breathes fire, the underside of its jaw and chest should be lit by a dynamic point light parented to the mouth socket, warm at 1900 to 2400 K, rather than by baked albedo values that look wrong the instant the dragon stops breathing.
- Keep emissive zones off the albedo map entirely. Mixing them means you can never turn the glow off for a dormant state.
- Give the eyes a small emissive value even when idle. A faint glow of 1 to 3 in multiplier terms reads as alive rather than as a statue.
- Mask emissive cracks with the same zone mask used for belly plates so the glow follows plate boundaries instead of cutting across them.
- For AR and mobile, keep emissive restrained. Many mobile viewers clamp emissive values and render an over-bright dragon as a flat white blob.
Print-Friendly Dragon Poses: Folded Wings, Wrapped Tails, No Supports
Printing a dragon is a posing problem before it is a slicing problem. The default spread-wing hero pose is close to the worst possible geometry for a printer: two large near-horizontal thin sheets held out on cantilevered arms, meaning maximum support material, maximum surface scarring, and maximum risk of failure at 80 percent completion.
Three poses solve most of it. A folded-wing perch tucks the membrane against the flanks so the wings become part of the body volume. A tail-wrap curls the tail around the base or the front feet, eliminating a long thin cantilever and widening the footprint. A wings-vertical pose raises both wings above the back so they self-support along their own vertical plane. The membrane also needs thickening regardless of pose: 1.5 to 2 mm for FDM and 0.8 to 1.2 mm for resin at final print scale, which means deciding your print height before you thicken.
Check overhang angles on the wing membrane specifically. Any membrane surface flatter than about 45 degrees from vertical needs supports on FDM and will show scarring on resin. Rotating the whole model 20 to 30 degrees on the plate often eliminates more supports than any amount of re-posing.
Articulated Flexi Dragon Joints: Designing Print-in-Place Segments
An articulated dragon 3d print, the flexi dragon that prints fully assembled and moves straight off the plate, is a different design problem from a display statue. The body is a chain of segments joined by ball-and-socket connections printed in place with a deliberate gap, so nothing needs assembly and, designed correctly, nothing needs supports.
Three numbers decide whether it works. A typical flexi dragon runs 20 to 45 segments from head to tail tip, shortening toward the tail so the taper stays smooth. Ball diameter is roughly 35 to 45 percent of the segment cross-section, commonly 6 to 12 mm at desktop scale. Clearance is the make-or-break value: 0.25 to 0.35 mm for FDM and 0.15 to 0.25 mm for resin. Design the socket to capture the ball at 200 to 230 degrees of enclosure, which holds the joint while allowing 25 to 40 degrees of articulation each.
- Print a three-joint test strip at your intended scale before committing to a six-hour print. Clearance that works on one printer fuses solid on another.
- Orient the chain so joints print in the vertical axis where possible. Horizontal ball joints pick up layer flattening on the underside and bind.
- Add a 0.4 to 0.6 mm chamfer at the socket lip. It reduces the force needed to free the joint and prevents chipping.
- Free the joints while the print is still slightly warm, or immediately after washing for resin. Fully cured resin joints snap more easily.
- Keep head, jaw, and horn spikes as one fused segment. Articulating a jaw at print-in-place tolerances rarely survives handling.
How Do You Prepare a Dragon 3D Model for Games, Film, or 3D Printing?
The same base dragon can serve three destinations, but each imposes different constraints on polygon count, rig complexity, material setup, and geometry validity. This section covers what changes between them and where the shared work stops.
Polygon Budgets: Cinematic Dragon Sculpts vs Game-Ready LODs
A dragon costs more polygons than a humanoid of equivalent quality, mostly because of the wings and the long tapering neck and tail. Budget roughly 30 to 50 percent above a biped in the same project, and expect the wings alone to consume 25 to 40 percent of the total once the membrane is properly subdivided.
For real-time work, build an LOD chain rather than one mesh. A typical console or PC creature ships with LOD0 at 60,000 to 120,000 triangles, roughly halving at each step down to a 2,000 to 4,000 triangle LOD3 for distant flight. Because dragons are frequently seen far away in the sky, the low LODs matter more than they do for ground enemies, and a good LOD3 silhouette is worth more than a great LOD0 you rarely see up close.
| Target | Triangle budget | Texture set | Bones | Notes |
|---|---|---|---|---|
| Mobile game / AR | 8,000 to 25,000 | 1024 to 2048, single material | 40 to 70 | Four influences max, simplified wing fingers |
| Console / PC gameplay | 60,000 to 120,000 at LOD0 | 2048 to 4096, 2 to 3 materials | 95 to 150 | Full LOD chain, helper joints in membrane |
| Boss or cutscene hero | 150,000 to 400,000 | 4096, 3 to 5 materials | 150 to 220 | Corrective blendshapes, sculpted spine scales |
| Cinematic / VFX | Base cage 100k to 300k, subdivided to millions | 4096 to 8192 UDIM | 250 plus | Muscle and cloth simulation on membrane |
| 3D print (STL) | 300,000 to 2,000,000 | None | None | Watertight, solidified membrane, no rig |
Flight Cycles and Ground Locomotion: Animating Two Modes of Movement
A dragon needs two effectively independent locomotion systems. Flight and ground movement share only the spine and neck, and the transitions between them, takeoff and landing, are their own animations and often the hardest in the set. Wingbeat frequency scales inversely with size: a full flap cycle of 36 to 60 frames at 24 or 30 fps reads as massive and powerful, while anything under 20 frames makes the dragon look like an insect regardless of its scale.
The core flight set is a flap cycle, a glide, a bank left and right, a dive, a hover or landing flare, and a takeoff. Add a wing-tuck for gliding descent and you have covered nearly every camera angle. Ground movement depends on body plan: a wyvern gets a bipedal walk and run, while a six-limbed dragon needs a four-beat walk, a trot, and a heavy run with the wings folded and rocking counter to the shoulders.
- Animate the wingbeat on a figure-eight wrist path, not a simple up-down arc. Real flapping sweeps the wingtip forward on the downstroke and back on the upstroke.
- Offset the finger fold from the main arm rotation by 3 to 6 frames. That lag makes the membrane feel like a flexible surface rather than a rigid panel.
- Drive neck and tail with secondary motion trailing the body by 4 to 10 frames, more at the tip than at the base.
- Build takeoff as a crouch, a leap, and only then the first wingbeat. Dragons that lift off from a standing pose look weightless.
Exporting to Unreal Engine, Unity, or Blender With the Wing Rig Intact
Wing rigs break on export more often than any other part of a creature, and the causes are consistent: influence-count truncation, scale inheritance on the finger chains, and helper joints stripped because the exporter treats them as non-deforming.
For Unreal Engine, export binary FBX with the skeleton rooted at a single joint, up-axis Z, units in centimetres. Confirm that membrane helper joints are included in the skeleton rather than exported as constraints, because Unreal will not evaluate a Maya or Blender constraint at runtime. For Unity, one unit is one metre, so a dragon exported at Unreal scale arrives a hundred times too large. Set the animation type to Generic rather than Humanoid, because Humanoid retargeting refuses to map wing fingers and silently discards them.
For Blender round-trips, GLB is usually cleaner than FBX because it carries armature, mesh, and materials in one file with fewer axis-conversion surprises. Remember the four-influence limit: run a weight-limiting pass before export so your software chooses which influences to drop rather than the exporter choosing at random.
Slicing an STL Dragon: Layer Height, Supports, and Scale Detail Retention
General slicing mechanics, layer heights, support structures, hollowing, and drain holes behave on a dragon exactly as they do on any other 3D character model, so the standard settings carry over unchanged. What is dragon-specific is the membrane.
Wing membranes are the only part where layer height genuinely changes whether the print succeeds. On resin at 0.03 to 0.05 mm layers, a 1 mm membrane is 20 to 30 layers thick and prints reliably. On FDM, a 1.5 mm membrane at a 0.4 mm nozzle is fewer than four perimeters wide, so the slicer may drop it to a single wall or skip it entirely. Check the sliced preview layer by layer through the wing region before you start. Sculpted scales also disappear below roughly 0.3 mm of relief on FDM and 0.1 mm on resin, so exaggerate scale depth by two or three times before export.
Scaling for Tabletop: Dragon Miniatures vs Large Display Pieces
Tabletop scale standards follow the usual conventions: 28 to 32 mm heroic for rank-and-file play, 54 mm for display busts, with base diameters stepping 25, 40, 50, then 100 mm as creature size increases. For dragons the practical constraint is different from every other miniature, because wingspan, not height, decides whether the model fits your build plate. An adult dragon at 32 mm heroic scale sits on a 50 to 100 mm base, but its spread wingspan easily reaches 200 to 300 mm, well beyond a 220 mm plate.
That leaves three options: fold the wings, split the model, or scale down. Splitting is the standard answer for display pieces. Cut each wing at the elbow, add 6 x 3 mm or 8 x 3 mm neodymium magnets in matched recesses, and print the wings flat. For large display dragons in the 250 to 400 mm range, plan split lines at the neck, wing elbows, tail midpoint, and hips before thickening, add 4 to 6 mm registration pegs alongside the magnets, and hide seams along scale boundaries or behind spike rows.
Marketplace Dragon Models vs Generating Your Own: Cost and License Tradeoffs
Dragons are among the most commonly sold assets in every 3D marketplace, so the buy-versus-generate calculation is genuinely competitive. An unrigged dragon sculpt typically runs $25 to $90, a game-ready rigged dragon with a basic animation set runs $120 to $400, and a film-quality dragon with a full flight library runs $400 to $1,200. Printable dragon STLs sit lower, commonly $5 to $25 per model on print-focused platforms.
Commissioning is a different order of magnitude. A game-ready rigged and animated dragon from a freelance creature artist generally lands between $1,500 and $6,000 with a two to six week turnaround, and cinematic work with simulation on the membrane starts around $8,000. Generation changes the calculation when you need specificity, iteration, or volume: a marketplace dragon is somebody else's design under terms that often restrict resale or print-for-sale, while generation matches your art direction exactly in minutes.
- Buy when you need one dragon, the design is flexible, and the licence covers your use.
- Commission when the dragon is a flagship asset, the design is locked and unusual, and you have budget and schedule.
- Generate when you need speed, variants, exact art direction control, or clean commercial rights over the output.
- Always read the licence for print-for-sale rights separately. Many marketplace STLs permit personal printing but not selling printed copies.
Frequently Asked Questions About Dragon 3D Models
Short answers to the questions that come up most often when people start building dragons, covering anatomy terminology, cost, printing, software, and rigging.
What Is the Difference Between a Dragon and a Wyvern in 3D Modeling?
A classical Western dragon has six limbs: four legs plus two wings. A wyvern has four limbs, with the forelimbs replaced entirely by wings, so it stands on two hind legs like a theropod. In modelling terms this is the difference between inventing a shoulder girdle that anchors two limb pairs and reusing the bat or bird arrangement that already exists in nature.
A wyvern skeleton is 25 to 45 bones lighter, retargets from existing biped animation, and never suffers the shoulder-collision problems that plague six-limbed rigs on a full downstroke. Most game dragons are technically wyverns. If your design is flexible and the creature will be animated heavily, choose the wyvern; if it is primarily a display piece or a film design where silhouette matters more than animation cost, the six-limbed form is worth the extra work.
How Much Does a Rigged Dragon 3D Model Cost?
On asset marketplaces, a rigged and game-ready dragon typically costs $120 to $400, rising to $400 to $1,200 for film-quality models with full flight animation sets. A custom commission from a freelance creature artist generally runs $1,500 to $6,000 for a game-ready rigged dragon with a two to six week turnaround.
Price is driven mostly by rig quality rather than mesh quality, because a good dragon rig involves spline IK chains for neck and tail, bat-style finger hierarchies, membrane helper joints, and corrective shapes at the wing joints. That work is specialised and slow, which is why a rigged model costs five to ten times an unrigged sculpt of the same creature. AI generation collapses the mesh and base rig cost and cuts turnaround from weeks to minutes, though the refinement described above still applies.
Can You 3D Print an Articulated Dragon Without Supports?
Yes, and support-free printing is the entire point of a print-in-place flexi design. The model is a chain of 20 to 45 segments connected by ball-and-socket joints with a printed clearance of 0.25 to 0.35 mm on FDM or 0.15 to 0.25 mm on resin, arranged so every overhang stays within about 45 degrees of vertical.
The constraints are real. Wings rarely survive a support-free print in a spread pose, so flexi dragons either omit wings, fuse them folded to the back, or attach them as separate magnetised parts. Horn spikes and tail spades should sweep back along the body rather than out into open air, and the head should be one fused segment. Print a three-joint sample strip at final scale and material first, since clearance that releases cleanly on one printer fuses solid on another.
What Software Is Best for Sculpting Dragon Scales?
For sculpted scale geometry, ZBrush remains the industry default because of its NanoMesh and IMM brush systems, which scatter thousands of individual scale objects along a surface flow with per-instance variation. Blender's sculpt mode combined with geometry nodes achieves similar results and is free, though it needs more setup for the same scattering behaviour.
For tiling scale textures, which is what most projects actually need, Substance 3D Designer is the standard for authoring the procedural tile and Substance 3D Painter for applying and masking the zones. The practical recommendation for most people is to skip sculpting entirely: generate the base dragon, apply a well-made tiling scale material with a proper zone mask, and sculpt only the spine ridge and brow scales that break the silhouette.
How Many Polygons Should a Game-Ready Dragon Model Have?
A console or PC game-ready dragon typically lands between 60,000 and 120,000 triangles at LOD0, with a full LOD chain descending to roughly 2,000 to 4,000 triangles for distant airborne rendering. Mobile and AR dragons run 8,000 to 25,000 triangles total, and cinematic dragons use a base cage of 100,000 to 300,000 quads that subdivides into the millions at render time.
The wings drive the number. A properly subdivided membrane consumes 25 to 40 percent of the total budget, which is why dragons cost more than a humanoid at comparable quality. Cutting membrane density is the first place to look when you need a tighter budget, but cut span loops before cross loops, since cross loops control the fold. Invest disproportionately in the low LODs, because a distant dragon in the sky is what is actually on screen most of the time.
Where Can You Download Free Dragon 3D Models?
Free printable dragon STLs are widely available on community print platforms including Thingiverse, Printables, and the free sections of Cults3D and MyMiniFactory, where flexi articulated dragons are one of the most popular categories. For rendering and game use, Sketchfab hosts a large library of Creative Commons dragon models, and Blender community sites carry free .blend files of varying rig quality.
Quality varies enormously and licensing varies more. Creative Commons terms range from fully permissive to non-commercial and no-derivatives, and many free print files explicitly forbid selling printed copies. Read the specific licence on the specific file, and be aware that free models are rarely rigged to a usable standard even when described as rigged. Free models fit generic needs; if you need a dragon matching a defined design, generating one from your own concept art is usually faster than searching and then modifying.
How Do You Rig Dragon Wings for Realistic Flight?
Rig dragon wings on bat anatomy: a scapula, humerus, radius, and wrist, followed by three or four finger chains of two to three joints each, with the membrane weighted between adjacent finger chains rather than to any bone of its own. Add two to four helper joints at the centre of each membrane panel, driven at half the rotation of the bounding fingers, so panels curve rather than collapsing into flat chords.
Model the wing flat and spread as the neutral pose, then test the extremes before finalising weights: full spread, tight fold, full downstroke, full upstroke, and a neck-curl bringing the head to the flank. The folded pose exposes almost every weighting error, especially membrane punching through the ribs where the plagiopatagium meets the body.
For animation, wire the entire fold to a single 0-to-1 control attribute so an animator closes a wing with one key instead of twelve, and drive the flap on a figure-eight wingtip path with the finger fold lagging the arm by 3 to 6 frames. That lag is the single detail that most separates a wing reading as living tissue from one reading as a hinged panel.