
How Do You Make Fantasy Character 3D Models From Images?
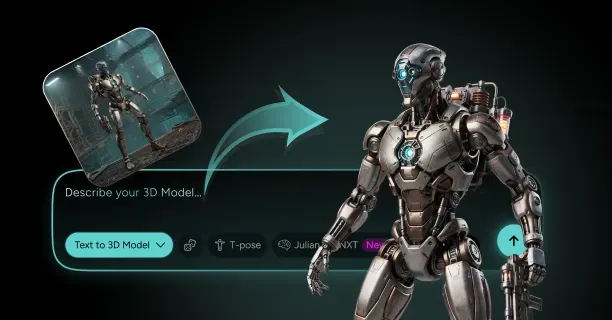
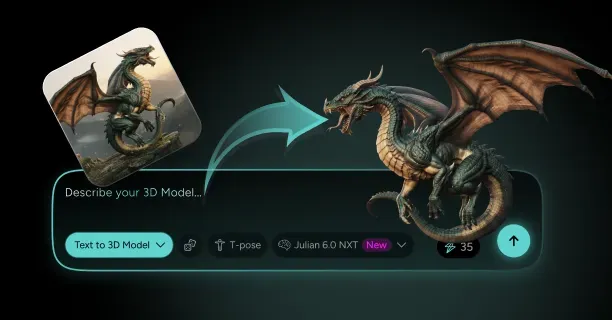
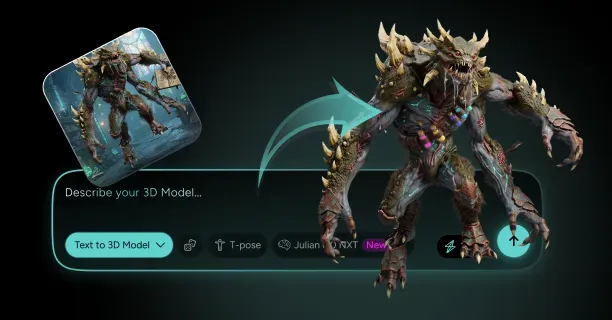
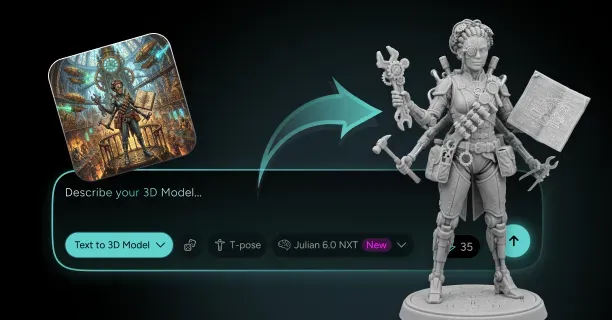
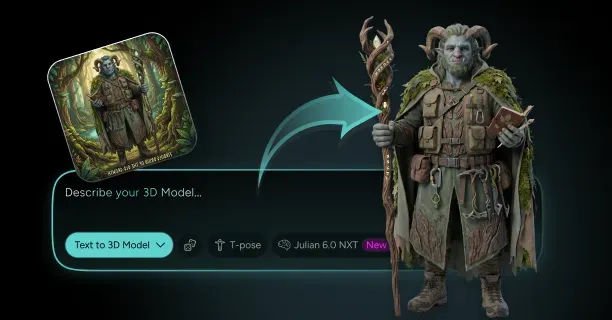
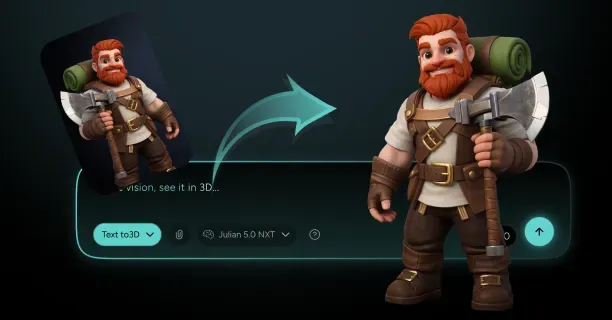
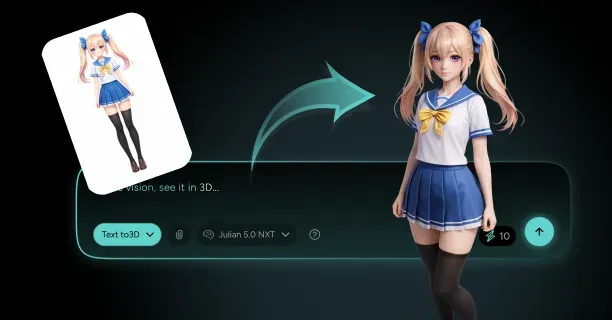
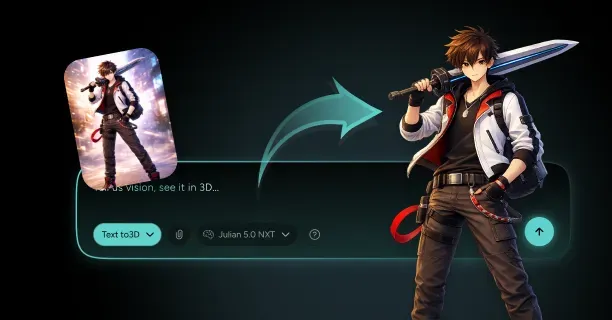
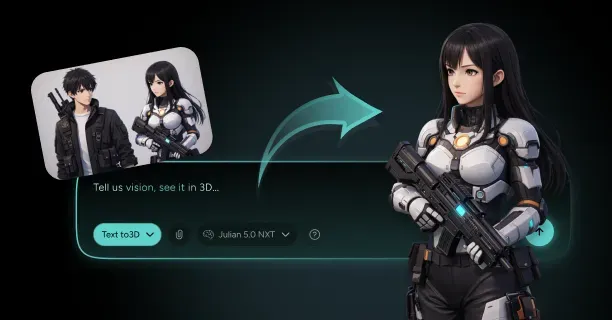
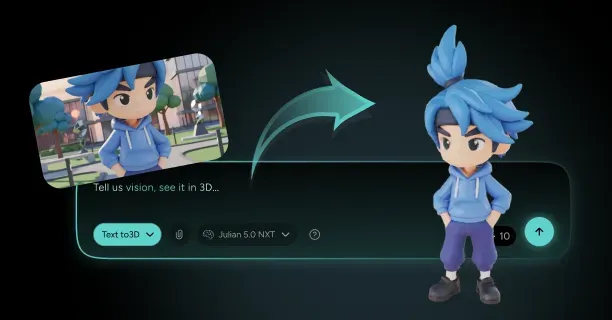
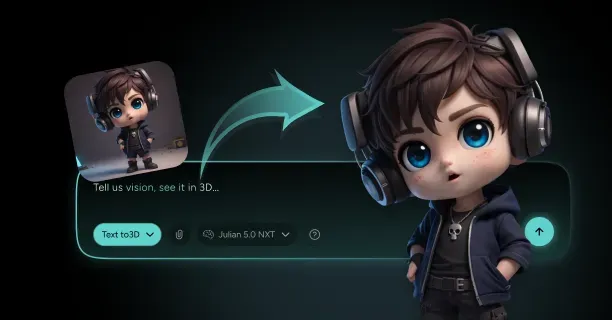
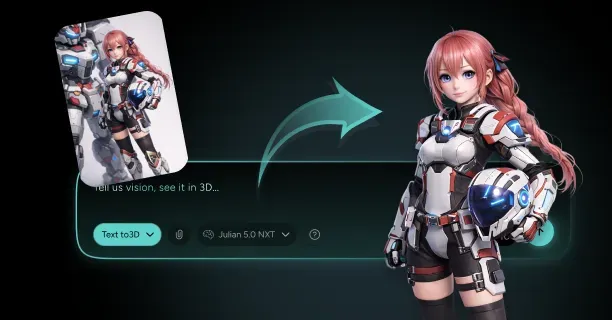
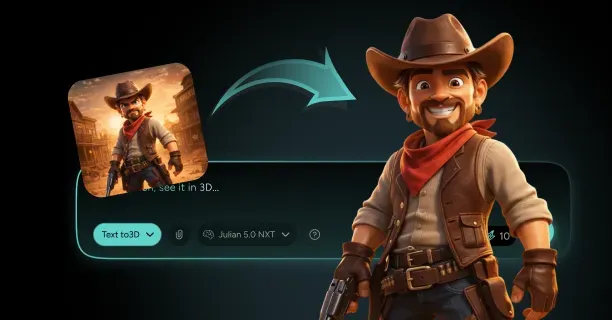
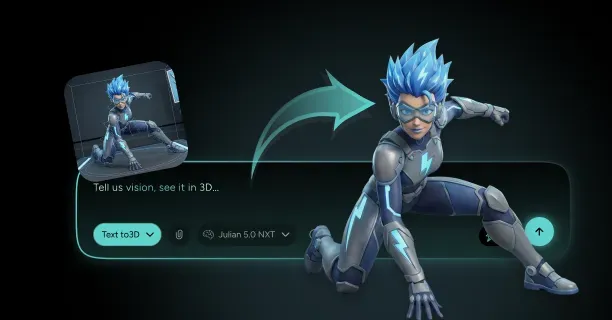
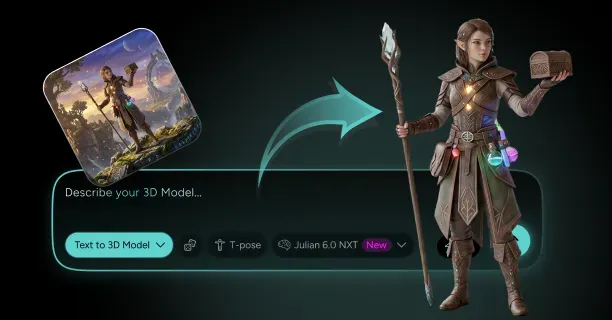
To make fantasy character 3D models from images, upload a full-body reference of the character to Threedium, write a prompt that locks in the archetype silhouette, the armor class, and the weapon scale, and let the Julian NXT generator reconstruct a closed mesh with PBR textures baked from your reference. You then inspect the parts fantasy designs reliably break, pauldron intersections, cape hems, weapon grips, and pointed or tusked facial features, before rigging and exporting to GLB, FBX, or USDZ. A usable fantasy 3d character model comes out of a single working session instead of the two to six week queue a sculpt commission normally runs, which is why a fantasy character creator 3d search usually ends at an image-to-mesh tool rather than at a sculpting package.
The rest of this page is the working process rather than a feature list. Fantasy characters are harder than modern-dress humans for one specific reason: almost none of the surface is skin. It is plate, mail, leather, fur, cloth, gemstone, and glow, layered on top of each other, and each of those layers has its own failure mode in reconstruction, in texturing, and in deformation. Get the layers right and everything downstream, posing, animation, printing, engine import, stops fighting you.
Choose or Generate a Fantasy Character Reference Image
Your reference decides roughly seventy percent of the result, so treat picking it as a real step rather than a formality. The best input is a single image that shows the whole character from head to boot sole, lit flatly, with the gear read clearly against the background. Concept art built for production, the kind with a clean silhouette and no dramatic rim lighting, converts far better than a finished illustration with heavy atmosphere, because reconstruction reads baked shadow as dark base color and you inherit that mistake permanently in the albedo map.
If you do not have art yet, generate it. A 2D pass first is almost always faster than fighting a 3D result you cannot describe. Ask your image generator for a full-body character sheet, neutral A-pose, flat studio lighting, plain grey background, and then regenerate until the armor design is internally consistent, meaning both pauldrons match, the belt actually closes, and the weapon has a visible grip and pommel. Illustrations hide those failures behind pose and lighting. Meshes cannot.
Resolution beats polish. A clean 2048 px flat-color piece outperforms a 1000 px painted render every time. If your only reference is moody and backlit, write the true colors into the prompt: state that the cloak is deep green rather than the near-black it appears under torchlight, and that the blade is polished steel rather than the orange it reads as beside a fire.
Pick an Archetype: Elf, Orc, Wizard, Knight, or Rogue
Archetype is shorthand for a proportion set and a material mix, and naming it early saves you correction passes later. An elf 3d model runs long in the limbs and narrow in the shoulder, usually 7.5 to 8 heads tall, with light armor and a lot of exposed cloth. An orc 3d model inverts that: 6.5 heads, enormous deltoid and trapezius mass, forward head carriage, and heavy asymmetric plate or hide. A knight is a proportion-neutral human wrapped almost entirely in rigid geometry. A rogue is a human silhouette dominated by straps, buckles, and a hood. A wizard 3d model is mostly cloth volume with a small amount of skin at the face and hands.
Those differences matter far more than lore does. The generator does not need to know the character's homeland; it needs to know whether the shoulders are wider than the hips and whether the volume comes from muscle or from fabric. Say that plainly in the prompt and the mesh lands closer on the first attempt.
- Elf ranger: 7.5 to 8 heads, leather and light mail, most often fails with the ear tips fused into the hair mass
- Orc warrior: 6.5 to 7 heads, hide and iron plate, most often fails with the tusks merged into the upper lip
- Wizard: 7 to 7.5 heads, layered cloth and trim, most often fails with the robe hem sealed to the ground plane
- Knight: 7.5 to 8 heads, steel plate and tabard, most often fails with the pauldron welded to the upper arm
- Rogue: 7 to 7.5 heads, leather and buckles, most often fails with the hood interior collapsed onto the skull
Prepare Your Reference: Full-Body View, Neutral Pose, Clean Background
Prep takes ten minutes and repays itself several times over. Crop so the character fills the frame vertically with a small margin, remove the background to flat white or flat grey, and if the pose is dynamic, that dramatic three-quarter lunge with the cape flaring, seriously consider regenerating or repainting to something closer to A-pose or T-pose. Dynamic poses force the reconstruction to guess at occluded geometry, and a cape mid-flare tells it nothing about where the cape actually attaches.
Occlusion is the enemy. Every part of the design hidden behind another part is a part the generator invents. A cloak thrown over the left arm means the left arm is fiction. A greatsword held vertically across the torso means the breastplate underneath is fiction. Where you can, pick or produce a reference where the weapon is lowered and the cloak hangs behind.
- Keep: even frontal lighting, visible boot soles, both hands readable, symmetrical stance
- Remove: lens flare, magical bloom over the face, motion blur, ground fog, heavy vignetting
- Fix before upload: asymmetric armor that was meant to be symmetric, missing straps, floating props
- Add if you have it: a second image from three-quarter or rear view, even a rough sketch
- Note in text: true colors of anything the lighting distorts, and the intended material of anything ambiguous
Upload Your Image to Threedium's AI Fantasy Character Generator
With the reference cleaned, upload it through the character model generator and let Julian NXT run its reconstruction pass. The system reads silhouette, depth cues, and material signals out of the image and produces a closed, single-shell mesh with generated albedo, roughness, metallic, and normal maps rather than a flat-colored blob you would then have to texture yourself. First-pass generation typically completes in a few minutes, which is what makes the iterate-and-correct workflow described below practical at all.
Treat the first output as a draft, not a delivery. Nobody experienced accepts pass one. The point of an ai fantasy character generator is that a correction cycle costs minutes rather than the days a sculptor needs, so plan on three to five passes: one to establish the base form, one or two to fix armor and gear geometry, one to settle materials, and a final one to lock the look. Naming the passes ahead of time keeps you from endlessly nudging a prompt that was never the problem.
If you are producing several characters for the same project, run them in one sitting with a consistent prompt skeleton. Party cohesion, matching stylization level, matching armor thickness language, matching texel density, is far easier to hold when the models are made back to back than when they are made weeks apart.
Write a Prompt That Locks In Archetype Silhouette, Armor Class, and Weapon Scale
Prompts for fantasy characters fail when they describe story instead of geometry. "A fearsome warrior of the northern clans, sworn to vengeance" gives the generator nothing. "Broad-shouldered humanoid, shoulders 1.6 times hip width, heavy segmented iron plate over the torso and left arm, bare right arm, fur mantle across the shoulders, two-handed axe with a haft roughly chest height" gives it everything.
Three variables carry most of the weight. Silhouette is the ratio language: shoulder to hip, limb length, head size relative to body, where the mass sits. Armor class is coverage and rigidity: unarmored, light and flexible, medium with rigid pieces over cloth, or full rigid plate. Weapon scale is measured against the body rather than named, because "greatsword" spans a factor of two across fantasy art while "blade length equal to the distance from shoulder to floor" does not.
- Silhouette: "shoulders 1.5x hip width, limbs elongated, 8 heads tall, mass concentrated in the upper back"
- Armor class: "rigid articulated plate on torso, thighs, and forearms, mail visible at the joints, cloth tabard over the front"
- Weapon scale: "staff height equal to character height plus one head, grip diameter roughly 4 cm at human scale"
- Material call-outs: "aged bronze trim, not gold; matte boiled leather, not glossy"
- Negatives: "no cape, no floating props, no ground base, weapon held clear of the body"
Describe the weapon in body-relative units, never in genre names. A prompt that says "longsword" produces anything from a 90 cm arming sword to a 160 cm slab. A prompt that says "blade length from the character's chin to the floor" produces the same weapon every time.
Review the Generated Mesh: Silhouette, Proportions, and Gear Readability
Review the result in stages and in that order, because fixing proportion after you have adjusted materials wastes the material work. Start with the silhouette. Fill the model with flat black in your viewer or turn off all lighting and look at the outline alone. A good image to 3d fantasy character conversion is recognizable as your character from the shape of the shoulders, the hem line, the weapon angle, and the head profile, with no color information at all. If the black shape looks generic, the reconstruction lost the design and no amount of texture rescues it.
Next, proportions. Check head-to-body count against the archetype table above, check that the hands land mid-thigh, and check that the feet sit flat on a common plane rather than one heel hovering. Fantasy armor hides proportion errors well in a render and exposes them brutally the moment the character walks.
Last, gear readability. Orbit the model at what will actually be its viewing distance. For a third-person game NPC that is roughly three to five meters, at which point a filigree pattern that took three generation passes to get right is invisible while the shape of the pauldron is everything. Cut detail that does not read at viewing distance and spend the budget on the shapes that do.
Refine Fantasy Features: Pointed Ears, Tusks, Horns, and Scars
Non-human facial features are the most reliable source of first-pass errors, because reconstruction is biased toward human anatomy. Pointed ears tend to shorten and round, tusks tend to sink into the upper lip, horns tend to fuse into the hairline, and facial scars tend to disappear entirely because they exist only in the texture of the reference, not in its silhouette.
Fix them by naming the feature and its measurement. "Ears extend 6 cm past the skull and angle 30 degrees back and up" beats "elven ears." "Lower canines protrude 3 cm past the upper lip, visible when the mouth is closed" beats "tusks." "Two ridged horns rising from above the temples, sweeping back, tip-to-tip span roughly 40 cm" beats "horned." The generator responds to dimension and direction because those are geometry instructions.
Scars, tattoos, war paint, and brands belong in the texture rather than the mesh, and you should say so. Asking for a carved scar produces a groove that reads as damaged topology at close range; asking for a raised pale scar line in the albedo and a subtle normal map ridge produces something that reads correctly at every distance. The same logic applies to tribal paint on an orc and to inked sigils on a wizard's forearms.
Check Armor Pieces and Weapons for Fused or Floating Geometry
This is the inspection pass that separates a usable fantasy armor 3d model from one that falls apart in an engine. Reconstruction produces a single continuous surface, which is exactly what you want for printing and exactly what causes trouble for animation, because a pauldron that should sit on top of the shoulder is instead welded to it, and a sword that should be a separate object is instead grown out of the palm.
Go through the model systematically and mark every place where two parts that should be distinct have become one, and every place where a part that should touch is floating with a visible gap. Both errors are fixable, the first by separating and rebuilding the contact surface, the second by closing the gap, but you have to find them first.
- Fusion hotspots: pauldron to bicep, gauntlet to forearm, weapon grip to palm, belt to tabard, hood to shoulders
- Floating hotspots: shield straps, scabbard against the hip, quiver against the back, buckles, dangling charms
- Interior check: hood cavity, helmet interior, open-faced visor, sleeve openings, boot tops
- Thin-geometry check: cape edges, blade edges, cloth hems, and feather or fur cards below 1 mm at real scale
Any surface thinner than about 1.2 mm at final print scale will not survive resin printing, and any surface thinner than roughly 0.5 cm at character scale will z-fight in a game engine at distance. Thicken blade edges and cape hems before export rather than after you discover the problem.
Choose Stylized or Realistic Rendering To Match Your Fantasy World
Stylization is a project-wide decision, not a per-model one, and it is worth settling before you generate the second character. A stylized fantasy character exaggerates: armor plates thicken to 3 or 4 cm of visible edge, hands and feet enlarge, facial features simplify, and materials trend toward broad flat value blocks with painted transitions. A realistic treatment keeps plate at a believable 1.5 to 2 mm, preserves anatomical hand structure, and relies on measured PBR values to carry the surfaces.
The practical difference is where detail lives. Stylized work puts detail in the silhouette, so a stylized dwarf reads at 200 pixels tall on a mobile screen. Realistic work puts detail in the maps, so a realistic knight needs 2K or 4K textures and reasonable lighting to look like anything at all. Neither is better; they fail in different conditions.
Mixing them within one party is the mistake to avoid. If your ranger is stylized with thick chunky leather and your wizard is realistic with fine fabric weave, they will never look like they belong in the same world, no matter how good each is alone. Pick a stylization level, write it into your prompt skeleton in the same words every time, and hold it across the whole cast.
Rig Your Fantasy Character for Posing and Animation
A static mesh is a statue. To pose it, animate it, or drop it into an engine as anything other than scenery, it needs a skeleton, and automatic rigging handles the standard humanoid hierarchy without you weight-painting by hand. A generated rigged fantasy character arrives with a humanoid skeleton in the range of 50 to 70 joints, which maps cleanly onto Unity's Mecanim humanoid avatar and Unreal's standard skeleton, so retargeted animation from a marketplace pack works immediately.
Facial rigging matters more for fantasy than people expect. If the character speaks in a cinematic, has dialogue barks in a game, or appears in any close-up, you want the 52 ARKit blendshapes set, which is the de facto standard supported by essentially every real-time facial capture and lip-sync pipeline. It works on non-human faces too, though tusks and heavy brows change how the shapes read and are worth checking one by one.
Rigid armor complicates weighting, and that is covered in detail further down. For now the practical rule is to rig after the geometry is final. Rigging a mesh, then discovering the pauldron is fused to the arm, then fixing the pauldron, means rigging again. Lock the mesh, then bind.
Export as GLB, FBX, or USDZ for Game Engines, Print, or Web
Format follows destination, and picking the wrong one costs you an hour of conversion pain later. FBX is what you want for Unity and Unreal, because it carries skeletons, skin weights, blendshapes, and multiple animation takes, and both engines import it without argument. GLB is the web and real-time format: one self-contained binary with meshes, PBR materials, and textures packed inside, ideal for three.js, model viewers, and anything embedded in a page. USDZ is the Apple AR path, opening natively in iOS Quick Look for AR placement.
For 3D printing you want a watertight solid rather than a rigged character, so you triangulate, merge the character and gear into a single manifold shell, and hand off to your slicer. Remember that print needs geometric thickness where a game gets away with a texture: a cape edge, a spear tip, and a filigree curl all need real millimeters.
Scale is the second thing people get wrong. Set your export to 1 unit = 1 meter for Unity, Unreal, and glTF-based web viewers. A model exported in centimeters lands in an engine a hundred times too large, and the usual symptom is a character whose head fills the entire camera frustum on import.
| Destination | Format | Carries rig | Notes |
|---|---|---|---|
| Unity / Unreal | FBX | Yes, skeleton plus blendshapes | Set 1 unit = 1 m; Y-up for Unity, Z-up conversion for Unreal |
| Web / three.js | GLB | Yes, glTF skinning | Textures embedded; keep under about 15 MB for fast load |
| iOS AR | USDZ | Yes, limited | Opens in Quick Look; keep materials simple |
| VTuber / avatar apps | VRM | Yes, plus visemes | Requires humanoid bone mapping and spring bones for cloth |
| Resin printing | STL or OBJ | No, posed and merged | Watertight, manifold, minimum 1.2 mm wall thickness |
What Image Quality Works Best for Fantasy Character Conversion?
The working minimum is a 1024 px shortest edge with the character occupying most of the frame; the comfortable target is 2048 px or larger. Beyond about 4096 px you gain very little, because the limiting factor stops being pixels and becomes how much of the design the image actually shows. A 6000 px render of a character whose back you never see is still a reconstruction with an invented back.
Quality here means information, not fidelity. Rank your candidate references by how much unambiguous geometry they reveal. A flat, slightly boring 1600 px turnaround sheet is a better input than a spectacular 4000 px key art piece drenched in volumetric light, because the turnaround answers questions and the key art asks them.
- Best: 2048 px or larger, flat lighting, plain background, A-pose, full body, weapon held clear
- Workable: 1024 to 2048 px, mild directional lighting, three-quarter pose, minor occlusion
- Needs a rewrite in the prompt: strong colored lighting, heavy shadow, magical bloom, motion effects
- Poor: bust crops, tokens under 500 px, back-lit silhouettes, images where gear reads as one dark mass
One habit is worth adopting permanently: keep the reference open beside the viewport during every review pass. Drift is subtle and cumulative, and three prompt iterations later you will happily accept a belt buckle that was never in the design.
What Makes Fantasy Armor, Cloth, and Materials Hard To Get Right in 3D?
Fantasy armor is hard because it is a stack of separate rigid and soft objects pretending to be one surface, and because the materials involved, polished steel, aged bronze, boiled leather, fur, mail, silk, gemstone, and emissive enchantment, sit at opposite ends of every PBR parameter at once. Reconstruction wants a single continuous shell. Animation wants separable parts with independent deformation. Rendering wants each material to hold its own distinct response to light. This section is about resolving those three demands on one character.
Layered Armor: Pauldrons, Breastplates, and Overlapping Plates
Real armor is built as overlapping lames that slide across each other, and that sliding is exactly what a generated mesh does not do by default. When the reconstruction fuses a three-lame pauldron into one dome, the character loses the shadow lines that read as armor and gains a shoulder that cannot rotate without tearing.
The fix is to describe layer separation explicitly and then verify it. Ask for visible gaps between plates rather than merged forms: "three overlapping shoulder lames with 4 mm visible separation, each lame with a rolled edge." Rolled or beveled edges are not decoration; they are what makes a plate read as a thick metal object rather than a paper shell, and they catch a highlight that sells the material instantly.
Watch the overlap direction as well, because it carries information. Plates on a real harness overlap downward on the shoulder and upward on the abdomen so the wearer can bend without the edges catching. Getting this backward is one of those errors nobody can name but everybody senses. On a game ready fantasy character you will likely simplify to two or three lames per pauldron rather than the historical five or six, which is fine, so long as the separations you keep are real geometry with real thickness.
Capes, Robes, Hoods, and Tabards Without Clipping Issues
Cloth layers clip because they are modeled as surfaces sitting fractions of a millimeter apart. A tabard laid directly on a breastplate will punch through it the instant the torso twists, and a hood modeled as a shell hugging the skull will show scalp through the fabric on the first head turn.
Give every cloth layer a deliberate offset. At character scale, roughly 5 to 10 mm of clearance between a cloth layer and the surface beneath it is enough to absorb normal deformation without reading as a gap. Hoods need more, closer to 20 mm at the crown, because head rotation moves the skull surface a long way relative to a hood that partly follows the shoulders.
Cloth also needs actual thickness. A single-sided plane looks fine in a static render and disappears the moment the camera sees its back face, and it renders as a razor edge at every silhouette. Model cloth as a shell with 2 to 4 mm of thickness at character scale, or accept that you will be fighting backface culling in every engine you touch.
If your engine budget allows it, remove geometry hidden under an opaque cloth layer rather than leaving it. Deleting the chest plate under a full tabard saves triangles and eliminates the clipping problem at the source, but only do this once you are certain the tabard never moves enough to reveal what is behind it.
Rendering Fantasy Metals: Polished Steel, Aged Bronze, and Enchanted Alloys
Metals in PBR are governed by two rules people constantly break: metallic is binary, either 1.0 or 0.0, with almost nothing legitimate in between, and a metal's color lives entirely in its albedo because metals have no diffuse component. Set metallic to 1.0 for the plate, then control the look with roughness and with a tinted base color.
Roughness is where the storytelling happens. A mirror-polished ceremonial cuirass sits near 0.1, a well-maintained field harness around 0.3, a weathered mercenary breastplate around 0.5, and rusted or pitted iron up around 0.7. Vary it across the surface with a roughness map rather than using one flat value: edges and high points polish smooth from wear while recesses stay dull, and that single contrast does more for believability than any amount of added geometry.
| Material | Metallic | Roughness | Base color note |
|---|---|---|---|
| Polished steel | 1.0 | 0.10 to 0.20 | Neutral light grey, slightly blue |
| Field-worn steel | 1.0 | 0.30 to 0.45 | Grey with darker recesses |
| Aged bronze | 1.0 | 0.35 to 0.55 | Warm brown-gold, green patina in recesses |
| Blackened iron | 1.0 | 0.55 to 0.75 | Very dark, near-neutral |
| Boiled leather | 0.0 | 0.45 to 0.65 | Mid brown, slight sheen on wear points |
| Wool or linen | 0.0 | 0.75 to 0.90 | Flat, no specular highlight |
| Gemstone | 0.0 | 0.05 to 0.15 | Saturated, needs transmission for realism |
Enchanted alloys are where fantasy departs from physics, and the trick is to depart in one parameter only. Keep the metal physically correct and add a single unreal element: a faint emissive in the engraved channels, a subtly iridescent tint, a color shift toward violet at grazing angles. Break three rules at once and the material stops reading as metal at all.
Leather, Fur, and Chainmail: Mixing Material Types on One Character
A single fantasy character routinely carries five or six distinct material types, and the thing that makes them read as distinct is not detail but contrast in roughness and in specular response. If your leather and your cloth both sit at 0.7 roughness with similar albedo, they become one brown mass no matter how carefully you painted the grain.
Chainmail is the special case. Modeling actual interlocked rings is a triangle catastrophe: a full hauberk in real geometry runs into the hundreds of thousands of triangles for something that occupies a few hundred pixels on screen. The standard solution is a tiling normal and alpha map on a simple shell, which gives you the ring pattern, the depth, and the correct broken specular for a few hundred triangles. Reserve real ring geometry for hero renders and for print.
Fur has the same economics. Real strand-based fur is a rendering feature, not a game asset. For real-time, use a shell of geometry with a fur normal map plus a soft alpha fringe along the silhouette edges, which is where fur actually reads. On a fantasy 3d character model destined for an engine, a fur mantle done as three alpha card layers along the shoulder outline will outperform a million-strand groom every time, because the viewer only ever perceives the edge.
Magic Effects: Glowing Runes, Spell Auras, and Emissive Maps
Glow belongs in the emissive channel, not in the albedo, and this distinction is worth internalizing because the wrong choice produces runes that look bright in your viewer and dead in an engine. An emissive map tells the renderer a surface outputs light independently of the scene, so it survives being placed in a dark dungeon; a bright yellow albedo is just a light-colored surface that goes grey when the lights go out.
Ask for the runes as a separate emissive texture with hard-edged shapes and no anti-aliasing softness that mush at distance. Keep emissive values modest, around 1.0 to 2.0 in intensity for a rune that glows steadily, and reserve higher values for effects that are supposed to bloom. Overdriving emissive is the single most common way a good fantasy armor 3d model ends up looking like a cheap mobile asset.
Auras, trails, and particle effects are not modeling problems at all, and you should stop trying to solve them in the mesh. A spell aura is an engine effect built from particles, a shader, or a translucent card that faces the camera. Generate the character with the runes carved into the armor and the gem set in the staff, then add the swirling light in Unity's VFX Graph, Unreal's Niagara, or your compositor. Baked glow geometry looks wrong from every angle except the one it was made for.
Swords, Staffs, and Shields: Handling Weapons as Separate Attachments
A weapon fused to the hand is fine for a print and useless for anything animated. The moment your character needs a sheathe animation, a weapon swap, a disarm, or simply a second pose, the weapon has to be an independent object parented to a hand socket.
Generate the weapon fused if that gives you a better silhouette on the reconstruction, then separate it as a cleanup step: select the weapon shell, split it into its own object, close the hole left in the palm, and set the weapon's origin at the grip point rather than at its geometric center. That origin placement matters enormously, because it becomes the pivot that aligns with the hand socket, and a sword whose origin sits at the blade midpoint will always attach at a strange offset.
Orient every weapon consistently across your whole set. Pick a convention, for example blade along positive Y with the flat facing positive X, and apply it to swords, axes, staffs, and wands alike. Consistency here is what lets one hand socket accept any weapon in the loadout without a per-item correction transform, which is the whole point of building a modular set.
Keeping Ornate Engravings Readable at Game-Ready Polycounts
Ornament is the reason fantasy armor is expensive. A knotwork border around a breastplate, modeled as geometry, can consume more triangles than the rest of the character. The answer is the standard high-to-low workflow: the detail lives in a normal map baked from a dense source, while the mesh you ship carries only the forms that affect the silhouette.
Deciding what stays as geometry comes down to one test: does the shape change the outline? A raised boss in the center of a shield does not, so it becomes a normal map. A spike protruding from that boss does, so it stays geometry. Run that test on every ornamental element and the budget resolves itself.
Texel density is the other half. Engraved detail needs roughly 1024 pixels per meter of surface to stay legible at close range, which for a human-scale character means a 2K texture set for the body plus a separate 2K set for gear, or a single 4K atlas if you prefer fewer draw calls. Below about 512 pixels per meter, knotwork turns into noise, and noise on armor looks like dirt.
Hand-Painted vs PBR Texturing for Stylized Fantasy Looks
Hand-painted texturing bakes the lighting into the albedo: the highlight on top of the pauldron and the shadow under the belt are painted in and never change. PBR keeps albedo lighting-free and lets the engine compute the response from roughness, metallic, and normal data. The choice is a look, but it is also a constraint on your lighting.
Hand-painted wins for stylized worlds with flat or simple lighting, and it stays readable at very low resolution, which is why it dominates mobile and top-down fantasy games. Its cost is rigidity: move a strong light and the painted highlights point the wrong way, and dynamic time-of-day systems expose the illusion immediately.
PBR wins anywhere lighting changes, which is most modern engines, and it is what a generated character ships with by default. If you want the painterly look with PBR flexibility, the practical hybrid is to keep the PBR maps and push the style through the albedo: broader value blocks, higher saturation, simplified transitions, plus a mild ramp or cel shader in the engine. You keep dynamic lighting and gain the illustrated feel, which is how most modern stylized fantasy character pipelines actually work.
Rigging Characters in Rigid Plate Armor: Joints and Weight Painting
Skinning assumes surfaces bend. Plate does not. Standard smooth weights on a rigid cuirass produce a breastplate that flexes like rubber when the spine bends, which instantly destroys the impression of metal. The correction is to treat rigid pieces as rigid bodies: weight each plate to a single joint at 1.0, with no blending across the boundary.
That creates gaps at the joints, and the historical solution is the same one armorers used. Put mail, leather, or cloth in the articulation points, weight those transition zones with smooth blended weights, and let them absorb all the deformation while the plates stay stiff. The armpit, the inner elbow, the back of the knee, and the waist are the four places this matters most.
For plates that need to move relative to the body, a floating pauldron or a hanging faulds skirt, add helper joints. A pauldron on its own joint, parented to the clavicle rather than the upper arm, can be posed to slide over the shoulder as the arm raises instead of intersecting it. Two or three extra joints on a heavily armored character are cheap and solve problems no amount of weight painting will. The auto-rig gives you a clean humanoid base; these refinements sit on top of it.
Why Do Capes and Skirts Break During Animation?
Capes and skirts break because they are attached to a skeleton designed for a body, and neither garment behaves like a body. A cape rigidly weighted to the spine swings like a plank. A skirt weighted to the pelvis alone stays a stiff cone while the legs pass straight through it. Both are the same underlying error: expecting skinning to do a job that belongs to secondary motion.
The fix has two parts. First, give the garment its own joint chain: three to five joints down the length of a cape, four to eight around the hem of a skirt or faulds. Second, drive those joints with something other than the body animation, either a physics or spring-bone system such as Unity's Dynamic Bone equivalents, Unreal's Kawaii Physics or built-in cloth, or VRM spring bones if you are exporting to an avatar platform. The joints follow the body; the physics adds the lag and swing that make it read as fabric.
Skirts and faulds need one more thing: leg-driven correction. The most robust cheap approach is to weight each hem joint partially to the nearest leg so the skirt front is pushed forward when the knee lifts. It is not simulation and it will not survive scrutiny in a cinematic, but it prevents the single most visible failure in a walk cycle, which is a leg passing cleanly through a robe.
Always test a cape or robe against a running animation before you consider the character finished. Idle and walk cycles hide almost every cloth failure. A sprint with a hard stop reveals all of them in about two seconds.
How Does a Fantasy Character Creator 3D Pipeline Ship Production Assets?
Generating one good character is a craft exercise. Shipping a cast is a production problem, and the constraints change: you need armor that reuses across body types, weapons that swap without rework, budgets that hold when six characters render in one frame, and licensing you can actually defend to a publisher. These are the questions that decide whether a generated character reaches a build.
Building One Armor Kit That Reskins Across Three Archetypes
The highest-leverage move in any fantasy production is designing one armor kit and reskinning it, because armor is the most expensive part of the character and the least noticed when reused. A single set of plate, breastplate, pauldrons, gauntlets, greaves, faulds, can carry a knight, a paladin, and a warlord if the differences are pushed into texture and into a small number of swappable ornaments.
Build the kit against a shared proportion baseline, then treat each archetype as a variant of that baseline rather than a new character. In practice that means generating the base armored figure once, then producing archetype versions by changing the albedo and roughness maps, swapping the helmet, and adding or removing two or three silhouette-defining pieces such as a crest, a cloak, or a shoulder trophy.
- Shared: torso plate, gauntlets, greaves, boots, belt, base UV layout, joint placement
- Per archetype: helmet, pauldron ornament, cloth color, heraldry decal, weapon
- Texture strategy: one shared normal and roughness set, three albedo variants, one decal layer
- Result: roughly a third of the asset cost of three independent characters
The failure mode is reuse that reads as reuse. Keep the shared silhouette but vary the value distribution, a dark knight against a pale paladin, and vary the head shape, and players will not register that they are looking at the same cuirass. Vary only the hue and they will notice within a minute.
Fitting Armor to Non-Human Proportions: Orc Mass and Elf Slenderness
Reusing an armor kit across body types is where most teams get stuck, because a cuirass built for a human torso does not fit an orc without either exploding through the chest or floating off the ribs. Uniform scaling is not a solution: scale a human breastplate 130 percent to fit orc shoulders and the waist grows with it, so the armor swallows the character.
Handle it as a proportional fit rather than a scale. Break the kit into regions and scale each against the target body: an orc typically needs 125 to 140 percent shoulder width, 110 to 120 percent chest depth, but only 100 to 110 percent waist, with arm length actually slightly shorter relative to the torso. An elf inverts most of it: 85 to 90 percent shoulder width, 90 percent chest depth, 105 to 110 percent limb length. Applied per region, the same plates read as tailored for each body.
Two details do the heavy lifting. First, thicken plate on heavy archetypes: an orc's iron reads as heavier at 4 to 5 cm of visible edge where a human's is 2 cm, even though nothing else changed. Second, re-place the joint articulation gaps, because an orc's shoulder pivot sits higher and further back, and armor whose gaps were placed for a human will bind exactly where the character needs to move. Regenerating the armored figure directly against the target body through the 3D model generator is usually faster than retrofitting a human kit by hand.
Modular Weapon Attachment Sockets So One Character Ships With a Loadout
One character with six weapons is a far better asset than six characters with one weapon each, and the whole thing depends on sockets. A socket is an empty transform parented to a joint, positioned and oriented where an item should sit, and every item in your loadout is authored to attach at its own origin with zero offset.
Define the socket set once and never change it. A workable standard fantasy loadout uses eight: right hand grip, left hand grip, left forearm for a shield, hip left for a sheathed sword, hip right for a dagger or pouch, upper back for a two-hander or bow, lower back for a quiver, and a head socket for helmets or circlets. Each socket needs a consistent orientation convention so any item drops in correctly.
- Origin at contact point: grip center for weapons, inner strap for shields, throat for helmets
- Consistent axis: item length along positive Y, forward face along positive Z, applied to every item
- Scale check: author every item at 1 unit = 1 m so no per-item scaling is needed at runtime
- Sheathed variants: a scabbard version and a drawn version of each blade, sharing the same origin logic
Once the convention holds, a single rigged fantasy character ships as a whole equipment system: the same warrior appears as a sword-and-board defender, a two-handed berserker, and an archer, with no additional character work and only per-item cost.
LODs and Texture Atlasing When a Fantasy Party Ships in One Scene
Budget stops being theoretical the moment four party members, three enemies, and a boss are on screen together. A single hero character at 80,000 triangles with four 4K texture sets is entirely reasonable alone and completely unshippable multiplied by eight. Plan the budget at scene level from the start.
| Role | LOD0 triangles | Texture set | Typical LOD chain |
|---|---|---|---|
| Hero / player character | 50,000 to 90,000 | 2 x 4K | LOD0 to LOD3, 50 percent reduction per step |
| Named NPC or party member | 25,000 to 50,000 | 1 x 4K or 2 x 2K | LOD0 to LOD2 |
| Standard enemy | 10,000 to 25,000 | 1 x 2K | LOD0 to LOD2 |
| Crowd or background | 3,000 to 8,000 | 1 x 1K, atlased | LOD0 to LOD1 plus impostor |
| Mobile or web target | 8,000 to 20,000 | 1 x 1K or 2K | LOD0 to LOD1 |
Texture atlasing is where the real savings usually sit. Every distinct material on a character is a draw call, and a fantasy character can easily reach eight materials, skin, hair, leather, plate, cloth, mail, gems, weapon, before anyone notices. Packing gear materials into one shared atlas per character, and one shared atlas across all crowd characters, cuts draw calls dramatically at almost no visual cost, because gear detail is not what the player is looking at.
Generate LOD0 first and derive the chain from it rather than generating separate models per level, since independently generated versions will not match and the pop between them will be obvious. Aim for a 50 percent triangle reduction per step and keep the silhouette intact through LOD2; the silhouette is the last thing that should degrade.
Licensing and Attribution When a Generated Fantasy Character Ships in a Commercial Game
Before a generated character enters a commercial build, settle three separate questions, because they have different answers: what rights the generation platform grants you in the output, what rights you hold in the input image, and whether the design infringes anyone's existing intellectual property.
The platform question is a matter of the terms you accepted. Most generation services grant commercial use of outputs on paid tiers, sometimes with restrictions on reselling the raw model as a standalone asset, so read the license for your specific plan and keep a copy of it with your project files. If a publisher, storefront, or funding partner is involved, they will ask, and "I think it was fine" is not an answer that survives due diligence.
The input question is the one people skip and the one that actually bites. If your reference is commissioned art, your commission agreement governs whether you may create derivative works from it, and many illustration contracts grant display rights only. If the reference is fan art, or a screenshot, or a character from a published property, converting it to 3D does not launder the underlying rights. Original art you own outright, or art you commissioned with an explicit derivative-works clause, is the only genuinely clean path.
- Keep on file: the platform license text for your plan, dated, alongside the project
- Keep on file: the commission contract or a written derivative-works permission from the illustrator
- Avoid entirely: references drawn from published game, film, or tabletop properties
- Check separately: any third-party animation packs, textures, or audio bundled with the character
Trademark deserves a note of its own. Generic fantasy archetypes, an elf archer, an orc warlord, a robed wizard, are not protectable; specific named characters, distinctive costume designs, and heraldic marks associated with a published property are. Design your character to be an elf ranger rather than a particular elf ranger and the question never arises.
Frequently Asked Questions About Fantasy Character 3D Models
Short answers to the questions that come up most often when people move from fantasy art to fantasy geometry, covering cost, tooling, engine readiness, printing, and how this workflow differs from building a specific tabletop character.
What Is the Best Free Fantasy Character Creator in 3D?
For genuinely free, fully open humanoid creation, MakeHuman and Blender's character add-ons remain the standard starting point, and Blender itself is free, capable of anything, and has the steepest learning curve of the group. For fantasy specifically, free tools generally give you a base human body and leave armor, gear, and stylization entirely to you, which is exactly the expensive part.
Character Creator from Reallusion and the various game-engine character tools sit in a middle tier, offering fantasy-adjacent presets with paid content packs for the actual armor. Free tiers on generation platforms typically let you produce and preview models with limits on resolution, export format, or commercial rights. The honest summary is that free tools are excellent for the body and weak for the fantasy, and fantasy characters are almost entirely gear.
How Much Does a Custom Fantasy Character 3D Model Cost?
A commissioned custom fantasy character from a freelance 3D artist typically runs 300 to 1,500 USD for a static, textured model, and 1,000 to 4,000 USD for a fully rigged, game-ready character with LODs and clean topology. Heavily ornamented armor pushes toward the upper end, because ornament is billed in hours. Turnaround is usually two to six weeks depending on queue.
Marketplace assets from established stores run 20 to 150 USD for a ready-made fantasy character, with the obvious tradeoff that it is not your character and other projects ship the same model. AI generation sits in a different bracket entirely: subscription pricing in the tens of dollars per month covering many models, with a per-model turnaround measured in minutes. The cost question is usually really a specificity question, and generation is strongest when you need many characters that are specifically yours.
Can AI Turn Fantasy Artwork Into a 3D Model?
Yes. Image-to-3D reconstruction is what these systems do: you provide artwork, the model infers volume, and you receive a textured mesh. Quality tracks the input directly, so a clean full-body piece with readable gear produces a strong result and a moody bust crop does not.
The important caveat is that the AI reconstructs what it can see and invents what it cannot. Backs of cloaks, undersides of pauldrons, and the reverse of a shield are all inferred, and inference on ornamented fantasy gear is where you should expect to spend your correction passes. Assume the visible three-quarters is faithful and the remainder is a proposal.
How Do I Make a 3D Elf, Orc, or Wizard Without Modeling Skills?
Generate a reference image first, then convert it. That two-step path, 2D generation followed by image-to-3D, requires no sculpting knowledge at all, and it puts your creative decisions in a medium where iteration takes seconds rather than in a viewport where it takes hours.
What you do need is vocabulary. You will not sculpt the tusks, but you do need to be able to say the tusks protrude 3 cm past the upper lip, that the pauldrons should be three separated lames rather than one dome, and that the robe hem should not fuse to the ground. Every measurement-based phrase in this article is there to give you that vocabulary, and it is far faster to learn than modeling is.
Are AI-Generated Fantasy Characters Game-Ready for Unity and Unreal?
They can be, with the qualification that "game-ready" is a checklist rather than a property. A generated character exported as FBX with a humanoid skeleton, polygon optimization applied, and PBR maps at 2K or 4K imports into both engines and animates with retargeted marketplace animation immediately.
What still needs your attention is the production layer covered above: LOD chains, material and draw-call consolidation, weapon sockets, and cloth secondary motion. None of those are things any generator delivers finished, and none of them are things a marketplace asset delivers finished either. Budget an afternoon per character for the production pass and the answer becomes a straightforward yes.
Can I 3D Print a Fantasy Character Made From an Image?
Yes, provided you prepare a print version rather than sending the game version to a slicer. Printing wants a single watertight manifold solid with no rig, no separate floating parts, and real thickness everywhere, which is close to the opposite of what an engine wants.
Practically that means merging the character and all gear into one shell, thickening anything below about 1.2 mm at final print scale, checking that no geometry self-intersects, and posing before merging since a printed model cannot be reposed. Thin fantasy elements, blade edges, cape hems, spell effects, feather tips, are the usual failures, and they are much easier to fix in the model than to rescue on the print bed.
How Is This Different From Making a D&D Character Model?
Scope, mostly. This page is about fantasy archetypes as a design and production problem: building armor that reads as metal, cloth that survives animation, and a cast that ships within a budget. It assumes you may be making several characters and that they need to work together.
Converting a specific tabletop character is a narrower and more personal job, driven by a character sheet, existing commissioned art, and the goal of one faithful likeness rather than a reusable kit. If that is what you are doing, the D&D character model workflow covers race and class specifics, virtual tabletop use, and matching a model to a sheet. The armor, material, and rigging techniques here still apply; the framing and the priorities differ.