
How Do You Make Sonic-Style 3D Models From Images?
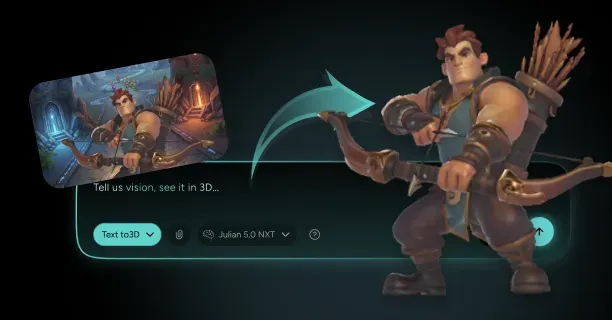
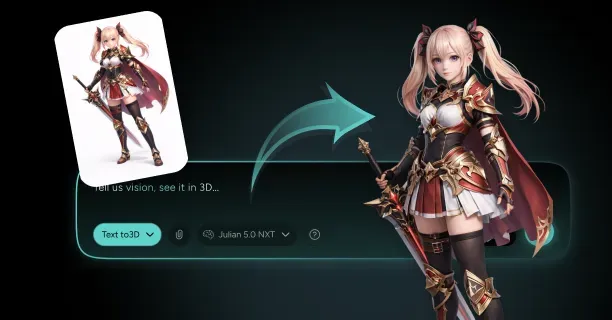
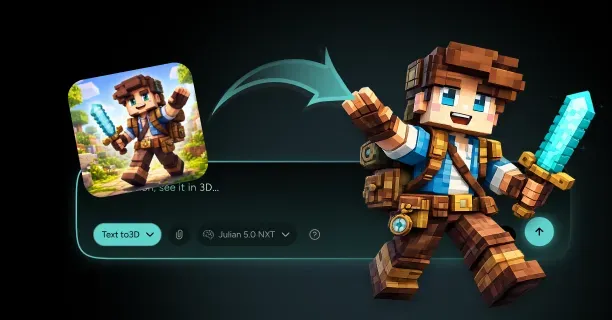
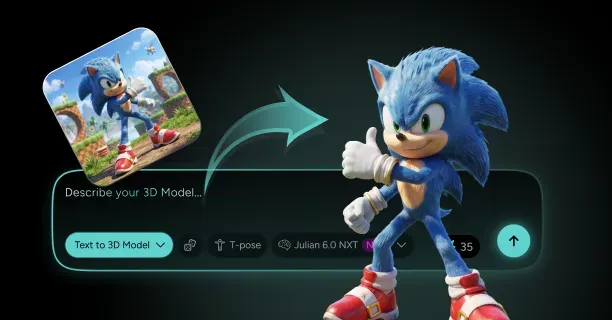
To make a Sonic 3D model from images, upload a clean flat-color drawing of your character in a neutral standing pose to Threedium, describe the SEGA-style anatomy in the prompt (oversized head, thin tapered limbs, three-fingered gloves, single fused eye mass with two pupils), and let the Julian NXT generator reconstruct a textured mesh from that reference. You then check the quill silhouette from every angle, separate the gloves, sock cuffs, and shoes into their own meshes, and export to GLB, FBX, or USDZ for Blender, Unity, Unreal, or a print slicer. The whole job lives or dies on two things generic character pipelines get wrong: quill geometry and the mono-eye.
Sonic-style characters are not stylized humans. They sit in a specific cartoon-animal design language: a head at roughly forty percent of total height, arms with almost no muscle definition, a body built for a spin attack, and a face where the two eyes merge into one continuous surface. Almost every pipeline built for humanoid characters mishandles at least three of those.
Choose Your Source Image: Sonic OC Ref Sheet, Fan Art, or Style Study
Your input image sets the ceiling for everything downstream. If you already have a Sonic OC ref sheet with front, side, and back views drawn at the same height with flat fills, use it and stop looking. That is the single best input format for any image-to-3D pipeline, because it removes the two things generation struggles with most: guessed occlusion and baked lighting.
If you only have a single illustration, pick the one where the character stands closest to a neutral pose with arms clear of the torso. A dramatic running pose with the quills whipping backward tells the generator almost nothing about where the quills actually attach to the skull. A boring standing shot with visible glove cuffs, visible sock cuffs, and a clean quill fan is worth ten action panels.
- Best input: a three-view ref sheet, flat cel colors, no drop shadows, quills clearly separated from the head shape
- Good input: one clean full-body front view plus a side profile, even if drawn at different scales
- Usable input: a single flat-colored front view with the arms held away from the body in an A-pose
- Weak input: heavily rendered fan art with rim light, motion blur, speed lines, or a foreshortened camera angle
- Avoid: screenshots of official game models, which are both a bad reconstruction source and an IP problem covered later
A style study is the third path. If you want a sonic style character 3d model to learn on, draw a simple front view with the proportions you want and treat it as your ref sheet.
Prep the Drawing: Why Clean Line Art in an A-Pose Beats a Running Sketch
Spend fifteen minutes cleaning the reference before you upload it. Delete the background entirely and replace it with flat white or transparency, because any patterned background bleeds into silhouette estimation and can attach stray geometry to the character. Remove speed lines, motion trails, sparkles, and floating rings; the generator reads them as objects and will try to model them.
Pose matters more here than in realistic character work because Sonic-style limbs are thin. An A-pose with arms at roughly thirty to forty-five degrees from the torso gives clean separation between arm and hip. A T-pose works too but tends to produce a slightly flattened shoulder. Avoid a strict I-pose with arms glued to the sides: thin arms merged into a thin torso is the single most common cause of fused geometry you then have to cut apart by hand.
Flatten the color. Delete the shadow layer or drop it to five percent opacity, because the generator bakes visible shading into the base color texture and a shadow under the muzzle becomes a permanent dark smear.
Export your reference at a minimum of 2048 pixels on the long edge. Below about 1200 pixels the quill tips and glove cuff rings get too few pixels to reconstruct as distinct forms, and you will get a soft blob where the spikes should be.
Write the Prompt: Locking In SEGA Proportions (Big Head, Thin Limbs, Gloves)
The prompt is where you force the style. Image-to-3D reconstruction infers a lot from the picture, but proportion language in the text prompt acts as a strong prior and stops the model drifting toward generic humanoid anatomy. Be explicit and numeric where you can.
Write the description as a spec sheet rather than a mood board. Name the head-to-body ratio, name the finger count, name the eye construction, name the footwear. A useful template: "cartoon anthropomorphic hedgehog character, stylized SEGA proportions, head is roughly forty percent of total height, large single connected eye mass with two separate pupils, short muzzle with small nose, six backward-swept quills from the crown, two chest quills, thin tapered arms with no visible muscle, three-fingered white gloves with rolled cuffs, white sock cuffs, red buckle shoes, flat cel colors, neutral A-pose, plain background."
Exclusionary phrasing helps too: "no human musculature, no five-fingered hands, no separate spherical eyeballs" reduces cleanup. If your sonic fan character 3d model has non-standard features, name them, since a fox tail, bat wings, or echidna spines default to hedgehog quills otherwise.
Generate the Base Mesh From Your Image in Threedium
With the reference cleaned and the prompt written, run the generation. Threedium's 3D model generator takes the image plus the text description and returns a watertight mesh with PBR textures already assigned: base color, normal, roughness, and metallic maps rather than a single flat diffuse image. That matters for a cartoon character more than people expect, because it means you can strip the model back to pure albedo for a toon look without losing the surface data you would need for a movie-style render later.
Generate at least three variations before you commit to one. Reconstruction is probabilistic, and small differences in how the quills get interpreted compound through the rest of the pipeline. Judge candidates on silhouette and quill attachment, not on texture detail; textures are cheap to fix and topology is not.
Expect the first pass to be a dense mesh of a hundred thousand triangles or more. That is correct: you want surface accuracy now, and polygon reduction happens once you know what you are keeping.
Check the Silhouette First: Quills Either Read From Every Angle or Not at All
Before you touch textures, do a silhouette test. Set the material to flat black, put a white background behind the model, and orbit through eight positions: front, three-quarter left, left profile, rear three-quarter, back, and the mirrors. A Sonic-style character is recognized almost entirely by outline, and if the quills fail from any of those angles the model will never look right no matter how good the texture is.
The classic failure is quills that read as a fan from the side and a lump from the front. Crown quills sweep back and slightly outward, so the front view should show distinct spike tips breaking the head outline on both sides. If the quills hug the skull, the front view collapses into an egg, and the fix is geometric rather than textural.
Check the back view specifically: a rear angle where the quills merge into one undifferentiated shell is a strong sign you will need to rebuild them as separate meshes.
Judge the test at small scale. If you can identify the character from a pure black outline at 128 pixels tall, the design reads. If you cannot, no amount of texture work will save it.
Refine the Quill Geometry: Separate Spike Meshes vs a Sculpted Shell
There are two accepted approaches to sonic quill geometry, and they have different downstream costs. The first is the separate-spike method: each quill is its own tapered mesh, roughly a stretched cone or a flattened blade with four to eight sides, intersecting the skull and parented to a head or quill bone. The second is the sculpted-shell method: the quills are part of the head mesh, modeled as a continuous surface with deep valleys between spike forms.
Separate spikes are easier to animate and fix individually, but produce intersection seams visible in ambient occlusion bakes. Sculpted shells look cleaner in a static render and print better, but deform poorly.
- Separate spike meshes: 300 to 900 triangles per quill, one bone each, best for animation, games, and VTuber use
- Sculpted continuous shell: baked into the head mesh, best for static renders and resin printing, deforms poorly
- Hybrid shell plus tip cards: 100 to 200 triangles per tip over a shell base, good for stylized hero renders
For most creators the separate-spike route wins. Keep each quill between three hundred and nine hundred triangles, taper the cross-section from a wide oval at the base to a near-point at the tip, and sink the base at least ten percent of quill length into the skull so the intersection never pops during head rotation. Enterprise refinement passes with human 3D artists are worth considering here if you want the intersection cleaned into a true blended surface.
Fix the Eyes: Recreating the Fused Mono-Eye With Two Pupils
The single most style-defining and most frequently botched feature is the eye. In modern SEGA-style design the two eyes are not separate spheres. They are one continuous connected surface across the bridge of the muzzle, with two pupils and irises sitting on that shared surface. Generic reconstruction almost always produces two separate eyeballs because that is what every human and animal training example looks like.
The practical fix is to build the eye as a dedicated mesh. Model a single shallow dome or lens shape that spans both eye sockets, following the curve of the face, and cut the eyelid geometry into the head mesh around it. The white surface is one object; the pupils are either painted into the texture with UV offset or built as two small floating meshes that slide across the dome surface.
Texture-driven pupils are the more flexible option for animation. Assign the eye mesh a material whose base color is a texture containing both pupils, then drive pupil position with UV offset nodes rather than by moving geometry. That gives you cartoon eye darts, cross-eyes, and the classic wide-then-narrow reaction beat without any bone setup. It also survives export to GLB cleanly, since UV animation can be baked to keyframes.
Classic-era designs use plain black eyes with no visible iris; modern designs use green irises with a defined pupil. Pick one and commit, because mixing a classic body with modern eyes is the clearest tell of a model built without a style reference.
Model Gloves, Sock Cuffs, and Buckle Shoes as Their Own Meshes
Gloves, sock cuffs, and shoes should never be painted onto the body as texture alone. They are volumetric in the source design: the glove sits proud of the wrist, the sock cuff is a raised ring, the shoe has a hard sole and a metal buckle. If they exist only in the texture, the silhouette flattens and the character reads as a repaint rather than a build.
Split them out as separate objects with their own materials. That gives you clean color breaks without UV seam bleeding, independent settings so the shoe can be glossier than the glove, and easy part swapping for alternate outfits.
- Gloves: three fingers plus thumb in classic design, rolled cuff ring extending 15 to 20 percent past the wrist joint
- Sock cuffs: a short raised cylinder above the shoe line, usually two to four times the ankle thickness at its widest
- Shoes: oversized relative to the leg, often as wide as the character's head, with a hard flat sole and a distinct upper
- Buckles and straps: small separate meshes with a metallic material, kept under 400 triangles each
- Optional accessories: goggles, scarves, gauntlets, wraps modeled as removable child objects of the relevant bone
Keep the parent-child hierarchy sane. Gloves parent to the hand bones, sock cuffs and shoes to the foot bones, accessories to whatever bone drives them. A tidy hierarchy at this stage saves an hour of debugging when you get to the rig.
Texture Pass: Flat Cel Colors vs Movie-Style Micro-Fur
There are two legitimate looks and they demand different texture work. Game-style is flat: large uniform color areas, a hard break between the blue body and the peach muzzle, minimal roughness variation, and a normal map used only for the shoe sole tread and the glove cuff roll. Movie-style is the opposite: fine fur detail rendered as a normal or height map, subtle color variation in the base, and a roughness map that separates fur from glove fabric from shoe leather.
For flat cel work, set the base color to true flat fills sampled straight from your ref sheet palette, push roughness to a uniform 0.6 to 0.8, and zero out metallic everywhere except buckles and rings. Resolution can drop to 1K or 2K without any visible loss because there is no high-frequency detail to preserve. The generated PBR maps still help: keep the normal map for hard edges, discard or flatten the rest.
For movie-style micro-fur, work at 4K on the head and body atlas. Real fur cards are usually overkill for a fan project and destroy performance in engine; a tiled fur normal map at around 0.3 to 0.5 strength, combined with a roughness map that darkens slightly in the fur direction, gets ninety percent of the look at a fraction of the cost. Keep the muzzle and belly patch smoother than the outer body so the two-tone break reads as a material change, not just a color change.
Retopologize for Animation: Where Edge Loops Should Flow Through Quills
A dense generated mesh renders fine and animates badly. If you plan to deform the model, retopologize the body to a quad-dominant mesh with deliberate edge loops. For a Sonic-style character, target roughly 8,000 to 25,000 triangles for the body depending on destination, with concentration in the face and the shoulder and hip joints.
Edge flow rules that matter for this specific anatomy: run at least three loops around each elbow and knee even though the limbs are thin, because thin limbs collapse fastest; run concentric loops around the eye opening and the mouth so facial deformation stays clean; and keep the quill bases as isolated loop islands so they can be weighted to their own bones without dragging skull geometry along.
Do not run loops through the quill length unless you want bendy quills. Rigid spikes need three to five rings from base to tip; bendy quills need six to ten rings and a bone chain each. Decide before retopology, because it changes the vertex budget significantly.
The muzzle boundary is the highest-tension area in any expression change: give it its own clean loop and avoid triangles within two loops of it.
Rig for Cartoon Motion: Squash-and-Stretch for a Speedster Body
A standard humanoid rig will technically bind to a Sonic-style body, but it will animate like a stiff human in a costume. Cartoon motion needs a rig that can squash and stretch, and that means bones with scale channels wired into the animation, not just rotation.
Start from an automatic humanoid skeleton, which Threedium's automatic rigging can generate along with the mesh, then extend it. Add a stretch-capable spine so the torso can compress on a landing and extend on a leap. Add scale-driven upper and lower limb bones so an arm swing can elongate at the extreme. Add a head squash control, because the head is the largest mass on the character and cartoon impact reads through the skull.
- Spine: three to four bones with uniform scale inheritance so a stretch reads through the whole torso
- Limbs: IK chains with stretch enabled, capped at roughly 1.3x rest length to avoid noodle explosions
- Head: one squash control driving non-uniform scale on the skull, with quill bones parented so they follow
- Feet: a reverse foot setup, since oversized shoes need a proper roll pivot at the toe
- Face: a blendshape set for expressions, plus UV offset control for pupil position
If the character also needs to speak or emote in an avatar context, add a full 52 ARKit blendshape set to the face. It is more expressive than most Sonic-style animation requires, but it is the standard input format for face tracking and it costs nothing to have available. A rigged sonic model for animation that ships with both a squash-and-stretch skeleton and a standard blendshape set covers essentially every use case you will hit later.
Add Wiggle Bones So Quills and Ears Get Secondary Motion
Secondary motion separates a model that looks alive from a statue being dragged around. The elements that should lag and overshoot are the quills, ears, tail, and any loose accessory.
The standard technique is a chain of two to four bones per element with a dynamics or jiggle constraint applied. In Blender this is typically done with bone physics via a Wiggle-style addon or by parenting bones to a simple cloth or softbody proxy; in Unity it is usually a spring bone component; in Unreal it is an AnimDynamics node. All three read the same underlying bone chain, which is why you should build the chains into the skeleton before export rather than adding them per-engine.
Tune conservatively. Quills are stiff in the source material: they should lag by two to four frames on a hard direction change and settle within about eight frames, not flop like hair. Ears are softer and can lag slightly longer. A tail can be the loosest chain on the character. If your quills are wobbling like rubber, drop the mass and raise the stiffness until the motion reads as a firm snap rather than a bounce.
Set collision only where it matters. Constrain the rotation range of each chain instead, so quills physically cannot pass through the skull; angular limits are cheaper than collision and more predictable in playback.
Export Your Sonic-Style Model as GLB, FBX, or USDZ for Blender and Engines
The export target determines your polygon budget, texture size, and format. Threedium exports to GLB, USDZ, and FBX, with VRM relevant when the character doubles as an avatar. Decide the destination before you optimize, because a printing mesh and a mobile game mesh are effectively different assets built from the same source.
| Destination | Triangle target | Texture size | Format | Critical requirement |
|---|---|---|---|---|
| Blender fan animation, hero render | 100,000 or more | 4K | FBX or GLB | Clean deforming topology, full rig |
| Unity or Godot fan game, PC | 15,000 to 40,000 | 2K | FBX or GLB | Single skeleton, few materials |
| Unreal Engine fan game | 20,000 to 60,000 | 2K to 4K | FBX | Correct scale, root bone at origin |
| Mobile game or web viewer | 8,000 to 20,000 | 1K to 2K compressed | GLB | File size under about 15 MB |
| AR preview on iOS | 10,000 to 50,000 | 2K | USDZ | Real-world scale in meters |
| Resin 3D print figure | Irrelevant | None needed | STL or OBJ | Watertight, manifold, wall thickness |
| Social VR or VTuber avatar | 20,000 to 70,000 | 2K, few materials | VRM or FBX | Humanoid rig plus blendshapes |
For Blender specifically, FBX preserves the armature and blendshapes most reliably across versions, while GLB is smaller and carries PBR materials in a single file. If you are building a sonic blender model intended for animation, import the FBX, verify the armature scale is 1.0 and rotation is zeroed, and check that shape keys survived the round trip before you start keyframing. For a purely visual asset, GLB is faster and cleaner.
Scale matters more than people expect. Set your character's real-world height explicitly, typically 1.0 meters for a classic-proportioned character and 1.0 to 1.2 meters for modern proportions, and export in meters. Engines that assume centimeters, notably Unreal, will need a 100x conversion applied at import rather than baked into the mesh. Details of preparing meshes for runtime are covered further in the game-ready 3D model reference.
Quills, Mono-Eyes, and Noodle Limbs: Where Auto-Riggers Fail
Every automatic character pipeline is trained overwhelmingly on human and near-human bodies. Sonic-style anatomy violates enough of those assumptions that specific, predictable failures show up in almost every generation. Knowing them in advance turns a frustrating debugging session into a fifteen-minute checklist. This section covers each failure mode, why it happens, and the concrete fix.
The Big-Head Ratio: Why a 1:2.5 Head-to-Body Split Breaks Auto-Riggers
Classic Sonic proportions sit somewhere around two and a half heads tall, meaning the head occupies roughly forty percent of total character height. A realistic adult human is seven to eight heads. Automatic rigging systems place the neck, shoulder, and spine joints by proportional estimate from total height, so a 1:2.5 ratio pushes those estimates badly out of position.
The usual symptom is a neck joint placed inside the skull and shoulders placed at roughly mid-chest height. Skinning then binds a chunk of the jaw to the neck bone, so any head turn drags the muzzle sideways. It is subtle in a static pose and glaringly wrong the moment the character looks left.
The fix is manual joint placement for three bones: the neck root, the head, and both clavicles. Put the neck root just above where the body silhouette narrows, place the head bone at the approximate center of skull mass rather than at its base, and set clavicles at the actual visual shoulder line. Everything below the chest usually survives auto-placement fine.
A second consequence is timing. Because the head is the heaviest visual mass, animation should lead with the head and let the body follow, the inverse of realistic human animation where the hips lead. Rig a head control that animates independently of the spine.
Quill Topology: Hard-Edged Spikes Growing Out of an Organic Skull
Quills are a hard-surface form growing out of an organic one, which is exactly the transition that reconstruction handles worst. The generator sees a continuous surface in the reference image and tends to produce a smooth blended lump where the design calls for a sharp break.
The topological problem is that a spike wants radial edge flow around its axis while a skull wants loop flow around the eyes and mouth. Where they meet you get either a pole with high valence or a smeared transition. Both are fine visually in a static render and both cause shading artifacts under a toon shader, where a hard-edged normal break makes the outline pass draw a stray line across the head.
- Symptom: quills look soft from the front but sharp in profile means the spikes lack width, not length
- Symptom: a visible dark ring around each quill base means an ambient occlusion bake caught the intersection
- Symptom: stray outline strokes in a toon shader means high-valence poles at the quill roots
- Fix: rebuild quills as separate tapered meshes, sink them into the skull, and exclude them from the AO bake
- Fix: if keeping a single shell, add a supporting loop 5 to 10 percent down each spike to hold the edge under subdivision
The Mono-Eye Problem: Two Pupils Sharing One Eyeball Surface
This deserves its own treatment because it is the failure mode that most reliably makes an otherwise good model look wrong. The design language calls for one continuous white surface spanning both sockets, joined across the bridge of the muzzle. Reconstruction produces two spheres because that is what eyes are in nearly all training data.
The rebuild is not difficult. Delete the generated eye geometry entirely. Model a single lens: take a UV sphere, cut away everything but a shallow front cap, then scale it wide and shape it to follow the face curve so it spans both sockets with a slight indent at the bridge. Cut the eyelid rim into the head mesh so the lens sits behind it with a small gap, typically one to two percent of head width, so blinking geometry has room to move.
For pupils, the UV-offset approach is the practical winner. Put both pupils on one texture, assign it to the lens material, and drive the offset with a controller. Blinking is then handled either by eyelid geometry rotating down over the lens or by a blendshape that scales the lens vertically to zero. Both are standard; eyelid geometry looks better in close-ups, blendshape scaling is cheaper and exports more predictably.
Test the eye at a three-quarter angle, not straight on. A fused eye mass that looks correct from the front but bulges through the muzzle at 45 degrees means the lens is too spherical. Flatten it toward the face curve until the profile silhouette stays clean.
Classic, Modern, and Movie Sonic Proportions Compared
The classic vs modern sonic proportions question is not a matter of taste alone; the two eras have measurably different construction and they demand different rigs. Classic-era design, the 1991 to 1998 look, is short, round, and stocky, with black eyes and six short quills. Modern design, from 1998 onward, is taller, thinner, and more athletic, with green irises and longer, more separated quills. The 2020s film design is a third thing again: closer to modern proportions but with real fur, a shorter muzzle, and more naturalistic eye placement.
| Attribute | Classic | Modern | Movie-style |
|---|---|---|---|
| Head-to-body ratio | Roughly 1:2.5 | Roughly 1:3 to 1:3.5 | Roughly 1:3.5 |
| Body shape | Round, pear-like torso | Slim, tapered torso | Slim with fur volume |
| Eyes | Solid black, no iris | Green iris, defined pupil | Green iris, higher detail, separate lids |
| Quill length | Short, tight fan | Long, separated, swept back | Medium, fur-textured |
| Limb thickness | Thicker, tube-like | Very thin, noodle-like | Thin but with visible fur silhouette |
| Muzzle | Wide, low, prominent | Narrower, higher set | Short, blended into face |
| Surface treatment | Flat cel color | Flat cel with soft gradients | Micro-fur normal, PBR roughness |
| Typical use | Retro fan games, printing | Fan animation, OCs, games | Cinematic renders |
Pick one and build to it consistently. The most common mistake in a sonic oc 3d model is mixing eras: modern limb thinness with classic quill length, or classic body roundness with movie fur. The result reads as off without the viewer being able to say why. If you are unsure, modern proportions are the most forgiving because they sit closest to standard humanoid rigs while still reading as SEGA-style.
Muzzle and Belly Patches: Managing Two-Tone Color Breaks in the Mesh
Almost every character in this style has a two-tone body: a colored outer coat and a lighter patch covering the muzzle, chest, belly, and often the inside of the arms and the palms. That break has to be razor sharp. A soft gradient between blue and peach immediately reads as a texture mistake.
You have three ways to achieve it. Texture-only paints the boundary into the base color map, which works but aliases visibly at 1K on a full-body atlas. Material-split assigns different materials to different face groups for a mathematically perfect edge, at the cost of an extra draw call and a boundary that must follow existing edge flow.
The third route, and the one most production models use, is a hybrid: put the boundary on an edge loop, split UVs there, and keep a single material but paint the texture so the seam falls exactly on the UV split. You get a perfect edge with one material, at the cost of planning the boundary during retopology.
Keep the boundary consistent with your reference: the muzzle patch typically wraps up around the eyes in classic design and stops lower in modern design, and the belly patch runs from the collarbone line to the waist. These outlines do more for character recognition than any amount of surface detail.
Noodle Limbs: Stopping Thin Arms From Collapsing at the Elbow
Modern-era arms are extremely thin, often no thicker than one eighth of head width, and thin cylinders are the worst case for skinning. When an arm with only six or eight vertices around its circumference bends past ninety degrees, the inner side collapses into itself and the outer side pinches into a crease.
Three fixes stack well together. First, geometry: give the elbow at least three edge loops, ideally with the middle loop slightly offset toward the outside of the bend so the volume has somewhere to go. Second, weighting: use a smooth falloff across those loops rather than a hard split at the joint, with roughly a 20 to 50 to 30 percent distribution across the three loops from upper to lower arm. Third, correctives: a single corrective blendshape triggered at ninety degrees of elbow flexion that pushes the crease area outward.
Knees have the same problem but are usually easier because the shoe and sock cuff hide part of the deformation. Fingers, if the character has articulated gloves, are usually best left rigid; three-fingered cartoon gloves rarely need per-joint articulation, and a simple open, relaxed, fist blendshape set covers most animation needs at a fraction of the rigging cost.
Test deformation before you texture. Pose the arm to full flexion, the leg to a deep crouch, and the spine to a full twist, then check the silhouette for volume loss. Fixing it later means redoing UVs and repainting.
Glove and Sock Cuff Rings: Geometry That Deforms Without Pinching
The rolled glove cuff and the sock cuff are small rings of geometry sitting at exactly the worst place: right next to a joint. Rig them carelessly and the cuff crushes into the wrist on a bend, or worse, the arm mesh pokes through the glove.
The rule is that a cuff should be rigid. Weight the entire glove cuff ring to a single bone, usually the forearm or the hand depending on where it sits, with no blending across the joint. A rigid ring that slides along the arm looks correct because that is what a real cuff does; a cuff that bends with the wrist looks like painted-on fabric.
Give yourself clearance. Model the cuff with an inner radius about eight to twelve percent larger than the arm, so the arm mesh can rotate inside it without intersecting, and delete arm geometry fully hidden inside the glove.
- Glove cuff: rigid, single-bone weighting, inner clearance of 8 to 12 percent over arm radius
- Sock cuff: rigid to the shin bone, sitting above the ankle so foot roll does not intersect it
- Shoe upper: weight fully to the foot bone, no blending to the shin
- Sole: completely rigid, weight 100 percent to the foot or toe bone with zero falloff
- Hidden geometry: delete arm and leg faces fully enclosed by gloves or shoes to save triangles and prevent poke-through
The Spin-Ball Test: Can Your Model Curl Up Without Quills Clipping?
This is the test unique to the genre, and it is the one that reveals whether your rig actually works. The spin attack requires the character to curl into a tight ball with the quills forming the outer surface. If your model cannot do it, half the animation vocabulary of the style is unavailable to you.
Run the test as a hard pose, not an approximation. Curl the spine fully forward, pull the knees to the chest, tuck the head down, wrap the arms around the shins, and rotate the quill chains to point outward and backward. Then orbit the result and look for four specific failures.
- Quill clipping: spikes passing through the back, the knees, or each other during the curl
- Shoe intersection: oversized shoes punching through the chest or muzzle at full tuck
- Spine collapse: the torso losing volume so the ball reads as flat rather than round
- Head placement: the skull sitting outside the ball outline because the head is too large to tuck
Most of these are rig fixes rather than remodeling. Quill clipping means the chains need wider rotation limits and a deeper base sink. Shoe intersection is solved by scaling shoes down five to ten percent during the curl on an animated scale channel, which nobody notices at spin speed.
Many production-quality fan models solve the spin ball with a swap: hide the full character and show a dedicated ball mesh during the attack. It is not cheating, it is what plenty of shipped games do, and it guarantees a clean silhouette at any speed.
Toon Shader or PBR: Picking a Look That Reads as SEGA, Not Uncanny
The shading decision determines whether your model reads as the character or as a slightly unsettling replica. The uncanny zone in this style is not realism, it is halfway: a cartoon shape with realistic specular highlights and soft shadow falloff. That combination makes the character look like plastic rather than like a drawing or like fur.
A cel shader with two or three shading bands, a controlled rim light, and a uniform outline is safest for classic and modern designs. Set the shadow band to a hue-shifted darker version of the base color rather than a multiply toward black, which is what makes cel-shaded 3D look hand-painted. Outline thickness around 0.2 to 0.5 percent of screen height reads well.
Full PBR is the right choice for movie-style renders, where the fur detail and material variety are the point. If you go that route, commit fully: fur normal maps, roughness variation across fur and glove and shoe, a subtle subsurface tint on the muzzle and ears, and real lighting. Half measures land in the uncanny zone.
A practical middle route many fan animators use is PBR geometry rendered with a toon lighting model, keeping normal maps for shape definition while flattening the light response. Generated PBR maps support this directly, since the normal and roughness data is already there whether or not you use it.
Making an OC, Not a Recolor: Pushing the Silhouette Past the Base Mesh
The oldest criticism in this fandom is the recolor: a character that is structurally identical to an existing one with a different palette. Beyond the community reaction, a recolor is also a weaker design and a weaker IP position. If you are going to build a character in 3D, push the silhouette.
Silhouette differentiation happens in a small number of high-leverage places. Head shape and quill arrangement carry the most identity: quill count, direction, length, whether they curl, whether they fan or point. Species reads through ears, muzzle length, and tail: a fox has a broad tail and tall pointed ears, an echidna has forward dreadlock spines, a bat has membrane wings, a cat has a slim tail and rounded ears. Then come accessories with real volume, goggles pushed up on the forehead, a scarf, gauntlets, a jacket, each of which changes the outline.
- Quills: change count, sweep direction, curl, and asymmetry rather than only length
- Species markers: ear shape, tail form, muzzle length, and hand shape all read at silhouette scale
- Build: vary height, limb thickness, and shoulder width within the style's range
- Volumetric accessories: anything that changes the black outline is worth more than any texture detail
- Palette: useful for personality but does nothing for silhouette, so treat it as the last step, not the first
The test is the same black-silhouette check from earlier. If your character in pure black outline is indistinguishable from a recolored existing character, the design is not finished. General principles for building original characters from art are covered in more depth on the OC 3D model page, which handles ref sheets and portfolio presentation for any style.
Where Do Sonic-Style 3D Models Get Used?
The demand for these models is driven almost entirely by fan creation rather than commercial work, which shapes what a good model needs to be. Most projects want a rigged, animation-capable character with clean topology and a readable silhouette, and most creators are working solo with no budget for a full commission pipeline. These are the destinations that actually consume the output.
Blender Fan Animations and the Sonic Meme-Render Scene
Blender is the center of gravity for fan animation in this space. A large body of Sonic-style animation, from full short films to fifteen-second meme renders, is produced in Blender with community-shared rigs, and the technical bar within that scene is unusually high: proper squash-and-stretch rigs, custom toon shaders, and outline passes built with Freestyle or geometry-based inverted hull setups.
If you are entering that scene with your own character, the expectations are specific. Your sonic blender model needs a working armature that survives FBX or GLB import, shape keys for expressions, and a material setup that either matches the community toon look or is easy to replace. Animators will not use a model they have to rebuild.
Practical Blender preparation: apply all transforms before export, keep bone names in a standard convention so retargeting works, and include a rest-pose reference file. Retargeting is the biggest time saver in fan animation, and standard bone names let a model inherit an entire library of existing motion.
Showing Off Your Sonic OC on Sketchfab, DeviantArt, and TikTok
Publishing a turntable is the fastest way to get eyes on a character. Sketchfab hosts interactive GLB viewers, gallery sites still carry a large Sonic fan-art audience, and short-form video rewards a ten-second orbit. Export a GLB under about 15 MB with 2K textures for web viewers, and render a 1080x1920 vertical turntable at 30 frames per second.
Label the work clearly as an original fan character, credit any base or tutorial you used, and keep the description honest about how the model was made. General guidance on presenting original characters, ref sheets, and portfolio pages lives on the OC model workflow page.
Original Fan Games in Unity, Godot, and Unreal Engine
Fan game development is where these models do the most technical work, and it has the strictest requirements. A character that only has to look good in a render can get away with a lot; one that has to run at sixty frames per second while spinning and colliding cannot.
Engine-specific realities matter. Unity expects meters and a humanoid avatar definition, works well with FBX carrying blendshapes, and handles quill motion through spring bone components. Godot 4 imports GLB cleanly with skeleton modifiers for jiggle chains. Unreal expects centimeters, a root bone at world origin, and X-forward orientation, with AnimDynamics covering quill physics.
- Budget: 15,000 to 40,000 triangles for a PC fan game player character, less for mobile
- Materials: aim for two to four total, combining body, gloves and shoes, eyes, and accessories where possible
- Bones: a standard humanoid set plus quill chains, typically 60 to 90 bones total
- LODs: at least two, dropping roughly fifty percent per level, with quills simplified aggressively at distance
- Colliders: a simple capsule for the body and a sphere for the spin state, never a mesh collider
Speed-based platformers put unusual stress on the character. At high movement speed the model is on screen for a fraction of a second per frame and detail is wasted, so a fan game benefits more from a clean readable silhouette and a good spin-ball mesh than from a high triangle count. Build the ball state as a dedicated low-poly sphere with quill detail baked into the normal map and swap to it during the attack; this is a standard trick and it removes an entire class of clipping bugs.
Ship a documented package. If you release your character for other developers, include the FBX and GLB, the source textures at working resolution, a materials note listing shader settings, the bone naming convention, and a clear license statement about what people may do with it. Broader technical guidance for runtime-ready characters is on the game-ready model page, and other game-oriented character workflows are collected under game 3D models.
3D-Printing a Figure of Your Sonic-Style OC
Printing a physical figure of a character you designed is one of the more satisfying endpoints, and it needs a genuinely different mesh preparation. Print meshes care about watertightness, wall thickness, and support geometry, and care nothing about topology, UVs, or polygon count.
Start by merging everything. Separate quill meshes, gloves, shoes, and eyes must be boolean-unioned into one solid manifold body, or the slicer will produce internal walls and failed layers. Then check the thin parts against your printer's minimum feature size: for resin at typical settings, keep no feature below roughly 1.0 to 1.5 mm; for FDM, 2.0 mm is safer. Quill tips, glove cuff rings, and thin fingers are the usual offenders.
Scale sensibly. A common figure scale is 100 to 150 mm tall, which for a two-and-a-half-heads character means a head roughly 40 to 60 mm across. At that size, quill tips scale down to fragile spikes, so thicken them by ten to twenty percent from the render mesh. This is a real difference between a render model and a print model and is the most common reason a first print snaps.
Plan orientation and cuts: split at the neck, use the oversized shoes as a flat base, and add keyed pegs at split points. Export STL or OBJ for slicing rather than GLB.
Skipping the Commission Queue: AI Generation vs VGen and Etsy Artists
The traditional route for a sonic 3d model commission is hiring a 3D artist through VGen, Etsy, Fiverr, or a direct Discord arrangement. That market is real and functional, and the artists working in it are often specialists who know this style deeply. It is also slow and expensive relative to what most fans can spend.
Typical market ranges as of the current market: a static, unrigged stylized character bust runs roughly 80 to 250 USD; a full-body unrigged model 200 to 600 USD; a fully rigged, game-ready or VTuber-ready character 500 to 2,000 USD or higher for complex designs. Turnaround is commonly two to eight weeks depending on the artist's queue, and revision rounds are usually capped at two or three.
| Factor | AI generation | Artist commission | Manual DIY in Blender |
|---|---|---|---|
| Time to first result | Minutes | 2 to 8 weeks | 20 to 100+ hours |
| Typical cost | Subscription or credits | 200 to 2,000 USD | Free plus your time |
| Iteration cost | Near zero, regenerate freely | High, limited revision rounds | High in hours |
| Style precision | Good with strong references | Highest with a specialist | Depends entirely on your skill |
| Rigging included | Automatic, plus blendshapes | Usually paid separately | You build it |
| Handles quirky OC anatomy | Needs explicit prompting | Yes, artist interprets | Yes, full control |
| Best for | Fast iteration, many characters, prototypes | A single hero character you care about | Learning, or total creative control |
In practice the three routes are complementary rather than competing. AI generation is the fastest way to explore a design, produce a whole cast, or prototype a fan game with placeholder characters that are actually usable. A sonic oc maker workflow that gets you from drawing to rigged mesh in an afternoon lets you test whether a design works in 3D before you spend money on it. Commissioning a specialist still makes sense for a single flagship character where you want a human eye on every quill, and enterprise refinement tiers that put professional 3D artists on top of a generated base sit between the two.
Staying IP-Safe: Original Fan Characters, Never Ripped Game Assets
This section matters more than any technique in this article, because it is the one that can end a project. Sonic the Hedgehog and the associated characters are owned trademarks and copyrighted works of SEGA. Nothing here is legal advice, but there are practical distinctions that the fan community and rights holders have both operated around for a long time, and they are worth understanding clearly.
The clearest line is between original characters and copied assets. An original fan character you designed, built in a style inspired by an existing franchise, is your own creation in terms of the specific design. A ripped model extracted from a shipped game is unambiguously the rights holder's copyrighted asset, and using it in anything you distribute, monetize, or publish is copyright infringement regardless of how it is credited. Do not do it, and do not use ripped models as generation references either.
- Safest: your own original character, your own design, built from your own reference art
- Generally accepted: non-commercial fan art and fan animation featuring official characters, credited and clearly unofficial
- Higher risk: selling prints, models, or merchandise depicting official characters
- Do not: extract, redistribute, or build on models, textures, or rigs ripped from shipped games
- Do not: imply official affiliation, use official logos, or present fan work as licensed
There is a second reason to build originals beyond risk: portability. A character you own outright can go into a commercial game, a print shop listing, a VTuber persona, or a client project without any of this being a question. A character built on someone else's IP is permanently locked to non-commercial fan use at best. If you are investing dozens of hours into a model, owning it is worth the extra design effort.
Practical hygiene: keep a record of your source art and who drew it, get written permission if a friend drew your ref sheet, avoid naming that trades on the official brand, and keep fan games free and non-commercial. Design the project so a takedown would not destroy years of work.
If your model would still be interesting with the franchise context removed, you have made a character. If it only works because it looks like something SEGA owns, you have made a derivative asset with a limited future.
Frequently Asked Questions About Sonic 3D Models
Common questions from creators building Sonic-style characters: workflow, legal boundaries, commission economics, and the technical differences between design eras.
Can I turn my Sonic OC drawing into a 3D model?
Yes. Upload a clean, flat-colored drawing of your character in an A-pose to Threedium, describe the SEGA-style proportions in the prompt, and the generator reconstructs a textured 3D mesh from that image. A three-view ref sheet gives the best result, but a single clear front view with the arms held away from the body works. To turn a sonic oc into a 3d model reliably, the two things that matter most are a flat-lit reference and an explicit proportion description.
Expect cleanup on the eyes and quills regardless of reference quality, since those features sit outside what general character reconstruction handles well. Budget an hour or two after generation for a model you intend to animate.
Is it legal to make and share Sonic-style fan models?
This is not legal advice, but the practical distinction is between original characters and copied assets. An original fan character you designed yourself, built in a style influenced by the franchise, is your own design and is what the fan community and rights holders have generally operated around for decades. Models of official characters are derivative works, tolerated in non-commercial fan contexts but always at the rights holder's discretion.
Where things get clearly risky is commercial use: selling prints, models, or merchandise depicting official characters, or presenting fan work as official. Extracting and redistributing assets from shipped games is straightforwardly infringing in any context. Build originals, keep fan work non-commercial and clearly labeled, and you are in the position the vast majority of the community occupies.
How much does a Sonic OC 3D model commission cost?
Current market rates for a stylized character commission run roughly 80 to 250 USD for an unrigged bust, 200 to 600 USD for a full-body unrigged model, and 500 to 2,000 USD or more for a fully rigged, game-ready or VTuber-ready character. Turnaround is typically two to eight weeks depending on the artist's queue, with two or three revision rounds included.
Price drivers are complexity rather than character type: unusual anatomy, many accessories, custom rigs, blendshape sets, and print prep all add cost. For one flagship character with human judgment on every detail, a commission is a reasonable spend.
What is the difference between classic, modern, and movie Sonic proportions?
Classic proportions, from the early 1990s design, are about two and a half heads tall with a round stocky body, solid black eyes with no iris, short tightly fanned quills, and thicker tube-like limbs. Modern proportions, from 1998 onward, are around three to three and a half heads tall with a slim tapered body, green irises, longer separated quills, and very thin limbs. Movie-style keeps modern proportions but adds real fur texture, a shorter blended muzzle, and more naturalistic eye placement.
The practical consequence is that they require different rigs and different shading. Classic bodies deform more forgivingly because the limbs are thicker; modern bodies need careful elbow and knee topology to avoid collapse; movie-style needs full PBR materials with fur normal maps rather than flat cel colors. Pick one era and build consistently, because mixing them is the most common reason a model looks subtly wrong.
How do I rig a Sonic-style model for animation in Blender?
Start with an automatically generated humanoid skeleton, then manually correct the neck, head, and clavicle placement, because the large head throws off automatic joint estimation. Add stretch-enabled IK chains for the limbs capped around 1.3x rest length, a squash control on the head, a reverse foot setup for the oversized shoes, and two to four bones per quill for secondary motion.
Weight the glove cuffs, sock cuffs, and shoe soles rigidly to single bones with no blending, and put three edge loops with smooth falloff at each elbow and knee. Then run the spin-ball test before animating anything. Automatic rigging and facial blendshapes can come with the model from generation, which turns this into a correction pass rather than a build from scratch.
Can I use ripped Sonic game models in my own project?
No. Models, textures, and rigs extracted from shipped games are the rights holder's copyrighted assets, and using them in anything you distribute, publish, or monetize is infringement regardless of credit or non-commercial framing. This applies to fan games, animations, prints, and uploads to model-sharing sites alike.
It also applies to using ripped assets as generation input. Feeding an extracted model or a screenshot of one into an image-to-3D pipeline produces a derivative of that asset, which does not change its status. Build from your own art, or from art you have permission to use, and you avoid the entire category of problem.
Can I 3D print a Sonic-style model of my OC?
Yes, with a print-specific preparation pass. Boolean-union every separate mesh, quills, gloves, shoes, eyes, and accessories, into a single watertight manifold solid, then check every thin feature against your printer's minimum: roughly 1.0 to 1.5 mm for resin and about 2.0 mm for FDM. Export STL or OBJ rather than GLB.
At a typical 100 to 150 mm figure scale, thicken quill tips and thin fingers by ten to twenty percent from your render mesh, because features that look fine on screen become fragile spikes in physical material. Plan splits at the neck and shoulders with keyed pegs for assembly, use the oversized shoes as a natural flat base, and print an original character rather than an official one if you plan to sell or trade the result.