How Do You Turn Yourself Into a Barbie-Style Doll From a Photo?
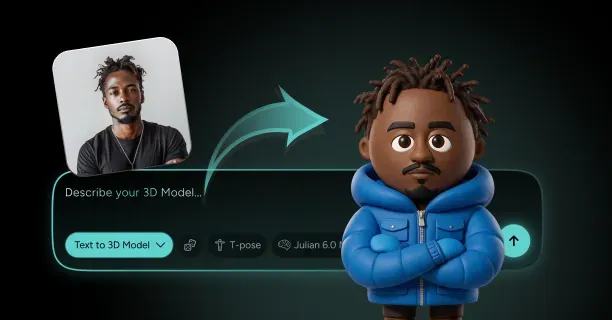
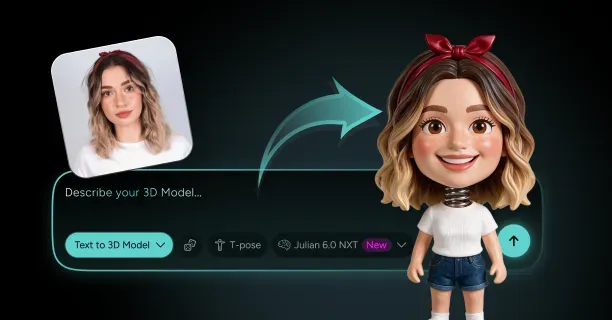
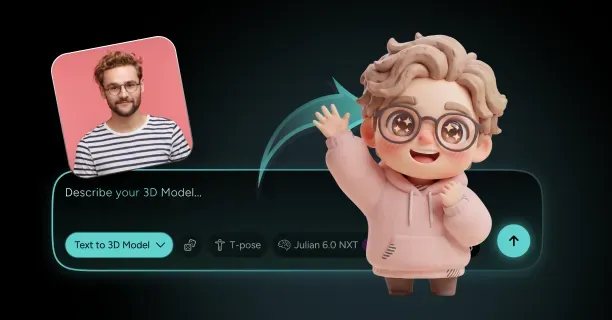
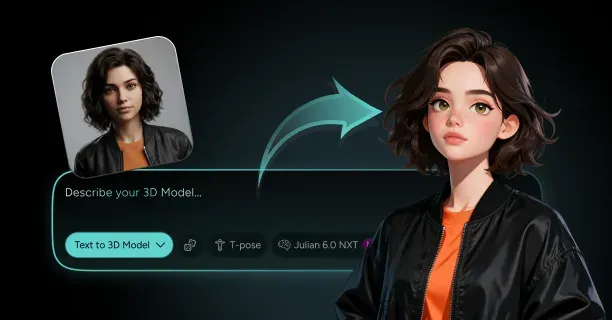
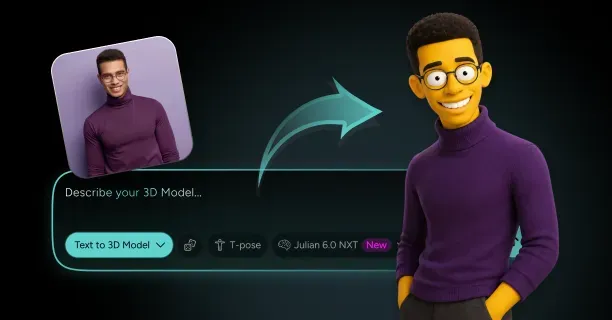
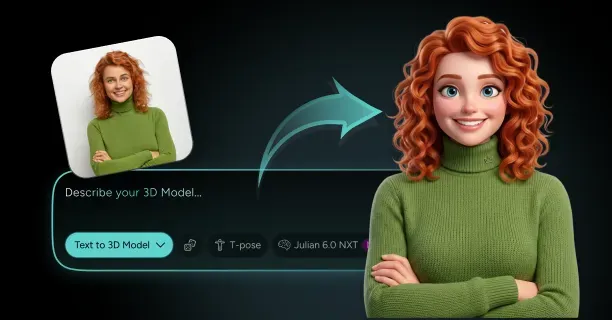
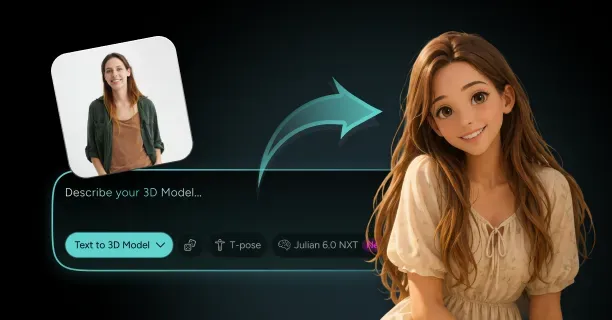
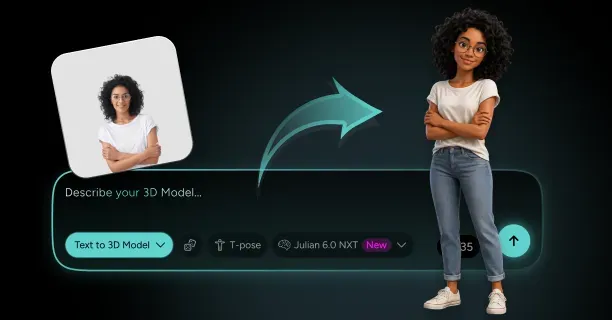
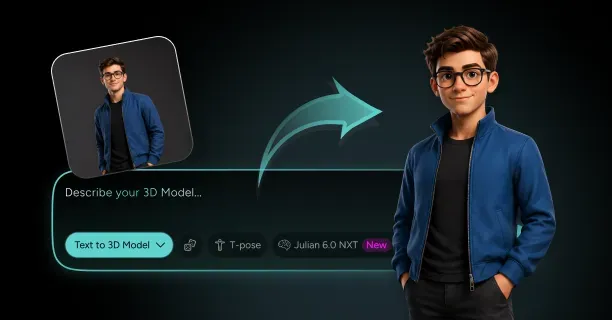
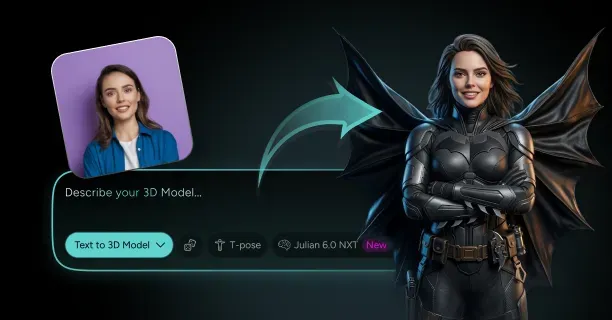
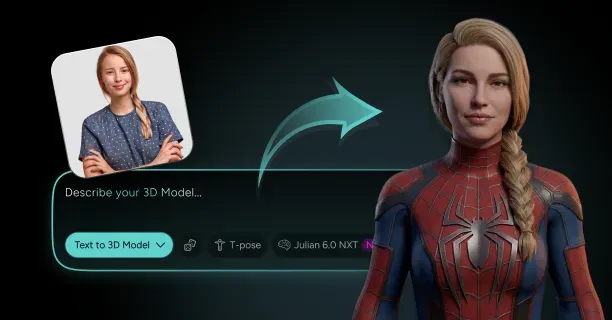
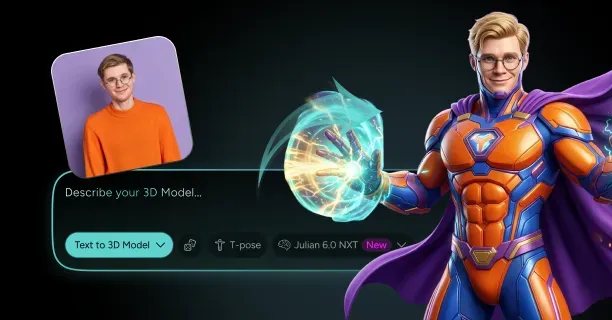
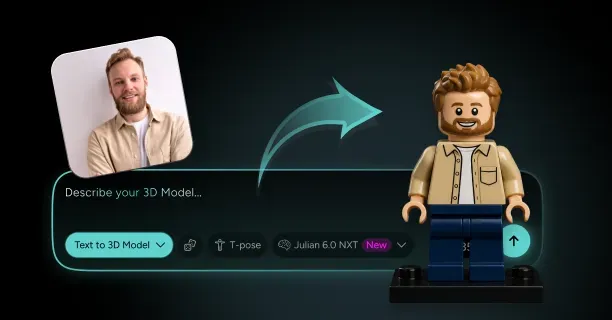
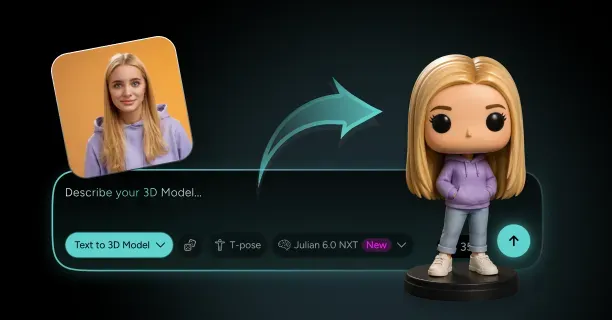
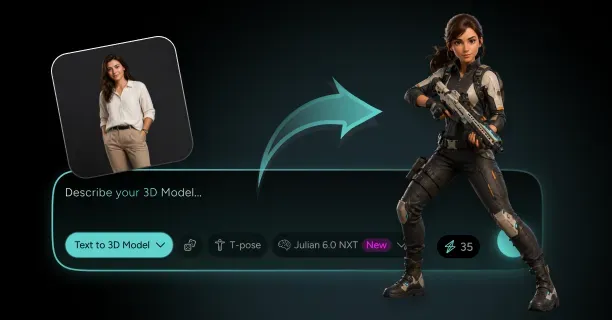
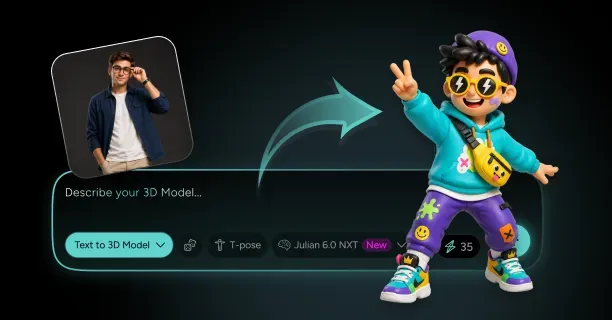
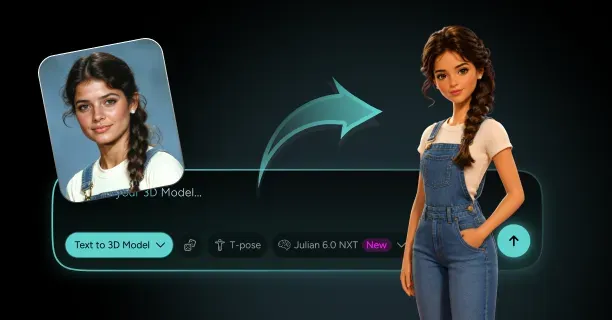
To turn yourself into a Barbie-style doll from a photo, upload one sharp front-facing headshot plus a full-body reference to an ai barbie doll generator, describe the fashion-doll proportions you want, then let the system rebuild your likeness on a stylized toy skeleton before boxing it. Threedium runs that pipeline through its Julian NXT generator, which reads your facial landmarks, hair silhouette, and outfit shapes from the references and returns a textured fashion doll 3d model with PBR maps, optional rigging, and export to GLB, USDZ, and FBX. The difference from every viral image tool is that you end up with real geometry you can spin, print, and place in AR rather than a picture of a doll.
The craft sits in one tension: a fashion doll is not a shrunken human. It has an elongated neck, a narrowed waist, oversized eyes, and a face sanded to smooth planes. Push too hard and the model stops looking like you; hold back and it looks like a small person in a plastic box.
Check first that the fashion-doll look is the one you want. A rugged articulated figure with visible joint hardware and weathered paint is a different build, and so is an oversized head on a tiny vinyl body; both live among the other self-portrait toy styles. This page is the one where your face gets doll-smooth, your limbs get long, and the packaging goes pink.
Choosing a Photo That Survives the Doll-Smoothing Pass
Doll conversion is subtractive. The generator removes pores, skin shading variation, nostril depth, lip texture, and most asymmetry, so the features that survive have to be unambiguous in the source. A photo that reads fine on Instagram can collapse into a generic face once smoothing runs.
Pick a front-on headshot at 1500 px or wider on the short edge, shot at roughly 50 to 85 mm equivalent focal length. Selfie cameras sit near 24 mm equivalent, which enlarges the nose and pulls the ears back, and those distortions get baked into the base mesh. Even, soft frontal light beats dramatic light here, because the model needs to read bone structure, not shadows.
Add a three-quarter view at about 35 degrees and a full-body shot from mid-shin up with arms slightly away from the torso. The three-quarter fixes cheekbone depth and nose projection, both of which flatten badly from a single frontal image. Shoot with your hair pulled clear of the temples so the hairline is visible.
Avoid beauty filters and skin-smoothing apps in your source photos. The doll pass applies its own smoothing on top, and pre-smoothed input compounds into a featureless mask with no readable jaw or nose. Raw, slightly imperfect photos convert better than retouched ones.
Writing the Doll Prompt: Fashion-Doll Proportions Without Losing Your Likeness
A good doll prompt names four things: proportion target, material, finish, and pose. Vague phrasing leaves the generator guessing between a porcelain collectible, a rag doll, and a molded fashion toy, which are three completely different meshes.
A working structure: "1:6 scale fashion doll of the person in the reference, approximately 6 heads tall, elongated neck and limbs, narrow waist, smooth molded vinyl skin with soft satin sheen, oversized stylized eyes with painted lashes, rooted long hair, standing straight-arm display pose, neutral closed-lip smile." Every clause controls a downstream decision. Dropping "6 heads tall" is the single most common reason a first generation comes back looking like a shrunken adult.
Keep identity language and style language separate: state what to preserve explicitly, then list the stylization after it. Mixed into one run-on sentence, the generator averages them and you lose the features that make the result recognizable. Terms worth including or avoiding when writing for an ai doll generator:
- Include: "molded vinyl", "satin finish", "articulated fashion doll", "painted facial features", "toy photography lighting".
- Include a scale anchor: "1:6 scale" or "29 cm tall figure" so the box and accessories generate at matching proportions.
- Avoid any trademarked doll line name, character name, or logo text. Use "fashion doll" or "fashion-doll style" instead.
- Avoid "realistic skin", "photorealistic", "subsurface pores". These fight the doll pass and produce the uncanny midpoint nobody wants.
- Avoid "cute", "chibi", "big head". Those pull the model toward a different toy category entirely.
Run two or three variants before committing, changing one clause at a time so you can attribute the difference. Generators are sensitive to proportion language in a way they are not sensitive to adjectives about mood.
Picking Your Doll Persona: Career, Era, and Signature Outfit
The persona turns a generic figure into a shareable one. Boxed dolls have always been sold as a role, not just a body: astronaut, veterinarian, chef, architect, guitarist. Pick what you are or want to be seen as, then let outfit, accessories, and backing card point at it. A doll with a job outranks a doll in a nice dress every time.
Era drives the visual language. A late-fifties doll means a monochrome striped swimsuit, curled bangs, and a slim rectangular box. A 1980s doll means volume hair, bold color blocking, and a wide window box. A 2020s doll means naturalistic makeup, an articulated body, and matte packaging. Pick one and stay in it; mixing eras is the fastest way to look like a stock render.
Write the persona as concrete nouns. "Marine biologist fashion doll, navy wetsuit with teal panel, clipboard accessory, wet-look pulled-back hair, snorkel mask on forehead" beats "adventurous science doll": objects generate, abstractions do not. The barbiecore aesthetic is a valid persona on its own, and if that is the look, give a hex value such as #E0218A for the dominant pink so outfit, card, and tray stay in one family.
Generating the Base Doll Model with Threedium's AI
With references and prompt ready, run the first generation through Threedium's 3D model generator. Julian NXT takes the image set plus the description and produces a watertight base mesh with PBR texture maps: base color, roughness, metallic, normal, and ambient occlusion. First-pass output for a character of this type lands in the 40,000 to 120,000 triangle range depending on hair complexity.
Generate the doll and the packaging as separate assets. A combined generation tends to weld the blister plastic to the shoulders and the backing card to the hair. Two clean assets give you a doll you can pose, print, and reuse independently of the box.
Judge the first output on four things: silhouette at thumbnail size, whether the face reads as you at 256 px, whether the hair mass sits correctly on the skull, and whether the limbs have the elongation you asked for. If the silhouette is wrong, regenerate rather than patch. Expect three to six generations before you have a keeper. On enterprise tiers you can hand the strongest candidate to Threedium's human 3D artists for refinement.
Dialing In Fashion-Doll Proportions: Elongated Limbs, Slim Waist, Oversized Eyes
Fashion-doll proportion is a defined system. A real adult reads at roughly 7.5 heads tall; a classic fashion doll reads at 6 to 6.5 heads, but achieves it by enlarging the head rather than shortening the body, so the limbs feel longer. Legs occupy 55 to 58 percent of total height from crotch to sole, against roughly 47 percent on a real body.
| Feature | Human reference | Fashion-doll target | What breaks if you overshoot |
|---|---|---|---|
| Total height in heads | 7.5 | 6.0 to 6.5 | Head reads as bobblehead, not doll |
| Leg length as percent of height | 47% | 55 to 58% | Torso looks amputated, poses fail |
| Neck length | Baseline | 1.3 to 1.6x baseline | Head detaches visually from shoulders |
| Eye width as percent of face width | ~20% | 26 to 30% | Uncanny insect look, likeness collapses |
| Waist to bust ratio | 0.75 to 0.85 | 0.55 to 0.60 | Silhouette becomes hard to rig |
| Hand length as percent of height | 10.8% | 8 to 9% | Hands look like mittens at print scale |
Eyes are where beginners overshoot hardest. Widening to 26 to 30 percent of face width gives the doll look; past 35 percent tips into anime and takes the likeness with it. Enlarge eye opening and iris together, keep the inner corners at their original spacing, and let growth happen outward and slightly upward. Moving inner corners apart destroys recognition, because interpupillary spacing relative to face width is one of the strongest identity cues a viewer reads.
Keep the feet arched for the classic read. Fashion dolls are molded on permanent tiptoe at a 45 to 55 degree ankle angle, recognizable even in silhouette, though a printed standing figure will need a stand.
Getting Doll-Smooth Skin: Plastic Sheen Shading Without the Uncanny Valley
Doll skin is not human skin with the pores turned off. It is a different material with a different light response, and treating it that way is what pulls the model out of the uncanny valley. Molded vinyl scatters light shallowly, holds a soft broad specular highlight rather than a tight one, and shows no micro-texture until you are centimeters away.
Starting values for doll-smooth skin shading in a standard PBR setup: roughness 0.28 to 0.38 across the body, dropping to 0.18 to 0.24 on the face where dolls are buffed smoother. Metallic stays at 0, specular around 0.5, matching an IOR near 1.5 for real PVC. Keep subsurface scattering very low, roughly 0.08 to 0.15 weight at a scatter radius near 0.5 mm at doll scale. Human skin uses radii closer to 3 mm; using human values on a doll produces waxy dead flesh.
Spec warning: do not bake a strong ambient occlusion map into the base color on doll skin. Molded plastic has almost no contact darkening in creases because the material is uniform and light bounces freely. Keep AO as a separate map at 0.3 intensity or lower, and never multiply it into the albedo.
Facial paint is separate from skin. On real dolls, eyes, lashes, brows, and lips are printed on top of the molded surface, so they sit glossier and marginally raised. Give eyes and lips roughness 0.10 to 0.15 against the face's 0.20, plus a barely perceptible 0.02 mm height offset at the paint boundary. That detail sells "painted toy" more than any texture work on the skin.
Styling Doll Hair: Sculpted Molded Hair vs Rooted Strand-Based Looks
Hair is the most doll-specific decision on the model and the one most people get wrong. Real dolls come in two fundamentally different hair constructions, each with a distinct 3D equivalent, geometry cost, and export behavior. Choosing wrong is the most common reason a beautiful preview render turns into a broken GLB.
Molded hair is sculpted directly into the head casting as solid plastic, painted, and finished. It appears on most male fashion dolls, vintage figures, budget lines, and any short or slicked style. In 3D it is the easy path: hair joins the head mesh or attaches as a single solid shell, adds 3,000 to 8,000 triangles, uses one opaque material with no transparency, and prints without a single support problem. Sculpt it as broad ribbon-like masses with defined edges, not individual strands. The look comes from carved channels roughly 1 to 2 mm wide at doll scale, a clean terminating edge along the hairline, and a slightly glossier finish than skin at roughness 0.22 to 0.30.
Rooted hair is the premium construction: fiber bundles of saran, nylon, or kanekalon plugged into holes in the vinyl scalp, then styled. It is what makes a doll brushable and gives the classic long-hair look. In 3D there are two ways to reproduce it and they are not interchangeable.
Card-based hair uses flat or gently curved polygon planes carrying an alpha-masked hair texture, layered in shells from the scalp outward. A good setup runs 150 to 600 cards, lands in the 8,000 to 25,000 triangle range, and works in every real-time engine and export format. This is the correct choice for GLB and USDZ, for AR, and for anything going into a game engine or web viewer.
Strand-based hair uses actual curve geometry, typically 20,000 to 80,000 child strands grown from 200 to 600 guides. It renders beautifully in any offline path tracer, handles physics for the hair-toss shot, and looks unmistakably like rooted fiber. It also does not survive glTF export as curves and must be converted to mesh or cards first, at which point triangle counts can pass a million if you are careless.
| Hair method | Typical tri count | Best for | Export notes |
|---|---|---|---|
| Molded solid sculpt | 3k to 8k | Short styles, 3D printing, AR | Opaque, no alpha, prints with zero supports |
| Alpha-masked cards | 8k to 25k | GLB, USDZ, real-time, most long styles | Use alpha clip at 0.5, never alpha blend |
| Strand curves | 200k+ after conversion | Offline renders, hero shots, hair physics | Convert to mesh or cards before glTF export |
| Hybrid shell plus cards | 15k to 30k | Volume styles, updos, ponytails | Opaque shell hides sorting artifacts |
The hybrid approach is what most production doll assets actually use. Build an opaque solid shell covering the scalp and the bulk of the hair mass, then layer alpha cards only on the outer silhouette and loose ends. The opaque core gives transparency sorting artifacts nothing to show through to, eliminating the see-through-to-the-skull flicker that plagues card hair in real-time viewers, and it keeps the triangle count sane.
If your doll is heading to USDZ for AR Quick Look, use alpha clip rather than alpha blend on every hair card and set the cutoff at 0.5. Alpha-blended hair in USDZ commonly renders with visible depth sorting errors on iOS, showing back-facing cards through front-facing ones. Clip is less pretty in close-up but it is stable.
One more doll-specific detail: rooted hair shows a visible rooting pattern, rows of plug holes across the scalp about 2 mm apart at doll scale. Reproducing that faintly in the scalp texture, as slightly darker dots along the part line, reads as genuinely doll-like to anyone who has handled one. Skip it and the hair looks like character hair on a small human.
Designing the Packaging Box: Blister Shell, Backing Card, and Tagline
Box proportions are dictated by the doll. A 1:6 scale doll at 29 cm needs a window box of roughly 32 to 33 cm tall, 15 to 17 cm wide, and 6 cm deep: taller and narrower than an action-figure blister, because the doll stands upright with legs extended and the tray runs vertically alongside the body.
The construction is a transparent vacuum-formed blister shell over a printed backing card. Model the shell as a shallow offset of the doll's outline with 3 to 5 degree draft angles, and keep the card a single textured plane. What changes for a fashion doll is the design language on top:
- Pink-family card design. Pick one dominant pink plus one accent and hold it across card, tray, and printed graphics.
- Vertical accessory tray. A narrow molded tray down one side holding shoes, a brush, and one or two props, rather than a wide bottom shelf.
- Full-height window. Doll blisters show the whole figure from hair to feet with only a narrow card border.
- Wrist and waist ties. Real doll boxes secure the figure with clear plastic ties at wrist, waist, and ankle. Two or three add instant authenticity.
- Foot tab. Dolls are held upright by a molded tab under the arch, not by a clamshell around the legs.
For the tagline, keep everything generic and descriptive. Your first name in a bold geometric sans at 36 to 48 pt equivalent at box scale, role underneath at half that, plus small text like "Includes 4 accessories" at 8 to 10 pt equivalent. Print the card art at 2048 x 4096 px minimum so small type stays legible in close-up.
Laying Out Accessories in the Box: Props That Tell Your Story
Accessories are the storytelling layer, and the count matters. Real fashion-doll boxes ship three to six accessories: fewer looks cheap, more clutters the tray. Choose items a stranger could name in half a second at thumbnail size, because that is how long people look at a reveal frame.
Build the list in three tiers: one hero prop that defines the role and reads at a glance, two supporting props at medium size, and one or two filler items fashion dolls always ship with, like shoes, a hairbrush, or sunglasses.
Scale is where accessories go wrong. At 1:6, a laptop is about 5 cm wide, a coffee cup 1.5 cm tall, a phone 2.5 cm, a guitar 17 cm. Measure against the doll's hand, roughly 2.5 cm from wrist to fingertip, and adjust. Keep each accessory in the 500 to 3,000 triangle range on a 1024 x 1024 atlas, matching its material family to the doll so the box reads as one manufactured set.
Refining the Doll Face So It Still Reads as You
Refinement is where you win or lose the likeness. Run a simple test: view the doll's face at 128 px next to your reference at the same size. If a friend could pick you out, the geometry is working. If not, the problem is almost always one of four things, and it is worth checking them in order.
First, eyebrow shape and position: brows carry an enormous share of identity and doll stylization replaces them with a generic arch. Match your brow angle, thickness, and brow-to-eyelid distance within a millimeter at doll scale. Second, face width at the cheekbones relative to the jaw, since smoothing converges every face toward a soft oval. Third, hairline shape. Fourth, the mouth's resting width and corner angle relative to the eyes.
Let everything else go. Nose bridge detail, nostril shape, ear structure, and skin tone variation are all things the doll pass legitimately removes and that viewers do not use for recognition at doll scale. Spending your refinement budget on those four features produces a far stronger likeness than preserving everything at half strength. This is also the pass worth handing to a human artist on enterprise tiers, because the corrections are millimeter-scale and specific to your face.
Exporting Your Boxed Doll as GLB, USDZ, or FBX
Three formats, three jobs. GLB is the web and cross-platform format: single binary, textures embedded, works in browser viewers, Android Scene Viewer, and most engines. USDZ is the iOS format required for AR Quick Look. FBX is the format for when the model goes into Blender, Maya, Unreal, or Unity.
- GLB for web and social: 60k to 120k triangles including box, textures at 2048, Draco compression on, file under 15 MB.
- USDZ for AR Quick Look: 80k triangles or fewer, textures at 2048, file under 25 MB. Go lower for older devices.
- FBX for further editing: full density up to 500k triangles, textures at 4096, exported as separate files rather than embedded.
- Print-bound STL or OBJ: no texture requirement, but the mesh must be manifold and watertight.
Set unit scale before export, not after. Work in centimeters, or set 1 unit to 1 meter and build the doll at 0.29 units. glTF assumes meters and FBX assumes centimeters by default, and getting this wrong is why models arrive in AR either microscopic or building-sized.
If you rigged the doll, GLB and FBX both carry skeletal animation and the automatic rigging travels with the export. Facial rigging with 52 ARKit blendshapes is available where it makes sense, but a boxed display doll rarely needs it: the classic look is a fixed painted expression. Rig the body, skip the face, unless you want the doll to talk.
Rendering the Boxed-Doll Reveal Shot for TikTok and Instagram
The reveal shot is a lighting problem more than a modeling one. Toy packaging photography is bright, frontal, slightly overexposed, with a soft broad key and minimal shadow. A large soft key at 45 degrees camera left, a fill at half key intensity on the right, and a subtle rim behind to separate box from background gives you the retail-shelf feel in three lights.
Use a 50 to 85 mm equivalent lens and keep the box parallel to the sensor, since wide lenses distort packaging into a trapezoid. Focus on the doll's face at around f/5.6 equivalent so blister front and backing card both stay sharp; toy product photography almost never uses heavy background blur.
Render at native platform resolution rather than cropping later: 1080 x 1920 at 9:16 for TikTok, Reels, and Shorts, or 1080 x 1350 at 4:5 for the Instagram feed. The strongest format is a sequence rather than a single frame: two seconds on the boxed doll, a turn to the side panel, then a cut to the doll out of the box in a pose. Rendering that in a real 3D scene is exactly what a barbie box generator built on flat image output cannot do. Keep clips at 30 fps and total length under 12 seconds.
What Makes a 3D Barbie-Style Doll Different From a Flat AI Doll Image?
A flat AI doll image is a single rendered viewpoint with nothing behind it. A 3D model is an object: it has volume, correct topology, materials with measurable properties, and it can be rotated, relit, animated, printed, and dropped into AR. This section covers the technical work that only exists once you are building an actual model.
Why Viral Barbie Box Trend Images Are Flat and What a Real 3D Model Adds
The barbie box trend that spread across TikTok and Instagram runs almost entirely on 2D image generation. You upload a selfie, the model returns a picture of a doll-like version of you in packaging, and that is the end of the asset. It is convincing in a feed and costs nothing, and it is a dead end the moment you want anything other than that exact frame.
The limits are concrete. You cannot change the camera angle without regenerating, and regeneration produces a different face. You cannot fix the tagline text, which image models render as approximate letterforms that fall apart under scrutiny. You cannot print it, place it in AR, or animate it. And a series of posts shows a subtly different person each time.
A model solves all of it because identity lives in geometry rather than in a sampled output. Camera angles become free, the card text is text you typed, and the same doll renders identically today and next month. The honest trade is speed: if you want one post today and nothing else, an image tool is faster. If you want an asset, a printable object, or a repeatable character, the model is the only path.
Modeling Fashion-Doll Anatomy: Stylized Proportions That Still Rig Cleanly
Fashion-doll anatomy fights good topology. The extreme waist taper, elongated neck, and tiny wrists create dense areas of small polygons next to sparse areas of large ones, and that mismatch produces pinching when the model deforms. Getting proportions right visually is half the job; the mesh has to survive being posed.
Keep edge loops perpendicular to the direction of bend at every joint, with a minimum of three loops per articulation point, and keep quads throughout the deforming body, saving triangles for static regions like accessories and molded hair. Maintain roughly even edge length across the torso even where the silhouette narrows, which means adding loops through the waist rather than letting existing ones stretch.
The neck is the specific trap. Lengthening it to 1.3 to 1.6 times human proportion by scaling existing geometry stretches loops into long thin rectangles, and a head turn then shears the whole column. Add loops as you lengthen, and terminate the neck at a clean horizontal ring where the head joins, which is also where the real doll's part line sits.
Hands are the other. At 8 to 9 percent of total height a fashion-doll hand is small, and most dolls have fused fingers with only the thumb separated, molded in a soft curl. Five articulated fingers on a doll is both wrong and the first thing that breaks in a print at 100 mm scale. For rigging, a standard humanoid skeleton works, but overlap spine bone influence generously through the waist and cap the waist bend at roughly 25 degrees, or naive automatic weights produce a pinched hourglass collapse.
Doll Joint Seams and Articulation Lines: Sculpting the Molded-Toy Look
Seams separate a doll model from a small human model. Real dolls are assembled from separately molded parts, and the visible joints, part lines, and mold seams are not defects to hide: they are the strongest available signal that the object is a manufactured toy. Leave them out and the render reads as a miniature person no matter how smooth the skin is.
- Neck: a horizontal ring where the head socket meets the torso post, a shallow groove 0.3 mm deep at doll scale.
- Shoulders: ball-and-socket, visible as a circular seam and a small gap. The most visible joint on the doll, worth modeling as an actual recessed ring rather than a texture line.
- Elbows and knees: only on articulated bodies. A hinge shows as a lens-shaped recess with two flat side discs. Solid bodies have no seam at all, which is a valid and cleaner choice.
- Hips: a diagonal seam from the outer hip toward the inner thigh, plus a socket line, often visible even on non-articulated dolls.
- Wrists and ankles: thin ring seams, typically 0.2 mm, often barely visible.
- Vertical mold parting line: a faint continuous line down the outer side of each limb. Almost invisible, but its absence is felt.
Model the major seams as geometry, not texture. A recessed ring catches light correctly from every angle and survives AR viewing and printing, where a painted line does neither. The exception is the mold parting line, fine as a normal map detail at 0.3 strength because it is too shallow to justify polygons.
Seam depth is the value people overshoot. At doll scale a real shoulder gap runs 0.5 to 0.8 mm and an elbow hinge recess about 0.4 mm. Model them deeper and the doll looks like a mechanical figure. Fashion dolls hide their engineering; action figures display it.
If your doll is going to be 3D printed under 120 mm tall, scale seam depths up by 1.5 to 2 times or they will disappear. A 0.4 mm recess at 290 mm becomes 0.16 mm at 120 mm, which is below what most FDM printers and many resin prints reproduce as a visible feature.
Materials for Molded Plastic: Gloss, Subsurface, and Specular Settings
A fashion doll is made from at least three plastics and they do not look alike. Head and arms are soft PVC or vinyl, slightly translucent and matte-satin. Torso and legs are often harder ABS, more opaque and glossier. Accessories are usually injection-molded polystyrene. Giving all three the same material is a small mistake with a large effect: the model looks carved from one block rather than assembled.
| Part | Material | Roughness | Subsurface weight | Notes |
|---|---|---|---|---|
| Head and face | Soft vinyl | 0.18 to 0.24 | 0.10 to 0.15 | Warmest tone, translucency at ears |
| Arms | Soft vinyl | 0.26 to 0.32 | 0.08 to 0.12 | Matches head tone, marginally rougher |
| Torso and legs | Hard ABS | 0.30 to 0.38 | 0.02 or none | Slightly cooler and more opaque |
| Molded hair | Hard vinyl | 0.22 to 0.30 | None | Glossier than skin, fully opaque |
| Accessories | Polystyrene | 0.15 to 0.25 | None | Highest gloss, flat saturated color |
| Blister shell | Clear PET | 0.02 to 0.06 | Transmission 0.95 | IOR 1.57, thin-walled |
Keep specular and IOR consistent across all the plastics at roughly IOR 1.5 to 1.55, which is where PVC, ABS, and polystyrene genuinely sit. Metallic stays at zero except on actual metallic accessory paint. What varies between parts is roughness and translucency, not specular intensity, and that relationship is why the materials read as different plastics rather than different shaders.
Translucency is what sells vinyl. Thin areas, the ear edges, fingertips, and nose tip, glow faintly warm against a backlight. Drive subsurface with a warm scatter color around RGB 0.85, 0.55, 0.45 at a very short radius so the effect is obvious only against a rim light. Add a subtle roughness variation map in the 0.03 to 0.05 range driven by large-scale noise, because perfectly uniform roughness is a quiet giveaway of a CG object.
Doll-Specific Packaging Choices and Brand-Safe Typography
With the box geometry built, the remaining work is proportional and typographic. Doll boxes are tall and slim, around 2:1 height to width against roughly 1.4:1 for a standard figure blister, and the blister is shallower at 4 to 5 cm deep because a doll has less depth than a posed action figure.
The accessory tray runs vertically in a narrow column, usually 3 to 4 cm wide down one edge, with individual molded wells rather than a single open bay. Model each well as a shallow recess matched loosely to its contents, which reads as retail blister pack packaging even at low resolution. The doll's own well is a full-height cavity with the foot tab at the bottom.
Use clean geometric sans-serif type in four zones: brand mark at top, name in large type, role or tagline in medium type, and small legal-style text at the bottom. Keep the name at roughly 12 to 15 percent of card width in cap height so it reads at thumbnail, and never reproduce a real brand's script logo or its specific pink-plus-layout combination, since that trade dress is exactly what trademark law protects.
Keeping It Brand-Safe: Fashion Doll Style vs Official Barbie Branding
Barbie is a registered trademark of Mattel, and the doll's face sculpt, packaging trade dress, and logo are protected intellectual property. None of that stops you from making a stylized fashion doll of yourself. The line runs between aesthetic style, which is not protectable, and specific protected marks and designs, which are. A pink box with a blister shell and a slim doll is a genre. A pink box with the Barbie wordmark on it is infringement.
- Do not use the Barbie name, wordmark, or script logo anywhere on the model, the card, or the file name.
- Do not reproduce the official doll's face sculpt. Your doll's face should be a stylization of your face.
- Do not recreate Mattel's packaging layout, graphic elements, or typography arrangement.
- Do describe your work as "fashion-doll style" in anything public-facing or commercial.
- Do invent your own brand mark if you want branding at all. A made-up name in clean type looks just as authentic.
Personal use has more latitude than commercial use. Posting a render of yourself with a generic pink box is a very low-risk creative act. Selling prints, running ads, or building a paid product around doll conversions raises the stakes, and the branding then needs to be unambiguously your own. None of this is legal advice.
Likeness matters in the other direction too. If you are converting someone else's photo, you need their permission: use photos of yourself, or of people who have said yes.
Posing Your Doll: The Classic Straight-Arm Display Stance
In-box, a fashion doll stands in a specific and slightly stiff way, and reproducing it exactly is what makes the boxed render feel real. Arms hang almost straight at roughly 8 to 12 degrees from the torso, palms facing the thighs, elbows bent no more than 5 degrees. Legs are straight and close with maybe 5 mm at doll scale between the knees.
The head faces forward with a barely perceptible tilt of 2 to 4 degrees, a manufacturing artifact of the neck socket present on almost every boxed doll. Feet are arched at 45 to 55 degrees, toes down. That is the whole stance, and it should not be dynamic.
Out-of-box posing is where you loosen up, and it is worth rendering both. A posed shot works best with a contrapposto weight shift: hip raised on the standing leg, shoulders counter-rotated, one arm bent. Stay inside real articulation limits: elbows and knees bend to about 90 degrees on articulated bodies and not at all on solid ones, the waist twists roughly 25 degrees either way, and wrists rotate but do not bend. Viewers recognize impossible doll poses immediately.
Turntable Animations: Rotating the Boxed Doll for Reels
A turntable is the cheapest possible proof that your doll is a real 3D model. Rotate the object, not the camera, at a constant 360 degrees over 5 to 6 seconds, which at 30 fps is 150 to 180 frames. Use linear interpolation with no easing, because a turntable that accelerates reads as a camera move rather than a rotating display.
Light from a fixed world position so highlights travel across the surface as the object rotates. Parent the lights to the rotating object and the shading stays static, which flattens the shot entirely.
Two turntables tell the story better than one: the boxed doll rotating, then a cut to the unboxed doll. Cut on the frame where the box faces away from camera so the transition lands cleanly. Total runtime around 10 to 12 seconds at 1080 x 1920, exported as H.264 MP4 at 10 to 12 Mbps. If you want the model to move rather than spin, the automatic rigging gives you a skinned skeleton you can drive with standard humanoid animation, but keep motions small and slightly mechanical: a doll that moves like a person is uncanny.
Converting Your Doll for 3D Printing: STL Export, Wall Thickness, and Supports
Turning a render-ready model into a 3d printable doll from photo requires a separate preparation pass. The mesh must be manifold: every edge shared by exactly two faces, no holes, no self-intersections, no internal geometry, consistent normals. A model that renders perfectly can be full of errors a slicer will refuse or silently mangle.
- Merge separate parts into one solid. Hair, clothing, and accessories floating as separate shells need booleaning into the body or printing as separate pieces.
- Check for non-manifold edges and holes. Blender's 3D Print Toolbox or any mesh repair tool reports these. Fix every one.
- Verify minimum feature size. Nothing thinner than 1.2 mm for FDM or 0.8 mm for resin should stand alone. Fingers, hair strands, and accessory handles are the usual offenders.
- Set wall thickness if hollowing. Hollow resin prints want 1.5 to 2 mm walls with two 3 to 4 mm drain holes hidden under the feet or in the scalp.
- Scale and export. STL in millimeters: a full-size doll at 290 mm, a desk figure at 120 to 150 mm, a keychain at 60 mm.
The fashion-doll body creates one specific print problem: the narrow waist. At 120 mm total height a stylized waist can come out under 6 mm across, a genuine weak point in both FDM and resin and exactly where the print snaps if handled. Thicken the waist by 10 to 15 percent in a print-only version, or accept it is display-only and print at 200 mm or larger.
The tiptoe stance is the other. A doll on pointed toes has almost no contact patch and cannot stand unsupported. Add a 3 mm thick disc base at least 40 mm across, or produce a flat-footed variant. Orient the print upright with supports on the back of the legs and under the arms, at 45 degrees maximum overhang before support becomes mandatory. Layer height of 0.05 mm on resin or 0.12 mm on FDM gives a face that holds up to close viewing.
Where Can You Use Your Barbie-Style Doll Model?
Once the model exists, the same asset serves very different outputs, and the export format drives which ones are available: social posts, physical prints, AR placement, group projects, and further work in a DCC application.
Posting the Boxed-Doll Reveal: Formats and Aspect Ratios per Platform
Render for the destination rather than cropping a single master, because a composition that works vertically does not work square. A boxed doll is a tall object and wants a tall frame, which is convenient given where the trend lives.
- TikTok, Reels, Shorts: 1080 x 1920 at 9:16, 30 fps, MP4 H.264. Keep the box within the center 80 percent vertically to clear UI overlays.
- Instagram feed: 1080 x 1350 at 4:5, the tallest ratio the feed displays uncropped. Best for a still hero render.
- Instagram carousel: 1080 x 1350, boxed first, then unboxed, then a turntable frame or accessory detail.
- Pinterest: 1000 x 1500 at 2:3, still image, works well for the packaging shot specifically.
- X and general web: 1200 x 675 at 16:9, meaning a horizontal composition with the box off-center.
The reveal structure that performs is reliable and boring: reference photo for one second, boxed doll for two to three seconds with a slow push-in, then the unboxed doll posed, total under 12 seconds. The comparison frame is what makes people stop, because the entire appeal of a barbie selfie generator result is the before-and-after, and a 3D model gives you a much stronger after. Export at around 12 Mbps, above what platforms retain, since every upload is re-encoded and clean source reduces banding on large flat pink surfaces.
3D Printing a Shelf-Ready Doll of Yourself
A printed doll of yourself is the most satisfying output of this workflow and more achievable than most people expect. Resin printing at 0.05 mm layer height on a consumer MSLA machine reproduces a stylized doll face convincingly at 120 to 150 mm tall, the size that fits a shelf without dominating it. FDM at 0.12 mm works but shows layer lines on the face that need sanding and priming.
Print size drives everything. At 290 mm you get accurate proportions but will likely split the model into head, torso, and legs for most build volumes, then pin and glue. At 120 to 150 mm the whole figure fits in one print. Below 60 mm the face stops reading.
Finishing matters here because the point is a smooth molded surface. Sand progressively from 400 to 1500 grit, prime with filler primer, sand again, then paint. Acrylic skin tones with a satin clear coat land close to real vinyl; gloss looks like a figurine and matte kills the doll read. Paint eyes and lips last with a size 000 brush.
Print services accept STL uploads and produce resin or full-color prints with no finishing work on your end, typically 60 to 200 USD for a figure this size with a one to three week turnaround. That is comparable to commissioning a custom doll repaint from an artist at 150 to 600 USD, except the printed version comes from a model you can reprint at any time.
Viewing Your Boxed Doll in AR on a Real Shelf with USDZ
AR is the payoff flat image tools can never match, and on iOS it needs no app. Export USDZ, put the file somewhere tappable, and iOS opens it in AR Quick Look. Point the phone at a shelf and the boxed doll appears at physical scale with real shadows.
Get the scale right or the illusion breaks instantly. Export the box at true dimensions, roughly 33 cm tall. USDZ reads the file's unit metadata, so an incorrect export scale produces a box that is either doll-sized or refrigerator-sized.
Keep the AR build lighter than the render build: 80,000 triangles or fewer, textures at 2048, file under 25 MB, card hair on alpha clip rather than alpha blend. Substitute a simple low-roughness partially opaque surface for the blister shell, because full glass transmission renders incorrectly on many mobile devices. On Android the same GLB works through Scene Viewer, and serving GLB to Android and USDZ to iOS from one page is the standard pattern, requiring only that you export both from your generated model.
Turning Friends, Couples, and Family Into Matching Dolls
A set of matching dolls beats a single one, and the technical requirement is consistency: every doll needs the same proportion system, skin shader family, hair method, and packaging design language. Lock your prompt template once and change only the identity clauses, keeping proportion, material, finish, and pose language identical between generations.
- Couples two-pack: one wider box, roughly 28 cm across, both dolls side by side with a shared accessory tray between them.
- Family collection: individual boxes rendered in a row, matching card design, name plate on each, varying only in doll height.
- Friend group set: same box, different persona per person, laid out in a grid render. The strongest social format, because everyone in it shares the post.
- Pet companion: a stylized pet as an accessory in the tray, scaled to 1:6 alongside the figure.
Importing Your Doll Into Blender for Custom Box Scenes
Blender is where you take the generated asset and build something specific. Import the GLB for a clean materials-included setup or the FBX for higher density with separate texture files. glTF import brings in a Principled BSDF per material already wired to the generated maps, which is most of the way to a good render.
Adjust immediately after import: set scene units to millimeters and confirm the doll measures around 290 mm, add a subdivision surface modifier at level 1 to the body only, enable shadow catcher on the ground plane for compositing onto real photographs, and use Cycles for hero shots with Eevee for turntables. From there, a shelf full of your dolls, a retail peg wall, or a hand reaching into frame to lift the box are all straightforward, and all impossible with a flat generated image.
Material tweaks with the biggest visual payoff: raise Coat weight to 0.15 with coat roughness 0.1 on skin for the vinyl sheen, keep Specular IOR Level at the 0.5 default, and enable Subsurface with the Random Walk method at low weight and a radius around 0.5 mm. For the blister shell use a Glass BSDF at IOR 1.57 with roughness 0.03, or a Principled setup with transmission at 0.95 and thin-walled enabled, which renders far faster.
Using Your Doll Alongside Other Styles Like Action Figures and Bobbleheads
The fashion doll is one entry in a family of self-portrait toy styles, and a set of yourself in multiple formats is a strong series of posts. Each style has its own proportion system and technical quirks, so it is worth understanding what changes rather than trying to convert one into another.
- Fashion doll: 6 to 6.5 heads, smooth vinyl, rooted hair, tiptoe feet, 1:6 at 29 cm.
- Action figure: 6.5 to 7 heads, visible articulation, matte paint and weathering, 1:12 at 15 cm.
- Vinyl big-head figure: 1.5 to 2 heads, oversized head, black dot eyes, no articulation, roughly 10 cm.
- Bobblehead: 2.5 to 3 heads, spring-mounted head over a realistic body, 15 to 20 cm.
These are separate generations, not conversions. Scaling up a fashion-doll head does not produce a vinyl figure, because that style has entirely different facial geometry, no nose, minimal features, and a different body construction. Generate each style from your original reference photos with a style-specific prompt.
What does transfer is the reference photo set and the identity clause in your prompt. The list of features to preserve, face shape, eye color, brow shape, hair color, hairline, moves between styles unchanged and is why four toy versions of you still read as the same person. Build that clause once and paste it into every generation. The self-portrait model library covers the other styles, and the vinyl big-head version pairs especially well here, because the two look so different side by side that the comparison itself becomes the post.
Frequently Asked Questions About AI Barbie Doll Generators
Is there a free AI generator that turns you into a Barbie doll?
There are free options, but almost all produce a flat image rather than a model. General-purpose image generators with an upload feature return a doll-in-a-box picture from a selfie at no cost, and several free-tier apps wrap that same capability in a one-tap interface. What none of them give you is geometry: no rotation, no printing, no AR, and no consistency between generations.
Free tiers on 3D generation platforms typically limit you by monthly credits, output resolution, or export format, often restricting you to a preview viewer rather than a downloadable file, which is still enough to evaluate the likeness before committing. The moment you want to print the doll, view it in AR, animate it, or produce a second matching image, the free image route stops working entirely. That is the practical dividing line.
How do I do the Barbie box trend with my own photo?
Upload a clear front-facing photo plus a full-body reference, write a prompt specifying fashion-doll proportions and a persona, generate the doll and box as separate assets, assemble them in a scene, and render a vertical reveal shot. The sequence takes twenty minutes to a couple of hours depending on how many generations you run.
The steps people skip and then regret: naming a proportion target in heads, giving the box real typography instead of generated letterforms, and rendering at the platform's native aspect ratio rather than cropping afterward. Those three account for most of the quality gap between a result that looks like a product photo and one that looks like an AI output.
For the rugged articulated-figure version of the trend, the packaging build is largely the same: swap in 6.5 to 7 head proportions, visible articulation, and a card design that is not pink.
What prompt should I use for the AI doll in a box trend?
Use a prompt with five named components: subject and scale, proportions, material and finish, persona and outfit, and packaging. A working template: "1:6 scale fashion doll of the person in the reference photos, approximately 6 heads tall with elongated neck and limbs and narrow waist, smooth molded vinyl skin with satin sheen, oversized stylized eyes with painted lashes, rooted long hair, [persona] outfit with [hero accessory], standing straight-arm display pose, preserve the subject's face shape, eye color, eyebrow shape and hairline."
Generate the box with a second, separate prompt: "tall vertical fashion doll retail window box, 33 cm tall by 16 cm wide by 6 cm deep, transparent vacuum-formed blister shell over a printed pink backing card, vertical accessory tray down the right side, generic sans-serif typography, no logos." Building them separately keeps both meshes clean and independently editable. Iterate one clause at a time: if the face is not landing, change only the identity-preservation clause; if the body looks like a small human, change only the head count.
Can I 3D print the doll version of myself?
Yes, provided you export a manifold mesh as STL in millimeters and prepare it for your printing method. Resin at 0.05 mm layers at 120 to 150 mm tall gives the best result for a stylized doll face on a consumer machine. FDM at 0.12 mm works but the face needs sanding and priming before it looks smooth.
Two doll-specific problems to solve before slicing: the narrow waist, which can drop below 6 mm across at small print sizes and becomes a snap point, and the tiptoe stance, which leaves no usable contact patch. Thicken the waist by 10 to 15 percent in a print-only version and add a 40 mm base disc, or produce a flat-footed variant. If you would rather not print it yourself, third-party services produce full-color resin or binder-jet versions from your STL with no finishing work, typically 60 to 200 USD for a figure this size.
Is it legal to make a Barbie-style doll of yourself with AI?
Making a fashion-doll-style figure of yourself is fine. Barbie is a registered trademark of Mattel, and the protected elements are the name, the logo and script lettering, the specific commercial face sculpts, and the packaging trade dress. The general aesthetic, a slim doll with smooth vinyl skin in a pink window box, is a genre and is not itself protectable.
Stay safe by never using the brand name or logo on the model or card, never copying the official doll's face sculpt, and never recreating Mattel's packaging layout. Describe your work as fashion-doll style, and invent your own brand mark if you want branding at all. Commercial use raises the bar: personal posts carry very little practical risk, while selling prints or building a paid service means your branding needs to be unambiguously original. This is not legal advice, and anyone building a business on this should consult an IP attorney.
Why does my AI doll look nothing like me?
Almost always one of three causes: the reference photos were too soft or too filtered, the prompt pushed stylization without an identity-preservation clause, or the eyes were enlarged past the point where recognition survives. Doll conversion removes so much detail that whatever identity cues remain have to be unusually clear in the source.
Fix it in order. Reshoot with a 50 to 85 mm equivalent lens under even frontal light with the hairline visible, and add a three-quarter view. Add an explicit clause listing features to preserve. Then check the four features that carry recognition at doll scale: eyebrow shape and position, cheekbone-to-jaw width ratio, hairline shape, and mouth width relative to the eyes. Finally, verify you have not overshot eye size, because past roughly 30 percent of face width likeness degrades quickly and past 35 percent it is gone regardless of what else you fix. If the model is close but not there, an enterprise refinement pass by a human 3D artist reliably closes the last gap.
Can I make a doll of my pet or my whole family?
Yes to both, with different approaches. Pets work best as 1:6 scale companion accessories in the doll's tray rather than standalone dolls, which is how the real toy lines handle them. Generate the pet separately from side and front reference photos, then place it in the accessory well.
Family and group sets need consistency discipline. Lock one prompt template covering proportions, materials, finish, and pose, then change only the reference photos and persona clauses. Child dolls should scale to 22 to 24 cm against an adult's 29 cm with a slightly larger head proportion at around 5.5 heads.
For packaging, choose between individual boxes rendered in a row with matching card design, or a single wider multi-pack at around 28 cm across. The row of matching boxes performs better socially because each person gets their own shareable frame. Start from the 3D model generator and run each family member as a separate generation on the same locked template.