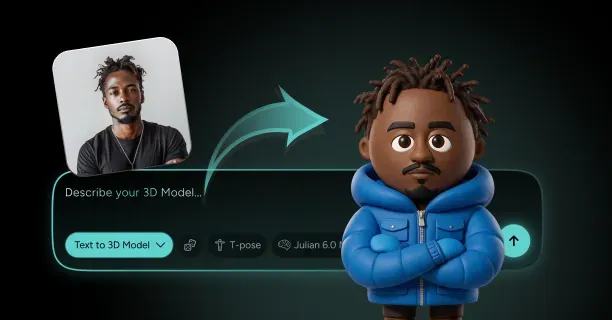
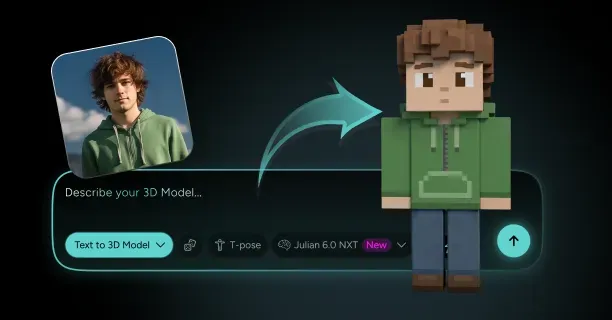
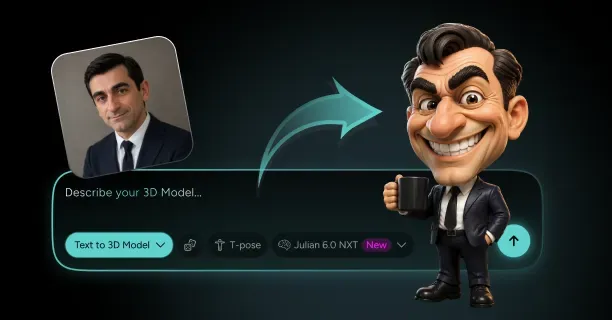
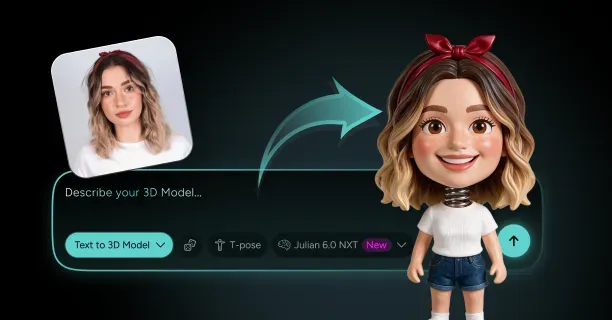
How Do You Turn Yourself Into a Family Guy-Style Character From a Photo?
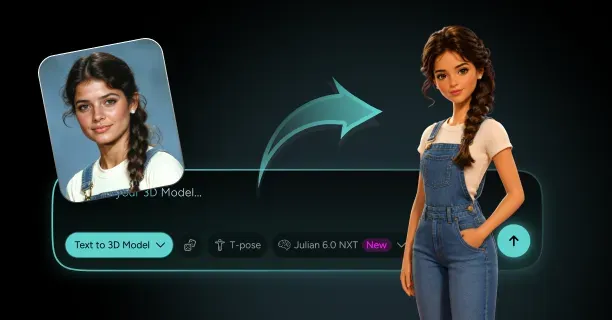
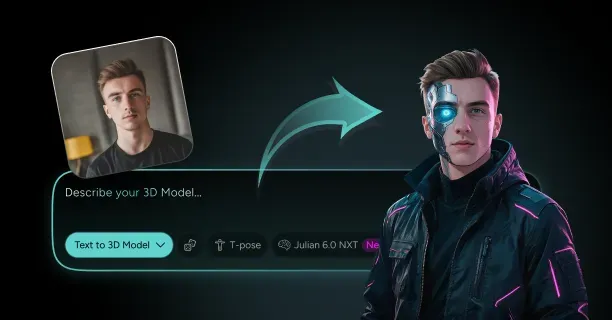
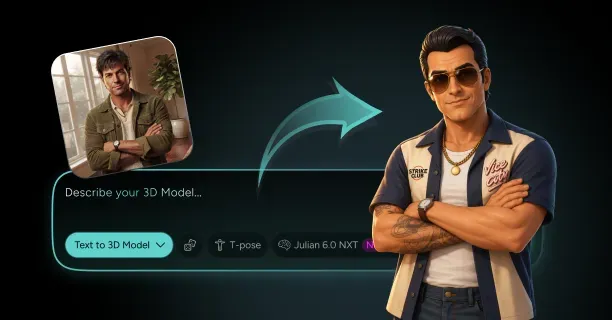
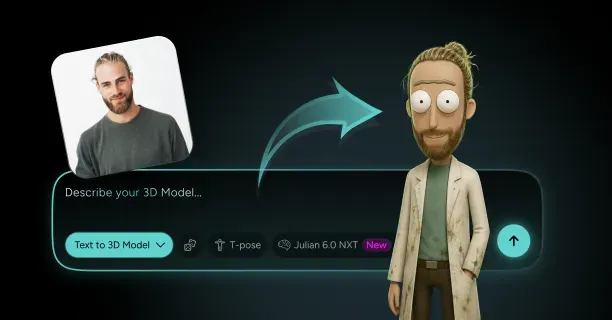
To turn yourself into a Family Guy-style character from a photo, upload a front-facing headshot at 2048 px or larger to Threedium together with a prompt that specifies side-by-side round eye pairs, a heavy protruding jaw, and flat unshaded color regions, then let the Julian NXT generator rebuild your features into a stylized mesh. Unlike a browser family guy character maker that returns a static PNG, this workflow produces a real textured model with PBR materials, a rig, and GLB, USDZ, or FBX export. The style is a reduction exercise: you keep roughly five identifying traits, being hair shape, eyewear, facial hair, chin mass, and skin tone, and you throw away everything else.
Everything on this page is style-inspired parody guidance. You are building an original character in the visual grammar of a well known prime-time animation house style, the same way somebody might draw themselves in a comic-book style or a paper-cutout style. Nothing here uses official assets, official character models, official rigs, or official artwork, and none of it is affiliated with the show, its studio, or its rights holders. Use it to make you, not to reproduce someone else's character.
Choosing a Reference Photo That Survives the Quahog Simplification
The house style deletes almost all of the information a normal portrait carries. There are no cheekbones, no nasolabial shading, no eyelid creases, no skin texture, and no rim light. What survives into the quahog character style is silhouette: the outline of your hair, the mass of your jaw, the thickness of your brows, the presence of glasses, and the shape of your facial hair. Pick a photo that reads those cleanly rather than one that flatters you.
Shoot straight on with the lens at eye level, using diffuse light from two sides so no hard shadow carves a fake crease into your cheek. A soft window plus a bounce card is enough. Keep the background plain and mid-value so the generator does not read a bookshelf edge as a hairline. If you wear glasses daily, keep them on, because circular or rectangular lens frames become one of the strongest identity anchors once the eyes flatten into ovals.
- One straight-on headshot at 2048 to 4096 px on the long edge, sharp at the jawline
- One three-quarter view so the generator can infer chin projection rather than guess it
- One full-body or waist-up shot if you want the outfit reconstructed instead of invented
- No beauty smoothing, no wide-angle selfie distortion, no sunglasses, no motion blur
Writing a Prompt That Describes Your Face in Family Guy Terms
The single biggest quality jump comes from translating your face into the vocabulary of the style before you type anything. Do not write "make me look like a cartoon." Write the geometry. The house style has a small, closed set of parts, and naming the specific part you want is what separates a generic cartoon yourself from photo result from something that actually looks like it belongs in the fictional town.
A workable prompt names five things in order: head shape, eye pair, chin template, hair shell, and outfit. For example: "adult male character in a flat 2D-inspired sitcom animation style, large rounded head, two separate white spherical eyes sitting side by side on the front of the face, thin curved single-line nose bridge, heavy rounded protruding chin with a soft crease, short dark brown hair as one solid shape, thick black eyebrows, green polo shirt, tan trousers, flat unshaded color regions, thick uniform black outline." That is specific enough for Julian NXT to hit the target on the first or second pass.
Never use the show's name, the studio's name, or a character's name inside your prompt. Describe the geometry instead. Naming a protected character biases the generator toward reproducing that character rather than stylizing you, and it puts your output on the wrong side of the parody line before you have even rendered a preview.
Generating Your First Family Guy-Style 3D Draft With Threedium's AI
With reference images and prompt ready, run the first generation from the turn yourself into a 3D character workflow. The generator reconstructs a base head from your photographs, then applies the stylization pass that pushes the proportions and flattens the shading. A first draft typically lands in the 25,000 to 60,000 triangle range before optimization, which is far more density than the style needs but gives you room to judge the forms before decimation.
Judge the first draft on four things only, and ignore everything else. Is the head-to-body ratio in the right neighborhood? Are the eyes mounted as two separate convex forms rather than sunk into sockets? Does the chin project forward past the lip line? Is the hair one closed shape rather than a clump of strands? If those four read correctly, every remaining problem is a texture or a tweak. If any of them read wrong, regenerate with a sharper prompt rather than trying to sculpt your way out of it.
Picking Your Eye Pair: Side-by-Side Ovals, Half-Lidded, or Glasses Circles
The eyes are the load-bearing element of this style, and they are the part that generic 3D tools get wrong most often. In this house style the eyes are not holes in a face. They are two separate rounded volumes mounted on the front of the skull, touching or nearly touching at the midline, with an upper lid that reads as a curved cap sliding over the sphere. There is no visible eye socket rim, no tear duct, no lower lid crease, and no sclera shadow.
You have three practical variants to choose from, and picking the right one for your own face is mostly about brow weight and how much of your iris shows when you are relaxed.
- Full open ovals: both spheres fully exposed, iris centered, lid cap sitting at the very top of the dome. Reads young, earnest, and slightly manic. Best if your resting expression is wide-eyed.
- Half-lidded: lid cap rotated down to cover the top 30 to 40 percent of the dome, iris partly occluded. Reads dry, tired, or sardonic. This is the safest default for adult characters and for anyone whose real eyes are hooded.
- Glasses circles: the frames become the dominant read and the eye domes shrink behind them. If you wear glasses, use this. It is the single strongest likeness anchor available in a style that has otherwise deleted your bone structure.
Matching Your Chin to a MacFarlane Jaw Template
After the eyes, the chin is where the seth macfarlane art style lives. The house language treats the lower face as a separate attached volume rather than as a continuation of the skull, and the shape of that volume is effectively the character's fingerprint. Getting yours right is what makes friends recognize you instantly instead of squinting.
Work from templates rather than from your actual jaw measurements. Look at your own face and decide which of the standard lower-face masses is closest, then let the generator exaggerate it. The exaggeration is the point: a chin that projects 15 to 25 percent past the lip plane reads as the style, while an anatomically accurate chin reads as a failed stylization.
| Jaw template | Form description | Projection past lip plane | Best real-face match |
|---|---|---|---|
| Ball chin | Single smooth sphere fused under the mouth, no crease | 20 to 25 percent | Round or soft-jawed faces |
| Cleft chin | Two adjacent spheres with a vertical valley between them | 20 to 30 percent | Strong dimpled or cleft chins |
| Jowl chin | Wide low mass sagging past the jaw corners, heavy cheeks | 10 to 15 percent | Fuller or older faces |
| Tapered chin | Narrow rounded wedge, minimal side mass, high jaw angle | 8 to 12 percent | Slim or heart-shaped faces |
| Shelf chin | Flat forward plane with a hard underside edge | 25 to 30 percent | Square, prominent jaws |
Geometrically, build the chin as a separate quad-sphere blended into the head mesh rather than as an extrusion of the jaw loop. That sounds like extra work, but it is what makes the crease behave. In the source style the seam where the chin mass meets the cheek is drawn as a single line, and a boolean-style union of two rounded volumes produces exactly that line for free when you apply an outline pass. Try to model it as a smooth continuous surface and the outline renderer finds nothing to draw, and the chin disappears.
Keep the underside honest. A common failure is a chin that looks perfect from the front and collapses at three-quarter view because the artist modeled a bulge on a flat plane instead of a volume. The underside of the chin mass should curve back toward the neck at roughly 45 degrees, and the neck itself should meet it well behind the front of the chin, never directly beneath it. If your model's neck attaches under the chin point, the profile reads as a melted snowman.
Finally, tie the chin to the mouth. In this style the mouth sits on the front face of the chin mass, not above it, and the upper lip line is where the two volumes meet. If you place the mouth too high, on the cheek plate, the whole lower face separates into unrelated parts. Keep the mouth's vertical center within the top 25 to 35 percent of the chin volume and the assembly holds together at any angle.
Simplifying Your Hairstyle Into One Solid Color Shape
Hair in this style is a helmet. It is one closed shell with a hard painted edge against the forehead, filled with a single flat color, and it does not have strands, cards, alpha planes, or highlights. If your generated draft has hair cards, delete them and rebuild. A shell of 800 to 2,500 triangles is plenty for anything short of a complicated updo.
Translate your real hair into three decisions: overall silhouette, hairline shape, and the presence or absence of a part. The silhouette is what people recognize from across a room. The hairline is what makes it look like your head rather than a wig sitting on it. The part, when it exists, is drawn as one curved line, not as a groove in the geometry, and it belongs in the texture rather than in the mesh.
Set the hair shell to intersect the scalp by 2 to 4 mm at real-world scale rather than sitting flush on it. A flush shell produces z-fighting and a visible seam in flat-shaded viewports, and the seam will show up in your GLB preview on every platform that does not sort transparency the way your modeling app does.
Translating Your Skin Tone Into Flat Family Guy Color Regions
Skin in this style is one flat color, full stop. There is no gradient from forehead to jaw, no blush on the cheek, no warm bounce under the chin. Where the style does add a second tone, it uses a hard-edged region rather than a soft falloff: a five o'clock shadow is a solid blue-gray shape with a crisp boundary, not an airbrushed haze.
Sample your actual skin tone from a well-lit photo, then shift it toward the style's palette. The house palette sits at moderate saturation and high value, which in practical terms means taking your sampled color, raising lightness by 8 to 15 percent, and pulling saturation down slightly so it does not compete with clothing. Store the result in an sRGB base color texture at 1024 x 1024 or 2048 x 2048, which is more than enough resolution for a texture made of solid fields.
Build your face texture as a small set of named regions rather than as a painting. Typical regions are base skin, lip line, brow shapes, eye whites, iris, pupil, stubble or beard block, and blush spot if you use one. Each region is a solid fill with a hard boundary, which means your texture compresses beautifully and stays crisp when scaled. Producing convincing family guy style art in 3D is mostly a discipline of refusing to blend.
Dressing Your Character in Show-Style Casual Wardrobe Staples
The wardrobe in this animation tradition is deliberately boring, and that is a feature. Characters wear one outfit forever, built from suburban staples: polo shirts, plain tees, cardigans, high-waisted trousers, simple skirts, and flat shoes. Clothing is modeled as part of the body silhouette, not as separate simulated cloth, so a shirt is really just the torso mesh painted a different color with a collar shape added.
Choose an outfit you actually wear, then strip it to two or three colors. Patterns almost never survive: a plaid shirt becomes a solid shirt, a graphic tee becomes a shirt with one simple shape on the chest. If a garment detail cannot be drawn with three lines, it does not belong in the model.
- Collars: model as a thin band with a visible notch, roughly 200 to 400 triangles
- Sleeves: cuff line goes in the texture as a hard color break, not in the geometry
- Belts: one solid band plus a rectangle buckle, no stitching, no holes
- Shoes: single fused shape per foot, no laces modeled, sole as a color band
Refining Body Proportions: Big Head, Round Torso, Short Legs
Adult characters in this style run roughly four to five heads tall, against about seven and a half for a realistic adult. The head is oversized, the torso is a rounded pear that is widest below the ribcage, the arms are short tubes with no visible elbow definition, and the legs are stubby with the knee sitting high. Children run closer to three and a half heads tall with a proportionally even larger skull.
Fix proportions in this order, because each one constrains the next: total height in heads, then head size, then torso width at the widest point, then leg length, then arm length. Adjusting arm length first and head size last guarantees you will redo the arms.
Watch the neck. In this style the neck is short and often barely visible, with the head sitting almost directly on the shoulders. A long neck instantly reads as a different, more elegant animation tradition. Keep visible neck height at or under 15 percent of head height, and make sure the trapezius area slopes rather than squares off.
Running the Griffin Silhouette Test on Your Draft Model
Before you commit to textures or rigging, run a silhouette test. Set every material to pure black, put a white background behind the model, and render orthographic front, side, and three-quarter views at small size, around 256 px tall. What you are looking for is whether the black shape alone still communicates the character.
The test catches four specific problems that are almost invisible in a shaded viewport. First, a chin that does not actually project, which shows up as a smooth curve from lip to neck. Second, hair that has become a blob because its notches are too shallow. Third, eye domes that do not break the head outline at three-quarter view, which means they are sunk rather than mounted. Fourth, a torso whose widest point has drifted back up to the chest, which kills the pear read.
Do the silhouette test at three sizes: 512 px, 256 px, and 96 px. Many models pass at 512 and fall apart at 96, which is roughly the size your character will appear as a Discord avatar, a stream corner overlay, or a marketplace thumbnail. If the identity survives 96 px, you are done.
Rigging Your Character for Stiff, Snappy Sitcom-Style Animation
A practical skeleton lands at 45 to 70 bones: a standard humanoid spine with three segments, clavicles, upper and lower limbs, a simplified hand with one bone per finger or even a single mitten bone, and a head chain. Skip the twist bones. Skip the toe articulation. This character will never do a naturalistic weight shift, and every bone you do not add is a bone that cannot deform your flat color regions into a smear.
The facial rig is where the effort goes. Threedium's automatic rigging can produce a 52 ARKit blendshape set, which gives you phoneme coverage, brow raises, blinks, and eye look directions out of the box, and which is what every mainstream face-tracking app expects. On top of that standard set, add a handful of custom shapes specific to this style: an overbite open, a wide flat grin, a lopsided smirk, and a jaw-forward shape that pushes the chin mass out during emphatic dialogue.
Exporting Your Quahog-Style Character as GLB, USDZ, or FBX
Once the model reads correctly and the rig behaves, decimate and export. This style compresses extremely well because it has no fine detail to preserve. A final character at 8,000 to 20,000 triangles is comfortable for real-time use, and you can push to 5,000 for mobile without visible loss if your outlines are shader-based rather than geometry-based.
| Format | Best for | Carries rig and blendshapes | Typical triangle budget |
|---|---|---|---|
| GLB | Web viewers, Three.js, Babylon, real-time preview | Yes | 8,000 to 20,000 |
| USDZ | iOS AR Quick Look, Apple ecosystem sharing | Partial, limited blendshape support | 5,000 to 15,000 |
| FBX | Unity, Unreal, Maya, Blender pipelines | Yes | Up to 50,000 |
| VRM | VTubing apps, social VR avatars | Yes, with expression presets | 8,000 to 25,000 |
| STL or 3MF | Resin or filament 3D printing | No, geometry only | Watertight, any density |
Check three things in the exported file before you use it anywhere. Confirm that the material count is one or two rather than a dozen, since split materials multiply draw calls and can break flat shading in engines that recalculate normals. Confirm that blendshape names survived export intact, because ARKit-driven apps match by exact name string and a renamed shape silently does nothing. Confirm the scale: most engines expect meters, and a character exported in centimeters will arrive one hundred times too large.
Why Round Eye Pairs and MacFarlane Chins Break Face Topology
The reason this style is harder to build in 3D than it looks is that its two signature elements, the mounted eye pair and the protruding chin mass, both violate the assumptions baked into standard face topology. Every face rig tutorial, every auto-retopology tool, and most generative models assume a face with recessed eye sockets and a jaw that flows continuously from the cheek. This style has neither. Understanding exactly where those assumptions break is what lets you steer a family guy ai generator toward the right result instead of fighting it.
Why the Round Eye Pair Breaks Standard 3D Face Topology
Standard face topology is built around two concentric edge loops surrounding each eye, sitting inside a socket that recedes into the skull. That layout exists for a reason: it lets the eyelids slide over the eyeball, it gives the orbicularis muscles somewhere to squash, and it keeps the deformation clean when the character squints. It also assumes the eyeball is behind the face plane.
In this house style the eyeball is in front of the face plane. The two domes sit on the front of the skull like headlights, each one a nearly complete sphere with only its rear third buried in the head. There is no socket, so there is nothing for the concentric loops to describe, and when an auto-retopology pass or a generative model applies its learned face layout, it does one of two wrong things. It either carves sockets into your character and drops the domes inside them, producing a face that looks like a realistic head wearing goggles, or it flattens the domes into painted discs on a smooth head, producing something that reads as a decal rather than a form.
The correct construction is separate geometry. Model each eye as its own closed sphere of roughly 300 to 600 triangles, positioned so that about 60 to 70 percent of the sphere is outside the head surface. The head mesh itself has a smooth front plate with no orbital detail at all, and the eyes simply intersect it. Do not boolean them together. Keeping them as separate objects preserves clean shading on both surfaces and lets you rotate the eyes independently for look-at animation without deforming a single vertex of the head.
The eyelid is the part people get wrong after they solve the socket problem. It is not a deforming skin flap. It is a second, slightly larger partial sphere that shares the eye's center point and is textured in the skin color, rotated down over the eye dome to close it. Because it is concentric, it slides perfectly with no stretching, and a blink becomes a single rotation value rather than a blendshape. This is how the style gets its characteristic snap: the lid cap moves as a rigid body, so the blink is instantaneous and mechanical rather than soft and organic.
Two practical consequences follow. First, your ARKit blink blendshapes must be wired to lid-cap rotation rather than to vertex morphs, or they will produce a soft realistic blink that fights the style. Second, the intersection ring where each eye dome meets the head is where your outline renderer will draw the eye's contour line, so that ring needs to be geometrically clean and consistent between the left and right eyes. An asymmetric intersection produces two visibly different eye outlines, and viewers read that as a broken face even when they cannot say why.
Finally, mind the gap and the tilt. The two domes are close together and their axes are nearly parallel, pointing forward, not splayed outward the way real eyes are set into an orbital arc. Splaying them by even 8 to 10 degrees per side, which is anatomically correct, makes the character look like it is trying to see around a corner. Keep them parallel or converged by a degree or two, and let the pupil position inside the dome do the work of directing gaze.
Modeling MacFarlane Chins: Ball, Cleft, and Jowl Variations
The chin in this style is the second structural violation, and it is the more subtle one. In anatomy, and therefore in every standard head mesh, the jaw is a continuation of the skull: the cheek flows into the jawline, the jawline flows into the chin, and the whole thing is one surface with varying curvature. In this style the lower face is a discrete attached volume, and the seam where it meets the rest of the head is drawn as an explicit line.
That distinction changes how you build. If you sculpt the chin as a bulge on a continuous head mesh, you get a smooth transition, and a smooth transition produces no outline. Your rendered character will have a chin you can see in a shaded view and cannot see in the final stylized render, because the thick-line pass has no curvature discontinuity to latch onto. The fix is to build the chin as an independent rounded volume that intersects the head, so there is a genuine crease at the join.
The three canonical variants each need slightly different construction. The ball chin is a single sphere, scaled to roughly 0.4 to 0.5 of head width, pushed forward until it clears the lip plane by a fifth of its own diameter, with the top third buried in the head. It is the easiest to build and the most forgiving under animation. The cleft chin is two overlapping spheres of equal size whose centers are separated horizontally by about 35 to 45 percent of one sphere's radius, producing a vertical valley where they meet. Do not model the cleft as a carved groove: a carved groove reads as a scar, while two fused balls read as the style. The jowl chin is a wider, flatter ellipsoid extended sideways past the jaw corners, with the lower edge drooping below the jaw line so it visibly overhangs the neck at three-quarter view.
Blending is where the craft is. You want the seam to exist without being a hard crack. In a subdivision workflow, keep the chin volume as a separate object during blockout, then bridge it into the head with a single ring of quads at the intersection and set that ring's crease weight to a mid value rather than full. In a sculpting workflow, use a low-strength smooth pass only along the top of the seam and leave the sides sharp. The target is a crease that survives at 256 px in your silhouette test but does not produce a visible polygon edge at close range.
Watch out for the animation consequence. Because the chin is a separate mass, jaw-open animation cannot simply rotate a jaw bone the way it would on a realistic head. Rotating a standard jaw bone will swing the entire chin volume down and away, opening a gap at the seam. Bind the chin mass so it rotates around a pivot placed near the ear line, not at the skull base, and add a corrective shape that fills the seam at maximum open. Alternatively, and more in keeping with the style, animate the mouth as a texture-driven or blendshape-driven shape on a static chin and never rotate the jaw at all. The source tradition largely does the latter, which is why the chin appears rigid even during shouting.
One last calibration: the chin's relationship to the nose. Draw an imaginary vertical line down from the tip of the nose in your side view. In this style the chin front should sit at or slightly forward of that line for most adult male characters, and slightly behind it for slimmer or younger characters. That one measurement does more to place your character correctly within the house style than any amount of texture polish, and it is the check to run before you commit to a family guy 3d model you plan to rig and animate.
The Nose Problem: Turning a Single Curved Line Into Geometry
In the source style the nose is often a single curved stroke: a line that comes down from between the eyes, hooks at the bottom, and ends. There are no nostrils, no wings, no septum, and frequently no visible tip volume at all. Translating a drawn line into a 3D form that produces that same line from every angle is genuinely difficult, and it is the third place where standard face topology gives you no help.
Three approaches work, with different tradeoffs. You can model a minimal geometric nose, a small wedge with a rounded tip and no nostrils, and let the outline shader draw its contour. This survives head rotation but tends to look too solid at front view. You can go fully flat and paint the nose line into the base color texture, which gives a perfect front view and disappears the moment the head turns. Or you can build a hybrid: a very shallow nose form, projecting only 3 to 6 percent of head depth, combined with a painted line that reinforces it at front angles.
Keeping Flat Color Regions Flat: Cel Shading Without Gradient Leaks
A flat-color character in 3D fights the renderer constantly. Every lighting model wants to add falloff, every engine wants to add ambient occlusion, and every material system wants to add a specular term. Producing genuinely flat regions means switching all of that off deliberately rather than hoping the values are low enough not to notice.
The reliable setup is an unlit or emissive-style material for the base color, with the outline handled separately. In glTF terms, that means the KHR_materials_unlit extension, which every serious GLB viewer supports and which guarantees the base color texture displays exactly as authored regardless of scene lighting. If you need some shading for depth, use a two-tone or three-tone ramp with hard steps rather than a smooth gradient, and put the step boundary at a consistent angle across the whole character.
- Metallic at 0.0 and roughness at 0.9 or above on every material, including eyes
- Ambient occlusion texture disabled or set to a flat white map
- Normal maps removed entirely, since they exist to create shading variation
- Base color textures exported at 1024 or 2048 px with no mipmap-induced color bleed at region edges
Thick Outline Rendering: Inverted Hull vs. Shader-Based Lines
Thick uniform outlines are the other half of the look, and there are exactly two production methods worth using. The inverted hull approach duplicates the mesh, flips its normals, scales it outward slightly, and renders it in solid black behind the original. The shader-based approach detects edges in screen space using depth and normal discontinuities and draws lines where it finds them.
Inverted hull is the safer choice for anything you will export and hand to somebody else. It is just geometry, so it works in any engine, in any web viewer, and in offline renders without configuration. The cost is roughly a doubling of triangle count, which is why keeping the base model at 8,000 to 15,000 triangles matters: a 30,000 triangle character becomes a 60,000 triangle asset once hulled. It also struggles at hard corners, where the offset shell can pinch or self-intersect, and it cannot draw interior lines that do not lie on a silhouette.
Screen-space outlines are cheaper and can draw interior detail lines, including the chin crease and the hair part, which the hull method misses. The catch is that they are a post-process, so they live in your engine's render pipeline rather than in the exported file. If you build your look around a custom Unity or Unreal outline pass and then export a GLB for the web, the outlines will simply not be there.
If your character is destined for multiple platforms, bake the essential interior lines into the base color texture and use inverted hull only for the exterior silhouette. Painted interior lines travel with the file, they cost nothing to render, and they guarantee the chin crease and hair part survive in a GLB viewer that has no idea what a post-process is.
Body Proportion Rules: Oversized Heads on Pear-Shaped Torsos
The torso should be widest at roughly 55 to 65 percent of the distance from shoulder to hip, which puts the widest point at the belly rather than the chest. Shoulders slope rather than square off, and the transition from neck to shoulder happens over a short distance with no visible trapezius bulk. Arms attach fairly low and forward, and they hang with a slight outward curve because the torso width pushes them out.
Legs are where beginners hedge. The instinct is to make them a bit short. The style wants them genuinely stubby, at roughly a third of total height, with a knee that sits high and a lower leg that is shorter than the thigh. Feet are small and often modeled as a single fused shoe shape. If your character can plausibly run, the legs are too long.
Handling Side Profiles in a Style Drawn Mostly at 3/4 View
Two-dimensional animation gets to cheat. A character drawn primarily at three-quarter view never has to reconcile that view with a true profile, and animators routinely redraw features in positions that could not coexist on a single solid head. In 3D you have no such luxury: your model must be correct from every angle simultaneously.
The specific conflict is the eye pair. At front view the two domes sit side by side on the face plate. At true profile, a mounted sphere means you see the near eye in full and the far eye protruding past the bridge of the nose, which looks alien. The source style solves this by simply drawing one eye at profile. Your 3D options are to accept the protrusion, to flatten the eye domes into shallower caps so the far eye stays hidden, or to add a shape key that slides the far eye back when the camera crosses a threshold angle.
For most uses, accept it. Real-time avatars, streaming overlays, and game characters are rarely seen at exact profile, and viewers tolerate the effect at anything past about 20 degrees off profile. If you genuinely need clean profiles, for instance because your character will appear in a side-scrolling game, flatten the domes so only 45 to 50 percent of each sphere sits outside the head, and accept a slightly less pronounced front view in exchange.
Mouth Shapes and the Overbite: Custom Blendshapes for Lip Sync
The mouth in this style has a distinctive default: a wide, slightly downturned line with the upper teeth often visible, sitting on the front plane of the chin mass. It is not a set of lips with volume. It is a shape, and the most reliable way to build it is as a shallow recessed pocket with a separate teeth object inside, rather than as deformable lip geometry.
The standard 52 ARKit blendshape set gives you comprehensive coverage for face tracking, and Threedium's automatic rigging can generate it. Those shapes are designed for realistic faces, though, so several of them will look wrong on a stylized head unless you tune them. Jaw shapes in particular will try to rotate a jaw that, in this style, should stay rigid.
- jawOpen: retarget to open the mouth pocket rather than rotating the chin mass
- mouthSmile variants: widen the mouth line horizontally, avoid raising cheek geometry
- mouthPucker and mouthFunnel: reduce intensity by 30 to 50 percent, since a flat face has no lip volume to purse
- Custom additions: overbite open, flat wide grin, one-sided smirk, chin-forward emphasis
Building Hair as a Single Mesh Shell Instead of Strands or Cards
Build one closed shell. It should be watertight, it should intersect the scalp rather than sit on it, and it should carry a single flat color with no highlight band. Its silhouette does all the work, which means the effort goes into cutting the outline: the hairline against the forehead, the notch above the ear, the sideburn shape, and any layer steps at the back.
A short style needs about 800 to 1,500 triangles. A medium or long style with visible layers needs 2,000 to 4,000. Beyond that you are adding detail the flat shading will never show. If your generated draft came back with 15,000 triangles of hair, decimate aggressively and check the silhouette rather than the wireframe.
Facial hair follows the same rule with one exception: light stubble is a texture, not geometry. A full beard is a shell that fuses into the chin mass. Anything in between, like a goatee or a moustache, is usually best as a shallow shell of 200 to 600 triangles so it breaks the silhouette at three-quarter view, since a purely painted moustache vanishes when the head turns.
Preserving Your Likeness Inside a Deliberately Simple Style
Rank your own features by how much they identify you, then map the top three onto the channels the style provides. For most people the ranking is hair silhouette first, then eyewear or facial hair, then chin mass, then skin tone, then a single accessory. If you have a distinctive feature outside that list, for example a very particular eyebrow shape or a visible scar, the style will let you keep exactly one of them if you commit to it as a hard-edged shape.
The test is comparative, not absolute. Put your reference photo next to a 256 px render of your character and ask whether the same three traits dominate both images. If your photo is dominated by your hair and your model is dominated by its chin, you have mis-spent your channels, and the fix is usually to exaggerate the hair silhouette rather than to tone down the chin.
This is also where a generative photo to 3D character workflow pays off more than a fixed-preset generator would. Because you can regenerate with different emphasis and compare drafts side by side, finding the right allocation of identity signals becomes an iteration problem rather than a guessing game.
Filters, Picrew, and Commissions: What Each Actually Delivers
Search results for this style are dominated by tools that produce a picture, so it is worth being precise about what each route hands you. Filters give you an image in seconds, commissions give you a polished image in days, marketplace models give you somebody else's geometry, and AI 3D generation gives you an asset you can rig, animate, print, and edit.
2D Family Guy Filters vs. Full 3D Models: What You Actually Get
A family guy filter on a social platform or a web image generator applies a learned style transform to your photo and returns a flat image, usually somewhere between 512 and 1024 px, often watermarked, and almost always at a fixed front-facing angle. It takes seconds, it costs nothing or nearly nothing, and it is genuinely fun. It is also the end of the road: you cannot turn the head, change the outfit, animate the mouth, or print it.
| Route | Output | Typical cost | Typical turnaround | Editable and animatable |
|---|---|---|---|---|
| 2D style filter or app | Flat image, one angle | Free to a few dollars | Seconds | No |
| Picrew or Perchance creator | Flat image from preset parts | Free | Minutes | No |
| Freelance 2D commission | High-quality illustration, source file sometimes | Roughly 20 to 150 USD | 2 to 10 days | Layered file only |
| Freelance 3D commission | Modeled, textured, sometimes rigged asset | Roughly 250 to 2,000 USD | 1 to 4 weeks | Yes |
| Marketplace stock model | Generic rigged character, not you | Roughly 20 to 200 USD | Instant download | Yes, but not your likeness |
| AI 3D generation | Textured, rigged, exportable model of you | Subscription or per-model credit | Minutes to hours | Yes |
Match the tool to the job. For a funny profile picture this afternoon, use a filter. For a character you will use across a stream, a game jam, stickers, and a printed figure, generate a model.
What Fiverr and Sketchmob Artists Charge for Family Guy-Style Portraits
Freelance marketplaces are full of illustrators offering cartoon-style portraits in various house styles. On Fiverr, a single-character 2D portrait in a specific animation style typically runs from about 20 to 80 USD at entry level and 100 to 250 USD for experienced sellers with strong portfolios, with delivery in two to seven days and one or two revision rounds included. Sketchmob and similar commission platforms sit in a comparable band, sometimes higher because they lean toward vetted artists.
Those numbers are for a flat illustration. A rigged 3D character in a stylized house style is a different product entirely, and freelance quotes for that work usually start around 250 to 400 USD for a simple model and climb past 1,000 to 2,000 USD once you want a full facial rig, blendshapes, and multiple export formats. Turnaround stretches to two to four weeks, and revisions are billed separately after the included rounds.
Commissions are worth it in two situations. The first is when you need art direction rather than execution: an experienced artist will make judgment calls about your likeness that no prompt can encode. The second is when the result is commercially important enough that you want a human accountable for it. For everything else, the economics favor generating a draft first and, if you want the human touch, using it as the brief for a much cheaper refinement pass. Threedium's enterprise tiers include exactly that kind of refinement by human 3D artists, which collapses the gap between the two approaches.
Perchance and Picrew Character Creators: Fun, but Not Export-Ready
Picrew hosts thousands of user-made dress-up style character makers, and Perchance hosts generator pages that assemble characters from text prompts or random tables. Both are free, both are genuinely enjoyable, and both are frequently what people find when they search for a family guy character creator. Neither produces anything you can take into a 3D pipeline.
Picrew makers are built from preset 2D parts drawn by the maker's creator, so your options are limited to whatever they drew, and the output is a flat PNG at whatever resolution the maker allows, typically a few hundred pixels square. Many Picrew makers also carry usage restrictions set by their authors, commonly prohibiting commercial use or requiring credit, which matters if you were planning to use the result as a logo or on merchandise.
Where they are genuinely useful is as reference. Building a character in a Picrew maker takes five minutes and produces a clear visual target, which you can then describe in a prompt or upload as a style reference alongside your photo. Treat them as a mood board tool rather than a competitor to the 3D model generation workflow.
When a Rigged Marketplace Model From TurboSquid or Sketchfab Makes Sense
TurboSquid, Sketchfab, and CGTrader all carry stylized cartoon characters, typically priced between 20 and 200 USD depending on rig quality and licence terms. For a background character, a crowd filler, or a base mesh to modify, buying one is often faster than generating or commissioning.
The obvious limitation is that a marketplace model is not you. It is somebody, and the whole point of a turn yourself into a family guy character project is that the somebody should be you specifically. Retopologizing a purchased head to match your likeness is real work, usually more than generating a fresh model from your own photos.
Check the licence before you buy, and verify the rig. Royalty-free in marketplace terms usually means you can use the asset in a project but cannot resell or redistribute the model itself in editable form, which quietly rules out some game and metaverse scenarios. Plenty of listings also advertise rigged while shipping a body skeleton with no facial controls at all, which is useless if you wanted lip sync.
Why Style-Inspired Framing Keeps Your Character on the Right Side of IP
This deserves plain language. An art style is not itself protectable in the way a specific character is. What is protected is the expression: the particular characters, their names, their designs, their voices, the show's logos, and its official artwork. A character of yourself, drawn in a general visual idiom associated with a studio, occupies very different ground from a copy of a specific protected character.
Practical rules follow from that distinction, and they are easy to keep.
- Model yourself or an original character, never a recognizable protected character from the show
- Do not use the show's title, logo, character names, or catchphrases in your model name, texture, or listing
- Do not upload or trace official artwork, screenshots, or ripped assets as reference or as textures
- Describe your result as style-inspired or as a parody-style original character, not as official or licensed
- Be more conservative for commercial use than for personal use, and get legal advice before selling at scale
Personal use, meaning an avatar, a stream overlay, a printed figure on your desk, or a gift, is where the vast majority of these projects live and where the risk is lowest. Commercial use, meaning merchandise, paid content, or anything trading on association with the show, is where you should slow down. The distinction is not about how good your model is; it is about whether an ordinary viewer would think it came from, or was endorsed by, the rights holder.
Using Your Quahog-Style 3D Character for Streaming, Games, and Printing
Once you have an exported model, the practical uses split into three families, each with its own preparation checklist. Streaming and VTubing want a VRM or GLB with a working ARKit blendshape set and a low triangle count for stable framerate alongside a game capture. Game engines want an FBX with a clean humanoid skeleton and materials consolidated into as few slots as possible. Printing wants a watertight STL or 3MF with the rig stripped and thin features thickened.
For VTubing specifically, the flat-shaded look is an advantage. A character with no normal maps, one material, and 10,000 triangles will run at full framerate on a mid-range machine while your game eats the GPU. Verify that the 52 ARKit shapes are named exactly as the standard specifies, since face-tracking apps match by string, and confirm that your blink is driven by lid-cap rotation so it snaps the way the style expects.
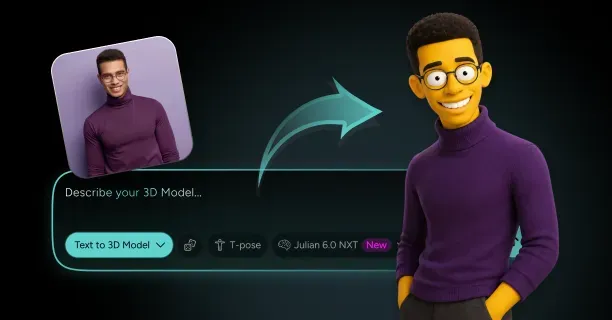
Neighboring house styles reuse this pipeline with different templates: a construction-paper idiom has almost no 3D volume, and a yellow-skinned suburban idiom leans on overbites and bulbous eyes. Because Threedium treats style as a prompt and reference problem rather than a fixed preset, the techniques transfer; the templates do not.
Frequently Asked Questions About Family Guy Character Makers
Common questions about building a character in this style, covering free tools, legality, printing, and the specific technical problems that trip up AI generators.
Is There a Free Family Guy Character Maker?
There is no official free character maker from the show's rights holders. What exists are third-party tools: free Picrew makers built from user-drawn parts, free Perchance generator pages, and free tiers on various AI image generators that will apply a cartoon style to your photo. All of them output flat images, and most of the free tiers watermark or limit resolution.
For 3D output, free options are thin. You can model a character yourself in Blender, which is free software but a substantial time investment, realistically dozens of hours for a first stylized character with a facial rig. AI 3D platforms typically offer a limited free tier or trial credits that let you generate a draft, with paid tiers required for higher resolution textures, full rigging, and unrestricted export.
How Do I Make Myself Into a Family Guy Character?
Take a well-lit front-facing photo plus a three-quarter view, write a prompt that describes your face in the style's own terms rather than naming the show, generate a 3D draft, then refine the eye pair, chin template, hair shell, and proportions before rigging and exporting. The whole loop takes under an hour for a first usable result and a few more hours if you want it polished.
The step people skip is the translation step. Before you generate anything, decide which jaw template matches your face, which eye variant matches your resting expression, and which single silhouette feature carries your identity. Writing those three decisions into your prompt does more for likeness than any amount of post-generation sculpting.
What Is the AI Filter That Turns Photos Into Family Guy Characters?
There is no single official filter. Several general-purpose AI image tools and social platform effects can produce a cartoon-styled version of a photo that leans toward this house style, and they appear and disappear regularly as platforms update their effect libraries. Search results for a specific named filter usually point to a general cartoon effect rather than a dedicated one.
A generative 3D approach differs structurally. Instead of restyling your photo's pixels, it reconstructs a head and then rebuilds it at the style's proportions, which is why the head grows, the legs shorten, and the chin projects. If a filter result has felt subtly wrong to you, that proportion rebuild is the missing piece.
Can I 3D Print My Family Guy-Style Character?
Yes, and this style prints better than most. Export as STL or 3MF, merge the eye domes and hair shell into the body so the model is a single watertight solid, remove the rig, and thicken any feature under 1.5 mm wall thickness. A figure at 60 to 120 mm tall is a good desk-scale target on either resin or filament.
Run a mesh integrity check before slicing. The two areas that commonly fail are the chin, where blended spheres can leave an interior self-intersection, and the neck-to-shoulder junction, where a short neck can create a zero-thickness sliver. Blender's 3D Print Toolbox add-on or your slicer's repair function will flag both.
Is It Legal to Sell Family Guy-Style Art of Myself?
This is a legal question and the honest answer is that it depends on jurisdiction and specifics, so treat what follows as practical orientation rather than legal advice. Broadly: styles are much harder to protect than specific characters, and an original character of yourself drawn in a general animation idiom sits on far safer ground than a reproduction of a protected character. Commercial sale raises the stakes considerably compared with personal use.
The factors that increase risk are the ones that suggest association with the rights holder: using the show's name or logo in your product listing, using character names, replicating a specific protected character's design, or marketing in a way that implies official endorsement. The factors that reduce risk are keeping the character original, describing the work as style-inspired, and avoiding all official assets and marks.
If you plan to sell at any meaningful volume, consult an intellectual property lawyer in your jurisdiction before you list. That is a few hundred dollars of consultation against a business decision, and it is the only way to get an answer that actually applies to your situation.
Can I Use a Family Guy-Style Avatar for VTubing or Streaming?
Yes, and it is one of the best uses for this style. Export as VRM for dedicated VTubing applications or GLB for browser-based overlays, keep the model at 8,000 to 25,000 triangles, and make sure the 52 ARKit blendshapes are present and named to spec so face tracking maps correctly. The flat-shaded, single-material construction means it costs almost nothing to render alongside a game.
On the platform side, keep your framing style-inspired: name your character something original, do not present it as an official show character, and be aware that some platforms have their own rules about content resembling protected properties. Personal streaming use is generally the lowest-risk category, but monetized content that trades on the resemblance is a different conversation.
Why Do AI Generators Struggle With the Family Guy Eye Shape?
Because the eyes in this style sit in front of the face rather than inside it, and almost every model of a human head that a generator has learned from puts eyes in recessed sockets. When the generator applies its learned face structure, it either carves sockets and sinks the domes into them, or it flattens the domes into painted discs. Both are the model doing the anatomically sensible thing in a style that is deliberately not anatomical.
The fix is prompt specificity plus post-generation correction. Describe the eyes explicitly as two separate spherical volumes mounted on the front of the head with no eye sockets, and exclude recessed sockets and orbital shading in your negative guidance. That gets most generations into the right territory.
If a draft still comes back with sunken eyes, do not sculpt your way out of it. Delete the eye geometry, smooth the face plate flat, and add two fresh spheres with about 60 to 70 percent of each sphere outside the surface. It takes a few minutes, it produces cleaner topology than any repair attempt, and it gives you independently rotatable eyes for look-at animation as a bonus.