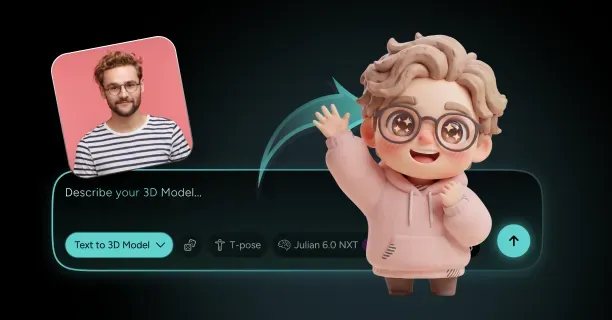
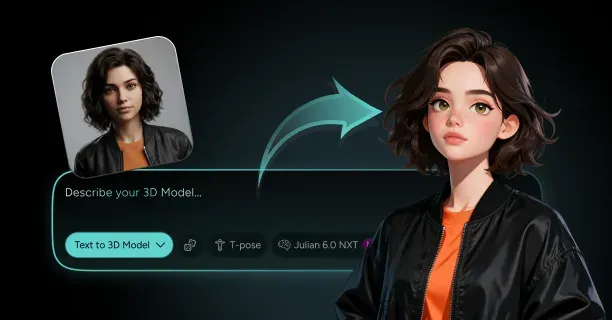
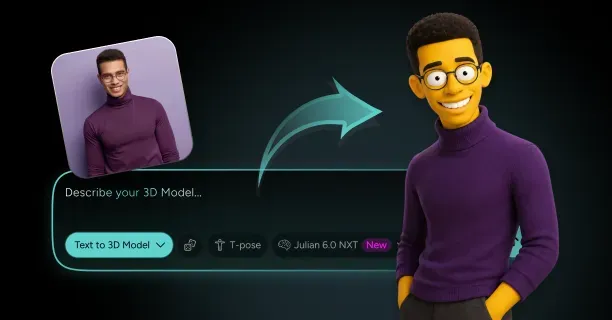
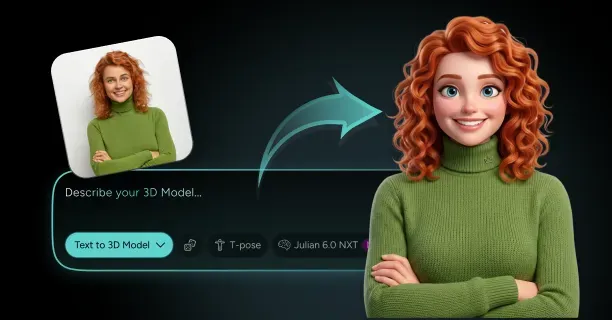
How Do You Turn Yourself Into a 3D Caricature From a Photo?
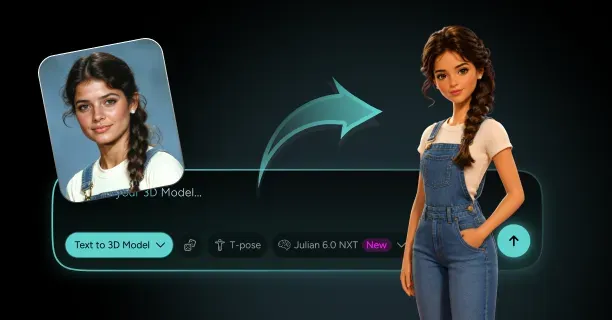
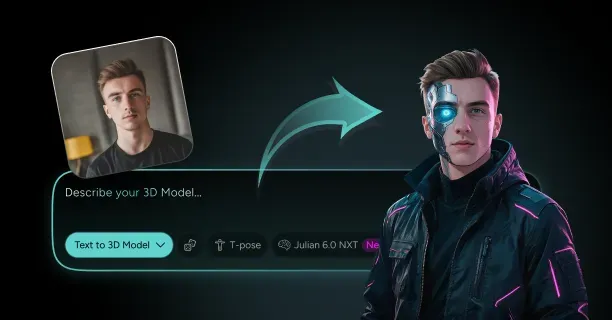
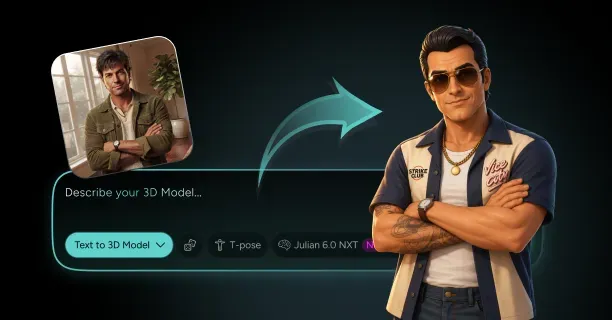
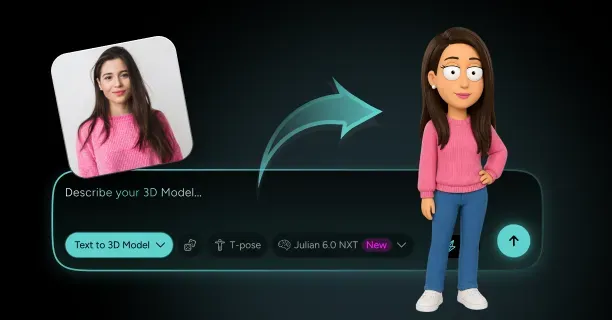
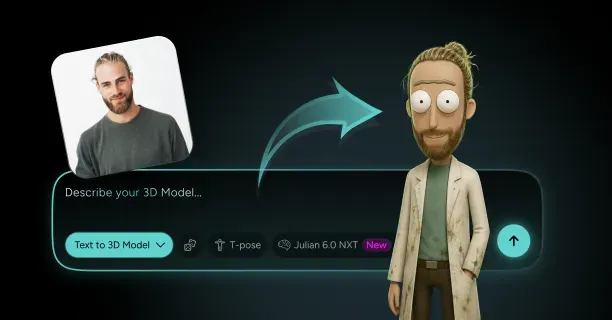
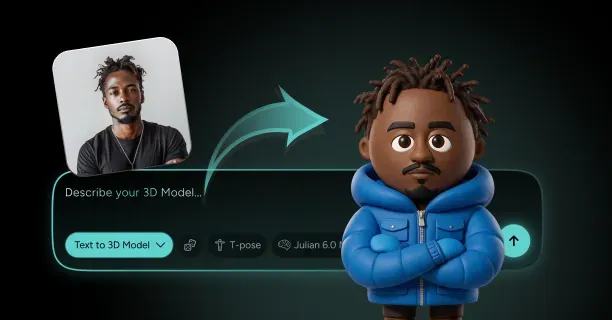
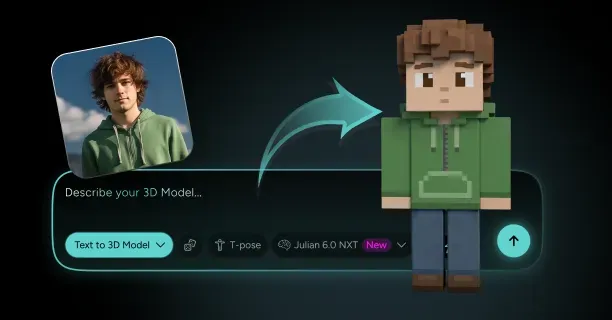
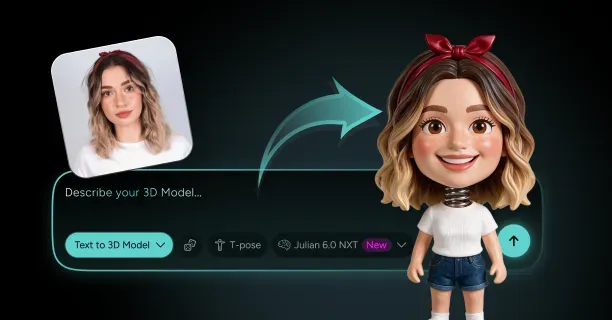
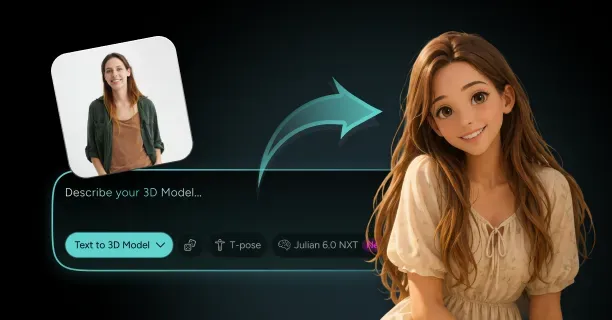
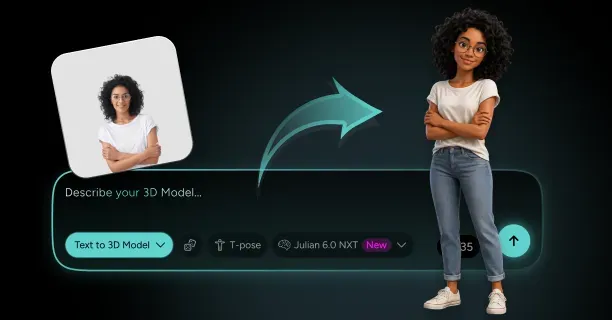
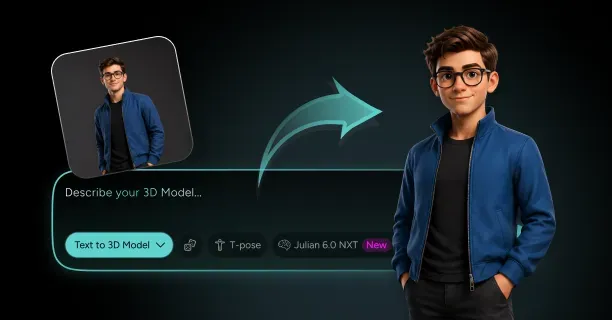
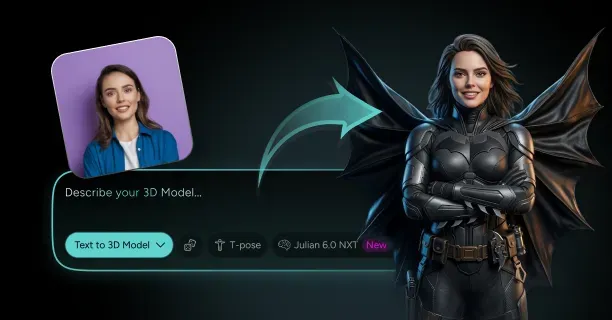
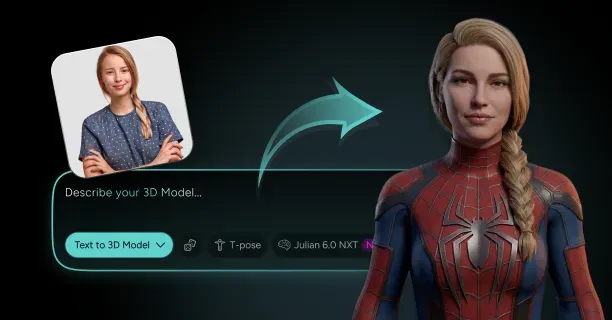
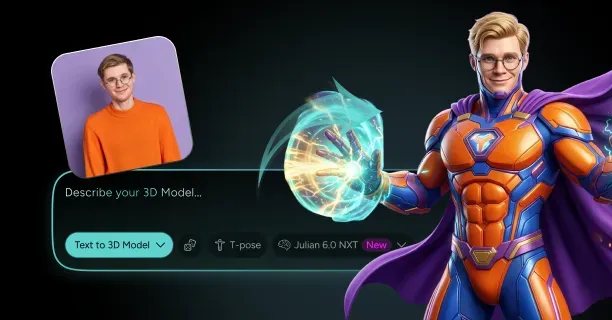
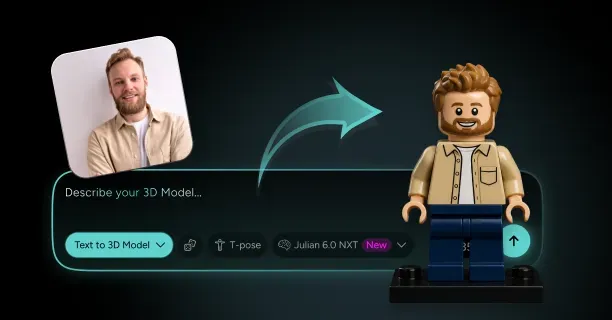
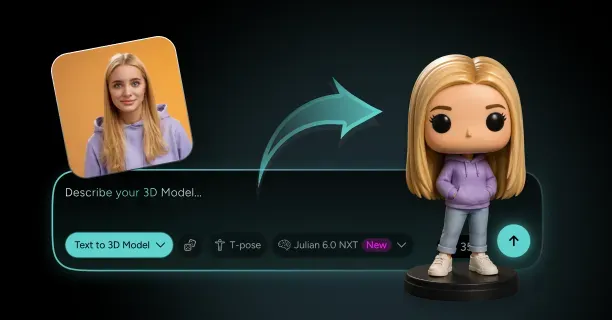
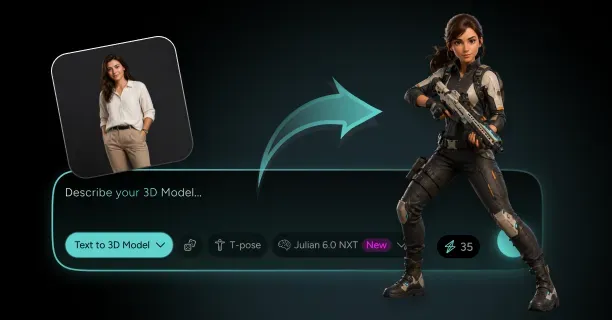
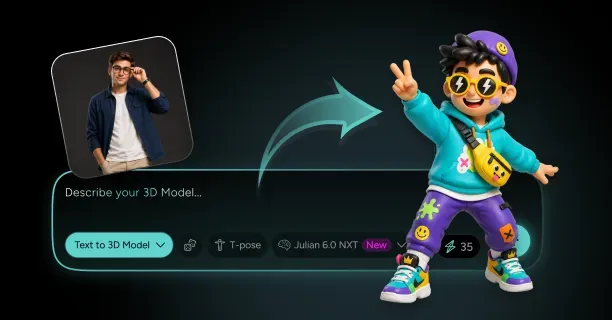
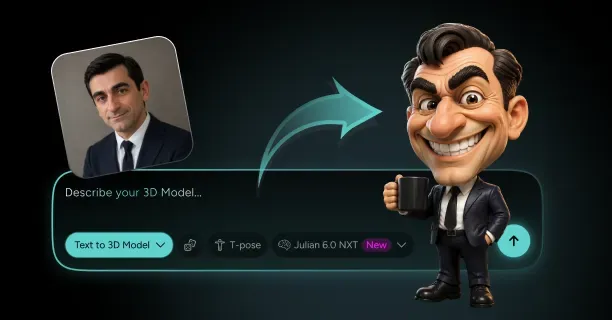
To build a 3d caricature from photo references, upload two or three sharp images of your face to Threedium and prompt its Julian NXT generator for a caricature bust or full figure, naming the two or three features you want pushed. Unlike almost every 3d caricature maker that ranks for this search, which returns a flat image rendered in a 3D style, Threedium returns an actual mesh with PBR textures and clean topology, exported as GLB, USDZ, or FBX. From there you either drop it into a web viewer or convert it to a watertight file and print it as a desk statue.
The hard part is not generation, it is judgement. A caricature only works when the exaggeration lands on the right features, and the right features are the ones that already deviate from an average face. This page covers the workflow end to end, then the caricature theory that decides whether the result reads as unmistakably you or as a stranger with a big nose.
Two neighbouring formats solve different problems. If you want a nodding spring-neck novelty rather than a solid statue, the bobblehead format is the better starting point. If you want cute rather than exaggerated, with soft rounded features and no distortion of your actual landmarks, ask for a chibi treatment instead. Caricature is the only one of the three that deliberately amplifies what is unusual about your face.
Which Photo Angles Capture the Features a Caricature Needs to Exaggerate?
A caricature needs depth information that a single selfie cannot supply. The exaggerations that matter most in 3D are depth exaggerations: how far the nose projects, how far the chin recedes, how much the brow overhangs the eyes. A frontal photo flattens all three. Shoot a straight-on front view, a true profile at 90 degrees, and a three-quarter view at roughly 45 degrees, all in the same lighting, same session, same hair.
Resolution and lens choice matter as much as angle. Aim for 2048 px or more on the long edge with the whole head and both ears inside the frame, shot in flat diffuse light. Avoid arm's-length selfies: a phone front camera sits around a 24 to 28 mm equivalent focal length, which inflates the nose and shrinks the ears. That is a false caricature the generator will happily amplify into a wrong face. Step back and use the 2x or 3x telephoto, or anything in the 50 to 85 mm equivalent range.
- Include a neutral expression frame plus one frame of your natural smile. The neutral shot gives clean landmark geometry, the smile shot tells the generator what your expression actually does to your cheeks and eyes.
- Pull hair back off the forehead in at least one shot. Hairline position is one of the strongest proportional cues in caricature, and a fringe hides it completely.
- Shoot glasses on and glasses off if you wear them daily. You will want the option of treating the frames as a separate silhouette element rather than baked geometry.
- Skip heavy directional light. Hard shadows under the nose and jaw get interpreted as surface detail and end up as permanent dents in the sculpt.
Writing a Caricature Prompt That Names Your Standout Features
Generic prompts produce generic results. Writing "make me a caricature" gives the model no information about which of your features deviate from average, so it falls back on the statistically common caricature moves: bigger head, bigger eyes, wider grin. That is a cartoon, not a caricature of you. The prompt has to do the diagnostic work that a human caricaturist does in the first ten seconds of looking at a subject.
Name features in the form of direction plus magnitude. "Long narrow face, high forehead, strong aquiline nose pushed 40 percent longer, small deep-set eyes, prominent chin" is a workable brief. "Funny version of me" is not. Add the format explicitly: bust versus full figure, head-to-body ratio, pose, and finish. A complete prompt for a photo to caricature pass might read: "caricature bust of the reference subject, 1:1.5 head-to-body ratio, exaggerate the long jaw and high hairline, narrow the eyes slightly, painted vinyl finish, neutral grey base, T-pose arms at sides."
Then iterate rather than rewriting from scratch. Change one variable per generation so you can attribute the difference. If the nose came out too subtle, reissue the same prompt with the nose magnitude raised and everything else identical. Threedium's 3D model generation workflow is fast enough that four or five controlled iterations cost less time than one round of notes with a freelance sculptor.
Choosing an Exaggeration Level: Gentle Cartoon Push vs Full Distortion
Exaggeration is a dial, not a switch, and the correct setting depends almost entirely on who the piece is for. A retirement gift handed to a colleague in front of forty people wants a gentle push of 15 to 25 percent on one or two features: recognisable, flattering, safe. A caricature for your own desk, or for a friend with a robust sense of humour, can run to 60 or 80 percent distortion and be funnier for it.
The useful mental model is percentage displacement from your actual measurements. If your nose is already 10 percent longer than an average nose relative to face height, a gentle caricature takes it to 20 percent longer and a heavy one takes it to 60 percent. Every level is amplifying the same underlying deviation, so likeness survives at any setting as long as you amplify the right thing.
| Exaggeration level | Feature displacement | Typical head-to-body ratio | Best for |
|---|---|---|---|
| Gentle | 15 to 25 percent | 1:3 to 1:4 | Corporate gifts, wedding cake toppers, client-facing pieces |
| Standard | 30 to 50 percent | 1:2 | Desk statues, birthday gifts, the default caricature look |
| Heavy | 60 to 90 percent | 1:1 to 1:1.5 | Roast gifts, comic props, deliberately absurd shelf pieces |
| Extreme | 100 percent and up | 1:1 or head-only | Stylised art pieces where recognition is secondary |
How Threedium's AI Amplifies What Deviates From the Average Face
The underlying principle of every serious caricature system, human or computational, is the same: a face is described as a set of landmark positions, an average face is described the same way, and caricature is the operation of pushing each landmark further along the vector that separates the two. This is not a new idea. Computational caricature generators built on exactly this logic date back to research work at MIT in the early 1980s, and every automated ai caricature generator since has been some refinement of it.
What a modern generative pipeline adds is that it does not need you to hand-place landmarks or define an average. It infers facial structure from the reference images, has an implicit sense of population norms from training, and produces the amplified result directly as geometry rather than as a warped 2D image. Threedium's Julian NXT generator handles the whole chain in one pass: reconstruction from your photos, stylisation toward the caricature target described in your prompt, UV unwrapping, texture generation, and polygon optimisation.
The practical consequence for you is that caricature exaggeration works best when your prompt describes deviations rather than absolutes. "Big nose" is an absolute and the model has to guess what big means. "Nose longer and more hooked than average, everything else close to baseline" is a deviation instruction and produces a far more targeted result. You are steering the amplification, not requesting a shape.
Previewing the Caricature Mesh: Checking Your Likeness From Every Angle
The single biggest advantage of a real mesh over a 2D caricature image is that you can orbit it. A flat caricature is tuned for one viewing angle and falls apart everywhere else. A real likeness sculpting pass has to hold up at 360 degrees, because a printed statue on a desk gets seen from every direction over its life.
Run a disciplined review rather than a casual spin. Check the front for symmetry and feature placement, the profile for nose projection and chin depth, the three-quarter for cheekbone and jaw transition, and the top-down for skull mass and hair volume. The three-quarter is where most caricatures either sing or fail, because it is the only view that shows both the frontal proportions and the depth exaggerations at once.
- View the mesh at thumbnail size, roughly 80 px tall, with the texture hidden. If the silhouette alone still reads as the subject, the caricature is working.
- Toggle to flat grey matcap shading. Texture and skin tone flatter a weak sculpt; grey clay shading exposes lumpy volumes and asymmetric landmarks immediately.
- Mirror the model horizontally and look again. Faces have real asymmetry, and a flipped view resets your eye so you notice errors your brain had normalised.
- Compare side by side with the original profile photo at matched scale. Nose projection and chin recession are the two measurements worth checking numerically.
Dialing In Head-to-Body Ratio: Why Caricatures Run 1:1 to 1:2 Proportions
An adult human runs roughly 1:7.5 head-to-body, meaning the head fits about seven and a half times into the full height. Heroic illustration pushes that to 1:8. Caricature runs violently the other way, typically 1:1 to 1:2, because the head is where the entire joke lives and everything below the neck is a supporting stand for it. That is the defining geometry of the big head small body figurine silhouette.
Different formats sit at different points on that scale, and the choice is not arbitrary. A 1:1 ratio, where the head is as tall as the entire body, reads as a pure comic bust on legs and works for heavy exaggeration. A 1:2 ratio leaves enough body to carry a pose, a uniform, or a prop, which matters if the caricature is meant to say something about the person's job or hobby. Between 1:3 and 1:4 you are in bobblehead and figurine territory, where the head is oversized but the body is still doing recognisable human things.
Whatever ratio you pick, keep the neck honest. The most common failure in a generated big head small body figurine is a neck that visually cannot support the skull, which reads as broken rather than stylised. Widen the neck cylinder to at least 35 to 45 percent of the jaw width and let the trapezius flare into the shoulders, and the piece looks designed instead of glitched.
Refining Nose, Jaw, and Eye Landmarks Without Breaking the Likeness
Refinement is a subtractive process: you are correcting the two or three landmarks the model got wrong, not resculpting the face. Work in this order: nose, jaw, eyes. The nose sets the centre of the face and every other proportion is read relative to it, so fixing eyes first means fixing them twice. For the nose, three measurements carry the likeness: length from brow ridge to tip, projection from the face plane, and bridge profile, meaning straight, convex, or concave. Get those right and nostril shape barely matters at figurine scale. For the jaw, the decisive number is the ratio of bigonial width, the width across the jaw angles, to bizygomatic width, the width across the cheekbones. A wide-jawed subject caricatures toward a square trapezoid, a narrow-jawed subject toward a taper.
Eyes are where amateurs overreach. Caricature rarely benefits from enlarging eyes: that move belongs to chibi and anime stylisation. What caricature does with eyes is adjust spacing, tilt, and lid exposure. Deep-set eyes get deeper, close-set eyes get closer, a heavy upper lid gets heavier. If your generated result has big round eyes on an otherwise distorted face, it drifted into cartoon and needs the prompt corrected.
Do not fix asymmetry. Real faces are asymmetric, and a perfectly mirrored caricature loses the specific crookedness that makes people say "that is exactly him." Preserve at least the natural eye-height difference and any jaw or smile bias.
Adding a Signature Pose, Props, and Hobby Details to the Body
With a caricature body reduced to one or two head-heights, the body cannot carry anatomy, so it carries identity instead. Props, clothing, and pose are doing the work that a full-length portrait would do with posture and physique. This is where a caricature becomes a gift rather than a likeness test.
Prompt props as part of the figure description, not as an afterthought. "Holding a chef's knife in the right hand, apron over a chef's whites, left hand on hip" gives the generator a coherent body brief. Keep the prop count to one or two hero objects: a caricature body at this scale simply has no room for a laptop, a coffee cup, a dog, and a guitar without turning into visual noise.
- Scale props up, not down. On a 1:2 figure, a normally sized guitar disappears. Oversizing the hero prop by 20 to 30 percent keeps it readable at 120 mm print height.
- Anchor props to the body. Free-floating objects held by a fingertip become fragile print geometry and usually snap during support removal or shipping.
- Pick a pose that reads in silhouette: arms crossed, hands on hips, one arm raised. Arms hanging straight down merge into the torso and waste the pose entirely.
- Use clothing as a period and personality marker. A specific jersey, lab coat, or uniform communicates more in one glance than any facial detail at this scale.
Texture Choices: Painted Vinyl Look vs Sculpted Clay Finish
Two finishes dominate 3D caricature output, and they suit different destinations. The painted vinyl look uses flat or near-flat colour blocks, low roughness variation, hard edges between colour zones, and no skin pore or fabric microdetail. It reads as a manufactured collectible, photographs well on a web page, and is the safer choice for full-colour printing because flat colour zones survive the printer's limited gamut.
The sculpted clay finish goes the other way: a single monochrome material, visible tool marks, subtle subsurface warmth, and all the information carried by form rather than colour. It reads as a maquette from a sculptor's studio and is the right choice if you plan to print in a single resin and hand-paint, or if you want the piece to look like art rather than merchandise.
Technically, both come out of the generator as PBR material sets: base colour, roughness, metallic, and normal maps, typically at 2048 x 2048 for a figure of this complexity and 4096 x 4096 if the face needs to hold up in close-range AR viewing. If the destination is a full-colour printer rather than a screen, the roughness and normal maps are ignored entirely and only the base colour map is used, which is a good reason to keep that map clean and unambiguous.
Exporting Your Caricature as GLB, USDZ, or FBX for Print or Web
Pick the export by destination rather than by habit. GLB packs geometry, textures, and materials into a single binary file and is the right answer for web viewers, three.js and Babylon scenes, and anywhere the model gets embedded in a page. USDZ is the format iOS uses for AR Quick Look, so it is what you send if you want someone to place the caricature on their real desk through an iPhone camera before committing to a print. FBX is the interchange format for Blender, Maya, 3ds Max, and Unreal, and it is what you export if any further sculpting, rigging, or rendering is planned.
For printing, none of the three is the final format. You will convert to STL for monochrome printing or to a colour-capable format such as 3MF, colour OBJ with a PNG texture, or VRML for full-colour output. That conversion step is where mesh problems surface, so treat the GLB or FBX as a master and the print file as a derivative you can regenerate. The trade-offs between all of these are laid out in more detail in the 3D file format reference.
On polygon count: a generated caricature typically lands in the 60,000 to 150,000 triangle range, which is comfortable for print and heavy for web. Decimate to 25,000 to 60,000 triangles for a browser viewer. Caricatures decimate gracefully because their forms are large and smooth, so keep the dense version for print.
What Caricature Rules Make a 3D Exaggeration Still Look Like You?
Caricature has a working theory behind it, and knowing it is the difference between prompting effectively and rolling dice. The rules below are the ones professional caricaturists apply in seconds, and each translates into something you can write in a prompt or fix in a refinement pass.
Why Exaggeration Starts From the Average Face: The Deviation Principle
The deviation principle states that caricature is not exaggeration of features, it is exaggeration of differences from the norm. Your nose is not caricatured because it is a nose, it is caricatured because it is longer, wider, or more hooked than the average nose relative to your face. Amplify the difference and you amplify identity. Amplify a feature that is already average and you destroy identity, because you have introduced a deviation that was never yours.
This is why a caricature of someone with a small, neat nose should shrink it further, not enlarge it. Beginners reflexively make everything bigger, which is why beginner caricatures all look like the same person. Direction matters more than magnitude. In practice, the diagnostic step is to compare mentally against a generic face and list every departure: face length, hairline height, jaw width, nose projection, eye spacing, lip fullness. Each departure becomes a vector, and caricature is simply multiplying every vector by the same factor.
Finding Your Two or Three Anchor Features Before Distorting Anything
Amplifying every deviation equally produces a technically correct caricature that feels flat. Good caricature is hierarchical: it picks two or three anchor features, pushes them hard, and treats everything else as supporting cast that gets pushed gently or not at all. This is a compositional decision and no generator will make it for you.
To find your anchors, ask what someone would mention if they had to describe you to a stranger in a crowded room without pointing. Usually it is a mix of one facial structure item, such as a strong jaw or a high forehead, and one non-facial item, such as thick-framed glasses, a shaved head, or a specific beard. Those are the anchors. Everything else is context.
- Anchor candidates from bone structure: jaw width, chin projection, brow ridge, cheekbone height, skull length. These survive at any print scale and any exaggeration level.
- Anchor candidates from soft tissue: nose profile, lip fullness, eyelid heaviness, nasolabial depth. Strong at bust scale, weaker on a 100 mm figure.
- Anchor candidates from the silhouette layer: hair volume, glasses shape, beard mass, headwear. These read from across a room and are the most reliable anchors for small prints.
Once you have named them, write them into the prompt in priority order and give only the anchors an explicit magnitude. The rest of the face should be described as "close to reference" so the generator leaves it alone.
The Likeness Paradox: Why a Good Caricature Reads More Like You Than a Photo
There is a well-observed effect in portraiture and face-perception research that a well-made caricature can be recognised faster than an accurate portrait of the same person. The reason is that human face recognition appears to encode faces relative to a population norm rather than storing absolute measurements. A caricature exaggerates exactly the coordinates that the encoding cares about, so it hits the stored representation harder than a literal likeness does.
The practical implication for a 3D caricature is that fidelity to the photograph is the wrong success metric. Nobody holds your figurine next to your passport photo and measures; they glance at it from two metres away and either say your name or not. If the exaggerated version triggers recognition faster than a scanned, photorealistic bust would, the caricature has done its job, even though every individual measurement is objectively wrong.
Push-and-Pull Balance: Enlarging One Feature Means Shrinking Another
Exaggeration works by contrast, and contrast is relative. If you enlarge the nose but leave everything else at 100 percent scale, the head simply grows and the nose stops looking large. To make a feature read as exaggerated, you have to shrink its neighbours at the same time. This is the push-and-pull rule, and it is the single technique that separates competent caricature from inflated portraiture.
Standard pairings recur constantly: a big nose with small eyes and a receding chin, a massive jaw with a small cranium, a high forehead with a shortened lower face. In each case total head volume stays roughly constant while the internal distribution shifts dramatically.
In prompt terms, always state both halves. "Enlarge the nose by 50 percent and reduce eye size by 20 percent, compress the distance from nose base to chin" gives a coherent instruction. Stating only the enlargement leaves the generator to preserve everything else, and the result looks swollen rather than exaggerated. On the mesh itself, the same logic applies during refinement: every time you scale a landmark up, look for the adjacent landmark that should come down.
Classic Caricature Proportions: T-Zone, Five-Eye Spacing, and Jaw Mass
Caricaturists work against a set of standard proportional benchmarks, and every deviation from those benchmarks is a caricature opportunity. Learn the benchmarks and your prompts get precise instead of vague.
| Benchmark | Average face | What deviation signals | Caricature move |
|---|---|---|---|
| Five-eye rule | Face width equals five eye widths | Eye spacing and face width | Push toward four eyes (narrow, crowded) or six (wide, spread) |
| Rule of thirds | Hairline to brow, brow to nose base, nose base to chin are equal | Forehead height and lower-face length | Stretch the dominant third, compress the other two |
| T-zone | Brow line plus nose axis form a balanced T | Brow heaviness against nose length | Widen the T bar for heavy brows, lengthen the stem for a long nose |
| Jaw mass ratio | Jaw width roughly 90 percent of cheekbone width | Square versus tapered face | Exceed 100 percent for a slab jaw, drop below 75 percent for a wedge |
| Eye line | Eyes sit at the vertical midpoint of the head | Cranium size against face size | Raise the line for a small cranium, lower it for a domed forehead |
The eye line benchmark is the most useful and the most commonly broken, because untrained eyes place eyes too high and generated results come back with a shallow cranium. On a neutral head the eye line sits at the midpoint between the chin and the top of the skull, so a caricature that raises or lowers it is making a statement about brain case size that you should be choosing, not inheriting.
How Far Is Too Far? Keeping Recognition Under Heavy Exaggeration
There is a ceiling on useful exaggeration, and it is set by the moment a feature stops being an amplified version of yours and starts being a shape in its own right. A nose pushed 60 percent is your nose, emphatically. A nose pushed 300 percent is a beak that happens to be attached to your face, and the viewer's attention transfers from you to the beak.
A reliable field test is the squint test at distance. Render the caricature at roughly 100 px tall, blur it heavily, and see whether the head shape still resembles the subject's. If the blurred silhouette reads as the subject, exaggeration is inside the recognition envelope.
- Keep relative order intact. Whatever is your longest feature must stay longest after exaggeration. Reordering breaks recognition faster than any amount of scaling.
- Never exaggerate more than three landmarks heavily in the same sculpt. Four or more competing distortions produce noise, and the eye finds no hierarchy to latch onto.
- Keep at least one anchor near baseline. A single accurately proportioned region gives the viewer a reference scale that makes the distortions elsewhere legible.
Translating 2D Caricature Tricks Into 3D Volume and Depth
Most caricature technique was developed for paper, and roughly half of it does not survive the move to a rotatable mesh. Line weight, deliberate outline distortion, and flattened perspective tricks all depend on a fixed viewing angle. In 3D, everything has to be solved as volume.
The tricks that do translate are the proportional ones: landmark displacement, push-and-pull, silhouette simplification, and hierarchy of emphasis. What does not translate is anything that cheats the third dimension. A 2D caricaturist can draw a nose occupying half the face in front view without ever deciding how far it sticks out. In 3D you have to decide, and that decision governs whether the profile works.
A few moves exist only in 3D. Volume redistribution, where mass is moved from cranium to jaw without changing the frontal outline, is one. Depth staging, where the nose, lips, and chin are pushed to distinctly different projection depths so the profile reads as a stepped silhouette rather than a smooth curve, is another. Both are worth prompting for explicitly, since a generator trained largely on images will not apply them by default.
Why the Profile View Breaks First, and How to Fix Nose and Chin Depth
If a generated caricature is going to fail, it fails in profile. The reason is straightforward: reference photos are overwhelmingly frontal, depth is the least constrained axis in reconstruction, and stylisation pressure pushes features outward in X and Y where the training signal is strongest. The result is a face that looks correct head-on and disturbingly flat from the side.
Diagnose it with three depth measurements taken in profile, each relative to the vertical plane through the eye socket. Nose tip projection should be the furthest forward point of the face on nearly everyone. Lip projection sits behind it, and chin projection behind that on most faces, or ahead of the lips on a strong prognathic jaw. If a generated caricature has all three at similar depths, the profile will look pressed against glass.
The fix is a prompt correction rather than a sculpt correction where possible: re-run with explicit depth language such as "strong nose projection, receding chin, lips set back behind the nose tip." If you are refining an exported FBX in Blender or ZBrush, a proportional-edit move along the depth axis on the nose tip and chin landmarks solves it in about a minute. Enterprise tiers on Threedium also route the model to human 3D artists, and profile depth is exactly the kind of correction that pass is best at.
Always supply a true profile reference photo if the caricature is destined for print. A screen render is usually viewed near-frontally, but a physical statue on a shelf gets seen from the side constantly, and depth errors that were invisible on screen become the first thing people notice.
Locking a Signature Smile or Smirk Into the Sculpt
Expression is a likeness carrier in its own right, and for many people the strongest one. A specific asymmetric smirk, a crinkle at the outer eye, a habitual raised eyebrow: those cost nothing and pay for themselves in recognition. A neutral caricature of an expressive person fails not because the geometry is wrong but because the face is doing nothing the subject ever does.
Bake the expression into the sculpt rather than treating it as a pose. On a static statue there is no animation system, so the mouth corner asymmetry, the cheek compression, and the eye narrowing all have to exist as permanent geometry. Prompt for it specifically: "closed-mouth smirk, right corner higher than left, right eye slightly narrowed, single raised left eyebrow."
If the caricature is also destined for a screen or an AR viewer rather than only a print, the animation option opens up. Threedium can generate a face rig with the 52 ARKit blendshapes, which lets the same caricature head drive expressions live from a phone camera. That is overkill for a desk statue and genuinely useful if the piece is going to be a talking avatar as well as a printed object.
Hair, Glasses, and Beards as Silhouette Amplifiers
At figurine scale, non-facial features carry more recognition weight than facial ones. A 120 mm statue viewed from a metre away presents a face roughly the size of a fingernail, and at that size individual landmark relationships are barely resolvable. What survives is the outline, and the outline is dominated by hair, facial hair, and eyewear.
Treat these three as the outer caricature layer. Curly hair becomes a blocked mass with carved separations rather than modelled strands, since strand detail disappears at print scale and creates fragile geometry. A beard becomes a defined geometric shape: wedge, spade, or block. Glasses become thicker frames scaled up 30 to 50 percent, since accurately scaled frames print as hair-thin filaments that break.
- Model hair as solid volumes with grooved separations, minimum 1.5 mm feature depth at final print scale, rather than individual strands.
- Fuse glasses arms to the head rather than leaving a real gap. A 0.6 mm floating arm is a guaranteed breakage point in both resin and sandstone.
- Exaggerate a bald head by enlarging and smoothing the cranium. Baldness is a silhouette feature, and treating it as a strong dome is more recognisable than a literal scalp.
- Give hats and headwear 2.5 mm minimum brim thickness. Scale-correct brims are the most commonly broken part of a printed caricature.
Flattering vs Mocking: Steering Exaggeration Away From the Insult Zone
Caricature sits on a line between affectionate and cruel, and which side you land on is a matter of technique, not luck. The practical distinction is which features you choose to amplify. Exaggerating structural features such as jaw, nose profile, forehead height, or eye spacing reads as characterisation. Exaggerating features tied to insecurity, most commonly body weight, hair loss, acne, teeth, or skin condition, reads as mockery even at low magnitudes.
The reliable rule for a gift piece is to exaggerate what the person would exaggerate about themselves. Amplifying a trait the subject is happy to own is flattering by definition, because it aligns with their own self-image.
Two mechanical adjustments also shift the read toward warmth: keep the eyes bright and open rather than narrowed, and keep the mouth in a positive expression. A caricature with squinted eyes and a downturned mouth reads as unkind almost regardless of what the proportions are doing. When in doubt on a piece for someone else, dial the exaggeration down to the gentle 15 to 25 percent band. A slightly under-pushed caricature is a pleasant gift, while an over-pushed one is a story the recipient tells for the wrong reasons.
How Do You Get a Caricature Printed in Full Colour?
Full-colour printing is the reason a 3D caricature works as a gift at all. A monochrome print of an exaggerated face is a maquette that needs painting; a full-colour print arrives finished, with skin tone, hair colour, clothing, and any logo or lettering already in the material. Two production routes deliver it: gypsum binder jetting, still commonly sold as full-colour sandstone, and full-color resin 3D printing on multi-material PolyJet or UV inkjet machines.
Prepping a Caricature Mesh for Full-Color Resin or Sandstone Printing
Colour printing has requirements that monochrome printing does not, and they are all about the texture rather than the geometry. Export with a UV-unwrapped base colour map at 2048 x 2048 minimum, or 4096 x 4096 for anything above 150 mm tall. Full-colour printers resolve roughly 0.1 to 0.2 mm per colour dot, so a 150 mm figure can genuinely use a 4K map, and undersized textures show as soft, blotchy skin at exactly the scale people look at the face.
Colour management is the part most people miss. These printers work in a limited gamut, and saturated colours, especially deep reds and vivid blues, shift noticeably from screen to material. Keep skin tones in the safe zone: mid-range luminance, low saturation, no reliance on subtle rosiness. Avoid pure black, which prints muddy on gypsum, and very light tints, which sandstone washes out toward its natural off-white. Bake any lighting or ambient occlusion you want visible directly into the base colour map, because the printer reproduces the map literally with no shading of its own.
- Deliver colour in a format the bureau actually reads: 3MF with embedded colour, OBJ plus MTL plus PNG, or VRML/WRL. A plain STL carries no colour data at all.
- Ensure the mesh is watertight and manifold with consistent outward normals. Inverted normals on a colour print produce inside-out texture patches, not just geometry errors.
- Avoid overlapping UV shells. Overlaps that are invisible in a game engine become mirrored logos and duplicated eyebrow patches on a printed statue.
- Set real-world scale on export. Millimetres are the safe unit; a model exported in metres arrives as a 0.12 mm speck or gets silently rescaled by the bureau.
The structural side of print prep, meaning wall thickness, support strategy, overhangs, and the extra load an oversized caricature head puts on a thin neck, follows the same rules as any small figure or tabletop miniature print: 1.5 mm minimum wall thickness, supports on every overhang past 45 degrees, and no unsupported spans. The one caricature-specific note is that a head at 1:1 or 1:2 ratio concentrates most of the model's mass at the top, so hollow it and keep the neck cross-section generous rather than scale-accurate.
Best Print Sizes for Desk Statues, Cake Toppers, and Shelf Displays
Print height drives cost more than anything else, because binder jetting and resin printing both price largely by material volume, and volume scales with the cube of height. Doubling a figure from 100 mm to 200 mm multiplies material use by roughly eight, so size is a budget decision as much as a display one.
- Cake topper, 100 to 130 mm: anchor features only. Needs a flat stable base and a food-safe barrier underneath.
- Desk statue, 120 to 180 mm: full facial landmarks resolve. The sweet spot for cost against presence.
- Shelf display, 200 to 300 mm: skin texture and fine props resolve, but cost rises steeply and the piece is usually printed hollow.
- Trophy or award, 180 to 250 mm: full landmarks plus engraving. Plan a separate plinth so the nameplate is not printed in colour.
- Keychain or token, 35 to 60 mm: silhouette only. Push exaggeration higher, since fine detail will not survive.
Below about 80 mm, strategy has to change. Facial landmarks stop resolving and the piece lives on silhouette alone, so hair mass, glasses, and head shape do all the work. Above about 250 mm the opposite problem appears: layer lines and gypsum grain become visible, and the piece often needs infiltration or a clear coat.
Caricature Gift Ideas: Wedding, Retirement, Graduation, and Boss Statues
A 3d printed caricature statue works as a gift because it is simultaneously personal, funny, and physical, which very few gifts manage at once. The occasion should drive both the exaggeration level and the prop choices, and the two most common mistakes are pushing too hard on a formal occasion and not personalising enough on an informal one.
- Wedding: a paired couple caricature at gentle 15 to 25 percent exaggeration, 130 to 160 mm, doubling as a cake topper and then a shelf piece. Model the actual dress silhouette and suit colour; those details carry more emotional weight than the face exaggeration does.
- Retirement: standard exaggeration, 150 to 180 mm, posed with the tools of the job and one hobby prop signalling what comes next. A nameplate with years of service turns it into an award rather than a toy.
- Graduation: cap and gown are strong silhouette elements, so exaggerate the mortarboard by 20 to 30 percent. 120 to 150 mm suits a desk in a first apartment.
- Boss or team leader: stay in the gentle band and exaggerate a known catchphrase prop rather than the face. This is the highest-risk category and the one where restraint pays.
- Sports or hobby milestone: heavy exaggeration is welcome here. Oversize the equipment, exaggerate the action pose, and let the piece be openly comic.
For group pieces, print each figure separately and mount them on a shared base rather than modelling one solid object. Separate prints let you fix one figure without reprinting the set and make shipping damage a partial loss rather than a total one.
Base, Nameplate, and Trophy-Style Mounting Options
The base is not an afterthought on a caricature, it is a structural requirement. With most of the mass concentrated in an oversized head, the figure's centre of gravity sits high and a small base makes it tip. Size the base to at least 60 to 70 percent of the figure's widest dimension and give it real thickness, typically 8 to 12 mm at desk-statue scale.
Nameplates are best handled off the print, since text in gypsum or colour resin at 3 mm cap height is legible but soft and colour bleed blurs the letter edges. Print the figure with a plain plinth and mount that on a separate laser-engraved acrylic or wood base: crisp lettering, extra weight exactly where you want it, and the piece reads as an award. Mounting styles worth considering: a simple disc or hex plinth printed as part of the figure for informal gifts; a two-part plinth and hardwood base joined with a 6 mm dowel or a recessed magnet for retirement and award pieces; a clear acrylic riser when you want the caricature to appear to float; and a domed display case for anything printed in gypsum, since sandstone is porous and collects dust that is very hard to clean out of textured hair.
Hand-Painting a Monochrome Print vs Ordering Full-Color Output
The decision comes down to unit cost, quantity, and how much you enjoy painting. A monochrome SLA resin print of a 150 mm caricature typically runs $25 to $60 in material and machine time through a hobby bureau, while the same figure in full-colour gypsum or colour resin usually lands in the $120 to $300 range depending on volume and finishing. The gap is real, and it buys you a piece that needs no further work.
Hand-painting is genuinely better in one respect: colour depth. A skilled painter can apply washes into recesses, dry-brush the high points, and give a caricature a sense of light that a printer reproducing a flat texture map cannot match. It costs four to eight hours per figure plus paints, primer, and a sealing coat. If you paint as a hobby, the monochrome route is the better piece for less money.
| Route | Typical 150 mm cost | Colour quality | Effort after printing | Best for |
|---|---|---|---|---|
| Full-colour gypsum (binder jetting) | $120 to $250 | Good, matte, slightly grainy | None, optional sealant | One-off gifts, complex clothing and logos |
| Full-colour resin (PolyJet / UV inkjet) | $200 to $450 | Excellent, smooth, wide gamut | Support removal by bureau | Premium pieces, small display sizes, fine detail |
| Monochrome SLA plus hand paint | $25 to $60 plus paint time | Best possible, painter dependent | 4 to 8 hours per figure | Hobby painters, batches, showpiece quality |
| FDM plus hand paint | $5 to $20 plus paint time | Limited by layer lines | Sanding, filling, then painting | Prototypes and size tests before a real print |
3D Caricature Maker vs a Caricature Sculptor: What Each Delivers
The choice between generating a caricature and commissioning one is not purely a price question, though the price gap is large. It is a question of what each route actually hands you: a file you own and can iterate on in minutes, or an artist's judgement applied once, slowly, with a result that is likely to be better in the ways that are hardest to specify.
What Hand-Sculpted Caricature Commissions Typically Charge
A caricature sculpture commission is priced by hours, and caricature is slow work. A digital sculptor building a caricature bust in ZBrush from reference photos typically quotes $250 to $700 for a single subject at print-ready quality, rising to $700 to $1,500 for a full figure with clothing, props, and a posed body. Complex group pieces and licensed or commercial-use work go higher.
Traditional clay or polymer sculpting, where the artist produces a physical original rather than a file, runs higher still. Expect $500 to $2,000 for a one-off hand-sculpted caricature figure, and considerably more from a named caricature sculptor with a waiting list. That price includes the original object but usually not a digital file, so reproductions require a mould or a scan.
The Printed Figurine Price Ladder: Roughly $170 to $690 by Size
Consumer services that sell a finished custom caricature figurine as a product, meaning you send photos and receive a painted object, bundle modelling, printing, finishing, and shipping into one price that scales with height. Across the market, the ladder tends to look roughly like this.
- 90 to 110 mm, $170 to $240: single subject, standard pose, basic base.
- 130 to 150 mm, $250 to $390: single subject, custom clothing, one prop.
- 180 to 200 mm, $400 to $550: custom pose, detailed props, engraved plinth.
- 230 mm and above, or two subjects, $550 to $690 and up: couple or group base, full customisation, revision rounds.
Two things are worth noticing. First, modelling labour is roughly constant across the range, so most of the increase between tiers is material volume, finishing time, and shipping weight. Second, almost none of those services give you the 3D file: you get the object, and a second copy or a different size means ordering and paying again. Generating your own mesh inverts that. You own a GLB and an FBX, print at 100 mm this year and 250 mm next year, run five copies for a team, and never repeat the modelling cost.
What an AI Caricature Generator Costs and What You Get for It
Most tools that market themselves as an ai caricature generator are 2D. They take a photo, apply a stylisation model, and return an image that looks like a caricature rendered in 3D. That image is fine for a profile picture and useless for printing, because there is no geometry behind it.
A true 3D generator returns a mesh. On Threedium that means geometry with PBR textures, clean topology, polygon optimisation, and export to GLB, USDZ, and FBX, produced from either a text description or uploaded reference images through the turn yourself into a 3D model workflow. Pricing is credit or subscription based rather than per-commission, which means iteration is close to free once you are on a plan, and the marginal cost of trying a heavier exaggeration is a few minutes.
What you do not get automatically is art direction. The generator will execute the caricature you describe, and if your description does not identify the right anchor features, it will produce a competent caricature of the wrong things. That is the real trade against a commission: you are supplying the judgement yourself. Threedium's enterprise tiers close some of that gap by routing generated models to human 3D artists for a refinement pass, which resolves profile depth, silhouette cleanup, and print preparation.
Turnaround Times: Minutes With AI vs Weeks in a Sculptor's Queue
Schedule is often the deciding factor, particularly for gifts, which arrive attached to fixed dates. Generation produces a first mesh in minutes, and a refined, print-ready result usually within a single working session of iteration. A commissioned digital sculpt typically takes one to three weeks including revision rounds, and a traditional hand-sculpted piece three to eight weeks, longer if the artist has a queue.
Then add printing and shipping, which are the same for both routes. Full-colour gypsum and colour resin bureaus generally quote 3 to 7 working days in production plus shipping, and international shipping on a fragile gypsum figure realistically needs another 5 to 10 days with proper packaging. The practical planning rule for a dated occasion is three weeks of buffer for a generated piece and eight to twelve weeks for a commissioned one.
Revision economics differ just as sharply. A generated mesh re-runs as often as your plan allows, a freelance sculptor typically includes two revision rounds and bills beyond that, and a clay original is effectively unrevisable once cured.
When a Human Caricature Sculptor Is Still the Right Choice
Two situations make commissioning clearly the better decision. The first is when the subject matters enormously and the occasion is unrepeatable: a milestone anniversary, a memorial piece, a retirement after thirty years. A skilled caricaturist's read of a face is still better than a prompt-driven approximation, and on a piece that only happens once, that margin is worth paying for.
The second is when the likeness is unusually hard. Faces close to population average are the hardest to caricature, precisely because the deviation principle has little to work with. An experienced artist will find an angle, an expression, or a posture that captures the person when no individual feature does. That kind of lateral solution is exactly what a generator, working from explicit feature instructions, is worst at.
A pragmatic middle path: generate the caricature yourself, iterate until the concept is right, then hire a sculptor for a paid polish pass on your mesh. You are buying an hour or two of expert judgement instead of a full commission, and artists will often quote $80 to $200 for exactly that.
Frequently Asked Questions About Making 3D Caricatures
What is the best app to turn a photo into a caricature?
It depends entirely on whether you need an image or an object. For a flat caricature image to use as a profile picture, general-purpose image generators and dedicated caricature filters handle it in seconds. For an actual 3D mesh you can rotate, animate, or print, you need a generator that outputs geometry, such as Threedium's 3D model generator, which returns GLB, USDZ, and FBX files rather than pictures.
The distinction trips up a lot of buyers, because most tools ranking for 3d caricature maker produce 2D images rendered in a three-dimensional style. If a tool's output is a JPG or PNG, it cannot be printed as a statue no matter how dimensional it looks on screen.
Can AI make a caricature from a photo for free?
Free 2D caricature effects are widely available and generally good enough for a social avatar. Free 3D mesh generation is more limited: most platforms with real 3D output run a free tier with a monthly credit allowance, watermarking, reduced resolution, or restrictions on commercial use, and reserve full-resolution exports for paid plans.
The practical approach is to use a free tier for concept exploration, testing exaggeration levels and poses cheaply, then move to a paid export once you have a version worth keeping. Since printing a 150 mm full-colour figure typically costs $120 or more, the modelling subscription is rarely the expensive part of the project.
How do caricature artists decide which features to exaggerate?
They compare the face against an internalised average and amplify wherever it departs from that average. A nose longer than typical gets longer, a chin smaller than typical gets smaller. This is the deviation principle, and it is why good caricaturists sometimes shrink features rather than always enlarging them.
Beyond that first pass, artists apply hierarchy. They pick two or three features to push hard and leave the rest close to accurate, because pushing everything equally produces a face that is distorted without being characterised. They also use push-and-pull: enlarging one feature while reducing its neighbours, so the exaggeration reads through contrast rather than by growing the whole head.
Can I 3D print a caricature of myself?
Yes, provided your caricature exists as a real mesh rather than an image. Export from the generator, convert to a print-ready format (STL for monochrome, 3MF or colour OBJ for full colour), verify the model is watertight with consistent normals, hollow the oversized head, and send it to a print bureau or run it on your own resin printer.
The caricature-specific issues are mass distribution and fragile silhouette elements. An oversized head puts most of the weight up high, so hollow it and keep the neck cross-section wider than anatomy would suggest. Glasses arms, hat brims, and hair strands are the usual breakages: thicken them to at least 1.5 to 2.5 mm at final scale, and fuse anything that would otherwise float.
How much does a custom caricature figurine cost?
Finished figurines from photo-to-object services generally run $170 to $690 depending on height and subject count, with a single 130 to 150 mm figure landing around $250 to $390. That price bundles modelling, printing, finishing, and shipping, and usually does not include the 3D file.
Splitting the job is cheaper if you are willing to do the modelling. Generating the mesh yourself on a subscription plan and sending it to a print bureau typically costs $120 to $300 for a full-colour 150 mm print, or $25 to $60 for a monochrome resin print you paint yourself. You also keep the file, which makes any subsequent copy or size change essentially free apart from print costs.
What is the difference between a caricature and a cartoon avatar?
A caricature exaggerates what makes a specific face unusual; a cartoon avatar applies a consistent house style to any face. Caricature moves your landmarks away from average, so the result is more distinctively you. A cartoon style, whether chibi, anime, or a vinyl toy look, moves every face toward the same target proportions, so two different people end up looking more alike.
That is the practical dividing line between this workflow and the neighbouring ones. If you want big eyes, soft round features, and a cute simplified read, prompt for a chibi treatment. If you want a nodding novelty on a spring, prompt for a bobblehead. Caricature is the format where the point is your specific asymmetries, not a style applied over them.
Can I make a 3D caricature of a couple for a wedding gift?
Yes, and it is one of the most common uses of a 3d printed caricature statue. Generate each subject separately from their own reference photos, keep the exaggeration matched in level between the two so one partner is not pushed harder than the other, then compose them on a shared base. Generating separately gives you far better likeness control than prompting for two people in one pass.
A few practical notes. Stay in the gentle 15 to 25 percent band: wedding gifts get displayed for years, so this is not the occasion for heavy distortion. Match head heights even where real heights differ, since mismatched heads read as an error rather than a choice, and stage the difference in the bodies instead. Model the actual dress silhouette and suit colour, because those details carry more sentiment than the facial exaggeration does.