How Do You Make Yourself a Minecraft Character From a Photo?
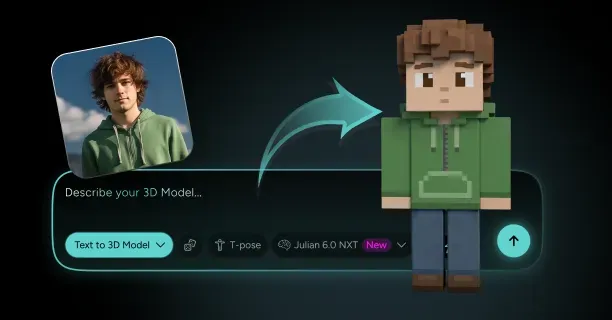
To make yourself a Minecraft character from a photo, upload a clear front-facing portrait to Threedium and prompt its Julian NXT generator for a blocky voxel likeness built on the standard player proportions, then export two separate things: a 64x64 PNG skin you can wear in game, and a voxel figure in GLB, USDZ, or FBX you can render or print. The generator reads your hair shape, skin tone, facial hair, and clothing colors out of the photo and quantizes them down to the handful of pixels the format actually gives you. What takes a skilled pixel artist an evening of nudging individual squares takes the platform a couple of minutes.
The hard part is not the modelling. When you make yourself a Minecraft character, the real work is compression. A player skin gives you an 8x8 pixel front panel for your entire face and roughly 1,632 usable pixels across the whole base layer, so every decision is about what to throw away. This page is about likeness specifically: getting a recognizable you out of that budget, then turning the flat skin into a solid figure.
Two neighbouring workflows get confused with this one. If you want a brick-built minifigure toy likeness, with the cylinder head, the C-shaped hands, and the printed torso decoration, that is a LEGO-style build and a different set of proportions entirely: start from the personal likeness hub and pick the brick toy route instead. And if you want blocks, mobs, ores, or props rather than a person, that is game asset work, covered separately below. Everything here assumes you want to make yourself a Minecraft character.
Minecraft is a trademark of Mojang Studios and Microsoft. Everything described here produces Minecraft-style original work from your own photo, uploaded through the official channels those companies provide. Nothing on this page is affiliated with or endorsed by them, and you should not sell renders or prints that reproduce their character designs.
Choosing a Front-Facing Photo That Survives Pixelation
Your source photo gets destroyed on purpose here. A 12-megapixel portrait ends up as sixty-four coloured squares on the face panel, so the only features that survive are the ones with strong, large-scale contrast. Pick a straight-on shot at 1024 px or larger on the short edge, evenly lit, with your whole head and both ears inside the frame and nothing crossing your face.
Flat, diffuse light is what you want. Hard side light carves a shadow down one cheek, and at this resolution the generator cannot tell a shadow from a colour, so half your face comes back two tones darker than the other half. Open shade, an overcast window, or a ring light all work. Avoid a hard flash straight on too, since it flattens your hairline into your forehead and blows out the highlight pixels you need for shape.
- Tie back or push aside anything covering the hairline and eyebrows. Those two lines carry most of the recognizability in a blocky face, more than the nose or mouth ever will.
- Wear something with a solid, saturated colour rather than a pattern. A striped or logo shirt turns into visual noise across the 8x12 torso panel and reads as dirt.
- Shoot a second frame from the back or a three-quarter angle if your hair has real volume or an undercut. The generator has to paint the back of the head cube from something, and guessing is where bald spots come from.
- Skip sunglasses, hats, and masks in the reference. Add those deliberately on the overlay layer later, where you control them.
Uploading Your Photo and Prompting Julian NXT for a Blocky Likeness
Drop the reference into the generator on Threedium's model creation workspace and write a prompt that specifies the format, not just the vibe. The most common way to fail when you make yourself a Minecraft character is to ask for "a Minecraft version of me" and getting a smooth, low-poly stylized bust with soft shading, which is a perfectly good model and completely useless as a skin. Name the constraints explicitly.
A prompt that works reads something like: blocky voxel character skin, standard player proportions, 8x8 head cube, flat unshaded pixel texture, hard-edged colour blocks, no gradients, no ambient occlusion, front-facing symmetrical layout, then your own description. The phrases doing the real work are flat unshaded and no gradients, because the default behaviour of every image-conditioned generator is to add soft lighting, and soft lighting at 8x8 is just mud.
Add the proportion call in the same breath. State classic 4-pixel arms or slim 3-pixel arms up front rather than fixing it after, because the arm width changes the UV layout and a late switch means the arm texture has to be rebuilt anyway.
Generate three or four variations before you start editing any of them. Pixel likeness is unusually sensitive to small starting differences: a hairline moved one pixel up or an eye colour shifted one shade can be the whole difference between "that is clearly you" and "that is a stranger." It is far faster to pick a good seed than to rescue a bad one.
Describing Hair, Facial Hair, and Glasses in Pixel-Friendly Terms
Hair is the single strongest identity signal in a blocky character, and it needs describing as a silhouette plus two tones, not as a hairstyle. "Wavy shoulder-length auburn hair" means nothing at this resolution. "Dark auburn hair covering the top and back of the head cube, straight fringe two pixels deep across the forehead, hanging one pixel past the jaw on both sides, lighter auburn highlight along the top edge" gives the generator an actual pixel map to fill.
Facial hair works the same way and is even more constrained. You have roughly the bottom three rows of the face panel to play with, so translate real facial hair into coverage:
- Full beard: the bottom two rows plus one pixel up each outer column, wrapping onto the left and right head faces so it does not stop dead at the corner.
- Goatee or chin strip: the middle two columns of the bottom row only, one shade darker than your skin base.
- Moustache: a single two-pixel-wide band directly under the nose row, which usually means it fuses with the mouth unless you keep one pixel of skin between them.
- Stubble: do not draw it as texture. Darken the whole jaw region by one step instead, because scattered dark pixels read as damage or dirt.
Glasses are pure geometry: two 2x2 lens squares with a one-pixel bridge, drawn either directly on the face or, better, on the overlay layer so you can toggle them. Thin wire frames are impossible, so pick a heavy frame colour that contrasts with your skin tone or they will vanish entirely.
Picking Classic (Steve) or Slim (Alex) Proportions
There are exactly two player body models and the only difference between them is arm width. The classic model, historically called Steve, uses 4-pixel-wide arms. The slim model, historically called Alex, uses 3-pixel-wide arms. Head, torso, and legs are identical on both: an 8x8x8 head, an 8-wide by 12-tall by 4-deep torso, and 4x12x4 legs.
This matters more than it sounds because the two models use different UV layouts. A skin painted for classic arms and worn on the slim model loses a column of pixels off each arm and shifts everything after it, producing a visible seam and a one-pixel band of the wrong colour. There is no automatic conversion that looks right; the arm panels have to be repainted. Decide before you generate.
Modern versions ship a wider set of default skins beyond the original two, but every one of them still resolves to classic or slim underneath. On Java you pick the model alongside the skin upload; on Bedrock the model is carried in the skin's geometry declaration.
The arm choice also changes your total pixel budget slightly. A classic skin has 1,632 usable surface pixels on the base layer; a slim skin has 1,568, because each 3-wide arm gives up 32 pixels against its 4-wide equivalent. Practically, slim arms suit narrower characters and classic arms suit bulkier ones. Pick whichever you already use in game so your existing skins stay consistent.
Reviewing How the AI Maps Your Face to the 8x8 Head Panel
The front of the head cube is 64 pixels, arranged 8 across and 8 down, and that is the entire face. Before you accept a generated result, check the row assignment, because this is where most AI output goes wrong. A face that reads correctly almost always lands on the same vertical structure.
- Rows 0 to 2: hair or forehead. If your fringe is deep, rows 0 to 2 are all hair; if you have a high hairline, row 2 is skin.
- Row 3: brow line. Usually one shade darker than the skin base, or hair-coloured if your eyebrows are heavy.
- Row 4: eyes. Two pixels for the left eye at columns 1 and 2, two for the right at columns 5 and 6, with columns 0, 3, 4, and 7 left as skin.
- Row 5: nose shadow. One or two pixels in the centre columns, one step darker than skin. Never a full nose shape.
- Row 6: mouth. Two to four pixels centred, darker than skin, and this is where a beard usually starts instead.
- Row 7: jaw and chin. Keep it the base skin tone unless you are drawing facial hair or the underside of a helmet.
When a generated face looks wrong but you cannot say why, it is nearly always a vertical drift: the eyes landed on row 3 instead of 4, which makes the character look startled, or on row 5, which makes it look sleepy and cramps the mouth. Nudging the eye row by a single pixel fixes more faces than any amount of colour work.
The other frequent error is asymmetry. Real faces are asymmetric and the generator faithfully reproduces that, but at 8x8 a one-pixel asymmetry reads as a mistake rather than as character. Mirror the left half onto the right for the eye and brow rows unless you have a deliberate reason not to.
Refining Skin Tone and Outfit Colors for a Limited Pixel Palette
Work in a deliberately small palette. A good likeness needs three skin tones: a base, a shadow roughly 12 to 18 percent darker, and a highlight roughly 8 to 12 percent lighter. Add a fourth, much darker tone only for the mouth and nose shadow. More tones than that and the face starts to look blurry rather than detailed, because the eye reads adjacent similar pixels as an unresolved gradient.
Sample your actual skin tone from the photo, but sample it from a neutrally lit area like the forehead or cheek, not from a shadow or a specular highlight. Then check it against the shadow tone: if you cannot tell them apart at a glance when the image is scaled to actual size, widen the gap. Contrast that feels excessive at 8x zoom usually looks correct at 1x.
Clothing follows the same rule with more freedom. Give each garment a base plus one shadow tone, put the shadow along the bottom edge and the inner arm faces, and keep the total palette under about twelve colours for the whole skin. Small palettes are what make pixel art look intentional.
Watch your greys. Pure neutral grey and pure black both read as holes in a character at this scale. Tint your darkest tones slightly toward blue or brown rather than using #000000, and your figure will keep its shape under every lighting condition in game.
Adding Overlay-Layer Details Like Hats, Hoods, and Headphones
Every body part has a second layer, an outer shell that renders slightly proud of the base cube. On the head it is traditionally called the hat layer and sits about half a pixel out on each side; on the torso, arms, and legs the outer layer sits about a quarter pixel out. That tiny offset is what lets you build depth into a model that has none.
This is where accessories belong, for one practical reason: you can delete them without touching the underlying character. Put a beanie, hood, cap brim, headphone band, or hair volume on the overlay and you can produce five versions of yourself from one base.
- Headphones: a 2x3 block on each side face of the head overlay plus a one-pixel band across the top face. Reads instantly and costs almost nothing.
- Hood: fill the entire head overlay except the front face, then leave the front face fully transparent so your actual face shows through the opening.
- Hair volume: copy the hair pixels from the base head layer onto the overlay and extend them one pixel further down. This is the closest thing the format has to hair that sticks out.
- Jacket: torso and arm overlays only, leaving the base layer as your shirt underneath, so the sleeves visibly sit on top.
Keep overlay alpha binary: every pixel either fully opaque or fully transparent. Partial transparency is handled inconsistently across versions and renderers, and semi-transparent skins have historically been restricted because of the advantages they gave. Fully opaque or fully gone is the safe rule.
Previewing Your Character on a Rotating Voxel Rig
Never judge a skin from the flat 64x64 PNG. It is a UV atlas, not a picture, and the parts that will actually be visible are scattered across it in a way that hides every seam problem. Preview it wrapped on the player model and rotating.
Threedium's viewer applies the texture to a voxel rig you can spin, which surfaces the three defects that flat previews never show. The first is corner mismatch: hair that ends abruptly where the front face meets the side face, leaving a hard vertical line down the temple. The second is top-of-head neglect, where the generator painted a good face and left the top face flat or bald, which is invisible head-on and obvious to anyone standing on a block above you. The third is limb mirroring errors, where the left and right arms got different treatments and the character looks lopsided in motion.
Check the character at three distances. Up close for the face rows, at mid distance for the silhouette and colour balance, and at what amounts to across-the-room distance, where only the hair shape, skin tone, and shirt colour survive. If it is not you at that third distance, no amount of face detail will rescue it, because that is how other players will mostly see you.
Exporting the 64x64 PNG Skin for Java and Bedrock
The playable output is a single file: a 64x64 pixel PNG with an alpha channel. That is the whole specification and it has not changed since the second layer and 64x64 canvas were introduced. Typical file size is 2 to 8 KB, which is a useful sanity check on its own, since a 200 KB file almost always means something rescaled it or added a colour profile it did not need.
Export with these settings and check them before uploading:
- Exactly 64 x 64 pixels. Not 64x32, which is the pre-second-layer legacy size and will render with missing overlays.
- PNG-32 with true alpha, not a white or magenta background masquerading as transparency.
- No interpolation on resize. If anything scaled the image, it must have used nearest-neighbour. A single blurred pixel edge is visible in game.
- sRGB, 8 bits per channel, no embedded colour profile. Exotic profiles shift your carefully chosen skin tones.
- No metadata bloat. Strip EXIF; some upload endpoints reject oversized files outright.
Keep the layered source alongside the flattened PNG. When you want a variant later, the overlay-only edits are trivial from source and painful from a flattened image.
Exporting the 3D Voxel Figure as GLB, USDZ, or FBX
The second output is the actual mesh, and this is what separates a skin maker from a 3D platform. Threedium exports the wrapped character as a real model in GLB, USDZ, or FBX, with the skin as its texture and, where you want it, a rig on the standard six-part body so the figure can be posed rather than standing in a T-pose forever.
Which format depends entirely on where it is going. GLB is the general-purpose choice and the one to default to. USDZ exists for Apple's ecosystem and AR Quick Look, which is how you get your blocky self standing on a real desk through a phone camera. FBX is the format that survives a round trip into legacy pipelines and older DCC tools with animation data attached.
| Export | Best for | Watch out for |
|---|---|---|
| 64x64 PNG | Wearing the skin in game | Must be exactly 64x64, binary alpha |
| GLB | Web viewers, Blender, Unity, Unreal, sharing | Set texture filtering to nearest after import |
| USDZ | iOS AR Quick Look, Apple tools | Texture filtering defaults to smooth |
| FBX | Older pipelines, animation round trips | Scale units vary between applications |
| STL (converted) | 3D printing | Carries no colour; must be watertight |
The one setting that ruins every one of these on import is texture filtering. Every engine defaults to bilinear or trilinear smoothing, which turns your crisp pixel art into a smear. Switch the texture to point or nearest sampling and disable mipmaps the moment you import, in every application, every time.
Uploading the Skin at minecraft.net or Through the Bedrock Dressing Room
On the Java edition, upload through your profile on minecraft.net or through the skins tab of the official launcher. Select the PNG, choose classic or slim to match what you built, and save. Propagation is usually near-instant but can take a few minutes to reach servers, and other players may keep seeing your old skin cached until they reconnect.
On Bedrock, the route is in-game. Open the Dressing Room from the main menu profile, choose the classic skins section, select an empty custom slot, and import your PNG from local storage. You will be asked to confirm the body type, which is the same classic-versus-slim decision under a different name.
A few edition-specific behaviours are worth knowing before you troubleshoot:
- Custom-imported Bedrock skins are flagged as non-Marketplace, and some servers, Realms, and featured servers restrict or replace them.
- Console Bedrock players can usually import custom skins, but file access differs by platform and some storefront-linked profiles are limited to purchased skins.
- If your skin appears as a default character, the file dimensions are almost always wrong, or it saved as a JPEG with a .png extension.
- If limbs look shifted by a pixel, you built classic and selected slim, or the reverse.
Both editions accept the same 64x64 file, so one export covers you if you play both. That is not true of anything above 64x64, which is where the HD question starts.
What Makes a Blocky Voxel Likeness Actually Look Like You?
Recognition at this resolution comes from silhouette and colour relationships, not from detail. When you make yourself a Minecraft character, the techniques below decide whether the minecraft character of yourself reads as you or as a generic villager wearing your shirt colour. Each one is a specific, checkable constraint of the format rather than an aesthetic preference.
Compressing Your Face Into an 8x8-Pixel Front Panel
Sixty-four pixels is the entire face, and roughly twenty of them are doing identity work. The rest are skin. Once you accept that, the job stops being "draw my face smaller" and becomes "decide which four features get pixels."
When you make yourself a Minecraft character, rank your features by how distinctive they are and spend the budget in that order. For most people the ranking is hair shape first, then eye colour and spacing, then facial hair, then skin tone, with everything else being decoration. A person with a strong distinguishing feature such as heavy eyebrows, a prominent beard shape, or a signature pair of glasses should promote that feature to the top and let something else go.
The arithmetic is unforgiving. On the front panel you have eight columns: columns 0 and 7 are the outer edges that wrap toward the ears and read as sideburn or hair, columns 3 and 4 are the centre line carrying the nose and mouth, and columns 1, 2, 5, and 6 hold the eyes. That leaves you almost no lateral freedom. Features cannot be nudged half a pixel to make room, so two features competing for the same row means one of them loses.
This is also why a photorealistic reference and a caricature reference produce nearly the same output at this scale. If you already know you are exaggerating, exaggerate deliberately: widen the fringe, deepen the beard, saturate the eye colour. Restraint reads as blandness once you are down to sixty-four squares.
Why Eyes Get Two Pixels Each and How Color Choice Saves Them
The convention is two pixels per eye, side by side on a single row, and it exists because it is the smallest arrangement that still communicates gaze direction. One pixel per eye gives you a dot with no direction. Three gives you a face that looks bug-eyed once the head is at normal viewing size.
Within that pair, one pixel is the light sclera and one is the iris. Which side the iris sits on sets where the character appears to look: irises on the inner pixels make the character look slightly cross-eyed and friendly, irises on the outer pixels look wary, and the standard choice is inner-facing. Keep both eyes consistent or your character develops a squint.
Colour is what makes this work at distance. A pale grey-blue iris next to a white sclera has almost no contrast and the eyes disappear entirely when the model is more than a few blocks away, leaving a blank face. Two fixes, in order of preference:
- Darken the iris well past your real eye colour. A light-eyed person needs an iris pixel two or three steps darker than reality to stay visible. Nobody perceives this as wrong.
- Use the brow row as a frame. A darker pixel directly above each eye pair anchors the eyes even when the iris contrast is weak, and it doubles as your eyebrows.
- Avoid pure white for the sclera on light skin tones. An off-white or very pale warm grey separates better from the surrounding skin pixels.
A character seen mostly in renders can afford a subtler eye. In multiplayer, contrast wins every time.
Banding Skin Tones Instead of Gradients at Minecraft Resolution
Gradients do not exist in this format. Any attempt at one produces banding, and the only question is whether the banding is deliberate and shaped or accidental and blotchy. Deliberate banding is called posterization and it is the correct approach.
Quantize your skin to three tones and place them structurally: the base tone across the centre of each face, the shadow tone along the bottom edge and the outer columns where the head curves away, and the highlight along the top edge and the brow ridge. This is the same logic as painting a sphere with three flat values, and it holds up because the underlying form really is a cube.
The specific failure to watch for is dithering, where an automatic quantizer alternates two tones in a checkerboard to fake a middle value. It works beautifully in 256-colour desktop art and it looks like a rash at 8x8. If your generated skin comes back with scattered alternating pixels across the cheeks, flatten them to the base tone; you will lose nothing.
Darker skin tones need a slightly wider value gap between base and shadow than lighter ones, because the same percentage step produces less perceptual difference at the dark end. If your shadow tone is not clearly reading as a shadow when viewed at actual size, push it further rather than adding a fourth tone in between.
Wrapping Hairlines Around All Six Faces of the Head Cube
The head is a cube with six 8x8 faces, totalling 384 pixels, and hair has to be continuous across five of them. The front face carries the fringe, the left and right faces carry the sides, the back carries the bulk, and the top carries the crown. Only the bottom face, which is the underside of the jaw, is exempt.
Continuity is checked at the seams. Whatever pixel value sits in column 7 of the front face must match the pixel that sits in column 0 of the adjacent side face, at the same row, or you get a hard colour break running down the corner of the head. AI-generated skins fail here constantly because the model paints faces as separate images rather than as an unfolded solid.
The most common defect in AI-generated Minecraft-style skins is a bald or flat-coloured top face. The generator optimizes for the front view because that is what your reference photo showed. Always rotate the preview to look straight down at the crown before you export, and expect to fix it roughly half the time.
Hair length is faked with the overlay layer and with the top rows of the torso. Shoulder-length hair is drawn as the head overlay extending to the bottom edge of the head cube, then continued onto the torso's front and back panels for the first two or three rows. Longer than that and you are drawing hair onto the chest, which works but locks the character into one shirt.
Using the Second Skin Layer for Hair Volume and Accessories
The minecraft skin second layer effectively doubles your pixel budget, adding another 1,632 addressable pixels on the classic model, and it is the closest thing the format has to real geometry. Because the outer shell renders slightly larger than the base cube, anything you draw there sits visually in front of the base with a genuine, if tiny, depth separation.
Use it for anything that should look like it is on top of you rather than part of you. Hair volume, hats, hoods, glasses, headphones, jackets, scarves, and armour-like shoulder pieces all belong on the overlay. Skin, eyes, mouth, and base clothing belong on the base layer.
There is a subtlety that catches people out. Because the overlay is inflated outward, a pixel drawn on the overlay is slightly larger on screen than the base pixel beneath it, and at the cube corners the two layers separate visibly. This is why hoods look convincing: the gap reads as thickness. It is also why an overlay drawn as a solid duplicate of the base layer looks subtly wrong, like the character is wearing a skin-tight copy of itself. Only draw what needs to be raised.
One efficiency note for renders and prints: some pipelines flatten the two layers into one texture, which discards that depth separation. If your hood or hair volume matters visually, keep the layers separate through export and confirm the outer shell survived into the mesh.
Reading Body Type Through 4-Pixel vs 3-Pixel Arms
The steve vs alex slim skin distinction is the only body-type control the format offers. There is no height slider, no weight slider, and no proportion adjustment. Every player is 32 pixels tall with an 8x8x8 head. All you get is a single pixel of arm width.
That constraint is worth understanding rather than fighting. Because everyone shares one silhouette, viewers read body type from colour and shading instead of from shape. A torso with darker outer columns reads as narrower. A torso with the base tone running edge to edge reads as broader. Sleeves that stop higher on the arm read as more muscular. These are painting tricks, and they are the only body-type tools you have.
Height is faked the same way: a longer shirt that covers more of the leg panels makes the legs read as shorter, while a shirt that ends high with more visible leg makes the character read as leggier. None of it changes the hitbox or the actual model, but at a glance it works, and glances are what this format trades in.
Working Within 1,632 Usable Pixels Per Layer on the 64x64 UV Map
The canvas is 64 x 64, which is 4,096 pixels, but only a fraction of that is surface. Adding up the six faces of every box on the classic model gives 1,632 usable pixels per layer: 384 for the head, 352 for the torso, 448 for the two arms, and 448 for the two legs. With the overlay layer that becomes 3,264 addressable pixels, leaving around 832 pixels of the canvas as unused padding between UV islands.
Knowing the number changes how you budget. The face is 64 pixels, under four percent of a layer, which is a useful corrective for anyone planning to spend all their effort there. The torso, at 352 pixels for the base layer alone, is more than five times the face and is where clothing detail actually pays off.
| Region | Base layer pixels | Share of layer | What it is worth spending on |
|---|---|---|---|
| Head front (face) | 64 | 3.9% | Eyes, brow, mouth, beard |
| Head, other five faces | 320 | 19.6% | Hair silhouette and continuity |
| Torso | 352 | 21.6% | Garment shape, collar, print |
| Arms (both) | 448 | 27.5% | Sleeve length, cuffs, hands |
| Legs (both) | 448 | 27.5% | Trouser break, shoe line, socks |
Avoiding the Melted-Face Effect When AI Downsamples Features
The melted face is the signature failure of naive photo-to-pixel conversion. It happens when a high-resolution portrait is resized to 8x8 with a smooth filter such as bilinear or bicubic, which averages large neighbourhoods of pixels together. Every feature turns into a soft brown blob and the result looks like a face seen through frosted glass.
The cause is the resampling algorithm, and the fix has three parts:
- Never smooth-resize into the target resolution. Features must be placed, not averaged. A good generator reconstructs the face as pixel decisions rather than shrinking a photograph.
- Restore contrast after quantization. Averaging pulls every tone toward the mean, so the shadow tone and base tone end up nearly identical. Push them back apart manually.
- Re-place the eyes and mouth by hand if needed. These are the two features that must sit on exact rows, and they are the two that averaging destroys first.
You can diagnose it in one look. Zoom the face panel to actual size and count distinct colours. If you see more than five or six tones in sixty-four pixels, it melted. A healthy face panel has a countable, deliberate palette, and every pixel looks like a choice.
This is the specific reason that any prompt you use to make yourself a Minecraft character should include hard-edged, flat colour, no gradients. You are not asking for a stylistic preference, you are steering the model away from the interpolation behaviour that produces mush.
HD 128x128 Skins: Render-Only Detail vs Vanilla Compatibility
You will see HD skins at 128x128 or 256x256 and wonder why you are working at 64x64. The answer is compatibility. Vanilla Java accepts 64x64 only, and higher-resolution skins require third-party support such as a client mod or a custom skin loader, which means only players running the same setup will see the detail. Everyone else sees a default character or a broken texture.
Bedrock is more permissive because skins there can ship with a geometry definition, and higher-resolution textures are used in some packaged content. Even so, a custom import that deviates from the standard is the least portable option you have, and server-side restrictions on non-standard skins apply on top.
The practical split is straightforward:
- For playing: build at 64x64 and stay there. Universal, cache-friendly, and it is the format every server expects.
- For renders, thumbnails, and prints: use the higher-resolution texture freely. Nothing outside the game cares about vanilla limits, and a 256x256 texture on the same voxel mesh gives you cleaner edges and finer fabric detail.
- The one rule if you do both: generate the HD version from the 64x64 layout by integer upscaling, so the two stay visually identical and your in-game self matches your rendered self.
Upscaling by an exact power of two with nearest-neighbour keeps the pixel grid intact and gives you room to add sub-pixel detail only where it will not conflict with the base design.
Converting the Flat Skin Into a Watertight Voxel Mesh
Turning a skin into a printable object means promoting each surface pixel into a cube and then making the whole assembly a single closed solid. Done naively, the result is a mesh with one quad per surface pixel, roughly 1,632 quads or about 3,264 triangles for the base layer, plus whatever the overlay contributes. That is trivially light by modern standards but structurally useless, because it is a shell of disconnected boxes.
Two things have to happen. First, greedy meshing merges coplanar adjacent faces of the same material into larger quads, which can cut the triangle count by 60 to 80 percent on a character with large flat colour regions. Second, the six body parts have to be joined into one manifold solid, because in game they are separate floating boxes held together by a skeleton, and a printer cannot print a floating arm.
Joining means adding real connective geometry: a shoulder join between arm and torso, a hip join between leg and torso, and a neck between head and torso. Keep these joins at least two voxels of overlap so the union operation produces a solid connection rather than a coincident-face intersection, which most slicers report as a non-manifold error.
Before sending anything to a printer, run a mesh check for non-manifold edges, self-intersections, and inverted normals. Voxel conversions are prone to all three, especially where the overlay layer intersects the base layer at corners. Blender's 3D-Print Toolbox or any slicer's built-in repair will find them; fixing them at the mesh stage is far cheaper than a failed print.
Setting Wall Thickness and Scale for 3D-Printing Your Blocky Self
Scale is easy because the model is dimensionless: it is 32 voxels tall, so pick a voxel size and multiply. At 3 mm per voxel you get a 96 mm figure, just under four inches, which is the sweet spot for a desk toy. At 4 mm per voxel you get 128 mm, and at 6 mm you get a 192 mm statement piece that costs considerably more to print.
Wall thickness depends on process. As a working rule, use 1.5 to 2 mm walls for FDM and 1 to 1.5 mm for resin, and hollow the model rather than printing it solid, which saves material and reduces resin cure stress. If you hollow a resin print, add two drain holes of 3 mm or larger, ideally under the feet, or trapped resin will keep curing and crack the shell weeks later.
| Voxel size | Figure height | Head cube | Notes |
|---|---|---|---|
| 2 mm | 64 mm | 16 mm | Detail loss at the face; paint carefully |
| 3 mm | 96 mm | 24 mm | Best balance of cost and readability |
| 4 mm | 128 mm | 32 mm | Face pixels clearly separate; good for colour print |
| 6 mm | 192 mm | 48 mm | Display size; hollow and consider printing in parts |
Orientation matters less than usual here, which is a genuine advantage of blocky models. Every surface is axis-aligned, so a figure standing upright on the plate has no overhangs steeper than 90 degrees except under the arms and jaw, and those are short enough to bridge or to support lightly. Print standing, keep supports off the face, and add a small brim if the footprint is only two 4x4 voxel feet.
Lighting and Rendering Voxel Figures Without Losing the Pixel Look
Rendering a voxel character model convincingly is mostly a list of things to switch off. The default render settings of every modern engine are tuned to make surfaces look soft and physical, and each of those defaults erodes the pixel aesthetic you spent your budget building.
- Texture filtering: nearest or point. Non-negotiable. This is the single setting that separates a crisp render from a blurry one.
- Mipmaps: off, or nearest-mipmap-nearest. Smooth mipmapping turns distant pixels to grey mush.
- Normal interpolation: flat shading. Smooth-shaded cubes get rounded-looking corners, which fights the whole look.
- Anti-aliasing: keep it, but on geometry edges only. You want clean silhouettes and hard texture pixels, which is the opposite of what a blur pass gives you.
- Ambient occlusion: light or none. Heavy contact shadows in the corners of a cube read as dirt.
For lighting, a strong key light at roughly 45 degrees, a soft fill at a quarter of the key's intensity, and a rim light to separate the character from the background is all you need. Keep shadows reasonably sharp; soft shadows fight the hard-edged geometry.
The one place to break the rules is materials. Giving the eyes a slightly different roughness value, or adding a faint emissive to a headphone LED, adds interest without touching the pixel grid. Since Threedium exports PBR materials, you have roughness and metallic channels available, and used sparingly they make a voxel figure feel like an object rather than a screenshot.
Where Can You Use Your Minecraft-Style Character?
Once you make yourself a Minecraft character, the two exports go to different places. The PNG lives in the game; the mesh lives everywhere else. Below is what each is genuinely good for, and where the practical limits sit.
Playing With Your Likeness on Java, Bedrock, and Consoles
The obvious use is the best one. If you make yourself a Minecraft character, a single 64x64 PNG works across Java and Bedrock, so one export covers desktop, mobile, and console play, subject to the platform-specific import routes covered earlier. Once uploaded, the skin is tied to your account and follows you to every world and server that permits custom skins.
What is worth knowing is how your character will actually be perceived in play. Other players see you at a distance, in motion, usually from the side or back, often in poor light. That is why the hair silhouette and the shirt colour do the heavy lifting and the face barely registers. If you want to be recognizable to friends across a build site, give yourself a distinctive colour combination rather than a detailed face.
Consider making a small set rather than one skin. A base version, a hood-up version, and a seasonal version take minutes each once the base exists, because they are overlay-layer edits on the same character.
Skin Rules on Servers, Realms, and the Marketplace
Custom skins are widely allowed but not universally. Large public servers frequently run content rules, and some enforce them automatically by rejecting or replacing skins that trip a filter. The common restrictions are consistent across most communities and worth designing around from the start.
- No semi-transparent pixels. Partially transparent skins have historically been used to gain a visibility advantage and are commonly blocked. Keep alpha binary.
- No impersonation. Copying another player's skin, or a staff member's, is a fast route to a ban on most servers.
- Content standards apply. Family-friendly servers enforce clothing and imagery rules on skins just as they do on chat and builds.
- Bedrock Realms and featured servers may restrict custom-imported skins to Marketplace content in certain configurations.
Selling skins is a different matter entirely. The official Marketplace is a curated, partner-based storefront, not an open upload platform, and publishing there involves an application and approval process rather than simply listing a file. A likeness of yourself is fine to wear anywhere that allows custom skins; commercially distributing Minecraft-style content is a separate conversation involving Mojang's own guidelines, and you should read those directly before selling anything.
Ordering a Printed Figurine vs $35-$199 Custom Print Services
A physical 3d printed minecraft figure of yourself is the most satisfying reason to make yourself a Minecraft character, and there are three routes to it. Printing it yourself on an FDM machine costs a few dollars of filament and gives you a single-colour figure you paint by hand, which suits the blocky aesthetic well since every panel is a flat rectangle. Printing on your own resin machine gives crisper voxel edges at similar material cost.
Sending the file to a bureau is the route most people take. Full-colour processes such as binder jetting or multi-jet printing reproduce the skin texture directly, and for a 90 to 130 mm figure typical pricing runs $35 to $80 at the small end and $120 to $199 for larger or higher-quality full-colour work, with turnaround usually 7 to 14 business days plus shipping. The third route is a custom service that does the modelling for you from a photo, which lands in the same price band but bundles labour you have already automated.
That is the real calculus. If you already have a clean, watertight, textured mesh out of the generator, you are paying a bureau only for the printing, which is the cheap part of the transaction. If you commission the whole job from a photo, you are paying for modelling time you did not need to buy. Generate first, then shop for printing on price and process alone.
Full-colour prints are more fragile and more expensive per millimetre than monochrome. For a first print, run a single-colour test at 3 mm per voxel to check the joins, the wall thickness, and the standing balance. It costs almost nothing and it catches the non-manifold problems that would otherwise waste a full-colour order.
Dropping the Voxel Figure Into Blender, Unity, or Unreal Renders
The GLB or FBX export drops into any modern DCC or engine, and because a voxel character is geometrically trivial, it is a genuinely cheap asset to work with. After greedy meshing you are typically looking at a model in the low thousands of triangles with a single 64x64 or upscaled texture, which is lighter than almost anything else you will put in a scene.
The workflow is the same everywhere: import, switch the texture sampling to nearest, set the material to flat shading, and check the scale. Blender treats one unit as one metre by default, Unity does the same, and Unreal uses centimetres, which is where FBX imports most often arrive a hundred times too large or too small.
If Threedium generated a rig with the export, you have a posable figure rather than a static one. The standard player skeleton is six parts, which is few enough that hand-posing is fast and animation retargeting from generic humanoid clips generally works, though limbs that bend in the middle will not, since there are no elbow or knee joints in the base model. For anything more expressive, the format simply is not built for it.
Making Profile Pictures, Thumbnails, and Stream Overlays From Renders
A rendered voxel likeness is a strong profile picture because it survives being displayed tiny. The hard edges and limited palette that made the format difficult to work in are exactly what keep it legible at 64 or 128 pixels on a timeline, where a photograph or a detailed illustration turns to noise.
For a profile picture, render a square crop framing the head and shoulders with the character turned about 15 to 20 degrees off axis, which shows two faces of the head cube and reads as three-dimensional rather than as a flat sprite. Keep the background a solid contrasting colour or transparent, and render at 1024x1024 so the same asset downsamples cleanly everywhere.
For thumbnails and stream overlays, the mesh export is worth more than the skin because you can pose and light it per shot. A full-body render at a dramatic angle with a strong rim light makes a workable thumbnail subject, and because the model is so light you can iterate on poses quickly. Rendering with a transparent background gives you a PNG you can composite over any layout without re-rendering.
When You Need Game Asset Models Instead: Blocks, Mobs, and Props
Everything on this page is about a likeness of a person, but the same generator handles blocky game assets: custom blocks, mob models, tools, and environment props built to the same voxel grid. If that is what you came for, the Minecraft-style game asset workflow covers texture atlases, block model formats, and mob geometry in detail.
Frequently Asked Questions About How to Make Yourself a Minecraft Character
How do I make a Minecraft character that looks like me?
To make yourself a Minecraft character that looks like you, upload a clear, evenly lit, front-facing photo to an ai minecraft skin generator such as Threedium, prompt for a flat, hard-edged voxel likeness on standard player proportions, then review the 8x8 face panel and fix the eye row, the hairline, and the top of the head before exporting. Export the 64x64 PNG to wear in game and the GLB or FBX mesh if you also want renders or a print.
The part people underestimate is the review. Generation gets you 80 percent of the way there in a minute, and the last 20 percent of what it takes to make yourself a Minecraft character is four or five specific pixel decisions: eyes on row 4, a hairline that wraps all six faces of the head cube, enough contrast between base and shadow skin tones, and a distinctive shirt colour. Those five checks are the difference between a generic character and one your friends recognize across a server.
Is there a free AI that turns a photo into a Minecraft skin?
Several free tools will turn photo into minecraft character pixels, and most let you make yourself a Minecraft character on a limited free tier with watermarking, low generation limits, or output restricted to the flat PNG. They are a reasonable way to test the idea. Where free tools generally stop is at the 3D side: producing a rigged, watertight, printable mesh with PBR materials is a different technical problem from painting a texture.
The honest comparison is by output. If all you want is a skin to wear, a free minecraft skin maker or a manual pixel editor will get you there, and a patient person with an editor and a reference photo can hand-place all sixty-four face pixels in an evening. If you want the same likeness as a posable model, an AR-ready USDZ, and an STL you can print, you need a platform that generates real geometry, which is what the 3D model generator is built to do.
What size and format does a Minecraft skin need to be?
A skin must be a 64x64 pixel PNG with an alpha channel, in sRGB, 8 bits per channel. Files are typically 2 to 8 KB. The older 64x32 layout still loads on Java for legacy reasons but has no second layer and no separate left-arm or left-leg textures, so there is no reason to use it today.
The 64x64 minecraft skin format divides that canvas into a base layer and an overlay layer, giving 1,632 usable surface pixels each on the classic model. Anything larger, such as a 128x128 HD skin, requires third-party client support on Java and will show as a default character to everyone else, so build at 64x64 for play and reserve higher resolutions for renders and prints.
How do I upload a custom skin to Java or Bedrock?
On Java, sign in to your profile at minecraft.net or open the skins tab in the official launcher, select your PNG, choose classic or slim to match the arm width you built, and save. On Bedrock, open the Dressing Room from the profile screen, go to classic skins, pick an empty custom slot, import the PNG from local storage, and confirm the body type.
If the skin does not appear, check three things in order: the file is exactly 64x64, it is a genuine PNG rather than a renamed JPEG, and the body type you selected matches the one you painted. Cached skins can also take a few minutes to propagate to servers, and other players may need to reconnect before they see the change.
What is the difference between Steve and Alex skins?
The only difference is arm width. The classic model, associated with Steve, has 4-pixel-wide arms; the slim model, associated with Alex, has 3-pixel-wide arms. Head, torso, and leg dimensions are identical on both, and both characters are 32 pixels tall overall.
Because the arm width changes the UV layout, a skin painted for one model does not transfer cleanly to the other: you lose or gain a pixel column on each arm and everything after it shifts, producing visible seams. Decide which model you want before generating. Modern versions ship a wider set of default characters than the original two, but each of them still uses either the classic or the slim geometry underneath.
Can I 3D print my Minecraft character?
Yes, once the flat skin has been converted into a watertight voxel mesh with the body parts joined into a single solid. Export as STL or convert from the GLB, scale by picking a voxel size, and print: 3 mm per voxel gives a 96 mm figure, which is the most common desk-toy size. Use 1.5 to 2 mm walls on FDM or 1 to 1.5 mm on resin, hollow the model, and add drain holes for resin.
The three things that cause failed prints are non-manifold edges where the overlay layer intersects the base layer, floating limbs that were never joined to the torso, and a footprint too small to keep a top-heavy figure standing. Run a mesh check before ordering, and if you are using a bureau for a full-colour print at $35 to $199, do a cheap single-colour test print first.
Can I use my Minecraft-style model outside the game?
Yes. The exported GLB, USDZ, or FBX is an ordinary 3D model and works in Blender, Unity, Unreal, web viewers, and AR, and it renders into profile pictures, thumbnails, and stream overlays. Because it is your own original character generated from your own photo, you own the likeness, and the personal likeness workflows are designed for exactly this kind of reuse across formats.
The boundary to respect is intellectual property. Minecraft is a trademark of Mojang Studios and Microsoft, and while a blocky original character of yourself is your own work, reproducing their character designs, logos, or branded assets in commercial products is not. Describe your output as Minecraft-style, never imply endorsement, and check the relevant brand and usage guidelines directly before selling anything derived from the aesthetic.