How Do You Turn Yourself Into a Custom Bobblehead From Photo References?
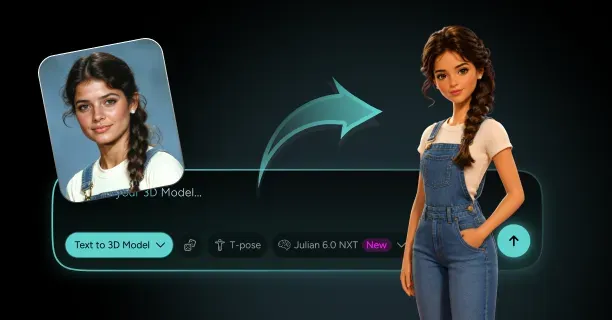
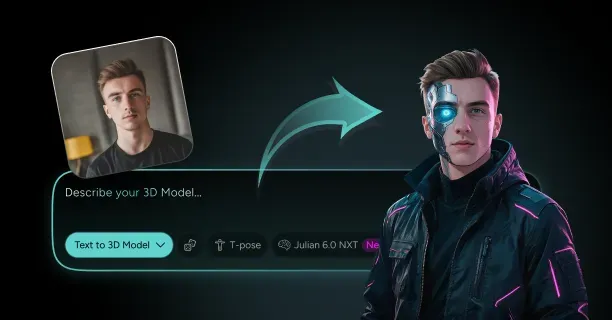
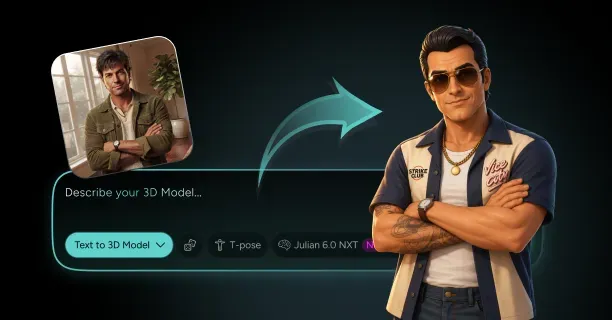
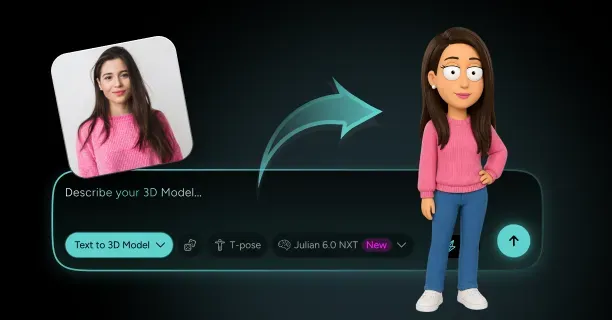
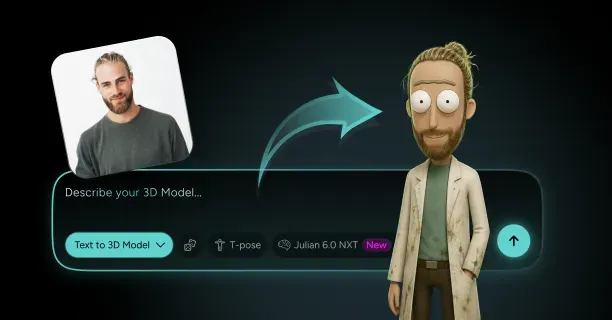
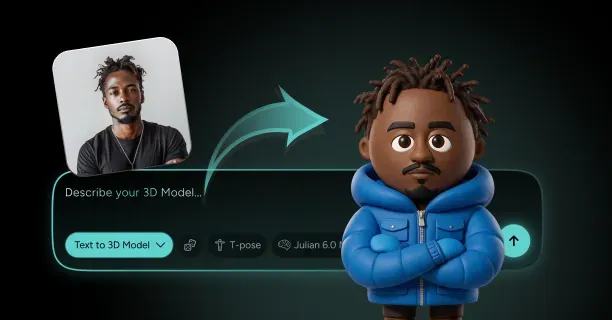
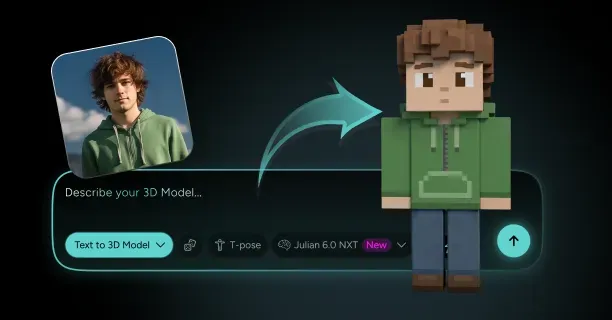
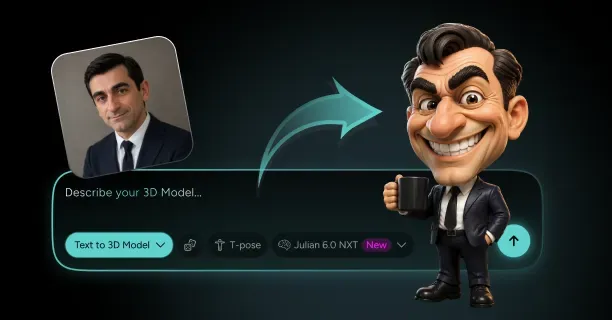
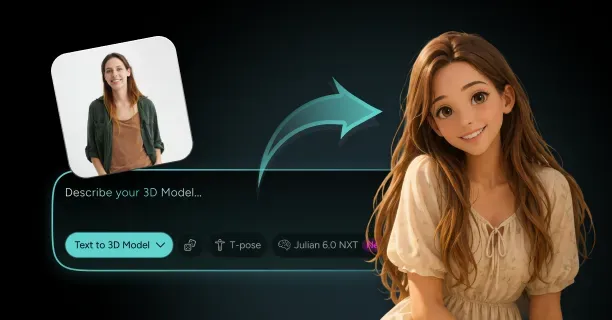
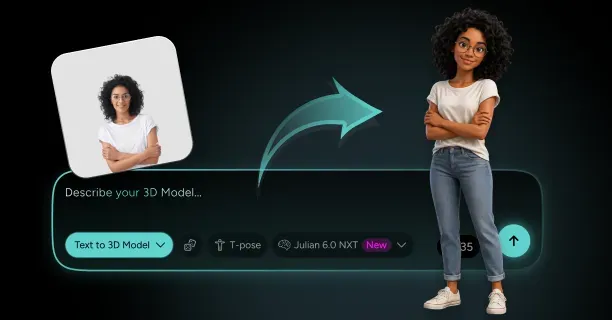
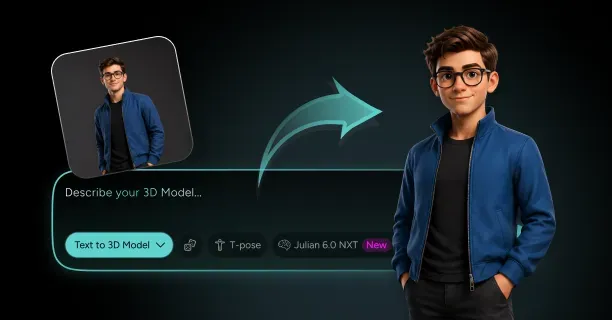
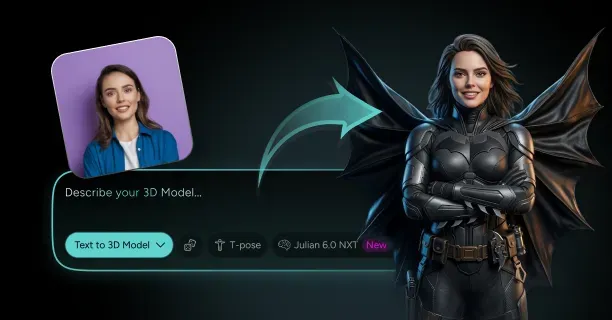
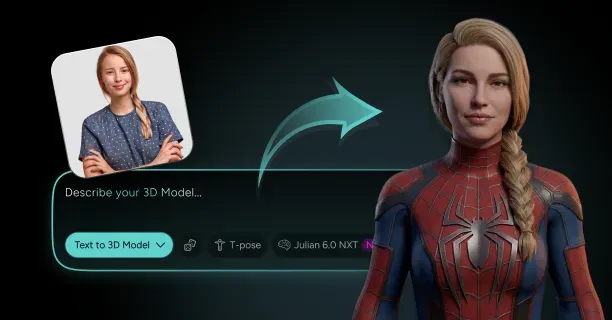
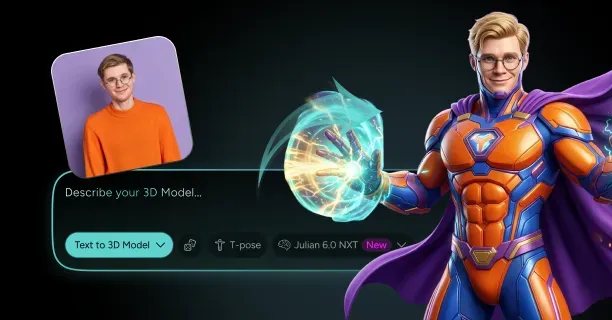
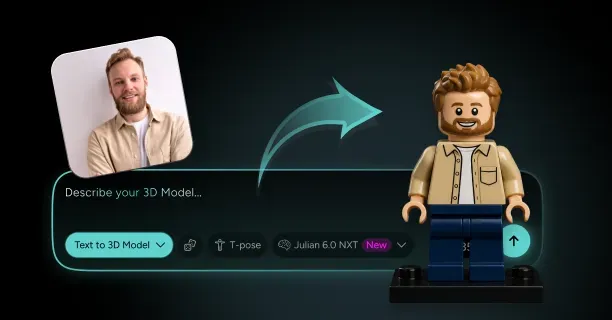
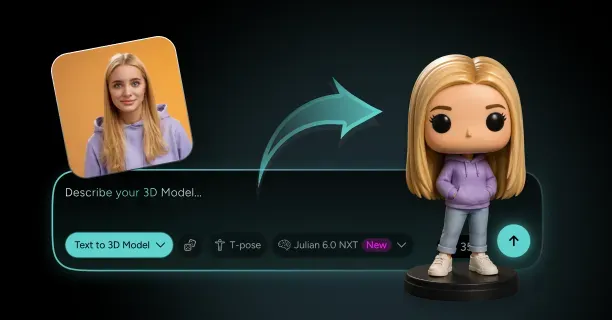
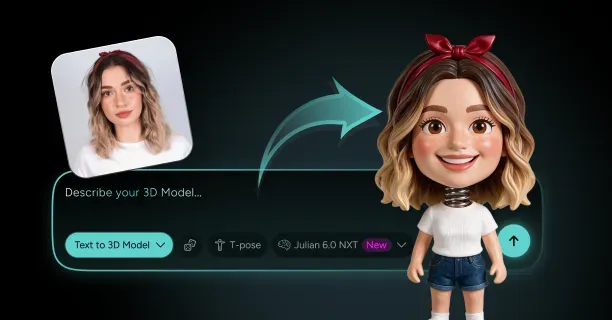
To build a custom bobblehead from photo references, upload two or three clear images of your face to Threedium and prompt its Julian NXT generator for a caricature bust on a scaled-down body, then export the result and split it into printable parts. The platform returns a textured mesh with PBR materials and clean topology in GLB, USDZ, or FBX, which you convert to a watertight STL, hollow the head, add a neck peg, and print. The whole modelling stage takes minutes instead of the three to four weeks a hand-sculpting studio needs.
What separates a custom bobblehead from photo input from every other stylized figure is the mechanism. A 1:3 head-to-body ratio, a hollow skull light enough to move, a spring seated on a neck peg, and a base heavy enough to stay put are all engineering decisions, not art decisions. This page covers the full path from photo to nodding desk toy, including the parts a generator cannot do for you.
If you want the exaggerated features without the spring, a static caricature bust is a simpler print and a cheaper one. Start from the turn yourself into a 3D model workflow instead and skip the entire mechanism section below.
Pick a Front-Facing Photo That Captures Your Likeness
Reconstruction quality is capped by your input long before any prompt matters. The best source is a straight-on portrait at 2048 px or larger on the long edge, shot in flat, diffuse light with the whole head and both ears inside the frame. Soft window light or open shade beats a flash: hard shadows under the nose and chin get read as geometry and end up baked into the sculpt as dents.
Focal length matters more than most people expect. A phone selfie taken at arm's length uses roughly a 24 to 28 mm equivalent lens, which balloons the nose and shrinks the ears. Have someone shoot you from about two metres away with the 2x or 3x telephoto, or use any camera in the 50 to 85 mm equivalent range. That distortion is invisible in a photo and glaringly obvious once it is a solid object sitting on a desk.
- Shoot a front view plus a three-quarter view at the same session, same lighting, same haircut. Two angles resolve the cheekbone and jaw volume that a single frontal view has to guess at.
- Keep the expression neutral or a closed-mouth smile. Open-mouth laughs create a cavity the generator has to invent teeth for, and printed teeth at this scale read as a grey smear.
- Pull hair back from the forehead and temples so the hairline is visible. Hairline shape is one of the strongest likeness cues on a shrunken face.
- Remove sunglasses. Clear prescription glasses are fine and can be modelled as a separate element, but mirrored lenses erase the eyes entirely.
- Avoid heavy compression. A re-shared social media JPEG that has been through three platforms carries blocking artefacts around the eyes and lips that survive into the mesh.
Upload Your Photo to Threedium's AI Generator
Drop your references into the image input on Threedium's 3D model generator and pair them with a written prompt. Generating a custom bobblehead from photo uploads is a two-part instruction: the image carries likeness, the text carries proportion, pose, and style. Treating the prompt as an afterthought is the most common reason a first generation comes back looking like a normal figurine with a slightly large head.
A workable first prompt reads something like: collectible bobblehead figurine of the person in the reference photo, oversized head at one third of total height, small simplified body, smooth matte skin, standing on a round pedestal base, neutral studio lighting, front-facing symmetrical pose. Naming the object class explicitly matters, because an ai bobblehead generator prompt that only says "figurine" will default to realistic human proportions.
Prompt for the Classic 1:3 Head-to-Body Ratio
The single defining spec of the form is proportion. On a mass-produced collectible the head occupies roughly one third of total height, against a real human ratio closer to one seventh. That means at a 7-inch (178 mm) finished height, the head is about 59 mm tall and the body plus base share the remaining 119 mm. Anything under about 1:4 stops reading as a bobblehead and starts reading as a stubby action figure.
Ask for the ratio numerically in the prompt rather than with adjectives. "Head is one third of total figure height" produces more consistent results than "big head", because the generator has a target rather than a vibe. If the first pass comes back too conservative, push to 1:2.75 before you push the facial exaggeration, since the ratio does most of the stylistic work on its own.
| Element | Share of total height | At 7 in / 178 mm | Notes |
|---|---|---|---|
| Head (crown to chin) | 33 percent | 59 mm | Classic collectible ratio |
| Torso and legs | 55 percent | 98 mm | Simplified, low detail |
| Base | 12 percent | 21 mm | Includes 8 to 10 mm ballast cavity |
| Head width at cheekbones | - | 48 to 54 mm | Slightly narrower than height |
| Shoulder width | - | 52 to 60 mm | Should not exceed head width by much |
Exaggerate the Right Facial Features Without Losing the Likeness
Caricature works by amplifying deviation from the average, not by enlarging everything. If your jaw is already square, push it squarer. If your nose is narrow, make it narrower. Uniform inflation just produces a generic balloon head that could be anyone. The features that carry recognition on a small printed figure are, in rough order of importance: hairline and hair silhouette, brow shape, nose profile, and jaw width.
Restraint on the eyes pays off. Enlarged cartoon eyes are tempting, but they flatten the individual read fastest of any change, because eye size varies less between people than nose or chin geometry does. A 10 to 15 percent increase in eye aperture is usually enough to keep the face lively at 59 mm without erasing you from it.
- Amplify shape, not size: a hooked nose becomes more hooked, a broad nose becomes broader. Both stay the same overall volume.
- Keep interpupillary distance proportional to the enlarged skull. Eyes that stay at real spacing on a tripled head look crowded toward the centre.
- Preserve asymmetry. Real faces are slightly uneven, and a perfectly mirrored bobblehead reads as a mannequin rather than as a specific person.
- Deepen the nasolabial and brow creases by roughly 0.5 mm at print scale. Shallow detail disappears under primer and paint.
Choose a Body Pose: Sports, Profession, Wedding, or Fully Custom
Bobblehead bodies are deliberately simple. The head does the identifying, so the body only has to communicate a role in one glance. That is why the four dominant categories are so durable: sports, profession, wedding, and hobby. Each has a canonical stance that reads instantly at 100 mm.
Sports poses are the most forgiving because they are already stylized: a batter mid-stance, a keeper crouched, a runner with one arm forward. Profession poses lean on props more than posture, so a chef pose is really a chef hat plus a pan. Wedding poses need the most care, since a couple has to work as either one printed piece or two figures that pair on a shelf.
Keep arms close to the body. Every limb held away from the torso is an overhang that needs support during printing and a weak point after it. A pose with arms folded, hands on hips, or one arm crossing the chest gives you personality without a fragile outstretched wrist that snaps the first time the figure gets knocked over.
Add Outfit Details, Props, and Team Colors to the Body
Clothing on a personalized bobblehead should be treated as blocked shapes with a handful of hard edges, not as fabric simulation. At a 100 mm body, a shirt collar is a 1 mm step, a belt is a 2 mm band, and a tie is a flat tapered plate. Anything finer than about 0.6 mm of relief will be swallowed by primer, and anything thinner than 1 mm in cross-section will be fragile on an FDM print.
Team colours and logos are best handled in texture rather than geometry. Threedium generates PBR texture sets, typically at 2048 x 2048 or 4096 x 4096, which is exactly what you need for a digital render or a full-colour print. If you are painting by hand instead, keep a rendered turntable of the textured model open as your reference, since it already shows where the colour breaks fall on the sculpt.
- Props under 3 mm thick (golf clubs, microphones, pens) should be printed separately and pinned in with 1 mm brass rod, not printed attached.
- Ask for flat colour blocking rather than photorealistic fabric weave. Weave detail at this scale becomes visual noise.
- Jersey numbers and short names work as raised text at 0.4 mm relief if you plan to dry-brush them, or as texture only if you are printing in colour.
- Trademarked team logos are fine for a private gift; do not sell figures carrying them.
Select a Base Style: Round Pedestal, Plaque, or Engraved Nameplate
The base is doing two jobs at once: it presents the figure and it stops the figure from tipping over every time the head moves. Three shapes cover nearly every use. A round pedestal at 55 to 65 mm diameter is the stadium-giveaway default and the most stable per gram. A rectangular plaque at roughly 60 x 45 mm suits desk and shelf placement and gives you a flat front face. An engraved nameplate is a plaque with recessed text, which is the version people actually keep on a desk for years.
Design the base as a shallow open box, not a solid slab. You want an internal cavity about 8 to 12 mm deep with a flat floor, sealed later with a printed or laser-cut disc. That cavity is where the ballast goes, and adding it after the fact by drilling a finished print is miserable work. Engraved text needs real depth: cut names and dates 0.6 to 0.8 mm deep with a stroke width of at least 1 mm, in a chunky sans or slab serif, because thin scripts vanish once the print is primed.
Refine Hair, Glasses, and Facial Hair So the Face Reads Instantly
Hair is the highest-leverage element on the whole model, because it defines the silhouette and silhouette is what you recognise from across a room. Model it as two to five solid masses with clear parting lines rather than as individual strands. Strand-level hair is unprintable at 59 mm head height and unpaintable even if it survives.
Glasses are the classic failure point. Printed as part of the head, frames at true scale would be 0.3 to 0.4 mm thick, which is below the reliable minimum for both resin and FDM. Thicken them to 1 to 1.2 mm and let them sit slightly proud of the face, or print them flat from a separate file and glue them on. Full lenses should be left out entirely, since a solid lens hides the eyes and an empty frame reads correctly at a glance.
- Beards and moustaches need 1 mm or more of relief off the face plane, with a defined outer edge, or they disappear into the skin under primer.
- Bald and closely shaved heads are the easiest to print and paint. Do not add fake stubble texture; paint a shadow instead.
- Long hair that falls past the jaw must be tucked into the neck or shoulders. Free-hanging hair around a nodding head will collide with the shoulders on every bounce.
- Ponytails and buns shift the head's centre of mass backward. Keep them tight to the skull or compensate in the ballast, or the head will rest tilted back.
Preview the Head-to-Body Balance in the 3D Viewer
Before exporting anything, orbit the model in the viewer and check it from angles you would never see in a render. The profile view is the one that catches problems: it shows whether the head sits forward of the shoulders, whether the chin overhangs the chest, and whether the back of the skull clears the upper back when the head tips.
Look specifically for the underside of the chin. On a real bobblehead the head has to tilt forward and back, and a chin that already touches the chest at rest will have nowhere to go. You want visible daylight between the jaw and the collarbone in the neutral pose, roughly 4 to 6 mm at 7-inch scale.
Check the front view for lean as well. Generated figures often carry a slight tilt inherited from the reference photo's head angle, which is invisible on screen and unmissable on a desk. Drop a vertical guide through the centre of the base and confirm the nose bridge, the sternum, and the gap between the feet all sit on it.
Decide Between a Fixed Head and a Spring-Mounted Nodder
This is the fork in the road, and it changes the model, not just the assembly. A fixed-head figure prints as one or two pieces, needs no internal geometry, and can be printed solid. A spring-mounted nodder needs the head and body modelled as separate watertight solids, a hollow skull, a neck peg, a receiving cavity, and a weighted base. It is roughly three times the preparation work.
Choose fixed if the figure is a display piece, a bobblehead cake topper that has to survive a car ride and a reception, or a bulk run where assembly time multiplies. A cake topper in particular is better rigid: a nodding head on a moving cake is a liability, and the topper spends most of its life being carried.
Choose the nodder if the figure is going on a desk and the whole point is that someone will flick it. The bobblehead spring mechanism is what makes the object a toy rather than an ornament, and it is the part that gets played with for years. It is also the part no generator produces for you, which is why the next section covers it in detail.
Export Your Bobblehead as GLB, USDZ, or FBX
Threedium exports to GLB, USDZ, and FBX, and which one you pick depends on where the model is going next. GLB is the practical default: it packs mesh, materials, and textures into one file and imports cleanly into Blender for print preparation. USDZ opens as an AR object on an iPhone straight from a message, and FBX suits a game engine or animation package. The trade-offs between them are laid out in more detail in the 3D file format guide.
None of these are print formats. Slicers want STL or 3MF, and getting there means one conversion pass. Import the GLB into Blender, check that the mesh is manifold, separate the head from the body if you are building a nodder, apply real-world scale, and export each part as its own STL. 3MF is worth preferring over STL when your slicer supports it, because it carries units explicitly and STL does not.
- Keep the untouched GLB archived. Every print-prep step is destructive, and you will want to go back to the original when you reprint at a different size.
- Run a 3D-print toolbox check for non-manifold edges, loose vertices, and flipped normals before you slice. Fix them in the mesh, not in the slicer.
- A bobblehead 3d model destined for full-colour printing must keep its UVs and texture intact, so export as GLB or a coloured 3MF, not as bare STL.
- Set units before export. A model that arrives at the slicer as a 7 mm figure instead of a 178 mm one has lost its scale in translation.
Send the Model to a Resin Printer or an Online Print Service
With STLs in hand you have two routes. A home MSLA resin printer gives you the best surface for faces and the fastest iteration loop: print, look at it, adjust, reprint the same evening. Consumer machines with build volumes around 150 x 90 x 170 mm take a 7-inch figure only split, which you are doing anyway for a nodder.
An online service is the better call if you want colour or a material you cannot run at home. Shapeways, Sculpteo, and Craftcloud accept uploads, quote per part, and ship finished pieces, with a typical turnaround of one to two weeks including shipping.
Whichever route you pick, the first physical output from a custom bobblehead from photo project should be a test head at 40 percent scale. It costs a few cents of resin and thirty minutes, and tells you whether the likeness survives at print resolution before you commit four hours and a full tank.
What Makes a Bobblehead Actually Nod?
A bobblehead nods because an oversized hollow head sits on a small helical spring anchored in the shoulders, and the head's mass, the spring's stiffness, and the base's weight are tuned against each other. Get any one of the three wrong and you get a head that either barely moves or flops around like it is broken. This is the part that no bobblehead maker tool or AI generator produces for you, and it is where a printed custom bobblehead from photo references succeeds or fails.
Why the 1:3 Head-to-Body Ratio Defines the Bobblehead Look
The ratio is not only stylistic. A head at one third of total height gives you a skull large enough to hollow out and still contain a spring cavity, a mounting boss, and glue, which a realistically proportioned head simply cannot at this scale. At 59 mm tall you have room for a 19 mm spring plus seating depth. At a realistic 25 mm head you do not.
There is a practical limit in the other direction. Past about 1:2.5, the head gets heavy enough relative to the body that either the spring has to stiffen (killing the bounce) or the base has to gain significant mass. Most well-behaved printed nodders live between 1:2.8 and 1:3.2.
Modeling the Neck Peg and Head Cavity for the Spring
The mechanism is two mating features: a neck peg rising from the shoulders and a cavity in the underside of the head, with the spring bridging them. The peg is a cylinder, typically 4 mm diameter and 8 to 10 mm tall, sitting in a shallow collar recess so the spring's bottom coils have a flat shelf to rest on. Model it as part of the body, not as a separate piece; a glued-on peg is the first thing to fail.
The head cavity mirrors it. Bore a blind hole roughly 5 mm in diameter and 10 to 12 mm deep up into the skull from the neck opening, ending well below the eyes so you never break through the face. Inside that hole, model a matching internal boss the spring's top coils grip. The spring is captured at both ends and free in the middle, which is exactly the behaviour you want. Because both processes add material relative to the CAD dimension, model the peg 0.1 to 0.2 mm under nominal and the cavity 0.2 to 0.3 mm over, then test-fit with a scrap print.
- Add a 0.5 mm chamfer at the mouth of the head cavity. It guides the spring in during assembly and stops the rim chipping.
- Keep the peg on the figure's vertical centreline. An offset peg makes the head rest crooked no matter how well the rest is balanced.
- Leave 2 mm of solid material around the cavity walls inside the head so the boss does not tear out of a hollow shell.
- Model a small vent hole through the top of the head cavity if you are resin printing, or the blind hole will trap uncured resin.
Choosing the Right Spring: Gauge, Diameter, and the Classic 3/4-Inch Length
The industry-standard bobblehead spring is small: roughly 3/4 inch (19 mm) free length, 6 to 8 mm outer diameter, wound from music wire around 0.5 to 0.7 mm (0.020 to 0.028 in) gauge, with closed ends. That combination gives a soft, slow oscillation rather than a fast buzz, and it is what the toy has felt like since the 1960s ceramic era.
Wire gauge is your main tuning knob. Too thin and the head sags forward at rest and wobbles unpredictably. Too thick and the head barely deflects when flicked, which reads as a stiff, cheap figure. Because printed heads vary in mass depending on wall thickness and material, buy an assortment pack of small compression springs and test rather than ordering a single size.
| Head mass (hollowed) | Wire gauge | Outer diameter | Free length | Expected behaviour |
|---|---|---|---|---|
| 8 to 12 g | 0.4 to 0.5 mm | 6 mm | 16 to 19 mm | Loose, long oscillation |
| 12 to 20 g | 0.5 to 0.6 mm | 7 mm | 19 mm | Classic collectible feel |
| 20 to 30 g | 0.6 to 0.7 mm | 8 mm | 19 to 22 mm | Firmer, fewer cycles |
| Over 30 g | 0.8 mm plus | 8 to 10 mm | 22 mm | Hollow the head further instead |
Do not substitute a ballpoint pen spring. Pen springs are wound for a short, stiff throw at around 0.3 mm wire in a 3 mm diameter, and a bobblehead head mounted on one will either not move or will lean permanently forward within a week.
Hollowing the Oversized Head to Keep the Nod Light
A solid resin head at 59 mm is a surprisingly dense lump, easily 40 to 60 grams, which no small spring will move gracefully. Hollowing is not an optional material saving here; it is the thing that makes the mechanism work. Target a finished head mass in the 12 to 20 gram band and size your spring from the result.
Use your slicer's hollow function or Blender's solidify modifier to leave a shell of 1.5 to 2 mm for resin, or 1.2 to 1.6 mm for FDM printed at 3 to 4 perimeters with sparse infill. Thinner than that and the skull flexes when you glue the boss in. Thicker and you are back to fighting the spring.
- Add two 3 mm drain holes in resin prints, positioned where they will be hidden by the neck opening or under the hair mass.
- Do not hollow the nose, chin, or ear tips. Let the shell close naturally in thin features rather than forcing a cavity into them.
- On FDM, use 10 to 15 percent gyroid infill rather than true hollowing. It adds a gram or two but stops the top surfaces sagging.
- Keep the cavity boss solid and tied to the shell with small ribs. It is the only structural connection between the spring and the head.
Balancing the Center of Gravity So the Head Bobs Instead of Flops
A nodding head is an inverted pendulum on a soft hinge. The further the head's centre of mass sits above the spring's top coil, and the further it sits off the vertical axis, the more the system wants to fall over rather than oscillate. The design goal is to keep the centre of mass close to the spring axis and as low in the skull as the shape allows.
Two features usually break this: a tall hairstyle, hat, or bun raises the centre of mass, while a long ponytail or a forward-projecting brim moves it off-axis. Both produce a head that rests tilted, the single most common complaint about home-printed nodders. Fix it in the model where possible: thicken the shell on the light side, thin it on the heavy side, or extend the cavity boss deeper into the heavy region so more mass sits near the pivot. Where the shape will not allow it, glue a small counterweight (a 1 to 3 gram steel nut or a length of solder wire) inside the shell on the opposite side before you seal the head.
Check the result physically. Rest the printed head upside down on a soft ring and see where it settles, or balance it on a fingertip. The point it balances on should be within a few millimetres of the neck cavity centreline. That check predicts nod behaviour better than any viewport inspection.
Setting Clearance Tolerances Between the Head and the Shoulders
Clearance controls how far the head can travel before something collides, and collision is what makes a nodder feel cheap. At 7-inch scale, leave a 3 to 5 mm gap between the underside of the head and the top of the shoulders in the neutral resting position, measured at the closest point rather than the average.
The closest point is rarely where you expect: the chin on a strong jaw, the back of the hair mass on a long hairstyle, the collar on a suited figure. Model a temporary cone at the neck to visualise the swept volume, rotate the head 15 degrees in each direction, and look for intersections in all four cardinal tilts.
- Rotate and check forward, backward, and both sides. Side collisions are easy to miss and are what makes a head feel notchy.
- Round the underside of the head into a shallow dome. A flat neck face will slam against the shoulders and stop the motion abruptly.
- Recess the shoulder top into a gentle bowl around the peg. It hides the gap visually while giving the head somewhere to travel.
- Account for paint. Two coats of primer plus colour add roughly 0.1 to 0.2 mm per surface, which eats into a tight gap from both sides.
Print Settings for the Nodder Parts
Print settings for a bobblehead are the same settings any small figure needs, so there is no reason to reinvent them here: 0.03 to 0.05 mm layers on MSLA resin, 0.1 mm layers with a 0.4 mm nozzle on FDM, supports off the face, and the head angled so the chin and nose are not printing into open air. Standard small-figure orientation, support placement, and wall-thickness practice applies directly to these parts, so use whatever profile your slicer already runs for tabletop miniatures.
The one bobblehead-specific rule is to slice head and body as separate files in separate orientations. The head wants to be tilted back roughly 30 degrees so supports land on the crown and neck rather than the face, while the body wants to stand near vertical so the base bottom stays flat.
Scaling Your Model to the Standard 7-Inch Collectible Height
Seven inches, about 178 mm, is the de facto standard for collectible and stadium-giveaway bobbleheads, and it is a good default for a printed one. It is big enough that a face reads from across a desk, small enough to print in two parts on a consumer machine, and it matches off-the-shelf spring hardware.
Scale in the modelling package, not in the slicer, and scale before you hollow. Hollowing to a 2 mm shell and then scaling the result to 70 percent gives you a 1.4 mm shell and a set of drain holes that no longer drain. Set final height first, then hollow, then bore the cavity, then export.
| Finished height | Head height | Spring length | Base diameter | Best use |
|---|---|---|---|---|
| 4 in / 102 mm | 34 mm | 12 to 14 mm | 38 mm | Cake topper, keychain scale |
| 5 in / 127 mm | 42 mm | 16 mm | 45 mm | Bulk office runs |
| 7 in / 178 mm | 59 mm | 19 mm | 55 to 65 mm | Standard collectible |
| 9 in / 229 mm | 76 mm | 22 to 25 mm | 75 mm | Display piece, needs ballast |
Designing a Base Heavy Enough to Survive the Wobble
Every nod puts a horizontal impulse into the figure, and a light printed base will walk across a desk or tip. The rule of thumb that works is to make the base and lower body together weigh at least three times the head. For a 15 gram head, you want 45 grams or more sitting under it.
A printed PLA base at 60 mm diameter and 20 mm tall weighs maybe 12 grams hollow, so ballast is not optional. Fill the cavity you modelled earlier with steel BBs, lead-free shot, or M5 nuts set in two-part epoxy, then cap it with a printed disc and a felt pad. Epoxy matters: loose shot rattles, and rattle in a nodding toy is worse than no nod at all.
- Keep ballast low and centred. Weight at the top of the cavity does much less for stability than the same weight at the floor.
- A 25 mm steel washer epoxied flat to the cavity floor is the cleanest single-part solution and adds around 15 grams.
- Add a felt or cork pad to the bottom. It stops the figure creeping across a hard desk as it oscillates and protects the surface.
- If the figure ships as a gift, ballast before packing. A weighted base is far less likely to arrive with a snapped ankle.
Gluing and Seating the Spring Without Killing the Bounce
The spring must be rigidly captured at both ends and completely free in the middle. Glue that wicks up into the middle coils turns your soft hinge into a stiff rod, and it is unrecoverable once cured. Bond the bottom one and a half coils to the neck peg and the top one and a half coils into the head cavity, and nothing else.
Use a gel-viscosity cyanoacrylate or a slow two-part epoxy rather than thin CA. Thin CA is exactly the product that will run the length of the spring by capillary action. Apply a small bead to the peg collar, seat the spring with a twist so it screws down onto the shelf, and let it set fully before touching the head end. Dry-fit the whole stack first and check the resting angle: if the head sits tilted, that is the moment to add a counterweight or swap springs.
Let the lower joint cure completely, then assemble the head end and immediately set the figure upright to cure. Curing the head end while the figure lies on its side locks in a permanent lean that you cannot correct later.
Testing the Nod: How Much Head Travel Looks Right
The target behaviour is well defined. A light flick of the head should produce a tilt of roughly 12 to 18 degrees from vertical, decaying over 4 to 8 visible cycles across about 2 to 4 seconds, and settling dead upright. That is the motion people recognise as a bobblehead.
Diagnose from the failure mode. A head that moves less than 8 degrees is over-sprung, over-weight, or both: hollow further, or drop a wire gauge. A head that swings past 25 degrees and takes a long time to settle is under-sprung: go up a gauge or shorten the free length by a coil. A head that oscillates fast and stops in under a second has too short or too stiff a spring for its mass.
- A head that rests tilted is a balance problem, not a spring problem. Adding stiffness hides it; it does not fix it.
- A head that rotates freely around the vertical axis means the spring is not properly seated at one end. Re-glue, do not tolerate it.
- A grinding or clicking sound on each cycle is a collision. Go back to your clearance check with paint thickness included.
- Test after painting, not before. Paint adds mass to the head and thickness to the gap, and both change the behaviour.
Which Material Should You Choose for a Printed Bobblehead?
Material choice sets the ceiling on facial detail, decides whether you paint or not, and drives most of the unit cost. Because a custom bobblehead from photo input lives or dies on whether the face is recognisable, material matters more here than on a generic figurine. For a 3d printed bobblehead the practical shortlist is three deep: photopolymer resin for detail, PLA for cheap durability, and full-colour powder printing for a paint-free likeness straight off the machine.
| Material | Detail resolution | Colour | Durability | Typical 7-in cost | Best for |
|---|---|---|---|---|---|
| MSLA resin | Excellent, 0.03 mm layers | Paint required | Brittle if dropped | 3 to 8 USD in material | Faces, fine detail, small runs |
| PLA (FDM) | Fair, 0.1 mm layers | Paint required | Tough, forgiving | 1 to 3 USD in material | Desk toys, bulk office runs |
| Full-colour sandstone | Good, slightly grainy | Printed in full colour | Fragile, chalky | 60 to 120 USD per part | Photo likeness, no painting |
| Nylon (SLS) | Good, matte finish | Dyed single colour | Very tough | 40 to 90 USD per part | Figures that get handled hard |
Resin for Smooth Skin and Fine Facial Detail
Resin is the default for anything where a face has to be recognisable. MSLA machines expose an entire layer at once through an LCD mask, with XY resolution around 20 to 35 microns and layer heights of 0.03 to 0.05 mm, which is enough to hold an eyelid crease, a nostril, and the edge of a hairline at 59 mm head height. Nothing FDM does comes close on skin.
The costs are handling and toughness. Standard resins are brittle, and a 7-inch figure knocked off a desk can snap at the ankles or the neck peg. Blending in 10 to 20 percent of a tough or ABS-like resin takes the edge off that without losing meaningful detail, and it is the standard move for parts that will be handled.
Uncured resin is a skin sensitiser. Wear nitrile gloves, work in ventilation, wash prints in isopropyl alcohol, and cure fully before painting. A gift figure that has not been post-cured properly stays slightly tacky and will collect dust for years.
PLA for Cheap, Durable Desk-Toy Bobbleheads
PLA on a decent FDM printer is the value option, and for bodies and bases it is arguably the better choice regardless of budget. It is tough, it costs pennies, and a 7-inch body prints unattended overnight. Nobody inspects a bobblehead's torso for layer lines.
Heads are the compromise. At 0.1 mm layers with a 0.4 mm nozzle, a printed face has visible stepping across the cheeks and forehead, and small features like nostrils and lip corners get rounded off. A 0.2 mm nozzle and 0.06 mm layers improve this significantly at the cost of print time, and a coat of filler primer sanded back at 400 grit closes most of the rest. The hybrid build is the one most people land on: resin head, PLA body and base.
- Print bodies at 3 perimeters and 15 percent infill. Solid bodies waste filament and add nothing to stability once the base is ballasted.
- Use matte PLA. It hides layer lines noticeably better than glossy and takes primer more evenly.
- PLA softens around 55 to 60 C. Do not leave a PLA figure on a car dashboard in summer, especially not a wedding topper in transit.
- PETG is a reasonable swap for outdoor or hot-car figures, at the cost of slightly worse surface detail.
Full-Color Sandstone for Paint-Free Photo Likeness
Full-color sandstone printing, also sold as full-colour gypsum or multicolour, is binder jetting: an inkjet head deposits coloured binder into a bed of gypsum powder, layer by layer, producing a part with the texture printed directly into the surface. For a bobblehead built from a photo, that means the skin tone, eye colour, hair colour, and jersey design come off the machine already applied.
This is the one route where the PBR texture Threedium generates does real work in the physical world. You upload a coloured file rather than a bare STL, so keep the UVs and the 2048 or 4096 px texture intact through export and send a coloured GLB, OBJ with MTL, or 3MF, whichever the service prefers. Colours print slightly darker and more muted than they look on a calibrated screen, so brighten saturated areas by roughly 10 percent before uploading.
The trade-offs are real. Sandstone parts are chalky, fragile, and expensive at typical figure volumes, often 60 to 120 USD for a 7-inch part, so the usual approach is a full-colour head on a printed body. For a one-off gift where nobody paints, it is still the shortest path to a coloured likeness.
Hand-Painting a Single-Color Print to Match Your Photo
Painting a bobblehead is a two-evening job and it is where a decent print becomes a good gift. Start with a grey or white filler primer from a rattle can or airbrush, applied in two or three light passes rather than one heavy one. Heavy primer fills the detail you deliberately deepened earlier.
Work the face in three steps: a base skin tone, a thinned wash of a darker brown or red into the recesses, then a dry-brush of a lighter tone across the cheekbones, nose, brow, and chin. That sequence produces the depth that a flat base coat never will, and it takes about twenty minutes per head once you have done a couple.
- Paint the head before final spring assembly, holding it on a dowel pushed into the neck cavity. Painting an assembled nodder is unnecessarily hard.
- Use the textured render as your reference, not the original photo. It already maps colour onto the sculpted forms.
- Eyes last, with the smallest brush you own. A white almond, an iris dot, a pupil dot, and one off-centre highlight is the whole recipe.
- Mask nothing. At this scale a steady hand and a damp cotton bud beat masking tape every time.
Comparing Print Costs: Home Printer vs Online Print Service
The maths on a custom bobblehead from photo build flips fast with quantity. A home MSLA printer costs roughly 200 to 400 USD plus resin at 30 to 50 USD per litre, and a hollowed 7-inch two-part figure consumes maybe 60 to 90 ml, so material lands around 3 to 5 USD. Add springs at well under a dollar each, primer, and paint, and a fully finished figure costs under 10 USD in consumables.
An online service quoting the same two parts in a detail resin will typically land between 40 and 90 USD before shipping, and a full-colour sandstone head pushes past 60 USD on its own. You are paying for a machine you do not own and a finish you do not have to produce. The break-even is roughly the fourth or fifth figure: below that, use a service; above it, the printer pays for itself.
Sealing and Finishing So the Paint Survives Years of Nodding
A bobblehead gets touched. That is the entire point of it, and it means the finish takes abuse that a display model never would. Seal with two light coats of an acrylic varnish, matte or satin, at least an hour apart, and keep it off the spring and the inside of the neck cavity.
Matte reads most convincingly on skin but scuffs shiny under handling. The usual compromise is matte over face and hair, satin over the body and props, and gloss only on eyes and painted metal.
- Let paint cure a full 24 hours before varnishing. Varnish over soft acrylic lifts and clouds.
- Mask or plug the neck cavity. Varnish inside it gums up the spring seat and stiffens the nod.
- Add a gloss dot on each eye after varnishing. That single reflection does more for liveliness than any other detail.
- Resin yellows under UV. Keep finished figures out of direct sunlight, and use a varnish with UV inhibitors if the figure will sit on a windowsill.
AI Model vs a Bobblehead Studio: Cost, Queue, and Control
A traditional commission and an AI-generated custom bobblehead from photo references solve the same problem with completely different economics. The studio sells you a finished object and absorbs all the craft; the generator sells you a model in minutes and hands you the craft to do yourself. Which is better depends almost entirely on how many figures you need, how soon, and whether you enjoy the making.
What $80-150 Buys You From a Traditional Bobblehead Studio
The established custom bobblehead trade runs on a well-worn model. You send photos, an artist sculpts a head in polymer clay or a digital equivalent, you approve a photo proof, and the finished, painted, spring-mounted figure ships. Typical pricing sits at 80 to 150 USD for a single figure, with couples and complex props pushing past 200. What you get is genuinely valuable: a hand-finished object, a skilled painter's read of your face, a mechanism assembled hundreds of times before, and no equipment or labour on your side.
What you do not get is control or repeatability. You cannot see the sculpt from every angle, you cannot adjust one feature and re-look instantly, and you cannot make a second copy without paying nearly the full price again. The model file, which is the reusable asset, is not yours.
Why 3-4 Week Sculpting Queues Miss Gift Deadlines
The standard quoted turnaround for a hand-sculpted custom bobblehead is three to four weeks, and that is production time, not calendar time from your side. Add proof approval, a revision round, and shipping, and the realistic window from order to doorstep is often four to six weeks. Rush fees exist but compress the queue, not the sculpting. That collides with exactly the occasions bobbleheads are bought for: retirements announced two weeks out, weddings that shift vendors late, playoff runs decided in days, and December gift cut-offs that close in mid-November.
The AI path compresses the modelling stage to minutes and leaves you with printing and finishing, which is one to three days at home or one to two weeks through a service. Even the slow version of the DIY route beats the fast version of the commission route, and you find out immediately whether the likeness works rather than three weeks later in a proof email.
Skipping the Proof-and-Revision Email Chain With Instant 3D Previews
The proof cycle is the most frustrating part of a commission. You receive two or three photographs from angles the studio chose, try to articulate that the nose is not quite right, and wait days for a revision that may not address what you meant.
Generating the model yourself replaces that loop with a viewport. You orbit the head, look at the profile, check the three-quarter view that photos never show, and if the jaw is wrong you re-prompt and look again in minutes. Nobody has to translate a facial observation into an email.
This is also where Threedium's enterprise tiers slot in sensibly. If you want a human 3D artist to take the generated model and refine it, that refinement starts from a model you have already approved in the round, rather than from a photo and a description. The artist is polishing a shape you have both looked at, which removes most of the ambiguity that makes proof cycles slow.
Gift Ideas: Wedding Cake Toppers, Retirement Desks, and Fan Tributes
The reason people want to make a bobblehead of yourself or of someone else is almost always occasion-driven, and the occasion should shape the build. A bobblehead cake topper wants a fixed head, a 4 to 5 inch height so it does not dwarf the tier, a food-safe barrier (a printed disc or a small acrylic plate) between the figure and the cake, and a base narrow enough to sit on a single tier.
A retirement or milestone figure is the opposite: full 7-inch scale, a nodding head, a heavily ballasted base, and an engraved nameplate. This is the version that lives on a desk for a decade.
- Wedding: two figures at matched scale on separate bases reads better than one fused pair, and it survives the divorce joke at the reception.
- Retirement: profession props and a nameplate. Keep the pose relaxed rather than heroic.
- Fan tribute: team colours in texture, a jersey number in relief, and a base in the club's primary colour.
- New parent or graduate: print at 5 inches and give a set of three rather than one large figure.
- Pet owner: the same workflow works from a pet photo, and a nodding dog head is disproportionately funny.
Printing Bulk Bobbleheads for Teams and Offices at One Model's Cost
Bulk is where the economics stop being close. Twenty commissioned figures at 100 USD each is a 2,000 USD line item and a two-month lead time. Twenty printed figures is twenty generation passes, a weekend of printing, and perhaps 150 to 250 USD in resin, filament, springs, and paint.
The workflow scales because the body is reusable: model one or two body variants and swap only the head per person. Print heads in plates of six to eight while the shared bodies run overnight on an FDM machine.
- Standardise on one spring size across the batch by keeping head shells at a consistent wall thickness. Mixed springs make assembly slow.
- Number the underside of each base. Twenty unpainted grey heads look identical on a bench and they will get mixed up.
- Budget 20 to 30 minutes of finishing per figure. That labour, not the printing, is the real constraint on a bulk run.
- Get consent and a decent photo from each person. A bad reference photo cannot be rescued at the printing stage.
When a Hand-Sculpted Commission Is Still Worth the Wait
There are cases where the studio is simply the right answer. If you have six weeks, want one perfect object, and have no printer, no paints, and no desire to acquire either, paying a specialist to handle the whole chain is a rational purchase. Skilled portrait painters also do something at 59 mm that is hard to match on a first attempt: a professional's third-thousandth head will look better than your third.
The middle path is often the best one. Generate the model yourself, iterate until the likeness is right, and either use an enterprise refinement pass with a human 3D artist or send the finished files to a print-and-finish service. You keep control of the shape and the file, and you buy only the craft you actually lack. You can start that process from the turn yourself into a 3D model workflow and take it as far toward the physical object as you want.
Frequently Asked Questions About Custom Bobbleheads From Photos
How much does a custom bobblehead cost?
A hand-sculpted commission from a traditional studio typically runs 80 to 150 USD for a single figure, with couples, complex props, and rush fees pushing past 200. Printing a custom bobblehead from photo references yourself costs under 10 USD in resin, springs, primer, and paint, plus the one-time cost of a printer. Ordering the same parts from an online print service lands somewhere between, usually 40 to 90 USD depending on material.
The variable nobody prices in is your time: budget two to four hours across modelling, print preparation, and assembly for your first figure, dropping to about an hour by the third.
How long does it take to make a custom bobblehead?
A studio commission takes three to four weeks of production plus proof approval and shipping, realistically four to six weeks door to door. Generating the model takes minutes, print preparation an hour or two, printing four to eight hours across both parts, and painting and curing another day or two. The realistic end-to-end DIY timeline is two to three days.
Using an online print service instead of your own machine adds one to two weeks, which still beats a commission and tells you whether the likeness works on day one.
What kind of photo works best for a custom bobblehead?
A custom bobblehead from photo references starts best with a straight-on, evenly lit portrait at 2048 px or larger, shot from about two metres with a telephoto or a 50 to 85 mm equivalent lens, with the whole head visible and hair pulled back from the hairline. A neutral expression or closed-mouth smile works better than a laugh. Adding a three-quarter view from the same session noticeably improves the jaw and cheekbone reconstruction.
Avoid arm's-length selfies, hard flash, sunglasses, and heavily compressed re-shared images. None of those four can be fixed later in the pipeline.
Can I 3D print a bobblehead of myself at home?
Yes. A consumer MSLA resin printer or a decent FDM machine will produce a 7-inch (178 mm) figure in two parts, and small compression springs are inexpensive hardware. The workflow is: generate the model from your photo, export GLB, convert to STL in Blender, hollow the head, add the neck peg and cavity, print head and body separately, ballast the base, and glue in the spring.
The parts that require care are hollowing the head to 12 to 20 grams, keeping 3 to 5 mm of shoulder clearance, and gluing only the end coils of the spring. Everything else is standard small-figure printing.
What is the best material for a 3D printed bobblehead?
For the head, photopolymer resin is the clear winner, since 0.03 mm layers hold the facial detail that makes a likeness readable. For the body and base, PLA is tougher, cheaper, and perfectly adequate because nobody inspects a torso. The hybrid of a resin head on a PLA body is the practical best of both.
If you do not want to paint at all, full-colour sandstone prints the texture straight into the part, at roughly 60 to 120 USD for a 7-inch piece. Blend 10 to 20 percent tough resin into standard resin for figures that get handled.
How does the spring in a bobblehead work?
A small helical spring, classically about 19 mm (3/4 inch) long and 6 to 8 mm in diameter, is glued at its bottom coils to a peg on the shoulders and at its top coils inside a cavity in the head. The head becomes an inverted pendulum on a soft hinge: nudge it and the spring flexes, gravity pulls it back, and it oscillates for a few cycles before damping out.
Three variables set the feel: wire gauge controls stiffness, head mass controls swing, and the centre of gravity decides whether it returns upright or rests tilted. Gluing beyond the end coils turns the spring into a rod.
Can I make a bobblehead of someone else as a gift?
Yes, and it is the most common reason people build one. A custom bobblehead from photo references needs nothing but images, which means the recipient never has to know. Work from the sharpest, most evenly lit portraits you have access to, and prefer an older good photo over a recent poor one.
Two cautions. Ask whether the person enjoys being caricatured and dial the exaggeration back if unsure, since a gentle 10 percent push still reads as a bobblehead. And for anything you sell rather than give, keep trademarked logos off the model.