How Do You Turn Yourself Into a Chibi 3D Character From a Photo?
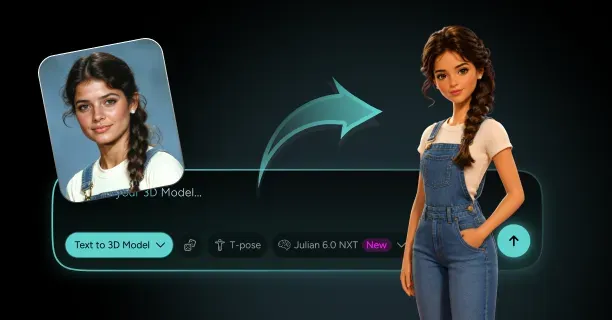
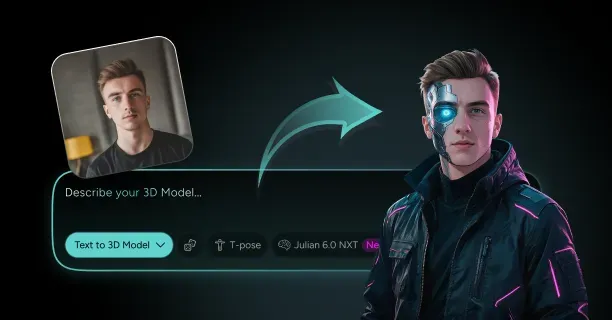
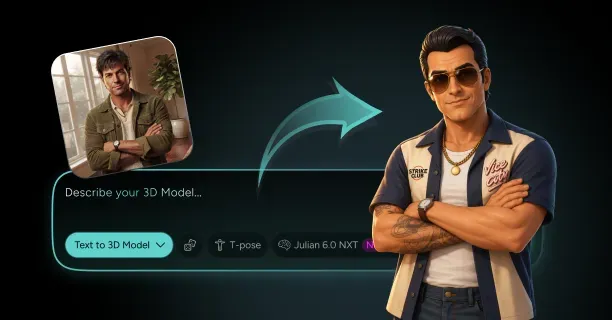
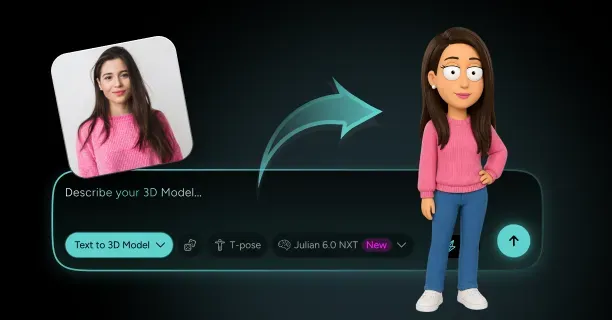
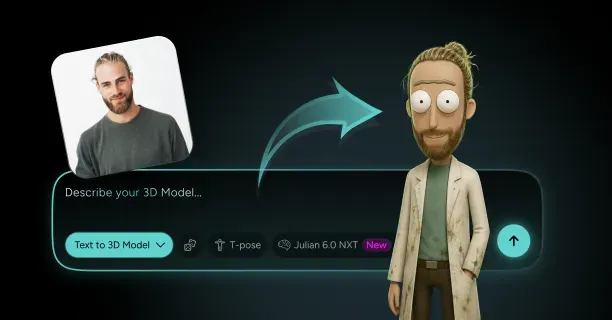
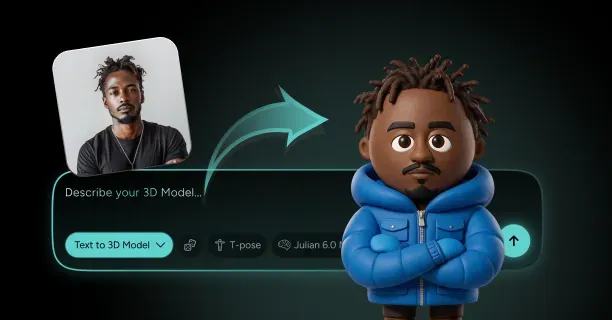
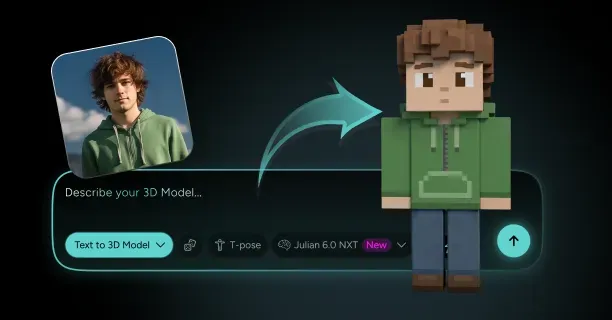
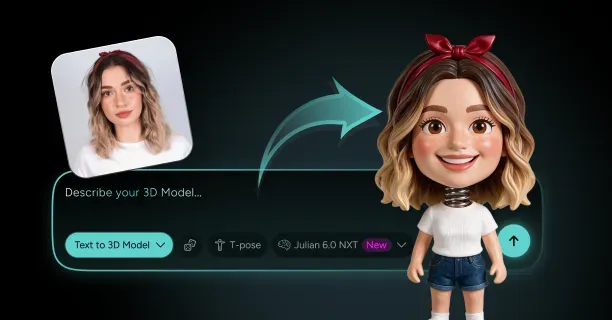
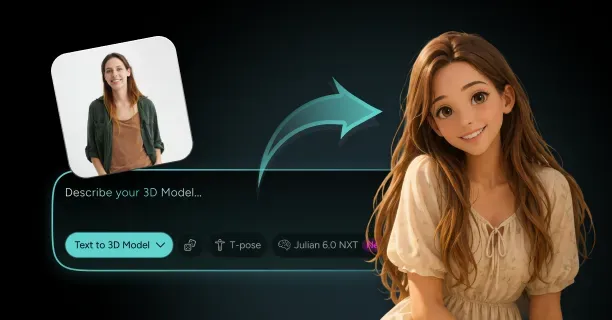
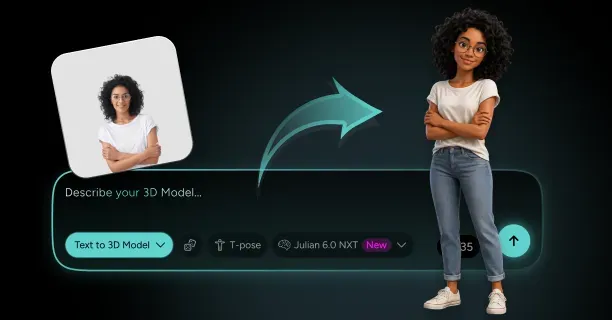
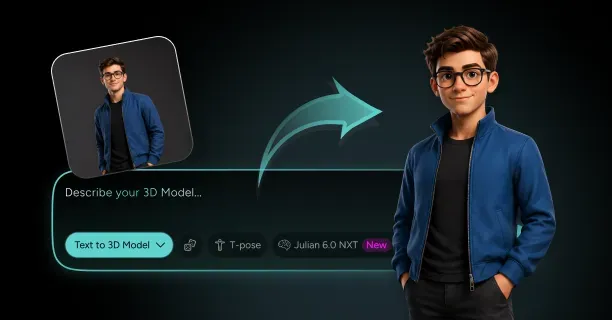
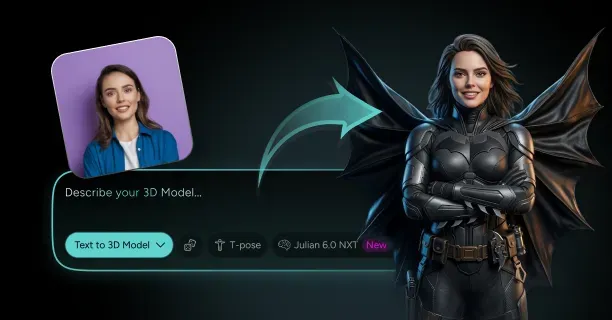
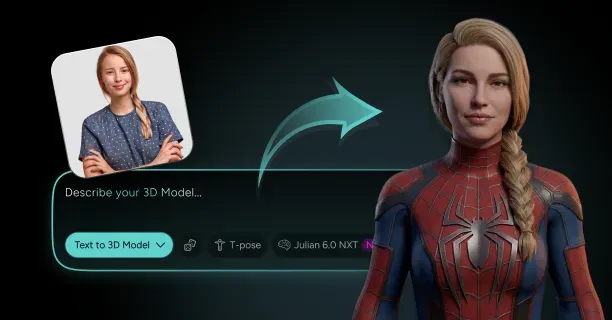
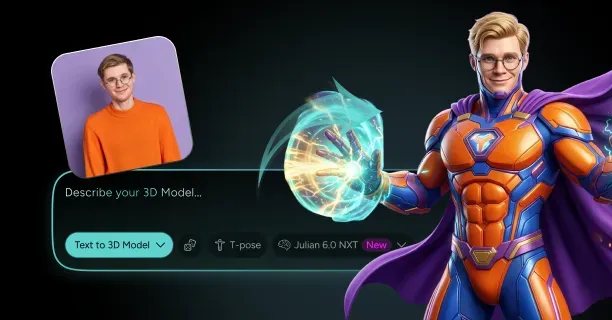
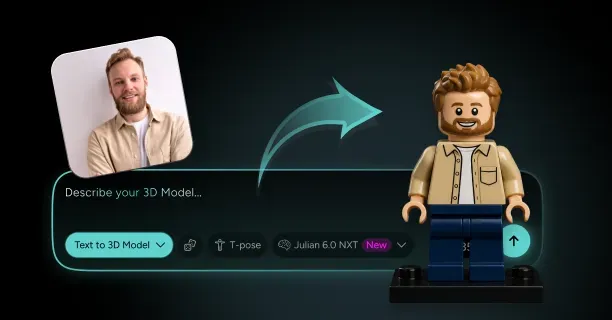
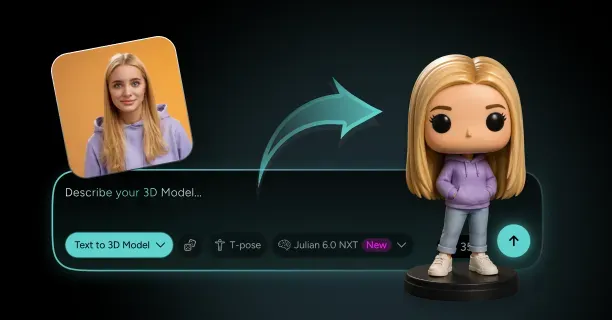
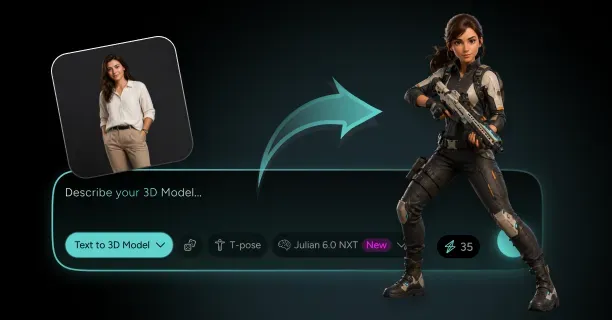
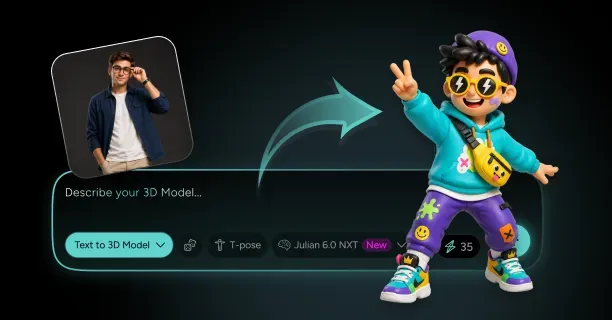
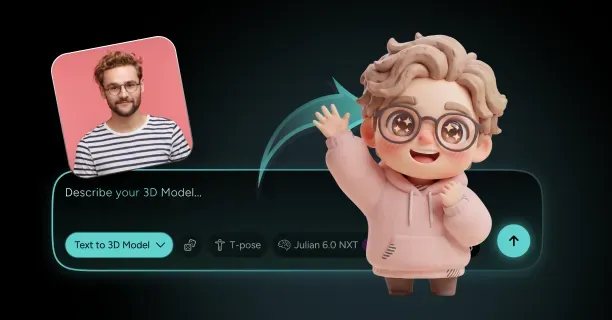
To turn yourself into a chibi 3D character from a photo, upload one front-facing headshot plus a full-body reference to an AI chibi maker from photo, describe the proportion target in heads (2, 2.5, or 3 heads tall), and let the generator rebuild your likeness on a super deformed skeleton before you export it. Threedium runs that pipeline through its Julian NXT generator, which reads your facial landmarks, hairline, and outfit silhouette from the reference images and returns a textured chibi 3d model with PBR maps, optional rigging, and export to GLB, USDZ, and FBX. What separates a chibi conversion from a normal 3D scan is deliberate subtraction: the model keeps four or five identity cues and throws the rest away.
That subtraction is the whole craft. A chibi likeness copies almost nothing and still reads as you at 30 mm tall or in a 128 px Discord avatar, because hair silhouette, glasses, hair color, and one or two accessories do more work than an anatomically correct nose ever will.
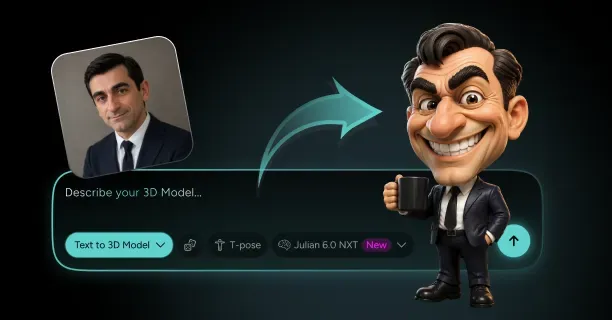
Before you start, make sure chibi is actually the style you want. If you want a nodding oversized head on a spring with realistic body proportions underneath, a bobblehead is the closer match. If you want exaggerated realism, real facial structure pushed to comic extremes rather than flattened into cute geometry, a caricature fits better. Both sit alongside chibi in the turn yourself into a 3D model lineup. Chibi is the one where your face becomes simple shapes on purpose.
Step 1: Pick a Photo Where Your Face Reads Clearly (Front-On, Even Light, Visible Hairline)
The reference photo sets the ceiling for everything downstream, and chibi is less forgiving than realistic conversion because the model keeps only a handful of features, so any ambiguity in those features shows up immediately. A shadow across your hairline turns into a mystery fringe.
Shoot or select a front-on headshot at 1500 px or wider on the short edge, taken at roughly a 50 to 85 mm equivalent focal length. Phone selfie cameras sit around 24 to 28 mm equivalent, which balloons your nose and shrinks your ears. That distortion matters less for chibi than for realism, because the nose is getting deleted anyway, but it also skews the width of your face and the position of your hairline, and those do survive.
Even, diffuse light is non-negotiable. Window light on an overcast day, a ring light at low intensity, or open shade all work. Hard directional light carves a shadow under the cheekbone, and the generator will read that shadow as geometry.
- Pull hair back from the forehead in at least one reference so the hairline shape is unambiguous. Widow's peak, straight line, or receding corners is one of the strongest cues that survives chibification.
- Add a back-of-head shot for an undercut, bun, braid, or long hair. The generator cannot invent the back of your head from a front view alone.
- Include a full-body standing shot if you want the outfit reproduced: arms at your sides, feet apart, no crossed limbs.
- Keep glasses on in every reference, or off in every reference. Mixed references produce half-committed frames.
- Avoid beauty filters. Smoothing erases the hairline and flattens the eye crease, the two things the generator needs most.
Three references is the sweet spot for a photo to chibi job: one front headshot, one three-quarter or back head shot, one full body. More than five rarely improves anything and can introduce conflicts.
Step 2: Describe Your Chibi in the Prompt: Head Ratio, Outfit, Expression, and Palette
An ai chibi generator needs the style target stated explicitly, because "chibi" covers everything from a 2-head Nendoroid to a 4-head shortstack. Write the prompt as a spec sheet, not a mood. Head ratio, outfit, expression, and palette change the output most, in that order.
Lead with proportion because it drives every other decision: "2.5 heads tall, super deformed proportions, oversized head, short stubby limbs, no visible neck." Then describe the outfit in shapes and colors rather than brand names: "oversized olive hoodie with front pocket, black jeans, white low-top sneakers" outperforms "my usual streetwear."
Expression should be a single frozen pose, because a chibi face is a graphic mark rather than a muscular performance. Naming the mouth shape and the eye shape separately (soft smile with closed eyes, small "o" mouth, wide sparkle eyes) gives far more control than writing "happy." Finish with a palette constraint: chibi reads best on four to six flat colors plus skin, with hair given as a color name plus a value and one accent color repeated across shoes and accessories.
Do not use realism words in a chibi prompt. Terms like photorealistic, detailed skin, subsurface scattering, and accurate anatomy fight the style and produce an uncanny hybrid: a real face pasted onto a stubby body. If you want realistic proportions with an anime face instead, use the full-proportion anime likeness workflow.
Step 3: Generate the Chibi Base Model and Compare It Side-by-Side With Your Photo
Generate two to four variations before judging anything. Chibi likeness is a threshold effect: one seed lands the hair mass and misses the eye spacing, another does the opposite, and it is faster to pick a good base than to fix a bad one.
Then run the test that matters. Put a front render next to your reference photo at the same head width, not the same overall height, and squint until both blur. If the chibi still reads as you, the silhouette and value structure are correct. If it turns into a generic cute character, the problem is hair mass or hair color value, not facial detail. Check these five things in order:
- Hair silhouette from the front and from above. This is 50 to 60 percent of chibi likeness. Get it wrong and nothing else saves the model.
- Head-to-body ratio. Measure it. If you asked for 2.5 heads and got 3.2, the model reads as a different style entirely.
- Eye spacing and eye size relative to face width. Chibi eyes typically occupy 30 to 40 percent of face width each, with a gap of about one eye-width between them.
- Skin and hair color values under neutral lighting. Judge against a grey background, not the render's default gradient.
- Outfit silhouette. Does the hoodie still read as a hoodie when the arms are 1.5 head-widths long?
Then show the render to someone who knows you, cropped to 128 px. If they name you without a hint, you are done with this stage.
Step 4: Refine Proportions, Hair Chunks, and Outfit Details Before Locking the Look
Refinement on a chibi is mostly about simplification, and it happens in three passes. The first pass fixes proportion. The second consolidates hair into chunks. The third cleans up outfit noise. Doing them in that order prevents you from lovingly detailing a hair strand you are about to delete.
For proportion, work with the head as your unit and scale the head uniformly rather than stretching the body, which distorts the outfit UVs. Also check shoulder width: a chibi's shoulders should be roughly 1.0 to 1.3 head-widths, narrow enough that the head clearly dominates.
Hair is the second pass and the most important. Real hair is thousands of strands; chibi hair is five to twelve solid chunks, so merge anything smaller and collapse strand geometry into wedges with clear tip directions. Every chunk should read as a shadow shape from three meters away.
Outfit refinement means deleting detail, not adding it: remove seams, belt loops, drawstring aglets, and shoelace geometry under about 2 mm at final scale, and keep only what identifies the garment. On enterprise tiers you can hand this stage to a human 3D artist, which is worth it when the outfit is the point.
Lock the look before you rig or print. Every proportion change after rigging invalidates weight painting, and every proportion change after a test print invalidates the balance work you did on the base. Sign off on the silhouette, then move forward.
Step 5: Export Your Chibi as GLB, USDZ, or FBX (Plus a Watertight Mesh for Printing)
Export twice, because the digital chibi and the printable chibi are different objects. The digital one wants low polygon counts, clean UVs, and packed textures; the printable one wants a single closed manifold volume and does not care about textures unless you are ordering full-color resin.
For digital use, a chibi is cheap: 8,000 to 25,000 triangles is plenty for a model with no facial anatomy and no finger separation, and 1024 x 1024 or 2048 x 2048 textures are more than enough for flat toon shading.
| Format | Best use | Textures | Rig support | Notes |
|---|---|---|---|---|
| GLB | Web viewers, Discord bots, engine import | Embedded PBR | Yes, skeletal | Single self-contained file, easiest to share |
| USDZ | iOS AR Quick Look, iMessage previews | Embedded | Limited | Tap to place your chibi on a real desk |
| FBX | Blender, Maya, Unity, Unreal pipelines | External maps | Yes, full | Best for further animation work |
| VRM | VTuber and social VR apps | Embedded MToon | Yes, plus blendshapes | Only if you plan to drive the face live |
| STL or OBJ | 3D printing and slicing | None or vertex color | No | Must be watertight and manifold |
If the chibi will be animated or used as a live avatar, request rigging at export. Threedium's rigging includes facial rigs with 52 ARKit blendshapes where the face supports them, though a chibi with a two-triangle mouth will only use a subset meaningfully: jawOpen, the smile and frown pairs, the blinks, and the brow set.
For the print copy, export a separate mesh with no rig, apply all transforms, and verify it is watertight: zero non-manifold edges, zero intersecting faces, positive volume. Chibi models frequently fail at the hair-to-scalp junction and on floating accessories, which look fine when rendered but are separate shells to a slicer.
The 2-Head vs 3-Head Rule: Choosing How Squished Your Chibi Should Be
Head count defines your chibi's style, measured the classic way: total figure height divided by head height, crown to chin. Adult humans run about 7.5 heads, and super deformed proportions compress that to between 2 and 4, trading body expressiveness for facial charm at each step down.
| Head ratio | Reads as | Body capability | Best for |
|---|---|---|---|
| 2 heads | Maximum cute, doll-like, mascot | Almost none, arms barely reach the face | Keychain charms, emotes, icons under 128 px |
| 2.5 heads | Classic chibi, Nendoroid territory | Simple gestures, hand near chest | Desk figures, stream badges, general purpose |
| 3 heads | Chibi with posture, outfit readable | Can hold props, sit, cross arms | Full-body avatars, figures showing an outfit |
| 4 heads | Stylized short, no longer strictly chibi | Nearly full range of poses | Playable game characters, animated shorts |
The practical rule is simple: go smaller when the model will be viewed small. A 30 mm keychain charm at 2 heads reads instantly because the face occupies half the object. The same character at 3.5 heads on a keychain becomes a blur of torso. Conversely, if your chibi needs to show off an outfit, a uniform, or a prop, 3 heads gives the body enough real estate to carry it.
Two constraints are worth knowing. At 2 heads the arms are too short to reach past the chin, which kills any pose with hands near the face, including waving. At 3 heads the head is light enough relative to the body to pose a lean without balance problems, which matters for printing. If you are unsure, start at 2.5 heads and generate a 3-head variant beside it.
Which Facial Features Survive Chibification: Hair, Glasses, Eye Color, Beards, and Moles
Chibi likeness is a shortlist. A chibi head has room for roughly four to six identity cues total, and everything competes for those slots. Choosing which of your features get them is the most consequential decision in the workflow, and far more effective than making the geometry more accurate. These survive well and should be prioritized:
- Hair silhouette and hair color. Undercuts, side parts, twin tails, buns, bangs, curls, and locs all read at chibi scale if built as chunks. Your strongest cue by a wide margin.
- Glasses. Frames are graphic shapes and survive perfectly. Keep the frame shape and color; drop the nose pads and hinges.
- Eye color. With eyes occupying a third of face width, iris color is unmissable and does enormous identification work.
- Beard or mustache as a shape. A full beard reads as a solid mass around the jaw, a goatee as a small block. Stubble does not survive; render it as a darker flat region.
- Skin tone. Chibi shading is flat, so pick the base tone carefully and avoid desaturating it into a generic pale default.
- One signature marking. A prominent mole, a freckle band, a scar, or a face tattoo. One only; two competing marks read as noise.
Freckles are a special case. As individual dots they disappear below about 40 mm print height and below about 256 px render size, but painted as a soft band across the cheeks and nose bridge they survive down to icon scale. The same logic applies to a beauty mark: place it, enlarge it slightly beyond life-accurate size, and it will register. Hair color follows a related rule, since chibi hair uses a flat base plus one or two shadow bands: if your hair is dark, lift the base value slightly so the chunks stay separable.
What Gets Simplified Away: Noses, Jawlines, Wrinkles, and Skin Texture
Understanding what the style deletes stops you from fighting the generator. Chibi is not a low-detail version of your face; it is a different representational system that happens to reference your face. Four things are removed almost universally, and trying to preserve them is what produces uncanny results.
The nose goes first. Most chibi styles render it as nothing at all, a single shadow dot, or a tiny wedge with no nostrils. That feels wrong to people converting their own likeness, because the nose is central to how we recognize real faces. It is not how we recognize chibi characters.
The jawline goes second. Chibi heads are a sphere or rounded egg with a soft chin taper, and angular jaws, cheekbone definition, and chin clefts all get absorbed into that shape. A very slight widening at the base of the head suggests a stronger jaw; pushing further breaks the style.
Wrinkles and under-eye structure go third, and skin texture goes last and completely. Age is communicated in chibi through hair color, glasses style, and clothing, not through skin geometry: a grey-haired chibi in a cardigan reads as older instantly, while the same head with sculpted crow's feet reads as a broken model. Pores, subsurface scattering, and specular breakup are all replaced by a flat albedo with a hard or soft shadow ramp. Removing all of that is exactly what makes a chibi cheap to render, cheap to print, and legible at tiny sizes.
Kawaii Styling Conventions: Oversized Sparkle Eyes, Blush Stickers, and Tiny Mouths
Chibi inherits a specific visual vocabulary from decades of kawaii chibi art, and following it is the difference between a model that looks intentionally cute and one that looks like a badly scaled avatar.
Eyes are the centerpiece. The standard construction is a large rounded shape with a dark upper lash line 2 to 3 times thicker than the lower, an iris filling most of the eye with a vertical gradient inside it, one large specular highlight in the upper quadrant, and one or two smaller sparkles opposite. Placement matters: chibi eyes sit at roughly 60 to 70 percent down from the crown, much lower than on a real head, which is what makes the forehead read as large.
Blush is applied as a graphic sticker rather than a lighting effect: two soft ovals or small clusters of diagonal lines on the cheeks, just outside and slightly below the eyes, painted into the albedo at about 15 to 25 percent opacity. The mouth is deliberately tiny, a small curve, a cat-mouth "w", a soft "o", or a flat line occupying no more than 10 to 15 percent of face width, because a large mouth competes with the eyes and breaks the proportional harmony.
- Keep eyebrows thin, simple, and often partially hidden behind the fringe. They carry most of the expression at icon size.
- Add an ahoge (a single stray hair sticking up) if you want a lively silhouette. It is a strong graphic cue and costs almost nothing in geometry, though it needs thickening for print.
- Round every hard corner on the body. Chibi silhouettes are built from capsules and spheres; sharp edges read as aggression.
- Consider mitten hands. Fingerless or three-finger hands are standard below 3 heads and print far more reliably than separated digits.
Keeping Your Signature Outfit Recognizable on Stubby Chibi Limbs
Your outfit is the second-strongest identity cue after hair, and the one most often ruined in conversion. The problem is geometric: a chibi arm is about 1 to 1.5 head-widths long and nearly as thick as it is long, so a sleeve has no length to communicate anything, and any garment relying on drape or cut loses all of it.
The fix is to translate the garment into three or four large shapes plus one identifying detail. A denim jacket becomes a boxy mid-blue torso block, a collar wedge, and two pocket rectangles. A lab coat becomes a white block to mid-thigh, a lapel V, and two patch pockets. A band tee becomes a black block plus a chest graphic reduced to two or three high-contrast shapes.
Then scale that identifying detail beyond life accuracy. A logo occupying 8 percent of chest width in reality should occupy 25 to 40 percent on a chibi or it disappears. Chibi plaid needs squares roughly three times larger relative to the garment than real plaid, or it turns into flat grey mush.
Layering needs simplification too. Real outfits stack four or five layers; a chibi supports two, maybe three. A hoodie under an open jacket works; a shirt under a hoodie under a jacket under a scarf becomes an undifferentiated lump at 30 mm.
- Give the outfit one accent color repeated in two or three places: shoelaces, a hair clip, a watch strap. Repetition reads as design.
- Model shoes as one chunky block per foot with a sole line. Separate laces and eyelets are wasted geometry.
- Keep bags, backpacks, and instruments as chunky rounded props. They are excellent identity cues and scale well.
- Preserve strong value contrast (dark jacket, light shirt) even when you simplify the hues. Value carries at icon size; hue does not.
Translating Your Real Hairstyle Into Chunky, Readable Chibi Hair Shapes
Hair is where a chibi character creator earns or loses the likeness. The mental model to adopt: chibi hair is a hat, not hair. It is a solid volume with a defined outer silhouette and a few internal divisions, sitting on and around a spherical skull.
Start by drawing your own hair silhouette from the front, side, and top as flat shapes with a marker, ignoring strands entirely. Whatever you can draw in six or fewer strokes is what the chibi should have. Then translate by hair type:
- Straight and fine: one smooth outer shell with a fringe divided into three to five wedge tips. The fringe carries all the interest.
- Wavy: a scalloped silhouette with two or three large S-curve masses per side. Model the envelope, not individual waves.
- Curly and coily: a rounded outer volume with a bumpy silhouette, textured through the normal map and shadow bands rather than geometry. This type is most often flattened incorrectly into a smooth helmet, and preserving the round volume matters enormously to the likeness.
- Locs, braids, and twists: discrete cylinders with visible segment bumps, kept to six to fourteen strands. More becomes noise; fewer reads as tentacles.
- Buzzed, bald, or very short: the scalp shape becomes the cue. Add a color band for the hairline shadow so the head does not read as a bare sphere.
- Long hair: two or three large masses down the back plus front sections framing the face, with clear directional points at the tips.
One warning that carries into printing: hair chunks extending past the head silhouette become overhangs and fragile spikes. Free on a digital model, a snapping hazard on a print.
Cel Shading vs Soft Toon Gradients: Texturing the Kawaii Finish
Chibi models are almost never lit realistically, and the shading approach affects both how the model looks in a viewer and how it translates to a painted or full-color print.
Cel shading uses a hard step between lit and shadow, typically two bands with a crisp boundary. It reads as ink-and-paint illustration, holds up at small sizes, and is the safer choice for emotes and icons under 512 px. It also doubles as painting instructions for a printed figure, since the shadow band shows exactly where the darker mix goes.
Soft toon gradients use a smooth ramp with a compressed midtone plus a rim light. They read as vinyl or clay, feel warmer, and photograph better for turntables. That is the better choice for a 3d printed chibi figurine ordered in full-color resin, because the printer can reproduce a gradient and the extra dimensionality helps the object read.
Practical texture setup for either approach: 2048 x 2048 albedo, roughness around 0.6 to 0.8 for skin and fabric, near-zero metallic except on metal accessories, and ambient occlusion baked at low intensity (around 0.3) to separate the head from the shoulders without muddying the flat colors.
Check your chibi under three lighting setups before you commit: a neutral studio HDRI, a single hard key light, and flat ambient. Toon shaders that look great under one setup often collapse to a single flat color under another, and social platforms will render your model however they like.
The same shading decisions apply when you build original chibi character assets from scratch rather than from a photo, and matching shadow band count across a set is what makes a group of chibis look like one family.
How Do You Get a Chibi to Print at Charm Scale?
Getting a chibi to print at charm scale means solving three problems that only appear when the figure is smaller than a matchbook: the face gets too small to hold eye detail, hair spikes get too thin to survive handling, and the oversized head makes the figure fall over. Fix all three in the sculpt, because no printer setting compensates for a 0.4 mm ahoge. General mesh repair, hollowing, and support strategy are covered on the broader 3D model generation hub; what follows is chibi-specific.
Choosing a Print Size: 30 mm Keychain Charms vs 80-100 mm Desk Figures
Print height determines every other decision, so pick it first and design backwards. The two common targets, a 25 to 35 mm charm and an 80 to 100 mm desk figure, are genuinely different products needing different sculpts.
| Total height | Head diameter (2.5 heads) | Minimum feature thickness | What survives | Typical use |
|---|---|---|---|---|
| 25-30 mm | 10-12 mm | 1.2 mm | Hair silhouette, glasses as a solid bar, blocky outfit | Keychain, bag charm, zipper pull |
| 40-50 mm | 16-20 mm | 0.8 mm | Eye shapes, mouth curve, separate shoes | Standee, gachapon-size figure, cake topper |
| 60-75 mm | 24-30 mm | 0.6 mm | Iris highlights, small props, layered outfit | Desk figure, gift piece |
| 80-100 mm | 32-40 mm | 0.5 mm | Blush, freckle band, fine accessories | Shelf display, nameplate figure, commission piece |
The honest guidance: if this is your first chibi figure of yourself, print at 75 to 100 mm even if you eventually want a charm, because a large first print tells you whether the likeness, the base, and the paint plan work at a size where you can see what went wrong.
Do not simply scale that figure down and reprint it. Feature thickness scales linearly, so an accessory that is a comfortable 1.5 mm at 90 mm tall becomes 0.5 mm at 30 mm, below the strength threshold for a handled object. Charm versions need their own thickening pass, and often a reduced head ratio (2.5 down to 2 heads) so the face regains the size it lost.
Why Big Heads and Stubby Limbs Print Better Than Realistic Proportions
Chibi geometry is accidentally excellent for 3D printing, and understanding why tells you where the remaining risks actually are.
The main reason is aspect ratio. Print failures cluster on thin, long features: a realistic 75 mm miniature has arms roughly 2 mm thick and 25 mm long, a ratio around 12:1, and those snap during support removal. A chibi at the same height has arms about 6 mm thick and 10 mm long, a ratio under 2:1, which is structurally a stub. The same holds for legs, the neck (usually absent), and fingers (usually merged into a mitten). The second reason is surface curvature: chibi forms are dominated by large convex surfaces that need less support, trap fewer resin pockets, and produce fewer stair-stepping artifacts than the concave folds of realistic clothing.
The third reason is that chibi tolerates lost detail gracefully: if a realistic miniature loses 0.2 mm of surface fidelity the face degrades into a smear, while a chibi that loses the same 0.2 mm still has shapes. What is left is a short list of genuine chibi print problems: the face is disproportionately small, the center of gravity is far too high, and any hair spike is a thin feature in an otherwise thick model. Those three get their own sections below.
Why a Face Under 15 mm Loses Its Eyes on Any Printer, and How to Compensate in the Sculpt
This is the failure that surprises people most: you print a beautiful 28 mm charm and the face comes out blank. Buying a better machine does not fix it, because the eye geometry you sculpted was never more than a few tenths of a millimeter deep.
Do the arithmetic. At 28 mm total height and 2.5 heads, the head is about 11 mm tall and the face maybe 9 mm wide. An eye occupying 35 percent of face width is roughly 3 mm across, and the relief defining it (lash groove, iris inset) is typically 2 to 3 percent of eye width, about 0.07 mm deep. That is at or below a consumer MSLA layer and far below what any FDM nozzle can express. The eye exists in the file and not in the object.
The fix is to over-sculpt relief specifically for print, on a dedicated copy of the mesh:
- Deepen the lash line to a real groove. Cut the upper lash as a channel 0.3 to 0.4 mm deep and 0.4 mm wide. That is exaggerated to the point of looking wrong in the viewport and correct on the print.
- Raise the eye as a slight dome, or inset it as a distinct socket. Give the whole eye shape 0.25 to 0.5 mm of relief from the face plane so it catches light and shadow physically rather than relying on paint alone.
- Enlarge the eyes by 10 to 20 percent on the charm-scale version compared to the digital model. Larger flat shapes hold better than smaller detailed ones.
Below roughly 15 mm of face width, stop relying on geometry and plan for paint or full-color printing: a smooth face with only the lash grooves cut in, then eyes painted with a size 000 brush. The groove doubles as a paint guide, which is why you cut it even when you intend to paint.
Print one head-only test at final scale before committing to the whole figure. A 12 mm head takes minutes and a few cents of resin, and it tells you immediately whether your eye relief survived. Skipping this test is the most common reason people end up with a drawer full of faceless charms.
Thickening Ahoge, Twin-Tails, and Tiny Accessories So They Do Not Snap
Everything that made the chibi silhouette lively is now a fragile protrusion. Hair spikes, ahoge, twin-tails, cat ears, glasses temples, bag straps, and held props all need a thickening pass before slicing, and a charm needs more than a shelf figure because it lives in a pocket. Work to these minimums, measured at the thinnest cross-section at final print scale:
- Ahoge and hair spikes: 1.2 mm at the base tapering to no less than 0.8 mm at the tip for a handled charm; 0.8 mm base and 0.5 mm tip on a shelf figure.
- Twin-tails and long hair masses: 2 mm minimum diameter, fused to the back or shoulders. A free-hanging 20 mm tail at 1.5 mm thick will snap.
- Glasses: no separate temple wires at charm scale. Merge the frame into a single bar across the face, 0.8 to 1 mm thick, fused at both sides.
- Cat ears, horns, bows, hair clips: 1 mm minimum and a fully fused base with a fillet, never point contact.
- Held props: fuse the prop to the hand and the hand to the body. Any floating gap is a break waiting to happen.
- Straps, cords, necklaces: 1.2 mm minimum, modeled as ribbons pressed against the body rather than free-floating loops.
Two techniques do most of the work. Fillet every junction: a spike joining the scalp at a sharp crease concentrates stress there, while a 0.5 mm fillet distributes it. And redirect protrusions inward: a twin-tail swept back toward the body is protected by the figure's own volume and prints with less support than one angled out at 45 degrees.
For a charm that will be clipped to a backpack, be more aggressive than these numbers: shortening an ahoge by 30 percent and thickening it by 50 percent barely changes the silhouette at 30 mm and dramatically extends how long the charm survives.
Balancing a Top-Heavy Chibi: Bases, Foot Contact Area, and Center of Gravity
A chibi is a physics problem. The head can be 35 to 50 percent of total volume, putting the center of gravity around the chest or even the chin, while the feet stay small. A figure that stands perfectly in the viewport will tip over on a real desk. The center of gravity must sit within the footprint polygon with a comfortable margin, not a technicality. Practical targets for a free-standing chibi:
- Combined foot contact area of at least 12 to 15 percent of the head's cross-section. Smaller than that, add a base.
- Base diameter of 60 to 80 percent of head diameter for a standing pose: a 2.5-head figure at 90 mm with a 36 mm head wants a 24 to 28 mm base.
- Base thickness of 2 to 4 mm at desk scale, which also adds mass exactly where you want it.
- Feet fused to the base with a small fillet, not resting on it. Both a strength and a stability fix.
Three techniques help beyond geometry. First, hollow the head and keep the legs and base solid. On resin, hollowing the head to a 2 mm wall with two 3 mm drain holes hidden under the hair removes much of the top-side mass. On FDM, use variable infill: 5 to 10 percent in the head, 60 to 100 percent from the hips down.
Second, add ballast: a cavity in the base sized for a few M4 nuts or a lead-free fishing weight, sealed with epoxy putty, will hold a very top-heavy 2-head figure upright permanently. Third, lean the pose slightly backward, shifting the head 1 to 2 mm rearward of the ankle line so the center of gravity sits over the middle of the foot rather than the toes, where most chibis tip. None of this applies to a hanging charm, which has a different requirement, covered next.
Keychain Loop Placement So the Charm Hangs Face-Forward
A custom chibi keychain lives or dies on one detail nobody thinks about until the first print: where the loop attaches. Put it in the wrong place and the charm hangs sideways or face-down, and every time you look at your keys you see the back of your own head.
The physics is simple. A hanging object rotates until its center of gravity is directly below the attachment point, so the loop must sit on the vertical line through the charm's center of gravity and leave the face pointing outward. Practical placement rules:
- Left-right: dead center on the mid-sagittal plane. Even 1 mm off-center on a 30 mm charm produces a visible tilt, and asymmetric hair makes it worse.
- Front-back: place the loop slightly behind the head's center, roughly 15 to 25 percent of head depth rearward. A chibi face is flat and the back of the head rounded, so the mass sits rearward and a true top-center loop hangs nose-down.
- Attachment point: the top of the head or the highest hair mass, fused with a fillet. Never attach to an ahoge or a spike.
- Loop dimensions: a ring of 3 to 4 mm inner diameter with a 1.5 to 2 mm cross-section takes a standard 5 to 8 mm jump ring or lobster clasp.
- Alternative: a blind hole 2.5 mm across and 4 mm deep for a screw eye set with cyanoacrylate. Stronger than a printed loop and less visible.
Add the loop as real geometry and boolean it into the mesh before you export the STL, not afterward in the slicer, since shells that merely touch are a classic source of slicing errors and weak joints. Two more checks: round every edge that will rub against a pocket, and orient the print so layer lines run across the loop rather than along it, because a loop split along its layer plane will delaminate under load.
Hand-Painting Your Print vs Ordering Full-Color Resin
Chibi is built on flat color blocks, which makes it unusually beginner-friendly to paint by hand and equally well-suited to full-color printing. The choice comes down to unit count, scale, and how much you enjoy the process.
Hand-painting works because the model gives you clean boundaries. Prime in grey or white, block in skin, hair, and outfit as flat colors, add one shadow mix about 15 percent darker in the recesses, then paint eyes last: white base, iris color, dark upper lash, then a dot of pure white as the highlight. A size 000 brush handles a 15 to 30 mm face. Expect 2 to 4 hours for a first figure and 30 to 60 USD in materials.
Below about a 12 mm face the eyes get genuinely hard, and that is where full-color printing earns its price. Full-color options include binder jetting on gypsum-like material (excellent color, more fragile, slightly grainy), full-color resin and multi-jet processes (smooth and vivid, higher cost), and multi-material FDM with a filament changer (few colors, visible seams, very cheap per unit).
Expect full-color service prices around 25 to 60 USD for a 60 to 100 mm chibi and 10 to 25 USD for a 30 mm charm before shipping. One hybrid worth knowing: print in a colored resin close to your skin tone, then paint only the hair, outfit, and eyes. It cuts painting time roughly in half and gives more even skin than a brushed base coat ever will.
What a Custom Chibi Really Costs: DIY Prints vs Etsy Commissions
Three routes exist for getting a chibi of yourself into the world, and their costs differ by more than an order of magnitude.
Full commission from a 3D artist typically runs 150 to 600 USD for a print-ready sculpt, with 1 to 4 weeks of turnaround and a revision round or two. Marketplace listings for a printed and painted custom chibi figure land in the 60 to 250 USD range depending on size, paint quality, and whether the sculpt is bespoke or a head swap on a stock body. This is the route for a wedding topper or a gift you cannot risk getting wrong.
AI generation plus your own printing is the cheapest per unit and by far the fastest. Generation through Threedium's likeness workflow takes minutes rather than weeks and gives you an editable mesh you can iterate on for free. Resin for a 90 mm chibi costs roughly 0.50 to 1.50 USD; a charm is a few cents. The real costs are the printer (150 to 500 USD for an entry MSLA machine plus wash and cure) and your learning time.
AI generation plus a print service sits in between: no equipment, no learning curve, roughly 10 to 60 USD per unit. That is the right route for a one-off gift or a small batch of charms for a team or a wedding party.
The pragmatic combination: generate the base yourself, iterate until the likeness lands, then decide whether to send the mesh to a print service, print it at home, or pass it to a human artist. Threedium's enterprise tiers include that human refinement step, which is useful when a specific outfit has to be exactly right.
What Can You Do With a Chibi 3D Model of Yourself?
One chibi mesh feeds an unusual number of outputs, which is what makes the format worth the effort. Because it is low-polygon, flat-textured, and legible at tiny sizes, the same file works as a printed charm, an emote set, a social avatar, and an AR sticker without a single re-model.
Printed Keychains, Bag Charms, and Phone Charms
Charms are the highest-volume use of a chibi self-model, and the economics are good: at charm scale a resin print costs pennies in material and a batch of twenty fits on one build plate of a mid-size MSLA printer.
The practical build is a 25 to 35 mm figure at 2 to 2.5 heads, printed with the loop unioned in, then finished with a jump ring and a split ring or lobster clasp. For phone charms keep the assembly under about 40 mm and 10 grams so it does not swing hard against the device; bag charms can go to 50 mm.
Finish anything that lives in a pocket with a thin coat of matte or satin clear, which protects the paint from abrasion and stops resin prints from yellowing under UV. Group sets are where this shines: charms for a team, a wedding party, or a Discord server cost very little per unit. Keep the proportion ratio and shading identical across the set so they read as a family, and vary only hair, outfit, and accent color.
Desk Prints, Shelf Displays, and Nameplate Figures
At 75 to 120 mm a chibi becomes a display object rather than an accessory. You now have room for painted eyes, a blush pass, a legible outfit graphic, and small props, plus a balance problem to solve with a proper base.
Nameplate figures are a good variation: the chibi stands on an extended base with a raised or recessed name, printed as one piece. Keep lettering at least 1 mm tall in relief and 0.8 mm wide in stroke so it survives printing and takes a paint wash cleanly, on a base of roughly 60 x 25 mm.
Props carry a lot of personality at this size. A chibi holding a coffee mug, a controller, a paintbrush, or a small version of a pet turns a generic figure into a portrait of what someone actually does. Keep props chunky and fused, and match the prop's simplification level to the figure's so it does not look imported from another style. Desk sets work well too: you next to chibis of your pets or your team, all at matched scale and shading.
Stream Emotes and Sub Badges Rendered From Your Chibi Model
A rigged chibi is an emote factory. Rather than drawing twenty emotes by hand, you pose the model once per expression, render, and export, and every emote in the set shares lighting, proportions, and color.
Render targets: emotes at 112 x 112, 56 x 56, and 28 x 28 px for Twitch, badges at 72 x 72, 36 x 36, and 18 x 18 px, and Discord emoji at 128 x 128 px, all on transparent backgrounds. The small sizes are the real constraint, and that is exactly where chibi beats a realistic avatar: at 28 px an oversized head and flat color blocks still resolve, while a realistic face becomes a smudge.
Practical production notes:
- Render orthographic or at 85 mm or longer so perspective does not shift between poses in the set.
- Crop to head and shoulders. Full-body emotes waste pixels on legs nobody can see at 28 px.
- Add a 1 to 2 px outline in post at the smallest size so the emote separates from light and dark chat backgrounds.
- Build a core set first: happy, sad, angry, surprised, laughing, sleeping, thinking, love, plus one signature pose.
- Export animated versions as APNG or GIF at 12 to 15 fps. Bounce, blink, and wave loops are three to eight frames each.
If the same chibi will also drive a live avatar, request the rig with facial blendshapes at export so the emote poses and the live face share one source of truth rather than drifting apart over time.
Chibi Gifts: Couple Sets, Pet Chibis, Graduations, and Cake Toppers
Chibi is a gift format. It is affectionate rather than vain, it does not demand a flattering likeness, and it works for people who would be uncomfortable receiving a realistic figure of themselves, which makes it the safest personalized 3D gift there is. The reliable formats:
- Couple sets: two figures at matched scale on a shared base, or two bases that dock together. Match head ratio and shading exactly; vary only hair and outfit.
- Pet chibis: the same super deformed logic on a dog, cat, or rabbit, at roughly two-thirds the height of the human figure.
- Graduation figures: cap, gown, and scroll prop on a nameplate base with the year, printed at 80 to 100 mm so the tassel survives.
- Cake toppers: print at 80 to 120 mm, use food-safe practice (a sealed figure or a barrier disc, never bare resin touching food), and keep the silhouette simple.
- Memorial and milestone pieces: a chibi from an old photo, where reference quality is limited and the style's forgiving nature is a real advantage.
Two cautions. Allow at least two weeks of lead time, because you will want a test print and a paint pass. And keep exaggeration in the hair and outfit, never the body: chibi flattens everyone into the same stubby silhouette, which is usually a relief, but if you push a feature the recipient is sensitive about, the cuteness will not save you.
Profile Avatars for Discord, Game Launchers, and Social Media
As a chibi avatar maker output, the model beats a photo because it works at every size and never looks like a bad crop. Render once at high resolution and downscale: 512 x 512 for a general profile image, 128 x 128 for Discord, 400 x 400 for most social platforms, and 1500 x 500 for a banner.
Crop tight to the head with a little shoulder, place the eyes at roughly the vertical center, and keep the silhouette clear of the corners for circular masking. Test the render inside a circle before you commit, because platforms crop aggressively and hair spikes are the first casualty.
Background choice matters more than people expect. A flat complementary color behind a chibi head produces a high-contrast icon that reads in a crowded member list, while transparent PNG is more flexible but can vanish against a matching theme, so keep an outlined variant on hand.
Because the same mesh exports to GLB and USDZ, the avatar is not stuck as a flat image: drop the GLB into a web profile viewer, share the USDZ so people can place your chibi on a table in AR, and use rendered turntables as animated banners.
Pairing Your Chibi Self With Original Chibi Character Assets
A chibi of yourself gets more useful when it is not alone, and the natural next step is a cast: original characters, mascots, pets, or companions in the same style. The key to a set that looks intentional is a shared style sheet. Fix five parameters and apply them to every model: head ratio, eye size as a percentage of face width, shadow band count, outline thickness, and palette saturation range. Two chibis with different head ratios standing side by side look like a mistake even when both are well made individually.
For characters that are not derived from a photo, build them directly as original chibi character assets using descriptions rather than references, then match them to your self-model's style sheet. That page covers designing chibi characters from scratch; this one covers converting a real person, and the two workflows meet at the style sheet.
Concrete uses for a matched set: a printed diorama of a friend group, an emote and badge library featuring you plus a mascot, chibi cutscene characters in a small game, and merch sheets rendered from one lighting setup. If you also want realistic-proportion versions of the same characters, the anime likeness workflow produces the taller counterpart, and keeping both in one palette lets you cut between them cleanly.
Frequently Asked Questions: Chibi Maker From Photo, Proportions, and Printing
Short answers to the questions that come up most often when converting your own photo into a chibi 3D model: how the tools work, what proportions to choose, what it costs, and what to check before printing.
What is a chibi maker from photo and how does it work?
A chibi maker from photo reads facial landmarks, hair silhouette, and outfit shapes from your reference images and rebuilds them on a super deformed body with an oversized head and stubby limbs. It is not a filter over a picture: it produces an actual 3D mesh with textures that you can rotate, rig, export, and print, interpreting your features as simplified geometric shapes rather than copying them literally.
In practice: upload one to three references, describe the target proportion and style, generate several variants, pick the one whose hair silhouette and eye placement read best, refine, and export. On Threedium the Julian NXT generator handles reconstruction, PBR texturing, polygon optimization, and export to GLB, USDZ, and FBX.
How many heads tall should a chibi character be?
Chibi characters are typically 2 to 3 heads tall, compared with about 7.5 heads for realistic adult proportions. Two heads is maximum cuteness and best for tiny charms and icons; 2.5 heads is the classic all-purpose ratio; 3 heads gives the body enough room to show an outfit or hold a prop.
Choose based on viewing size: smaller final sizes want lower head counts, because the face needs a larger share of the object to stay readable. If undecided, generate at 2.5 heads with a 3-head variant beside it and compare at the size you will actually use.
Can I turn a photo of myself into a chibi for free?
You can produce 2D chibi illustrations free with many image tools, and several 3D platforms including Threedium offer free tiers or trial credits that let you generate and preview a model before paying. Free tiers usually limit resolution, export formats, commercial licensing, and generations per month, so read the terms if the result is going on merchandise.
The genuinely free DIY route is manual: sculpt the chibi yourself in Blender, which is free and open source, using your photo as a background reference. Expect a first attempt to take 10 to 30 hours if you are learning as you go. AI generation mainly buys back that time.
Can I 3D print a chibi figure of myself at home?
Yes, and chibi is one of the easiest character styles to print at home, because thick limbs, large convex surfaces, and no fine anatomy avoid most of the failure modes that ruin realistic miniatures. A resin MSLA printer gives the best face detail; FDM works well from about 80 mm upward with a 0.2 mm nozzle.
Before printing, confirm three chibi-specific things: the mesh is watertight with no floating shells, every spike meets minimum thickness (roughly 1.2 mm at charm scale), and the figure balances on an adequate base or is hollowed in the head. Print a head-only test at final scale first to check the eye relief survived.
How much does a custom chibi figure or keychain commission cost?
A custom chibi sculpt commissioned from a 3D artist typically costs 150 to 600 USD with 1 to 4 weeks of turnaround. A printed and painted custom chibi figure from a marketplace seller usually falls in the 60 to 250 USD range, and simple custom chibi keychains often sell for 20 to 60 USD each, less in batches.
Generating the model yourself and sending it to a print service brings the per-unit cost to roughly 10 to 60 USD depending on size and color process, and printing at home costs well under 2 USD in resin once you own the equipment. Commissions stay worth it when the likeness has to be guaranteed.
What kind of photo works best for chibi conversion?
The best reference is a front-facing headshot in even, diffuse light, taken at a 50 to 85 mm equivalent focal length, at least 1500 px wide, with your hairline clearly visible and no heavy filters. Add a back or three-quarter head shot if your hairstyle is distinctive, and a plain-pose full-body shot if you want the outfit reproduced.
What to avoid: hard directional lighting, wide-angle selfies taken very close, sunglasses or heavy hair over the forehead, extreme expressions, and beauty filters that erase the hairline and eye crease. Chibi keeps only a handful of features, so those few must be unmistakable in the source.
What is the difference between chibi style and Funko Pop style?
Both use oversized heads, but they come from different traditions. Chibi is a Japanese super deformed convention: 2 to 3 heads tall, huge glossy eyes with irises and highlights, a tiny mouth, soft rounded limbs, and a visible expression. Funko-style vinyl figures are roughly 3 heads tall with a boxy, squared-off head, solid black dot eyes with no iris, no mouth at all, and a deliberately neutral look.
The practical implication: chibi carries identity through hair, eye color, and expression, while the Funko look carries it almost entirely through hair silhouette, outfit, and accessories, because the face is standardized. If you want a stylized likeness with more body and less head, the taller anime and caricature routes are closer fits.