
How Do You Turn Yourself Into a Cyberpunk Character From a Photo?
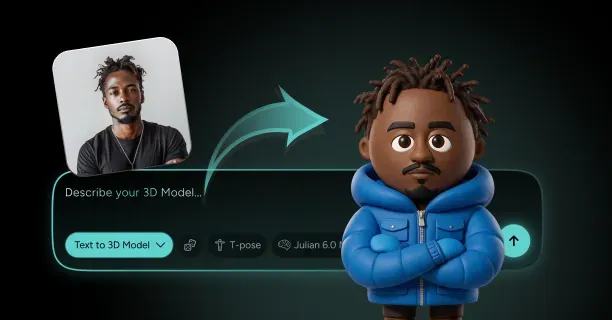
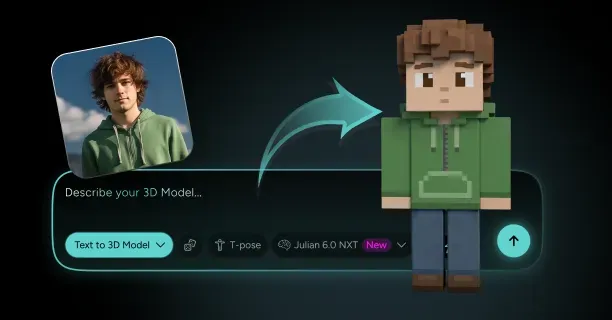
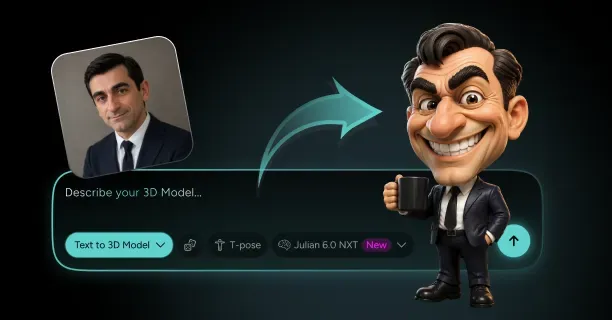
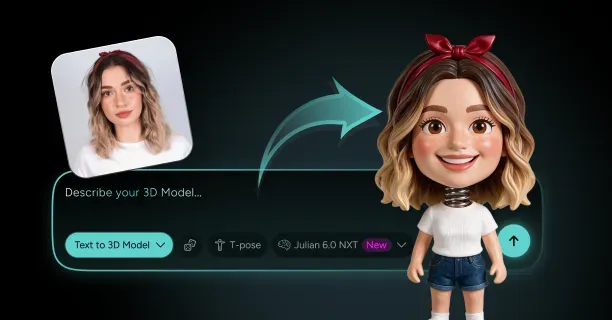
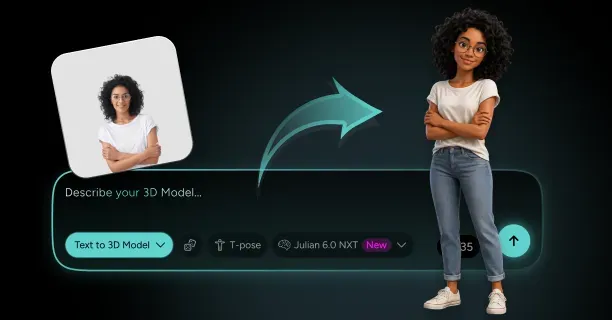
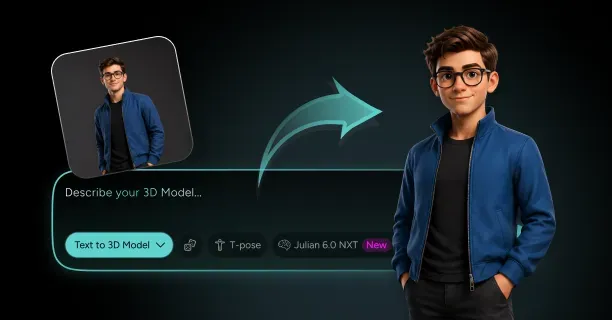
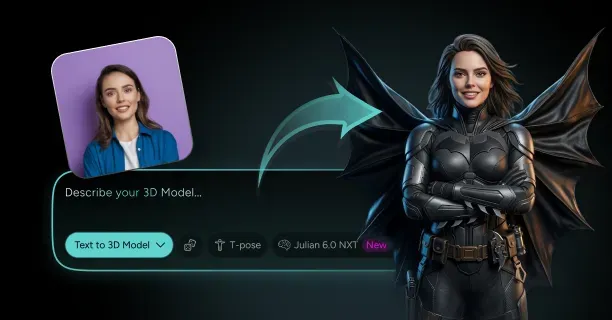
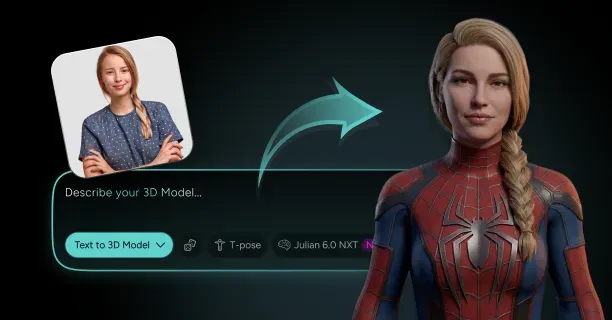
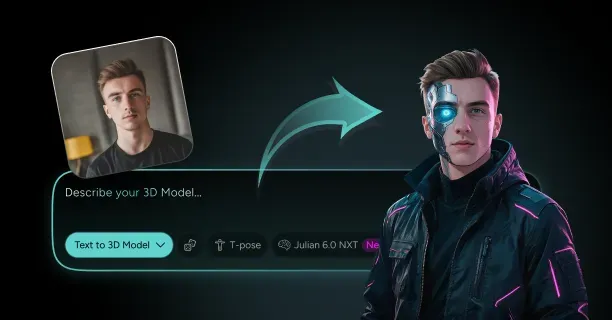
To turn yourself into a cyberpunk character from a photo, upload two or three well-lit reference images to a cyberpunk character creator such as Threedium, then describe the augmentation you want in the prompt: implant placement, techwear layers, and neon accent colours. The Julian NXT generator reconstructs your facial geometry from the photo and applies the cyberpunk styling as part of the same pass, returning a textured mesh with PBR materials, emissive channels for the glowing parts, and export to GLB, USDZ, and FBX. The whole point of this workflow, and the thing that makes it harder than generating a robot, is that the face underneath still has to look like you.
Every decision that follows is a negotiation between two forces. Chrome, visors, and jaw plates are what make the character read as cyberpunk. They are also, geometrically, the exact features that carry your likeness. Add too little and you have a person in a leather jacket. Add too much and you have a generic street samurai that nobody recognises. The sections below work through the full pipeline: reference capture, archetype choice, prompt construction, implant placement, techwear layering, emissive setup, cleanup, export, and rigging.
Decide your augmentation budget before you generate anything. A useful rule: augment no more than 30 percent of the visible face surface, and never both eyes plus the jaw plus the cheekbones in the same design. Recognisability collapses fast once you cross that line, and it cannot be repaired in cleanup.
Which Photo Angles Give the AI Enough Facial Landmarks to Preserve Your Likeness?
Supply a straight-on front view, a true profile at 90 degrees, and a three-quarter view at roughly 45 degrees, all shot at the same camera height with the same lens. The front view fixes interocular distance, mouth width, and the horizontal proportions the eye uses to identify a person. The profile fixes nose projection, chin position, and the brow-to-nose angle, which is the single most under-supplied measurement in photo to cyberpunk conversions. The three-quarter view resolves cheekbone volume, the feature that most often ends up flattened when only a front shot is available.
Shoot at 2048 px on the short edge or better, under soft, even light with no hard shadow across the nose or under the eyes. Baked-in shadow is the classic failure mode: the reconstruction reads a dark crease as a geometric groove and carves it into the mesh, which then looks like a scar you never asked for. Avoid a wide-angle phone lens held at arm's length, since a 24 mm equivalent focal length enlarges the nose and narrows the ears; step back and use the 2x or 3x telephoto if your phone has one, which lands nearer the 50 to 85 mm portrait range.
- Neutral expression, mouth closed, teeth not visible. A smile deforms the cheeks and the generator bakes that deformation into the neutral mesh.
- Hair pulled back from the forehead and ears. Temple and ear geometry are where implants usually go, and hidden geometry gets guessed.
- No glasses, no hat, no heavy makeup that changes apparent bone structure.
- Plain mid-grey background so the silhouette separates cleanly from the backdrop.
- Keep the shoulders in frame. Neck and trapezius geometry matter for a high-collar techwear outfit that has to sit on real anatomy.
How Do You Pick a Cyberpunk Archetype: Netrunner, Street Samurai, Techie, or Fixer?
Pick the archetype first, because it determines silhouette, implant density, and palette before a single polygon exists. The four classic roles map cleanly onto four different visual problems. A netrunner is defined by interface hardware and minimal body armour, so netrunner character design concentrates detail at the head and hands: temple ports, a data cable, thin-gauge jacks, and a slim jacket that does not fight the silhouette. A street samurai inverts that, loading the body with armour plating and subdermal reinforcement while keeping the face relatively intact.
A techie reads as functional clutter: tool harness, mismatched replacement parts, exposed servo work on one forearm, oil-stained fabric. A fixer is the most restrained of the four, closer to street formalwear with one or two expensive-looking augments, which makes it the safest archetype if your priority is that the model still looks like you at a glance.
| Archetype | Implant density | Silhouette driver | Typical palette | Likeness risk |
|---|---|---|---|---|
| Netrunner | High at head, low at body | Slim coat, trailing cables | Cyan and violet on black | Medium: temple hardware crowds the face |
| Street samurai | Low at head, high at limbs | Broad shoulders, armour panels | Gunmetal and red on charcoal | Low: face stays mostly organic |
| Techie | Medium, asymmetric | Tool harness, bulk at one arm | Amber and rust on olive | Low to medium |
| Fixer | Low, concentrated | Tailored coat, clean lines | Magenta accent on deep navy | Lowest: minimal facial change |
If you cannot decide, start as a fixer and add hardware in a second generation pass. Removing an implant from a finished mesh means rebuilding the skin underneath it; adding one is a comparatively cheap edit.
How Do You Write a Prompt That Adds Chrome Without Erasing Your Face?
Write the prompt as three ordered blocks: preserve, add, and exclude. The preserve block tells the generator which features are load-bearing for your identity, phrased as concrete anatomy rather than adjectives, for example "preserve the subject's eye shape, nose bridge, and jawline proportions from the reference". The add block lists augments with explicit locations and materials. The exclude block is the one most people skip, and it does the heaviest lifting.
A working example: "Preserve the subject's facial proportions, eye spacing, and lip shape from the reference photos. Add a brushed chrome temple port above the left ear, a thin cheek plate along the right zygomatic arch only, and a black high-collar techwear jacket with layered shoulder panels and tactical strap detailing. Thin cyan emissive trim along the jacket seams. Exclude: full face mask, both eyes replaced, helmet, generic robot head, mirrored implants on both sides of the face."
Two habits improve results immediately. First, always specify laterality. "Cheek plate" gets you a symmetric pair that reads as a mask; "right cheek plate only" gets you asymmetry, which is both more characterful and far less destructive to likeness. Second, name materials by their physical description rather than by mood. "Brushed chrome with fine anisotropic grain" produces a more controllable surface than "shiny futuristic metal", and it survives the trip into a game engine intact.
How Does Threedium Convert Your Selfie Into a Stylized Cyberpunk 3D Mesh?
Threedium's Julian NXT generator treats the reference images and the text prompt as a single conditioning signal rather than two separate steps. It reconstructs facial geometry from the photographic landmarks, then applies the described augmentation as part of the same generation, which is why implants sit on your bone structure instead of floating over a generic head. The output is a textured mesh with a full PBR material set: base colour, normal, roughness, metallic, and an emissive channel for the neon elements.
Practically, you get a cyberpunk 3d character model with polygon optimization already applied, so the mesh arrives at a workable density rather than a multi-million-triangle scan. Typical working targets for this kind of character sit around 25,000 to 60,000 triangles for a real-time hero character and 8,000 to 15,000 for a background or mobile-tier version. Textures come out at 2K or 4K depending on how much of the budget the face needs.
Where a full 3D model generation workflow pays off on this specific subject is iteration speed. Implant placement is a taste problem you solve by comparison, not by reasoning: generate four variants with the port at the temple, the mastoid, the jaw hinge, and the nape, then look at all four next to your reference photo. Enterprise tiers add refinement by human 3D artists, which is the sensible route when a seam has to be perfect for a printed piece or a hero render.
Where Should Implants Go: Temple Ports, Cheek Plates, or a Single Cyber-Optic Eye?
Put hardware where the skull is close to the surface and where the face carries the least identity information: the temple, the area behind and below the ear, the mastoid process, the nape of the neck, and the outer edge of the brow. These regions have shallow soft tissue, so a plate or port sits flat without implying that flesh was removed, and none of them is a landmark the eye uses to recognise a person.
Temple ports are the highest-value single augment in the whole vocabulary. They read instantly as cybernetic implants cyberware, they sit in profile where they catch rim light, and they cost you nothing in likeness. A single cyber-optic eye is the most dramatic option and the most dangerous: replacing one eye keeps the paired asymmetry readable and is usually survivable, while replacing both eyes removes the strongest identity signal on the human face and turns the model into a stranger. Cheek plates split the difference and must be single-sided, following the zygomatic arch rather than covering it.
Never mirror facial implants. Symmetric hardware reads as a mask or a helmet, and the brain classifies masks as objects rather than faces. One-sided augmentation reads as a person who has been modified, which is the entire aesthetic.
How Do You Build a Techwear Outfit With Layered Jackets, Tactical Straps, and High Collars?
Techwear reads through layering and hardware, not through fabric detail. Build it as three stacked shells: a base layer that follows the body, a mid layer with visible panelling and asymmetric zips, and an outer shell with an oversized collar, a storm flap, and a hem that breaks the silhouette. The collar is the strongest single element, because a collar that rises to the jawline frames the face and gives implant hardware something to read against.
Straps, buckles, and MOLLE-style webbing should be modelled as separate geometry rather than painted into the base colour texture. A painted strap dies the moment a light moves across it, since it casts no shadow and catches no specular highlight. Real geometry at 200 to 600 triangles per strap costs almost nothing at modern budgets and survives any lighting setup.
- Keep the collar 15 to 25 mm clear of the neck mesh so it does not interpenetrate when the head turns.
- Break symmetry deliberately: one shoulder pad, one arm sleeve rolled, one thigh pouch.
- Give the jacket a visible thickness of 8 to 15 mm at open edges. Zero-thickness cloth reads as paper in any engine.
- Reserve one high-contrast accent colour for hardware only: buckles, zip pulls, and clip points.
- Keep the boot and glove silhouettes chunky. Techwear falls apart when the extremities go thin.
How Do You Add Neon Trims, Circuit Tattoos, and Glowing Accents to the Model?
Glowing elements are driven by the emissive channel of the material, which is a separate texture map from base colour. Anything that should glow gets painted white or coloured on the emissive map and near-black elsewhere; the base colour underneath should be a dim version of the same hue so the element still reads correctly when the scene is fully lit and the glow is less dominant.
Neon trims work best as thin continuous runs along existing edges: jacket seams, collar rim, boot sole line, the outer edge of a cheek plate. Aim for a trim width of 2 to 5 mm at real-world scale. Wider than that and the element stops reading as a light strip and starts reading as a painted stripe. Circuit tattoos follow a different rule: they should trace anatomy rather than ignore it, running along the sternocleidomastoid, over the deltoid, or down the forearm extensors, because circuitry that fights the underlying muscle looks like a sticker.
Keep the total emissive coverage low. A useful discipline is the five percent rule: no more than about five percent of the model's visible surface area should be emissive. Cyberpunk lighting works by contrast, and a character where everything glows has no focal point and photographs badly against a neon background.
How Do You Choose a Neon Palette That Reads Under Night-City Lighting?
Use two accent hues, not five. The genre default is a magenta and cyan opposition, which works because the two sit far apart on the colour wheel and separate cleanly against the desaturated blue-black of a night street. Pick one as the dominant at roughly 70 percent of the emissive area and one as the secondary at 30 percent, then let a third colour appear only in tiny quantities, for example an amber warning light or a red status LED at a few pixels of coverage.
The critical constraint is that your character has to survive being lit by an environment that is already saturated. Under night city lighting, ambient magenta and cyan spill covers everything, so a character whose accents are the same two hues disappears into the background. Two ways out: either give the character an accent that the environment does not use, or keep the character's clothing extremely low in saturation so the accents pop off a neutral field.
Value structure matters more than hue. Build the outfit at three clearly separated values, roughly 8 percent, 20 percent, and 45 percent reflectance, so the silhouette holds even when the colours are washed out by coloured light. If your character reads correctly as a greyscale image, it will read correctly in any lighting.
How Do You Refine the Mesh So Implant Seams Sit Cleanly on the Skin?
The seam where hardware meets skin is where generated cyberpunk characters most often fail. Two symptoms dominate: the implant floats a millimetre above the surface with a visible gap, or it sinks into the skin with a soft, melted transition that looks like a burn rather than an installation. The fix for both is a deliberate transition zone rather than a direct boundary.
Build the transition as a narrow bevelled lip around the implant, 1 to 2 mm wide, angled so it catches a highlight. That lip does the same job a panel gap does on a car body: it gives the eye a crisp line to lock onto and hides any imprecision in the underlying geometry. Underneath it, the skin should show a slightly raised rim and a small amount of discolouration in the base colour texture, which sells the idea of tissue that healed around metal.
Check the seam at three viewing distances before you accept it. At silhouette distance the implant should read as a shape change. At mid distance the panel line should be visible as a dark line. At close range the bevel should catch a specular highlight along its full length. If the highlight breaks into segments, your bevel has inconsistent width and needs an even offset rather than a hand-adjusted one.
How Do You Export Your Cyberpunk Character as GLB, USDZ, or FBX?
Choose the format by destination. GLB is the default for web viewers, Three.js, Babylon.js, and most social and marketplace uploads, because it packs mesh, materials, and textures into one binary file and supports emissive maps natively. USDZ is the Apple AR path: it is what iOS Quick Look consumes, so it is the format for showing your character standing in a real room from an iPhone. FBX is the pipeline format for Unity, Unreal Engine, Maya, and 3ds Max, and it is the only one of the three that carries complex rig data reliably.
| Format | Best destination | Emissive support | Rig support | Practical size target |
|---|---|---|---|---|
| GLB | Web, social, marketplaces | Full, with emissive strength extension | Skeletal, single skin | Under 15 MB |
| USDZ | iOS AR Quick Look | Full | Basic skeletal | Under 25 MB |
| FBX | Unity, Unreal, DCC apps | Varies by importer, often needs remap | Full, including facial rigs | No hard limit |
| VRM | VTubing and social VR apps | Full, with MToon control | Humanoid plus blendshapes | Under 40 MB |
One export gotcha specific to this genre: FBX importers frequently drop or misinterpret the emissive strength value, so a character that glowed correctly in the source application arrives in Unreal with dull, non-glowing trim. Expect to reconnect the emissive texture and set the intensity manually on the engine side rather than assuming the export carried it.
How Do You Rig the Character for Idle Animations and Game Engines?
A cyberpunk character rigs as a humanoid, which is a large advantage over a mechanical model. Use a standard humanoid skeleton of roughly 60 to 70 bones for the body plus fingers, which maps directly onto Unity's Mecanim humanoid, Unreal's standard skeleton, and any retargeted motion capture library. Threedium's automatic rigging pipeline handles skeleton placement and weight painting, and where the model has a face that needs to emote it can add 52 ARKit blendshapes for expression and lip sync.
The augmentation is what needs special handling. Rigid implants must not deform. Weight a chrome jaw plate or a forearm shell to a single bone at full influence rather than letting it blend across two, otherwise it will bend like rubber when the joint moves. Cables and straps have three options in order of cost: paint them into the mesh as static geometry, weight them to the nearest bone and accept some clipping, or add a short chain of two to four dynamic bones so they swing.
For an idle loop, keep the motion small and mechanical. A four to six second cycle with two to three centimetres of breathing movement at the chest, a slow head drift, and one asymmetric weight shift is enough. Add a subtle emissive pulse on the implants, roughly a 10 to 15 percent brightness oscillation over three seconds, which sells the hardware as powered without turning the character into a Christmas tree.
How Do You Add Chrome to a Real Face Without Losing the Face?
Adding chrome to a real face is a subtraction problem disguised as an addition problem. Every square centimetre of hardware you place covers a square centimetre of the geometry that made the model recognisable, and the human visual system is unforgiving about which centimetres you take. This section covers the technical craft that separates a convincing augmented human from an expensive-looking mannequin: placement rules, seam construction, material values at the skin boundary, emissive behaviour, and the lighting setups that make the result photograph well.
Which Implant Placements Keep You Recognizable and Which Destroy Likeness?
Face recognition in humans is driven by a small number of high-information regions, and cyberware placement succeeds or fails on whether it respects them. The eyes and the region between them carry the most identity information by a wide margin. The mouth, especially lip shape and mouth width, comes second. The nose and the jawline outline come next, and everything else, including the forehead, the temples, the cheeks below the zygomatic arch, and the entire area behind the ear, carries relatively little. Place hardware in the low-information zones and you can add a great deal of it before the model stops looking like you. Place it in the high-information zones and even a small piece is fatal.
The most common mistake is a full-face or lower-face mask. It is visually striking, it is everywhere in genre concept art, and it destroys likeness completely because it covers the mouth and jawline together. The second most common is bilateral eye replacement. A single replaced eye keeps the other as an anchor and reads as a person with a prosthetic; two replaced eyes remove the anchor entirely, and the result is interchangeable with any other character built the same way.
Here is a concrete placement map for a character that has to stay recognisable as you.
| Placement | Verdict | Why | Safe coverage |
|---|---|---|---|
| Temple port, one side | Safe | Shallow tissue, near-zero identity information, reads strongly in profile | Up to 40 mm across |
| Behind-ear or mastoid plate | Safe | Almost never used for recognition, easy to hide under hair | Unlimited |
| Nape jack cluster | Safe | Invisible from the front, high genre payoff for netrunners | Unlimited |
| Brow ridge bar, one side | Safe | Sits above the eye rather than on it, preserves eye spacing | Thin bar only, 4 to 8 mm |
| Cheek plate, one side | Use with care | Alters apparent cheekbone volume, which is a secondary cue | Follow the arch, do not cover it |
| Single cyber-optic eye | Use with care | Dramatic and characterful, but removes half the strongest cue | One eye only, keep iris size similar |
| Chin or jaw plate | Risky | Jawline outline is a primary silhouette cue | Edge trim only, never full wrap |
| Nasal bridge implant | Risky | Sits inside the highest-information triangle of the face | Avoid unless very small |
| Both eyes replaced | Destroys likeness | Removes the dominant identity signal outright | None |
| Full or lower-face mask | Destroys likeness | Covers mouth and jaw simultaneously | None |
| Mirrored bilateral face plating | Destroys likeness | Reads as a helmet, not as a modified person | None |
| Skull crown replacement | Destroys likeness | Removes hairline and head shape, both strong cues | None |
There is a workable formula behind the table. Rank the visible face regions by identity value, take everything in the bottom half, and treat that as your available canvas. That gives you the temples, the area behind and below the ears, the nape, the outer brow, the lower cheek near the jaw hinge, and the neck. It is a surprisingly generous amount of real estate, and characters built inside it consistently look more augmented than characters that reach for the eyes and mouth, because the hardware is spread and layered rather than concentrated in one attention-grabbing lump.
Test the result the same way a casting director would. Render the model at 256 pixels tall, in greyscale, and put it beside your reference photo. At that size, all the fine detail is gone and only proportion and silhouette remain. If the two still read as the same person, the placement is sound. If they do not, the fault is almost always a piece of hardware sitting inside the eye-nose-mouth triangle, and moving it 30 mm outward usually rescues the design without losing any of the genre character.
How Do You Blend Skin-to-Chrome Transitions With Panel Gaps and Seam Lines?
Do not blend them. The instinct is to soften the boundary between flesh and metal so it looks natural, and the result always looks like melted plastic. Real hard objects installed in soft tissue produce a hard edge, and the way to make that edge look intentional is to give it structure: a recessed gap, a raised lip, or a rim of a third material such as a rubber gasket or a matte black bezel.
The gasket approach is the most reliable. Put a 1 to 3 mm band of dark, rough material between the chrome and the skin. It absorbs any imprecision in the geometry, it gives the eye a clean reading of "part meets part", and it is physically plausible as a seal. Without it, chrome touching skin directly produces a reflection that bleeds skin tone into the metal edge and makes both surfaces look uncertain.
Panel gaps on a face follow different rules than panel gaps on a machine. On a hard-surface robot, gaps run in long straight lines across large plates and the whole surface is mechanical, which is the territory of hard-surface robot modelling. On a face, gaps should be short, follow anatomical contours, and never cross a feature boundary. A panel line that runs straight across the bridge of the nose looks like a mistake; one that curves along the zygomatic arch looks like it was fitted to that specific skull.
What Metallic and Roughness Values Sell Brushed Chrome Versus Matte Gunmetal?
For the small chrome parts that sit directly against skin, the values that matter are metallic at 1.0 and roughness in a narrow band. Polished chrome sits at roughness 0.05 to 0.15, brushed chrome at 0.2 to 0.35, and matte gunmetal at 0.45 to 0.6. Anything above 0.7 on a metallic surface stops reading as metal and starts reading as painted plastic, which is exactly the failure that makes a cheap-looking implant.
Skin-adjacent chrome has one property that full metal bodies do not: it is small, so it reflects mostly skin. A polished implant next to a cheek will pick up a wash of warm flesh tone in its reflection, and if your scene has no environment map to reflect, it will instead render as a flat grey blob. Always give a chrome implant something to reflect. In practice that means using a real HDRI environment rather than a plain colour background, even for a simple turntable render.
Brushed chrome is usually the better choice for skin-adjacent hardware because its anisotropic grain gives a directional highlight that survives poor lighting. Run the grain along the long axis of the part. For a full metal body, where large plates and consistent material breakup are the dominant problem, the material logic is different and belongs with hard-surface work rather than character skin work.
How Do Emissive Maps Drive Neon Trims, Glowing Tattoos, and Optic Rings?
An emissive map is a texture that tells the renderer which parts of a surface produce light rather than reflect it. It is multiplied by an emissive colour and an intensity scalar, and the result is added on top of whatever the lighting calculation produced. This is why neon emissive materials stay bright in a dark scene: they are not being lit, they are contributing light values directly.
Author the map as a mostly black texture with the glowing shapes painted in. Keep the edges of those shapes reasonably crisp; a soft gradient on an emissive map produces a muddy halo rather than a light source, since the actual soft falloff should come from bloom in the renderer, not from the texture. For thin trims, make sure the painted line is at least 4 to 6 texels wide in the final texture resolution, otherwise mipmapping will make it flicker or vanish at distance.
- Neon trim: narrow line, single saturated hue, constant intensity along the run.
- Circuit tattoo: branching pattern following muscle direction, lower intensity than trim so it stays secondary.
- Optic ring: a thin annulus around the iris, the brightest element on the model, kept small so it dominates by contrast rather than area.
- Status LEDs: two to four pixels each, ideally in a colour the rest of the palette does not use.
- Screen surfaces: use a separate unlit material so text and UI stay readable rather than blooming out.
How Bright Should Emissive Intensity Be Before Bloom Blows Out the Render?
There is no single number, because emissive intensity is meaningless without knowing the scene exposure. What matters is the ratio between the emissive value and the average scene luminance. A practical starting point in a physically based renderer is to set emissive so the glowing element sits 2 to 4 stops above the brightest lit surface in frame, then tune bloom rather than tuning the emissive.
The failure mode is easy to recognise. When intensity is too high, the bloom halo grows until it eats the geometry underneath: a thin jacket seam becomes a fat glowing worm with no visible edge, and an optic ring becomes a white disc. The tell is that you can no longer see the physical shape of the emitting object at all. If that is happening, reduce emissive intensity by half before touching the bloom threshold, because raising the bloom threshold to compensate also kills the softer glow on your secondary elements.
Practical numbers for the common cases: in Unreal, emissive multipliers around 2 to 8 work for neon trim on a character in a normally exposed night scene, with hero elements such as an optic ring going to 15 or 20. In Blender's EEVEE, emission strength of 2 to 5 with bloom threshold near 1.0 gives a comparable look. Both figures shift the moment you change exposure, so always tune with your final camera and final exposure settings in place.
Render one frame with bloom disabled entirely before you finalise emissive values. If the character still reads correctly with no bloom at all, the underlying material setup is sound. If it looks flat and dead, you have been using bloom to hide a weak base colour and normal map.
Why Do Techwear Cables, Buckles, and Straps Need Separate Mesh Layers?
Cables, buckles, and straps sit above the garment surface, cast shadows onto it, and move independently of it. Every one of those behaviours requires that they exist as separate geometry with their own material assignment. Merged into the jacket mesh, they inherit the jacket's fabric roughness and normal detail, which makes a metal buckle look like a fabric patch shaped like a buckle.
Separation also solves the UV problem. Hardware wants a small, tightly packed UV island at high texel density because it is viewed close and has fine detail. A jacket wants a large island at lower density. Sharing a texture between them forces a compromise that shortchanges both. Give the hardware its own material with its own 1K or 2K texture, and the jacket a separate 2K or 4K set.
The third reason is animation. A cable that hangs from a nape jack down to a deck on the belt should swing, and that means either a dynamic bone chain or a cloth simulation, neither of which can be applied to a subset of a merged mesh without extra work. Building it separate from the start costs nothing; separating it later means splitting geometry, repairing the UV seam, and reweighting.
How Do You Style Cyberpunk Hair: Undercuts, Neon Streaks, and Fiber-Optic Strands?
Undercuts are the genre default for a practical reason: they expose the temple and the area behind the ear, which is exactly where the safe implant real estate is. A shaved side with a hard fade line also gives you a clean surface for scalp circuitry or a barcode tattoo, and it simplifies the hair geometry considerably compared to a full head of long hair.
For real-time work, build hair as card geometry rather than strands: 40 to 120 planes with an alpha-tested or alpha-blended hair texture, totalling perhaps 3,000 to 8,000 triangles. Sort the cards back to front if you use alpha blending, or accept the harder edge of alpha testing, which is often the better trade for a stylised cyberpunk look anyway.
Neon streaks are the cheapest high-impact detail on the whole character. Paint two or three streaks into the hair base colour, then add matching emissive at low intensity so they glow faintly rather than blazing. Fibre-optic strands are a step further: model 10 to 30 thin tubes with an emissive gradient running from dark at the root to bright at the tip, which mimics light travelling along the fibre. Keep them clustered in one section rather than distributed evenly, since a uniform spread reads as a wig.
How Do You Light a Night-City Render With Magenta-Cyan Rim Lights and Wet Reflections?
The canonical setup is three lights and a floor. Put a magenta rim light behind and to one side at roughly 45 degrees off axis and slightly above head height, put a cyan rim on the opposite side lower down, and add a dim, cool fill from the front at maybe 10 percent of the rim intensity so the face does not go completely black. The two rims do the genre work: they separate the silhouette from the background and they trace the edge of every implant and strap on the model.
The floor is what most people forget. Wet asphalt is not decoration, it is a light source. Give the ground a roughness of 0.1 to 0.25 with a subtle normal map for puddle ripples, and it will bounce the neon back up under the character's chin, which is the single change that makes a render stop looking like a character on a black background and start looking like a character in a street.
Add atmosphere at low density. A volumetric fog with enough scattering to produce visible light shafts but not enough to grey out the midtones, typically a very low density value tuned by eye, gives the rims something to bleed into. Finish with a subtle chromatic aberration at the frame edges and a light grain, both at values low enough that a viewer would not name them if asked what they saw.
How Do Emissives Behave Differently in Blender EEVEE Versus Unreal Engine Bloom?
The same emissive value produces visibly different results in the two renderers, and knowing why saves a lot of confused re-tuning. EEVEE's bloom is a screen-space effect driven by a threshold, a knee, a radius, and an intensity, applied after rendering. Unreal's bloom is convolution-based and reacts to the full high dynamic range values in the frame, which means it responds more smoothly to very bright small sources and produces a more physically shaped halo around them.
The practical consequences are specific. A thin neon trim that looks correct in EEVEE often looks under-bloomed in Unreal, because EEVEE's threshold-based bloom catches the whole line uniformly while Unreal weights by actual luminance. Conversely, a bright optic ring tuned in Unreal frequently blows out in EEVEE, because EEVEE's knee curve ramps faster past the threshold.
Two habits make the difference manageable. First, keep emissive intensity in the material and never bake glow into the base colour texture, so the value is a single number you can adjust per engine. Second, build a small test scene with a known reference: a mid-grey sphere, a white card, and one strip of your neon material. Load that scene into every renderer you use and calibrate against it once, rather than re-tuning per character.
How Is a Cyberpunk Cyborg Different From a Full Robot Model?
A cyborg is a human mesh with hardware attached; a robot is a mechanical assembly with no organic base. That difference changes almost every technical decision downstream. A cyborg deforms like a person, so it takes a standard humanoid skeleton with smooth skinning weights and retargetable motion capture. A robot articulates at mechanical pivots, so it needs rigid parts, no weight blending across joints, and a rig built around hinges and ball joints.
Material logic diverges too. On a cyborg, metal is the exception on a surface that is mostly skin, cloth, and hair, so the craft is in the transitions. On a robot, metal is the whole surface, and the craft is in breaking it up: panel lines, wear masks, and material variation across large plates so the model does not read as a single injection-moulded lump. If you are building a full machine with no human base, generate it as a standalone hard-surface subject in the 3D model generator and prompt for part separation, panel line construction, and mechanical joints instead of skin blending, because none of the seam work described here applies.
There is also a middle case worth naming: the heavily converted borg who has replaced both arms and part of the torso but kept the face. That character rigs as a humanoid, textures largely as a robot, and is the trickiest of the three to get right, because it has to satisfy both sets of rules along the boundary where they meet.
Where Can You Use Your Cyberpunk 3D Character?
A finished cyberpunk character is unusually portable because it is a rigged humanoid in standard formats. The same asset can serve as a playable character, a streaming avatar, a printed statue, a tabletop token, and the subject of an animated loop, provided you export the right variant for each. The sections below cover what each destination actually requires, and what to check before you commit time or filament to it.
Can You Drop the Character Into Unity or Unreal Engine Night-City Scenes?
Yes, and this is the destination the format and rig are best suited to. Export FBX with the humanoid skeleton, import into Unity with the rig type set to Humanoid so Mecanim can retarget any animation clip onto it, or into Unreal where you can retarget onto the standard mannequin skeleton through the IK Rig and IK Retargeter system. Both engines will import the mesh and textures; both will need manual attention on the emissive materials.
Budget-wise, a hero character at 25,000 to 60,000 triangles with a 4K texture set is comfortable on desktop and current-generation consoles. For a crowd character or a mobile target, produce a second export at 8,000 to 15,000 triangles with 1K or 2K textures, and simplify the hardware: merge the small implants into the head mesh and drop the dynamic cable chain.
Two engine-side checks are worth doing immediately after import. Confirm that the material is set to use the emissive channel and that the intensity is not sitting at its default of 1.0, which will look dead. Then run the character through a walk cycle and watch the rigid implants at the extremes of motion, since retargeted animation frequently pushes joints further than the source rig anticipated and reveals implant clipping that a T-pose hides.
Does the Model Work as a Social or Streaming Avatar After Rigging?
It does, and cyberpunk is one of the better-suited aesthetics for it, because the glowing elements read clearly at small sizes and through video compression. For VTubing and social VR, the target format is VRM, which wraps a humanoid rig plus a standard blendshape set into one file that avatar applications can load without per-app configuration. Facial tracking needs the 52 ARKit blendshapes, which cover the eye, brow, jaw, mouth, and cheek movements that iPhone and webcam trackers output.
Practical constraints differ from game engines. Most social platforms enforce polygon and material limits, and a common target is under 70,000 triangles with a small number of material slots, sometimes as few as four to eight. That pressure argues for consolidating your hardware materials: one atlas for all chrome parts, one for fabric, one for skin and hair, one for emissive elements. Building an avatar version of yourself with those limits in mind from the start is much easier than retrofitting them.
One aesthetic note specific to streaming: an ai cyberpunk avatar generator output tends to look best on stream when the emissive elements are placed near the face, because that is the region a viewer sees at 400 pixels tall in a corner webcam frame. Trim on the boots is invisible; a temple port that pulses is not.
Can You 3D Print It as a Night-City Statue or Desk Miniature?
Yes, but printing requires a different mesh than rendering. The render mesh is hollow, has separate intersecting parts, and includes zero-thickness elements that a slicer cannot interpret. Before printing, merge everything into a single watertight, manifold solid, then check minimum wall thickness: 1.5 mm for FDM and 0.8 mm for resin are the usual safe floors. Thin techwear straps and trailing cables are the usual offenders and often need thickening by 50 to 100 percent to survive.
Scale drives everything else. A desk statue at 150 to 200 mm tall holds implant detail well and prints in one or two pieces on a standard resin printer. A tabletop miniature at 28 to 32 mm scale, meaning roughly 32 to 40 mm to the eyes, cannot hold a 2 mm panel line at all, so exaggerate: deepen every seam to at least 0.4 mm and simplify the implant shapes into readable blocks.
- Hollow anything above 100 mm and add two drain holes of 3 to 4 mm for resin printing.
- Cut the model into parts at natural seams: collar line, shoulder, wrist, and boot top.
- Add 3 mm registration pins at each cut so parts align during assembly.
- Check the centre of mass. A leaning action pose usually needs a base plinth or a support strut.
- Remember that emissive is a render property only. To make a printed model glow, print the trim in translucent resin and light it from inside, or paint with a fluorescent acrylic.
Can You Use Renders as Cyberpunk RED Campaign Art and TTRPG Tokens?
Yes, and it is one of the fastest payoffs from the whole workflow. A single character model gives you an unlimited supply of consistent art: a portrait for the character sheet, a full-body reference for the group, a top-down render for a virtual tabletop token, and variant renders in different outfits or lighting as the campaign progresses. That consistency is very hard to get from image generation alone, where every render produces a slightly different person.
For virtual tabletop tokens in Foundry, Roll20, or similar, render orthographically from directly above with the character in a neutral standing pose, output at 512 x 512 px with a transparent background, and add a subtle drop shadow so the token separates from the map. Top-down is unforgiving about shoulder silhouette, so widen the jacket shoulders slightly for the token render if the default looks weak from above.
A note on intellectual property: Cyberpunk RED is a published game by R. Talsorian Games, and the wider genre includes well-known video game properties. Building a character in the genre style for your own campaign or personal use is fine; using someone else's trademarked characters, logos, or setting names in commercial work is not. Keep your character your own design and the question never arises.
Can You Animate It for Shorts, Loops, and Synthwave Music Visuals?
A rigged humanoid drops straight into any animation pipeline, and the genre rewards short looping content specifically. The most effective format is a four to eight second seamless loop: a slow turntable, a subtle idle, or a single repeated gesture, rendered vertically at 1080 x 1920 for short-form platforms. Because the loop repeats, you can afford far more render quality per frame than you could for a long piece.
Synthwave and music visual work uses one technique heavily: driving emissive intensity from the audio. Map low-frequency energy to a global emissive multiplier and the character pulses with the kick drum, which costs almost nothing to set up and reads as far more elaborate than it is. Add a second, slower oscillation on the optic ring so the character does not feel purely reactive.
For motion, retargeted motion capture is the practical route. Free and paid libraries provide idle, walk, and gesture clips that map onto a standard humanoid skeleton, and the augmentation rides along automatically as long as your rigid implants are weighted to single bones. Watch the shoulders during any clip with large arm movement, since shoulder pads and layered collars are where retargeted animation most often produces clipping that needs a corrective adjustment.
Frequently Asked Questions About Cyberpunk Character Creators
Is there a free cyberpunk character creator?
There are free routes, but they produce different things. Free 2D character creators and picrew-style dress-up tools give you a flat portrait in minutes with no 3D asset at all. Free 3D options include Blender, which is fully capable and completely free but requires real modelling skill and many hours, and character base tools like MakeHuman for a starting body you then augment yourself. Most AI 3D generation platforms, Threedium included, offer a free tier or trial credits that let you produce a model before committing to a paid plan.
The honest trade is time against money. A free manual route costs 20 to 60 hours for a first-time modeller to get a decent augmented character with clean seams. An AI generation route gets you a usable mesh in minutes and spends your time on refinement instead. If you only need one character and you already know Blender, do it manually. If you need several, or you need them to be consistent with each other, generation wins on both time and consistency.
How do I make a cyberpunk version of myself with AI?
Capture three reference photos at front, profile, and three-quarter angles under soft even light, upload them to an AI 3D platform, and write a prompt that names what to preserve, what to add, and what to exclude. Generate several variants with different implant placements, pick the one that still reads as you at thumbnail size, then refine the seams, materials, and emissive setup before exporting.
The step people skip is the exclusion list. Without it, generators default to the most recognisable genre imagery, which is a full face mask and a pair of glowing eyes, and both of those erase likeness. Explicitly excluding masks, helmets, bilateral eye replacement, and mirrored face plating changes the output more than any other single edit to the prompt.
What should I write in a cyberpunk character prompt?
Write four things in order: the archetype, the preserved features, the added hardware with explicit locations and materials, and the exclusions. Skipping any of the four leaves the generator to guess, and its guesses trend toward genre cliche.
A template that works: "[Archetype] character based on the reference photos. Preserve the subject's eye spacing, nose shape, and jawline. Add [hardware] at [specific location, one side], made of [material description]. Wearing [garment] with [layering detail] and [strap or panel detail]. Thin [colour] emissive trim along [specific edges]. Exclude: face mask, helmet, both eyes replaced, mirrored facial plating, generic robot head."
Be specific about material physics rather than mood. "Brushed chrome with fine directional grain" and "matte gunmetal, roughness around 0.5" produce more controllable surfaces than "futuristic" or "high tech", which mean nothing to a material system.
What is the difference between a cyberpunk character and a robot model?
A cyberpunk character is a human with augmentation: it deforms organically, rigs as a humanoid, and its surface is mostly skin, cloth, and hair with metal as an accent. A robot has no organic base: it articulates at mechanical pivots, uses rigid parts with no weight blending, and its surface is entirely hard material that has to be broken up with panel lines and wear.
The practical consequence is that the two need different craft. Cyborg work lives at the boundary between materials, so the skill is in seams, transitions, and preserving likeness under hardware. Robot work lives in part separation and mechanical believability. If your subject is a full machine, a hard-surface robot build is the right reference rather than this one.
How much does a custom cyberpunk 3D character commission cost?
Commission pricing for a custom character varies widely by artist and scope. A stylised, unrigged bust or portrait model typically runs a few hundred dollars. A full-body game-ready character with clean topology, a PBR texture set, and a humanoid rig commonly lands in the low to mid four figures, with high-end studio-quality hero characters going considerably above that. Turnaround is usually two to six weeks depending on the artist's queue and the revision count.
Cyberpunk characters sit at the higher end of their bracket for a specific reason: the hardware adds a second modelling problem on top of the character itself, and implant seams are fiddly, manual work. AI generation plus your own cleanup is dramatically cheaper and faster, and platforms like Threedium offer a middle path on enterprise tiers where human 3D artists refine the generated result, which gets you closer to commission quality without a full commission timeline.
Can I use my cyberpunk character in video games or Cyberpunk RED?
Yes to both, with different technical requirements. For video games, export FBX with a humanoid skeleton and check the polygon and texture budgets for your target platform, then verify materials and emissive intensity on the engine side after import. For a tabletop game like Cyberpunk RED, you need renders rather than the mesh: a portrait for the character sheet and a top-down 512 x 512 px transparent PNG if you play on a virtual tabletop.
Commercial use depends on the licence terms of whatever platform generated the model, so read those before you ship. Separately, keep your design original: building in the genre style is unrestricted, but reproducing trademarked characters, logos, or setting-specific branding from a published game is a different matter entirely and is not something a generated model licence can authorise.
What file formats does a cyberpunk 3D character generator export?
The standard set is GLB, USDZ, and FBX, with VRM added where the model is intended as an avatar. GLB is the web and social default and packs geometry, materials, and textures into one file. USDZ targets iOS AR Quick Look. FBX is the pipeline format for Unity, Unreal, and desktop 3D applications, and is the most reliable carrier for complex rig data. VRM is the avatar standard for VTubing and social VR.
Export a variant per destination rather than trying to make one file serve everything. A 4K-textured 60,000-triangle FBX for your engine work, a compressed GLB under 15 MB for web sharing, and a material-consolidated VRM for avatar apps are three different builds of the same character, and each takes minutes to produce once the source model is finished. You can start the whole pipeline from the 3D model generator and export as many variants as you need.