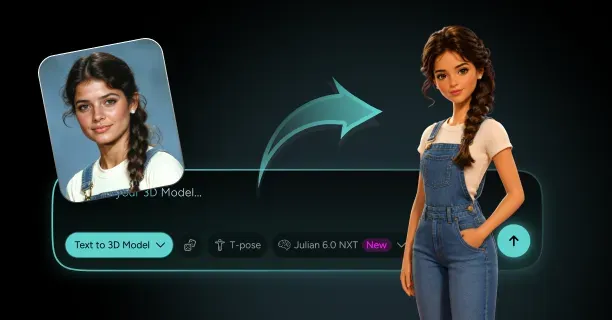
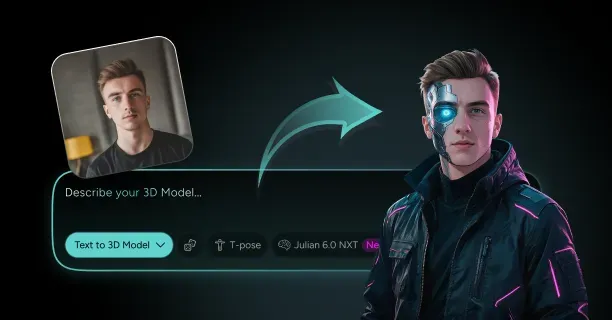
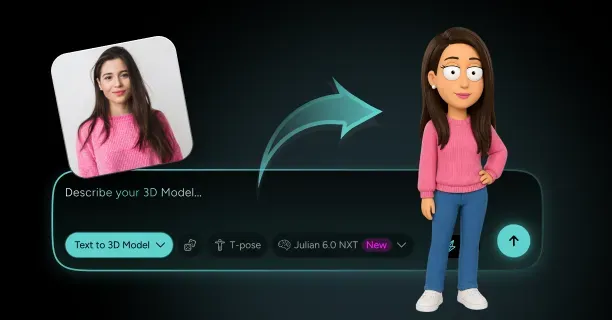
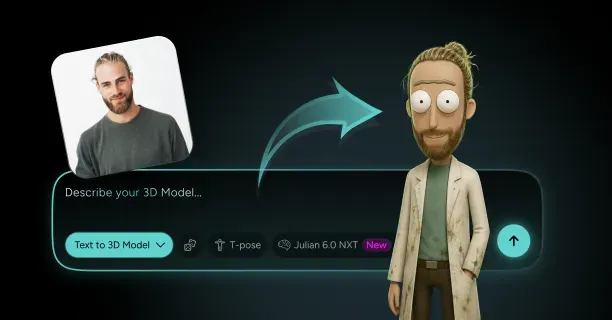
How Do You Turn Yourself Into a GTA-Style Character From a Photo?
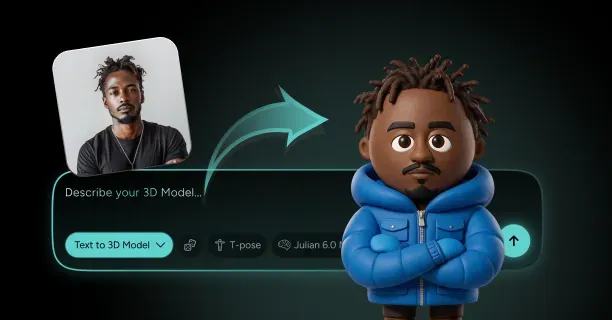
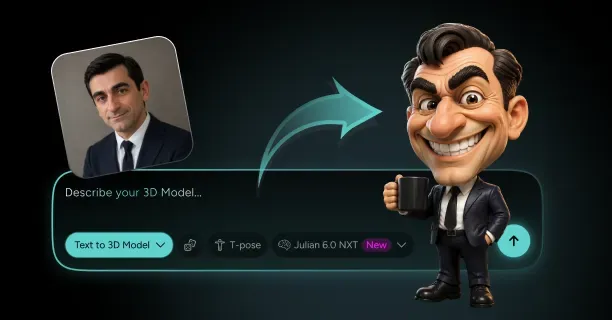
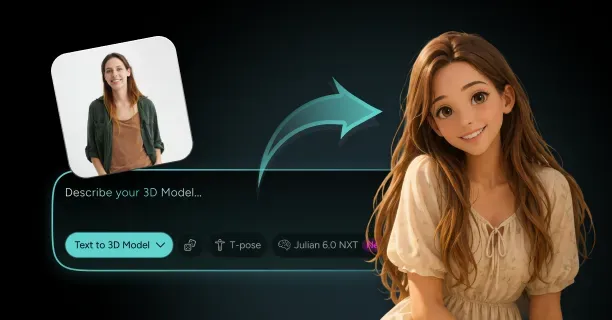
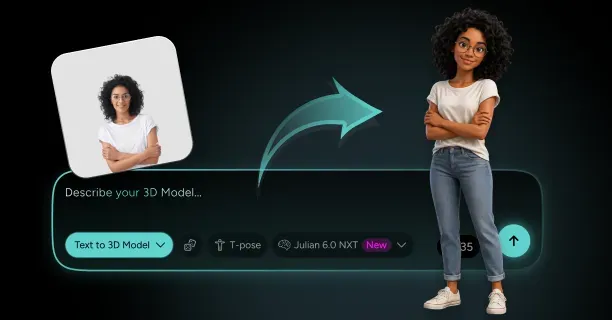
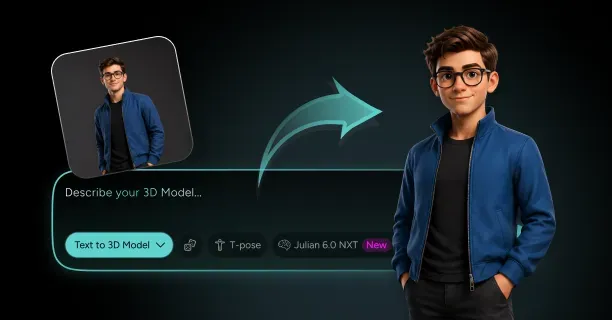
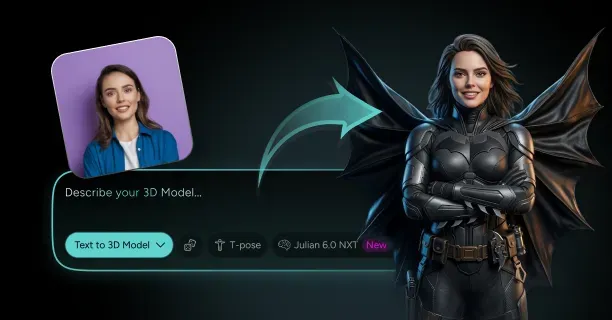
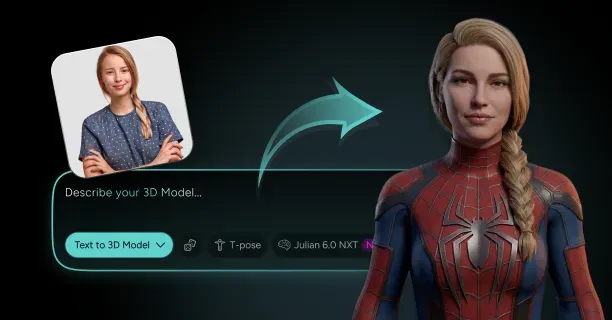
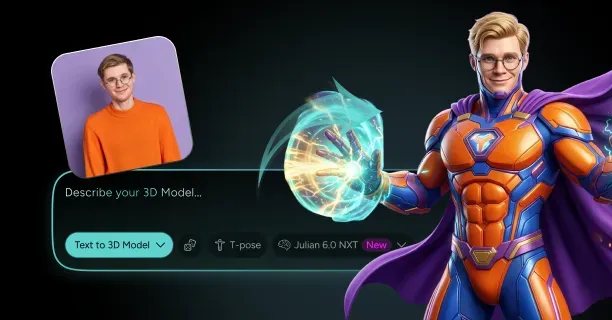
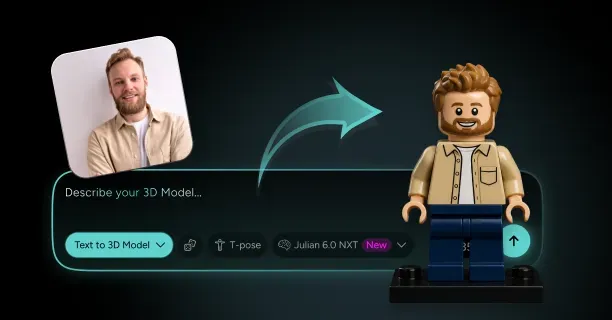
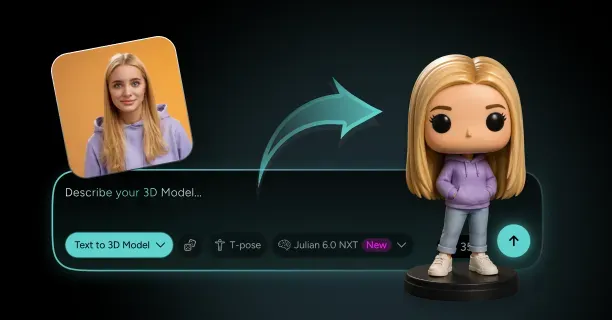
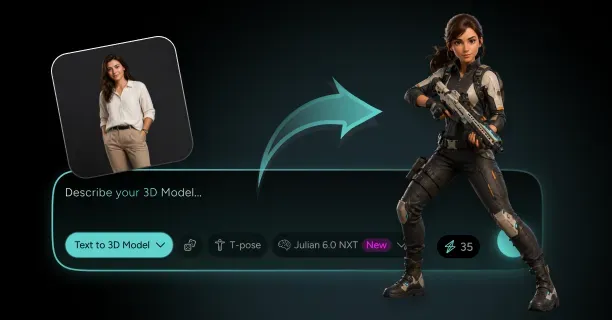
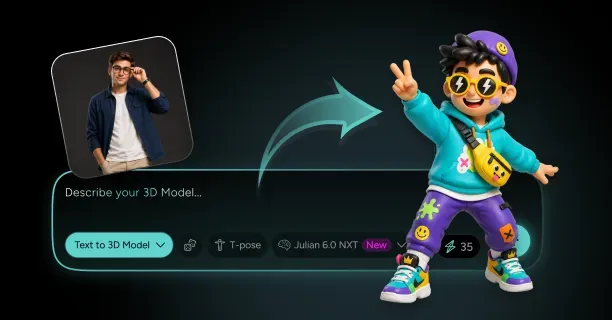
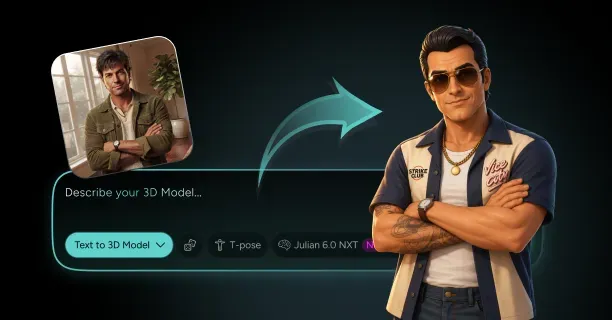
To turn yourself into a GTA-style character from a photo, upload a front-facing headshot at 1024 px or larger to Threedium, describe the look in illustration terms rather than by naming the game (flat cel-shaded color blocks, heavy black contour lines, oversaturated palette, low-angle pulp-poster framing), and let the Julian NXT generator rebuild your face and body as a stylized 3D mesh. A proper gta character maker workflow does not stop at a flat picture: it produces a rigged model with PBR textures that you can export to GLB, FBX, or USDZ, render as loading-screen panels, drop into a game engine, or send to a resin printer. The stylization work happens in the prompt and the shading setup, and the likeness work happens in the mesh refinement pass afterward.
The reason most people end up disappointed with an ai gta filter is that a filter only recolors pixels. It flattens your photo, thickens the edges, cranks the saturation, and hands back a square image that looks wrong the moment you crop it differently. The illustration style everyone is actually chasing is a construction style: strong shape design, deliberate silhouette, a specific camera height, and color that was chosen before the drawing started. Rebuilding yourself as geometry lets you satisfy all of those from any angle, in any pose, forever.
Step 1: Pick a Front-Facing Photo That Survives the Cel-Shaded Translation
Cel shading is brutal to soft photos. When a renderer quantizes your face into two or three flat tones, every piece of information that lived in a subtle gradient disappears. A photo with soft window light and a shallow depth of field looks great on a phone and turns into an unreadable blob of a single skin tone once you posterize it. What survives the translation is structure: a defined jaw edge, a clear brow shelf, visible nose planes, and a hairline that reads as a shape rather than a fade.
Shoot or choose a photo with directional light coming from roughly 30 to 45 degrees off camera. That angle produces a shadow edge down one side of the nose and under the cheekbone, which is exactly the boundary a two-band cel ramp will latch onto. Avoid flash-on-camera selfies, which flatten everything, and avoid dramatic backlight, which throws the whole face into a single dark band.
- Resolution: at least 1024 px across the face itself, not just the full frame; 2048 px is comfortable
- Angle: one straight-on front view plus one three-quarter view at about 35 degrees is the ideal pair
- Expression: neutral or a slight closed-mouth smirk; wide open-mouth smiles distort the lower face and confuse jaw reconstruction
- Framing: shoulders visible, head not cropped at the crown, no extreme wide-angle phone lens distortion from a close selfie
- Accessories: remove reflective sunglasses for the base pass; you can add aviators later as separate geometry
If you plan a full-body character rather than a bust, add one standing full-length photo in loose clothing with arms held slightly away from the torso. It just needs to tell the generator your actual proportions: shoulder width relative to hips, arm length, and where your torso mass sits.
Spec warning: heavy beauty-filter smoothing is the single worst input for a cel-shaded pipeline. Filters erase the nasolabial fold, soften the jaw edge, and blur the nostril wings, which are the three landmarks a stylized head model needs most. If your only good photo has a filter baked in, find an older unfiltered one instead.
Step 2: Write a Prompt That Names the GTA Loading-Screen Art Style, Not the Game
Prompting the game title directly is the least effective thing you can do. Generative systems increasingly decline or dilute requests that name a protected franchise, and even when they comply you get a muddled average of every screenshot ever posted, which means realistic in-game rendering rather than illustration. The gta loading screen art style is a set of describable visual decisions, and describing them explicitly gives you far more control than a brand name ever will.
Break the style into its parts and name each one. The core recipe is: flat vector-adjacent color fills, a bold uniform black contour around the character and around major internal shapes, two or three tone bands per surface with hard boundaries, saturation pushed well past photographic, a slightly low camera so the subject reads as monumental, and a plain or minimally detailed background so the figure carries the whole composition.
- Shape language: "flat color-block illustration, hard-edged shadow shapes, no soft gradients on skin"
- Line work: "uniform heavy black outline on silhouette and interior forms, consistent line weight"
- Palette: "oversaturated pulp poster palette, warm skin against cool background, limited to six or seven hues"
- Framing: "low three-quarter camera, subject filling a vertical panel, plain flat background"
- Attitude: "confident stance, direct eye contact with the viewer, slight lean, deadpan expression"
What you are recreating is essentially the stephen bliss art style: Bliss was the illustrator behind Rockstar's key art and loading-screen panels across the Grand Theft Auto III through Grand Theft Auto IV era, and his approach is what most people picture when they think of that look. His work is characterized by simplified anatomy pushed slightly toward caricature, extremely economical line work, and color chosen for poster impact rather than realism. Naming those qualities gets you the aesthetic. Naming the game gets you a screenshot.
Step 3: Generate Portrait Concepts and Choose Your Box-Art Composition
Generate a batch of stylized portraits before you touch any 3D. Six to twelve concepts is the right number: enough to see the range, few enough to actually compare. You are not picking the prettiest one. You are picking the one whose shape design is strongest, because that concept becomes the reference the mesh gets built against, and a weak concept produces a weak model no matter how much you refine it afterward.
The compositional grammar of this style is worth understanding because it is unusually rigid. Panels are almost always vertical, roughly 2:3 or narrower. The figure sits in the lower two thirds. The camera is at chest height or slightly below, tilted up a few degrees, which makes the subject read as taller and more imposing. Negative space is flat and large, and nothing competes with the character.
- Vertical panel: 2:3 or 9:16, figure occupying 60 to 75 percent of the frame height
- Low camera: lens at sternum height, one to five degrees of upward tilt, never a downward selfie angle
- Flat ground: either no ground plane at all or a single flat band of color, no rendered environment
- Crop discipline: hands and props stay inside the frame; limbs that exit the panel edge should exit cleanly, not at a joint
Once you have your pick, generate two supporting views from the same concept: a straight-on front and a clean side profile, both in a neutral standing pose with flat lighting. These are not the hero image. They are construction references, and the image-to-3D stage uses them to resolve occlusion, which is the single biggest cause of mangled geometry when you feed in a dramatic pose as the only source.
Step 4: Convert the Stylized Portrait Into a Full-Body 3D Character Mesh
Now push the concept through image-to-3D. Feed the neutral front and side references together with the hero concept and a short prompt that restates the proportions you want. On Threedium's 3D model generator, Julian NXT reconstructs a watertight base mesh with PBR texture maps already assigned, which gives you albedo, roughness, normal, and metallic channels to work with rather than a single baked diffuse image that fights you later.
Set your expectations for the first output correctly. What comes back is a solid, well-proportioned stylized human with your facial structure and your wardrobe, textured in flat-ish colors. It will not yet have the black contour lines, because outlines are a rendering feature, not geometry, and they get added in the next stage. Judge the first pass on silhouette, proportion, and whether your face is actually recognizable in the mesh rather than only in the texture.
| Target use | Triangle budget | Texture resolution | Notes |
|---|---|---|---|
| Still renders and loading-screen panels | 80,000 to 200,000 | 4096 x 4096 | Density is free here; keep the high-poly result |
| Real-time engine hero character | 30,000 to 60,000 | 2048 x 2048 | Comfortable for Unity, Unreal, or Godot at 60 fps |
| Web and AR viewer (GLB / USDZ) | 15,000 to 30,000 | 1024 to 2048 | Keep the whole file under about 15 MB |
| Background NPC crowd instance | 6,000 to 12,000 | 1024 x 1024 | Outline pass gets disabled at distance |
| Resin 3D print, 100 mm figure | 200,000+ (solid, manifold) | Not applicable | Geometry only; color lives in paint |
Step 5: Refine Facial Likeness Without Softening the Bold Black Outlines
This is the step where most people accidentally destroy the style. The instinct when a face does not look enough like you is to add detail: more topology around the eyes, subtler cheek transitions, softer nose blending. Every one of those moves fights the aesthetic, because a cel-shaded outlined character reads through large planar shapes and hard edges, not through micro-detail. Add smoothness and you get a generic stylized human who happens to have your nose.
Work on likeness at the level of proportion instead. Measure the distances that actually encode identity: interpupillary distance relative to face width, the vertical position of the eye line, brow-to-hairline height, nose length as a fraction of face height, chin projection, and the width of the jaw at the gonial angle compared to the cheekbones. Nudging those five or six ratios toward your photo does more for recognizability than a thousand extra polygons ever will.
- Eye line height: should sit near the vertical midpoint of the skull including hair, adjusted to match your photo
- Jaw width: the strongest single identity cue in a flat-shaded head; get it right before anything else
- Brow shelf depth: controls where the forehead shadow band lands, which defines half your face in cel shading
- Nose plane angle: keep the side plane of the nose distinct and flat so it catches its own tone band
- Lip mass: simplify to two shapes, upper and lower, with a defined mouth line rather than a soft blend
Watch what happens to your outline pass as you edit. Outline rendering, whether it comes from an inverted hull or a screen-space edge detector, keys off geometric creases and silhouette boundaries. If you smooth a crease away, the line vanishes there and the drawing falls apart in that region. A good habit is to keep the outline preview on the whole time you are sculpting so you are always looking at the final drawing rather than the naked mesh. Enterprise tiers on Threedium include a human 3D artist refinement pass, which is worth considering here specifically because likeness-versus-stylization is the judgement call that automated systems handle worst.
Step 6: Dress Your Character in Open-World Wardrobe Staples: Bowling Shirts, Hoodies, Gold Chains
Wardrobe is where your character stops being a generic 3D person and starts belonging to this world. The costume vocabulary is specific and it is not actually about brand logos: it is about a small set of silhouettes drawn from American street and beach-city clothing of the 1980s through the 2000s, rendered in flat blocks of saturated color with almost no fabric texture.
Build a wardrobe list before you generate, and keep it to three or four garments plus footwear. Overloading a cel-shaded character is a classic mistake, because every additional garment adds outline edges, and past a certain density the black lines start to visually merge into noise. Two strong shapes beat six competing ones.
- Short-sleeve camp collar or bowling shirt: the definitive silhouette, worn open over a plain tank or tee, huge flat color panels
- Oversized hoodie: reads as a single mass with a hood shape behind the neck; keep the drawstrings as two simple cylinders
- Tracksuit jacket: stripes down the sleeve are ideal cel-shading material because they are flat and graphic
- Denim: straight or loose leg, not skinny; the leg should read as a tapered rectangle in silhouette
- Gold chain: one chunky rope chain modeled as actual geometry, not a texture, so it catches its own outline
- Footwear: chunky trainers or plain work boots; simplify laces into two or three shapes total
Model garments as separate mesh objects with their own material slots rather than baking them into the body. This costs nothing and buys you a lot: you can swap a shirt without regenerating the character, assign a different tone ramp to leather than to cotton, hide a jacket for a print version, and control outline thickness per garment. It also makes the model far more useful if you later drop it into an engine and want a wardrobe system.
Step 7: Add Signature Props: Aviators, Phones, Cash Stacks, and Baseball Bats
Props in this style are narrative shorthand. A character holding a phone, a bat, or a fan of banknotes tells a whole story in a single panel, which is exactly what a loading screen has to do. Because the illustration is so simplified, props also carry a disproportionate amount of the visual interest, so it is worth modeling two or three well rather than a dozen carelessly.
Generate props separately and attach them afterward. Trying to get a single generation pass to produce a good character and a good pair of sunglasses at once usually produces a mediocre version of both. Prop meshes are small, cheap, and fast to iterate: an aviator frame is maybe 1,500 triangles, a phone is under 500, a rope chain is 3,000 to 6,000 depending on how you build the links.
- Aviators: model the frame as geometry and the lens as a flat opaque plane with a single highlight shape; do not use a transparent glass shader
- Phone: a rounded rectangle with a flat screen color; hold it low and angled, not up in a selfie pose
- Cash stack: a simple box with a banded edge texture reads better than individually modeled notes
- Baseball bat: a tapered cylinder with a defined grip band; keep it fully inside the frame in your hero pose
- Chain and rings: use a single strong gold hue with a near-white highlight band, no environment reflection
Practical tip: reflective and transparent materials are the enemy of this style. Sunglass lenses, phone screens, chrome, and glass should all be flat opaque color with a hard-edged highlight shape painted or modeled in. The moment you add real reflections, the character stops looking illustrated and starts looking like a mid-2000s game asset.
Step 8: Pose Like a Loading Screen: Crossed Arms, Over-the-Shoulder Glance, Leaning on the Car
Loading-screen poses follow rules that make sense once you notice them. The figure is almost always static rather than mid-action. Weight sits on one leg. The head and the hips are turned in slightly different directions, creating a gentle twist through the torso. And the pose is chosen so that the arms do not overlap the torso silhouette, because overlapping limbs create ambiguous black-line intersections that ruin the read.
The core repertoire is small. Crossed arms with a slight hip drop. One hand in a pocket, the other hanging loose. Leaning back against a vehicle with one foot up on the sill. Over-the-shoulder glance with the body angled away and the head turned back toward camera. Hands resting on a prop held vertically in front of the body. Learn those five and you can build almost any panel.
- Contrapposto: weight on one leg, that hip raised, opposite shoulder dropped; never stand square on both feet
- Torso twist: aim for 10 to 20 degrees of counter-rotation between hips and shoulders
- Negative space: keep a visible gap between each arm and the ribcage so the outline stays readable
- Head angle: a slight chin lift plus a few degrees of tilt sells attitude better than any expression
- Hands: simplify to confident shapes; a relaxed half-fist reads far better than splayed fingers in flat shading
Test every pose in silhouette before you commit. Fill the model solid black in your viewport and look at it. If you cannot tell what the character is doing, holding, or wearing from the black shape alone, the pose has failed and no amount of color will rescue it. This is the same test illustrators use, and it transfers to 3D perfectly.
Step 9: Export Your GTA-Style Character as GLB, FBX, or USDZ
Once the mesh, wardrobe, and props are locked, export for wherever the character is going. Threedium outputs GLB, USDZ, and FBX, plus VRM when you are building something intended for avatar platforms, and each format has a job it is genuinely better at. Exporting to the wrong one is the most common reason a model that looked fine in the generator arrives broken in the target application.
| Format | Best for | Carries rig | Watch out for |
|---|---|---|---|
| GLB | Web viewers, Godot, three.js, quick sharing, model marketplaces | Yes, skeleton plus morph targets | Textures are embedded, so file size climbs fast at 4K maps |
| FBX | Unity, Unreal, Maya, Blender, animation pipelines | Yes, widest animation support | Scale unit mismatches; confirm 1 unit equals 1 metre on import |
| USDZ | iOS AR Quick Look, Apple ecosystem previews | Limited | Custom toon shaders will not survive; expect default shading |
| VRM | Avatar platforms and VTuber applications | Yes, with standardized expression set | Strict humanoid bone naming; outline settings are platform specific |
| OBJ or STL | 3D printing and slicers | No | No rig, no color; must be manifold and watertight |
Run a short pre-export checklist every time. Apply all transforms so scale is 1,1,1 and rotation is zero. Confirm the character is roughly 1.7 to 1.9 metres tall in world units, because engines and AR viewers both assume metric human scale and a model authored in centimetres will arrive a hundred times too large. Triangulate if the destination is an engine. Make sure texture paths are packed rather than linked to a local folder that nobody else has.
Step 10: Rig It for Idle, Walk, and NPC-Style Animation Loops
A static model is a picture. A rigged model is a character. Threedium's automatic rigging pipeline fits a standard humanoid skeleton to the mesh, generates skin weights, and where the model has a proper face it adds a facial rig with the 52 ARKit blendshapes, which is the same expression set used by iOS face tracking and by most avatar and motion-capture tools.
For an open-world character, a typical skeleton runs roughly 60 to 70 bones: spine chain, neck and head, clavicles, arms with twist bones in the forearm, standard hands at three joints per finger, and legs with a foot and toe. That is enough for retargeting general-purpose humanoid animation without being so dense that cleanup becomes a project in itself.
- Idle loop: 3 to 5 seconds, subtle weight shift, a breath in the chest, one small head adjustment
- Walk cycle: 24 to 32 frames at 30 fps, slight swagger, arms swinging with a relaxed elbow bend
- Turn and glance: the single most useful loop for short-form video, 2 seconds, head leads and the body follows
- Lean or prop hold: a static pose held with micro-motion so it does not look frozen
Retarget rather than animate from scratch. Humanoid animation libraries exist precisely for this, and a standard bone hierarchy accepts most of them with minor hip-height and shoulder corrections. Spend your hand-animation effort on the two or three seconds of hero motion that makes the character feel like yours: the way you shift your weight, the head tilt, the pause before the glance.
How Do You Put Loading-Screen Illustration on an Actual Mesh?
Getting a flat illustration style onto real 3D geometry is a genuinely hard problem, and it is where most attempts at a gta style 3d model come apart. A drawing is authored from one viewpoint by a person making thousands of small decisions about what to simplify. A mesh has to make those decisions automatically, from every angle, under moving light. The rest of this section is about the specific techniques that close that gap, and the specific places they fail.
Recreating the Stephen Bliss Illustration Look on an Actual 3D Mesh
Stephen Bliss illustrated Rockstar's key art and loading-screen panels through the Grand Theft Auto III, Vice City, San Andreas, and Grand Theft Auto IV era before leaving the studio, and his visual grammar became the default mental image of the series. Understanding what he actually does is more useful than any prompt keyword, because his choices are reproducible and most of them are about subtraction.
Three habits define the look. First, anatomy is simplified toward geometry: a forearm becomes a tapered tube, a deltoid becomes a rounded wedge, a hand becomes a mitten shape with a few articulated fingers. Second, detail is placed unevenly on purpose, with dense line work concentrated around the face and one or two focal props while entire regions such as a plain shirt or a trouser leg are left almost empty. Third, the drawing is built for a poster, meaning it reads at thumbnail size and reads at billboard size with nothing in between doing the work.
- Simplify anatomy to primitives: if a muscle group cannot be described as a tube, wedge, or sphere, it is too detailed
- Concentrate detail: face and one prop carry 80 percent of the detail; everything else stays open
- Design for thumbnail: squint at your render at 100 px wide; the pose and character should still be legible
- Push proportion slightly: heads about 5 percent larger than realistic, hands and feet slightly larger, shoulders slightly wider
Bold Black Outlines: Inverted-Hull Meshes vs. Shader-Based Line Rendering
There are two practical ways to get cel shading with bold outlines onto a character. The inverted-hull method duplicates the mesh, flips the normals, pushes the vertices outward along their normals by a small distance, and assigns an unlit black material with front-face culling, which leaves a black rim visible around the silhouette. The shader method runs a post-process or material-level edge detector over depth and normal buffers and draws lines wherever it finds a discontinuity.
Inverted hull is cheap, works in every engine and every offline renderer, exports as real geometry, and gives you thickness control per object. Its weaknesses are that line thickness scales with camera distance unless you compensate, and it cannot draw interior lines where there is no silhouette. Shader-based detection catches interior creases and gives uniform screen-space thickness, but it is renderer specific, costs more per frame, and tends to produce noisy lines on dense geometry.
For a character like this, most people end up combining them: an inverted hull at roughly 0.002 to 0.005 of body height for the main silhouette, plus a light screen-space pass for interior creases such as the jaw line, the shirt collar, and the fold at the elbow. Keep the hull thin enough that it does not fatten the silhouette, and the crease pass weak enough that it stops drawing lines inside flat wardrobe panels.
Cel-Shading Faces: Flat Color Bands Instead of Smooth Skin Gradients
A cel shader replaces the smooth falloff of a normal lighting model with a small number of hard steps. For skin in this style, the sweet spot is two or three bands: a lit tone, a shadow tone, and optionally a narrow occlusion tone in the deepest areas such as under the chin and inside the nostril. Four bands starts to look like an anime shader. One band looks like a sticker.
The critical parameter is not band count but band placement. The shadow boundary should be tuned so that with your key light at 35 degrees, the terminator falls along the side plane of the nose, under the cheekbone, and beneath the brow. That produces the recognizable mask of shapes that makes a stylized face read as a face. If the terminator lands in the middle of a flat cheek, the shape is meaningless and the character looks smudged.
- Shadow color: never a darker version of the skin tone; shift it toward red-violet or cool blue depending on your scene
- Band edge: keep it hard but not aliased; a 1 to 2 pixel soften prevents jagged stair-stepping at render resolution
- Specular: a single hard-edged highlight shape on the forehead, nose tip, and lower lip, or none at all
- Ambient occlusion: bake it as a third band, do not multiply a soft AO map over flat color
The most common failure here is leaving a photographic skin texture underneath the cel shader. Repaint the albedo as large flat regions with painted-in shape breaks: a warmer nose and ear, a cooler jaw for beard shadow, a defined lip color.
Oversaturated Color Grading That Reads as GTA, Not Generic Comic Book
Plenty of styles use flat color and black lines. What separates this one from generic comic book rendering is the specific way color is pushed. The palette is not just saturated: it is saturated toward a warm, sun-bleached, slightly grimy end of the spectrum, with cyan-leaning shadows and skin tones that sit noticeably more orange than reality. It looks like a photo shot on expired film in strong sun, then traced.
Practically, that means grading rather than just picking bright colors. Push saturation up by 20 to 40 percent from your base render, lift the blacks slightly so nothing is pure zero except the outlines themselves, warm the highlights, and cool the shadows. The lifted blacks matter more than people expect: when the shadow tones are crushed to true black they merge with the outlines and the drawing loses its structure.
Comic book rendering, by contrast, tends toward primary-heavy palettes with clean whites and neutral blacks. If your render is landing there, the fix is usually to remove pure white and pure black from everything except the line work, and to add a unifying color cast across the whole frame.
Translating 2D Loading-Screen Poses Into Silhouettes That Work From Every Angle
An illustration only has to work from one camera. A 3D character does not have that luxury, and poses copied literally from 2D reference frequently collapse the moment you orbit 30 degrees. The classic case is crossed arms: in a front-view drawing the forearms form a clean horizontal band, but in 3D from the side they become an unreadable tangle of overlapping cylinders with outlines crossing each other.
The fix is to design poses with a primary viewing angle and a tolerance range, then verify inside that range. Decide the pose will be shot between about 20 degrees left and 40 degrees right of front, then check the silhouette every 10 degrees across that arc. Adjust arm rotation and elbow spacing until the negative space holds through the whole sweep rather than only at the hero angle.
- Crossed arms: rotate the forearms so one clearly passes in front; never let them sit coplanar
- Hands in pockets: keep the elbows away from the ribs so the arm gap survives rotation
- Prop held vertically: angle it 10 to 15 degrees off vertical so it does not merge with the leg silhouette in profile
- Over-the-shoulder glance: limit head rotation to about 60 degrees; beyond that the neck deformation gets visible in flat shading
Keeping Your Likeness Once Features Get the Pulp-Illustration Treatment
Stylization and likeness pull in opposite directions, and the pulp illustration treatment pulls hard. It simplifies, exaggerates, and removes exactly the fine detail that a photograph uses to say "this is this specific person." The counterintuitive truth is that caricature preserves likeness better than smoothing does, because caricature amplifies what is distinctive while smoothing averages it away.
Identify your two or three most distinctive features and push them slightly rather than normalizing them. A strong brow, a hooked nose bridge, wide-set eyes, a pointed chin, a specific hairline: pick the ones a friend would use to describe you and increase them by maybe 10 to 15 percent. Then simplify everything else aggressively. That asymmetric treatment is what makes a stylized portrait land.
Practical tip: test likeness at thumbnail scale, not at full resolution. Render your character at 128 px wide next to a 128 px crop of your photo and look at both. If the stylized version is recognizable at that size, it will be recognizable everywhere. If it only works when you zoom in, you have detail-based likeness rather than structural likeness, and it will not survive cel shading.
Hair and facial hair deserve separate attention because they change the perceived shape of the skull more than almost anything else. Getting your hairline shape and hair mass silhouette right will do more for recognition than perfecting the nose. If you have a beard, model it as a shape attached to the jaw rather than as a texture, so it contributes to the outline.
The Open-World NPC Aesthetic: Proportions, Stance, and Attitude
Characters in this style are not idealized heroes and they are not realistic humans. They sit in a specific middle band: roughly 7.5 heads tall rather than the 8 to 8.5 of comic book heroes, with slightly heavier mass in the torso, hands and feet a little oversized, and a stance that reads as lived-in rather than posed. The design goal is a person who looks like they belong on a street, not on a poster of a superhero.
Attitude is carried mostly by the head and shoulders. A slightly forward head position, relaxed rather than pulled-back shoulders, a small chin lift, and a neutral-to-flat expression produce the characteristic detached confidence. Big smiles break the aesthetic almost instantly. So does a military-straight posture.
- Height: 7.25 to 7.75 heads for adults; drop to 6.5 for a heavier or older character
- Hands: about 110 percent of realistic scale so they stay readable in silhouette
- Shoulders: roughly 2.5 to 2.8 head widths, relaxed and slightly rolled forward
- Neck: visibly present but short; a long neck reads as fashion illustration, not this style
Texturing Denim, Leather, and Jewelry in Flat Color Blocks
Material differentiation in flat shading cannot rely on roughness values, because there is barely any specular response to modulate. Instead you differentiate materials through tone band count, band contrast, and highlight shape. Denim gets low contrast between its two bands and no highlight. Leather gets high contrast plus a single broad soft-edged highlight shape. Gold gets three bands with a near-white top band and very high contrast.
- Cotton tee or hoodie: 2 bands, low contrast at about a 15 percent value drop, no highlight
- Denim: 2 bands, low contrast, plus painted seam and knee-fade shapes, no highlight
- Leather jacket: 3 bands, high contrast at about a 45 percent value drop, one broad soft highlight along the shoulder and sleeve
- Gold chain or rings: 3 bands, very high contrast, near-white top band, hard-edged highlight following the form
- Skin: 2 to 3 bands, medium contrast with a hue shift rather than just a value drop, small highlights on forehead, nose, and lower lip
- Sunglass lens: 1 flat band, no contrast, one opaque angled bar shape as the only highlight
Painted detail replaces procedural detail throughout. Denim stitching is a hand-drawn line in the albedo, not a normal map. A leather jacket's zip is a modeled strip or a painted band. Jean fading at the knee is a soft airbrushed shape in the texture. This is texture work done like an illustrator paints, and it is why generated PBR maps usually need a simplification pass before they suit the style.
Hair That Holds Up Under Hard Shadow Edges
Hair cards and strand-based hair both fall apart under cel shading. Cards produce transparent edges that the outline pass either misses or draws as a rectangle. Strands produce a fine noise pattern that quantizes into a mess. The correct approach for this style is solid modeled hair: a small number of chunky, clearly separated masses built as real geometry with opaque materials.
Build the hair as three to seven shapes for most styles. A short fade might be a single skull-hugging mass with a defined edge. A curly style becomes four or five overlapping rounded clumps. Long hair becomes two or three ribbons with clear thickness. Each mass gets its own silhouette, catches its own outline, and takes a two-band ramp cleanly.
- Opaque only: no alpha-tested hair cards; every strand cluster is solid geometry
- Defined hairline: model the hairline as a clean edge on the forehead, not a texture fade
- Chunk separation: leave visible gaps between masses so the outline pass can find them
- Two-band ramp: one lit tone, one shadow tone, plus optionally a single painted highlight band across the crown
Lighting Renders Like a Vice City Sunset or a Los Santos Night Scene
Two lighting recipes cover most of what people want from this aesthetic, and they are almost opposites. The sunset recipe is warm, high-key, and low contrast, built around a large low sun and a pink-to-cyan gradient sky. The night city recipe is cool, low-key, and high contrast, built around hard sodium and neon sources with deep blue fill.
| Setting | Coastal sunset grade | City night grade |
|---|---|---|
| Key light color | Warm orange, roughly 2800K | Cool white or sodium amber |
| Key angle | Low, 10 to 20 degrees above horizon, from behind and to one side | High and hard, or a low neon source at chest height |
| Fill | Bright cyan sky bounce, strong | Deep blue, weak; let shadows stay dark |
| Rim light | Hot magenta or pink along one edge | Cyan or green on one side, magenta on the other |
| Background | Flat gradient, pink to teal, palm silhouettes optional | Near-black with a few bright flat window shapes |
| Overall contrast | Low to medium; skin stays bright | High; large areas of the figure sit in shadow band |
In cel shading, lights do double duty: they set mood and they place the shadow shapes that define form. That makes light position far more consequential than in realistic rendering, where a badly placed light just looks slightly off rather than destroying the drawing. Move your key in small increments and watch the terminator on the face, not the overall brightness.
How Do You Use a Loading-Screen Character Without Touching Rockstar IP?
A stylized character of yourself is genuinely useful across social content, streaming, game prototypes, and physical prints, and almost all of those uses are fine as long as you stay on the right side of a fairly clear line: your face and an art style are yours to work with, while a publisher's logos, fonts, characters, and game files are not. This section covers both what to do with the model and where the boundary actually sits.
Riding the GTA 6-Era Trend: Loading-Screen Panels for TikTok and Instagram
The gta 6 ai trend keeps resurfacing because the format is perfectly matched to vertical video: a 9:16 panel, one character, flat background, big graphic type. A 3D character has a decisive advantage over a flat filter here, because you can generate a dozen panels in an afternoon from a single model, each with a different pose, outfit, and grade, all perfectly consistent with each other.
Build a small render template and reuse it. Set up your vertical camera at chest height, lock the framing, save two lighting rigs (sunset and night), and then just swap poses. A batch of nine panels rendered at 1080 x 1920 takes minutes once the setup exists, and consistency across a set is what makes the content read as a series rather than as one-offs.
- Panel set: render six to nine variations so you have a grid post plus individual stories
- Turntable clip: a 4-second 360-degree rotation is a strong opener for short-form video
- Before and after: your source photo cutting to the stylized character consistently outperforms the render alone
- Type treatment: use a generic bold condensed sans for any text; do not reproduce a game's actual logo typeface
This is also the format where people search for how to turn yourself into a gta character and give up after one flat filter output. Vertical renders with large flat color areas also survive platform re-encoding better than photographic content, so keep gradients minimal.
Profile Art, Banners, and Stream Overlays With Open-World Attitude
The same model feeds a full set of channel graphics. Render a tight head-and-shoulders crop for avatars, a wide composition with the character offset to one side for banners, and a transparent-background cutout at high resolution for overlays. Because it is a 3D model rather than a fixed image, each of those is a camera change rather than a redraw.
For streaming specifically, export a PNG sequence or a transparent-background video of an idle loop and drop it into your scene as a corner presence. If you rigged the face with ARKit blendshapes, you can go further and drive the character live from a webcam through standard face-tracking software, which turns a static piece of channel art into an actual on-screen persona.
- Avatar: 512 x 512, head and shoulders, generous margin so it survives circular cropping
- Channel banner: 2560 x 1440 with the figure clear of the centre safe area
- Overlay cutout: render at 2x your target size with alpha, then scale down for clean edges
- Emote set: use blendshape presets to render six expressions at 112 x 112
Dropping the Character Into Unity, Unreal, or Godot Scenes
Game engines here are export destinations, not the subject. Import your FBX into Unity or Unreal, or your GLB into Godot, and you have a playable stylized character for a prototype, a machinima shot, or a portfolio piece. Budget 30,000 to 60,000 triangles for a hero character and 2048 texture maps, which is comfortable on any modern hardware.
Rebuild the outline on arrival. In Unreal, that usually means a post-process material doing depth and normal edge detection, or a second mesh pass with inverted normals. In Unity, both the URP and HDRP have established toon and outline approaches, and the inverted-hull method works in any of them. In Godot, the standard route is a second material pass with the grow property and culling set to front.
- Scale check: confirm the character stands 1.7 to 1.9 units tall and the feet sit at Y equals zero
- Humanoid mapping: in Unity, set the rig to Humanoid and verify no bones show as missing in the avatar configuration
- Material count: keep it to four to six slots; every extra slot is a draw call in a crowd scene
- Shadow settings: disable soft shadow filtering on the character; hard shadows suit the style and are cheaper
If you are building anything with more than one character, generate a small cast rather than one hero. The personalized character generator makes it cheap to produce yourself plus four friends in a matched style, which is exactly the kind of asset set a prototype needs and exactly the kind of thing that used to cost a month of artist time.
Turntable Renders and Wanted-Poster Mockups
Turntables are the standard way to show a 3D character, and they are worth setting up properly once. Use a 360-degree rotation over 120 to 180 frames at 30 fps, with the camera fixed and the character rotating rather than the reverse, so your lighting stays stable relative to the viewer. Loop it seamlessly by ensuring the last frame is one step short of a full revolution.
Wanted-poster and mugshot mockups are a fun secondary format that plays to the style's strengths. A front view and a profile view side by side with a height chart behind them, graded harshly, produces a strong graphic. Just keep the design generic: use a plain sans-serif, a made-up department name, and invented numbers rather than reproducing any real game's or real agency's identity.
- Turntable: 150 frames, 30 fps, three-point lighting, plain mid-tone background
- Mugshot pair: front and left profile, identical camera height, flat frontal key light
- Poster layout: vertical 2:3, character in the upper two thirds, generic type block below
- Contact sheet: nine poses in a 3x3 grid is the most shareable single image you can make from one model
3D Printing a Mini Protagonist Figure of Yourself
Printing this character works well because the style is already built around chunky, simplified forms that survive at small scale. A 75 to 120 mm figure is the sweet spot: large enough to show face detail on a resin printer, small enough to print in one piece on most machines and to paint in an evening.
Preparing for print is a different job from preparing for rendering. Delete the inverted-hull outline mesh entirely, because it will print as a bizarre shell around your figure. Merge all garment and prop meshes into the body as a single manifold solid. Thicken anything below about 1.2 mm at final scale, which usually means chain links, sunglasses arms, and any dangling drawstring. Add a base disc of 3 to 5 mm and check the centre of mass sits over it.
- Wall and detail thickness: nothing thinner than 1.2 mm at print scale for resin, 1.5 mm for FDM
- Manifold check: run a mesh repair pass; no non-manifold edges, no interior faces, no flipped normals
- Overhangs: anything past 45 degrees needs support; consider splitting arms at the shoulder for a clean print
- Layer height: 0.03 to 0.05 mm on resin for a face at this scale; higher layers lose the eye detail
- Painting: the flat colour design translates directly; use hard-edged blocking rather than blending
Spec warning: the black outlines do not print. They are a rendering effect, and a printed figure will look noticeably different from your render because of it. Many people compensate by painting a thin black line into the deepest creases with a fine brush or a fineliner after priming, which gets surprisingly close to the rendered look.
What to Avoid: Rockstar Logos, Game Files, and Fan-Art Boundaries
This is the section that actually protects you, so read it properly. The short version: an art style is not owned, but a brand and its assets are. Copyright does not protect a general aesthetic such as flat colors with heavy outlines, which is why a stylized character of yourself in that idiom is generally fine. What copyright and trademark do protect is the specific expression: the logo, the wordmark, the custom typeface, the named characters, the box-art compositions themselves, and every file inside the game.
Rockstar Games and its parent Take-Two Interactive have a long and well-documented history of enforcing their intellectual property, including action against mod projects, fan remakes, and commercial merchandise. That history is worth taking seriously. None of it prevents you from making a stylized picture of yourself, but it should make you careful about the specific things below.
- Do not reproduce logos or wordmarks: the series logo, the studio logo, and the distinctive title typeface are trademarks; recreate none of them
- Do not extract or reuse game files: ripping models, textures, fonts, or audio from an installed game and building on them is copyright infringement, full stop
- Do not model named characters: a character of yourself is fine; a model of a specific protagonist is derivative of protected work
- Do not recreate specific existing artwork: copying a particular published panel or cover composition shot for shot is far riskier than working in the same general style
- Do not imply endorsement: never present your work as official, licensed, an announcement, or a leak
- Be very careful with commerce: selling prints, figures, or merchandise that trades on a recognizable franchise identity is where fan work most often draws legal attention
Personal and non-commercial use sits in the most comfortable zone: a profile picture, a stream overlay, a printed figure on your own shelf, a video where you clearly present the work as your own fan-adjacent creation. Commercial use of a character that is unmistakably yours in style but contains no protected marks is a reasonable position, though if real money is involved you should get actual legal advice rather than relying on an article.
The safest framing, and the one that also produces better work, is to treat this as a genre exercise rather than a franchise tribute. Pulp illustration, hard-edged cel shading, sun-bleached crime-fiction color, and confident poster posing are a coherent visual language that predates any single game and belongs to nobody. Build in that language, name it in those terms, and you get a character that is legally clean, stylistically stronger, and still instantly reads the way you wanted it to.
Frequently Asked Questions About GTA Character Makers
Short answers to the questions that come up most often when people set out to turn a photo into a stylized open-world character, covering tools, terminology, output formats, and the boundaries of what you can legitimately do with the result.
Is there a free GTA character maker online?
There are plenty of free web tools that apply a cel-shaded, heavy-outline look to an uploaded photo, and they will give you a flat image in seconds at no cost. What none of the free tools produce is a 3D model: you get a single flat picture at a fixed angle, usually watermarked, usually at low resolution, and usually with no control over pose, wardrobe, or lighting.
Most serious 3D platforms, including Threedium, offer a free tier that lets you generate and preview models, with paid tiers unlocking higher polygon counts, larger texture maps, commercial licensing, and rigging. The honest way to think about it is that free tools are fine if you want one profile picture, and a model pipeline is what you want if you plan to reuse the character.
How do I make a GTA picture of myself with AI?
Upload a clear front-facing photo to any image generation tool that supports image-to-image or reference conditioning, then prompt for the style in descriptive terms: flat cel-shaded color blocks, bold uniform black outlines, oversaturated warm palette, low camera angle, plain flat background, vertical poster framing. Generate a batch of six to twelve and pick the strongest shape design, not the prettiest face.
For a photo to gta style conversion that goes further than a flat image, take your chosen concept into an image-to-3D pipeline so you end up with a mesh you can pose, re-light, and export. That extra step is the difference between one picture and an asset you can use for a year. Describing the style rather than naming the franchise also produces noticeably better results from any gta ai generator, since the description gives the model actual visual instructions instead of a brand association.
What is the GTA loading screen art style called?
It has no official name. In practice people describe it as pulp or comic-book illustration with cel shading and bold black outlines, sometimes as vector-style poster illustration. Its closest art-historical relatives are mid-century pulp paperback covers and 1970s exploitation film posters, filtered through modern flat vector illustration technique.
If you need a working label for prompting or briefing, "cel-shaded pulp poster illustration" gets you closer to the target than the franchise name does. The defining traits are flat color fills, uniform heavy contour lines, two or three hard tone bands per surface, oversaturated warm-to-cyan grading, and a low-angle vertical composition on a plain background.
Who drew the GTA loading screens and box art?
Stephen Bliss was the principal artist behind Rockstar's key art and loading-screen illustrations across the Grand Theft Auto III, Vice City, San Andreas, and Grand Theft Auto IV era. He was an in-house artist at the studio for roughly a decade before leaving to work independently, and his style is what most people mean when they refer to the classic look.
Later entries in the series were illustrated by Rockstar's internal art team, continuing the established visual language rather than departing from it. When people prompt for the stephen bliss art style they are usually asking for the specific combination of simplified geometric anatomy, uneven detail placement, and poster-first composition that defines his work, all of which you can specify directly without naming anybody.
Can a GTA character maker output a rigged 3D model instead of a flat image?
Yes, but only if it is built on a 3D pipeline rather than an image filter. Threedium's Julian NXT generator reconstructs a textured mesh from your photo or concept art and then runs automatic rigging, fitting a humanoid skeleton of roughly 60 to 70 bones with generated skin weights, plus a facial rig with 52 ARKit blendshapes where the model has a suitable face.
That distinction is the entire reason to use a model pipeline. A rigged character can be posed for a hundred different panels, animated into an idle loop, driven live by webcam face tracking, dropped into a game engine, or exported for print. A flat image can be cropped. If you only need one avatar, a filter is enough; if you want a character, you need the rig.
Can I use my GTA-style character in GTA 5 or FiveM?
Technically people do import custom models into single-player Grand Theft Auto V through third-party modding tools, and FiveM servers run custom content. Legally and practically, this is the riskiest thing on the list. Rockstar's stance has historically tolerated single-player modification while prohibiting anything that touches the online mode, and enforcement has changed over time, including after Rockstar acquired the FiveM project's developer.
Injecting custom models into online play risks account bans regardless of intent, and modding tools generally require you to work with extracted game files, which is exactly the boundary you should not cross. If you want to see your character running around an open world, a far better path is to build your own scene in Unity, Unreal, or Godot, where you own everything and nothing is at risk. The in-game gta online character creator is the sanctioned way to make a character inside the game itself, and it is entirely separate from anything you generate externally.
What file formats does a GTA-style 3D character export to?
The standard set is GLB for web and general-purpose sharing, FBX for game engines and animation pipelines, and USDZ for iOS AR previews. VRM is available when the character is destined for an avatar or VTuber platform, and OBJ or STL is what you convert to for 3D printing, since neither carries a rig or materials.
Pick based on destination rather than habit. GLB embeds textures and is the easiest to hand to someone else; FBX carries animation most reliably; USDZ will drop your custom toon shading and render with default materials, so treat it as a preview format rather than a final one. Whichever you choose, verify scale on import: a model authored in centimetres will arrive in a metric engine at a hundred times its intended size, which is the single most common export problem people hit.