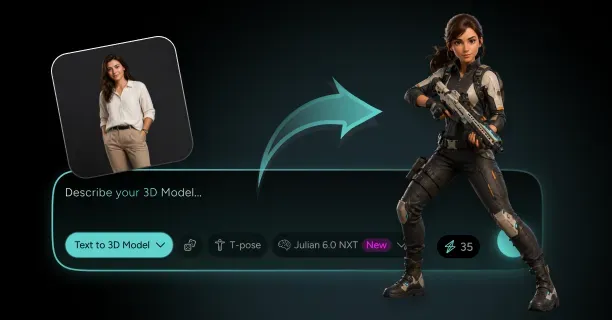
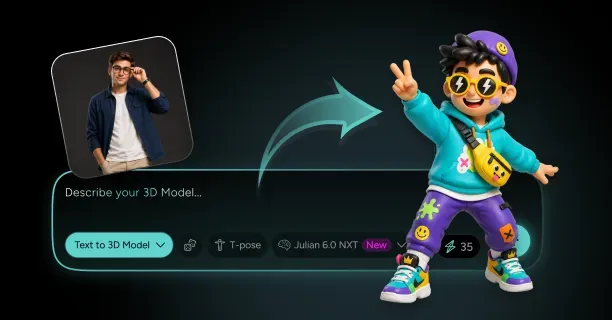
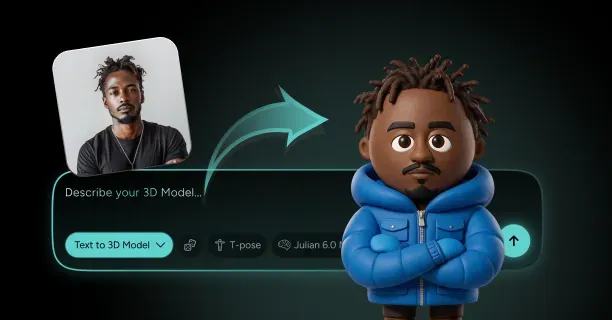
How Do You Turn Yourself Into a South Park-Style Character From a Photo?
To turn yourself into a South Park-style character from a photo, upload a flat, front-facing headshot to Threedium along with a prompt that specifies a construction-paper cutout aesthetic, then let the Julian NXT generator rebuild your features as a flat circular head, a neckless oval torso, mitten hands, and stub legs. Unlike a browser-based south park character creator that hands you a flat PNG, this route produces an actual textured mesh you can export as GLB, USDZ, or FBX, rig, animate, or 3D print. The whole job is reduction: you are throwing away roughly ninety percent of your facial detail and keeping only the four or five traits that still identify you at cutout scale.
Everything below is style parody, not licensed material. You are building a character in the visual language of paper-cutout animation, the same way people draw themselves in a sitcom style or a comic-book style. Nothing here uses official assets, official character models, or official artwork, and none of it is affiliated with the show or its rights holders.
Pick a Photo Where Your Defining Features Survive Cutout Simplification
The cutout look is unforgiving in a very specific way: it deletes bone structure. There is no nose geometry, no cheekbone shading, no jawline. What survives the conversion is hair shape, hair color, eyebrow weight, glasses, facial hair, skin tone, and whatever you are wearing on your head. So choose a photo that shows those cleanly rather than a photo that flatters you.
Shoot or select at 2048 px on the long edge minimum, straight-on, eyes level with the lens, with diffuse even lighting and no hard side shadow. Hair should be in its normal state and fully visible, including the hairline and the silhouette at the top of the skull, because that outline is going to become a solid cut shape. Avoid hats unless the hat is the point.
- A neutral or slightly amused closed-mouth expression, since cutout mouths are drawn separately anyway
- A plain background so the generator does not read wall texture as hair or clothing
- A second three-quarter photo and one full-body shot if you want the outfit reconstructed accurately
- No sunglasses, no heavy filters, no beauty smoothing, and no motion blur on the hair edge
Decide What Your Character Keeps: Hair, Glasses, Facial Hair, and a Signature Outfit
Before you write a single word of prompt, make a list of exactly four to six identifying traits. This is the entire design document. In a style this reduced, a character is a color block plus a hair shape plus one accessory, and adding a seventh trait usually makes the result read as less like you, not more.
Rank your traits by how far away they remain legible. Hair silhouette and hair color are almost always number one and two. A strong beard shape, thick-framed glasses, a distinctive hat, or a single bold garment color are the usual three through five. Freckles, moles, ear shape, and eye color are decorative at this scale and can be dropped without anyone noticing.
The outfit matters more than beginners expect. Cutout characters are known by their clothes because their faces are nearly identical: a parka reads instantly, an orange hoodie reads instantly, a plain green t-shirt does not. Pick one signature garment in a saturated flat color and commit to it. If you have a real jacket you wear constantly, use that, and describe it by color and shape rather than by brand.
Write a Prompt That Locks In the Construction-Paper Cutout Look
Generic prompts produce generic cartoons. To pull a south park style ai generator result out of a photo-to-3D pipeline, your prompt has to describe geometry and shading, not vibes. Say flat. Say circular. Say unlit. Say no neck. The model responds to construction language far better than it responds to adjectives like "funny" or "crude."
A working prompt skeleton looks like this: "Construction-paper cutout style character built from the reference photo. Perfectly circular flat head, roughly 1.6 times the width of the torso, no neck, head sits directly on an oval body. Solid unshaded color fills, no gradients, no specular highlights, visible paper grain. Small black dot eyes with white oval whites, thin line mouth, simple curved eyebrows. Mitten hands with no separated fingers, short stub legs, small oval shoes. Character is 2.5 head-heights tall. Flat frontal read, matte paper texture."
Do not put character names, show titles, or studio names in your prompt. Describe the construction instead: flat circle head, dot eyes, mitten hands, paper grain. You get a cleaner result and you stay firmly on the parody side of the line.
Add your personal traits after the style block, not before it. Style first, identity second, outfit third. If you invert that order the generator tends to prioritize likeness and gives you a semi-realistic head that resists flattening later.
Choose Your South Park Archetype: Parka Kid, Grown-Up, Goth, or Background Townsfolk
The style has four broad body archetypes and picking one up front saves you three regeneration cycles. Each has its own proportions, palette rules, and silhouette logic, and mixing them produces something that reads as off-model without anyone being able to say why.
- Parka kid: roughly 2.5 head-heights, hood or hat covering most of the skull, tiny visible face window, mitten hands, minimal color count
- Grown-up: 3 to 3.25 head-heights, slightly narrower head relative to body, visible hairline, often a collared shirt block and a belt line
- Goth: same child proportions but a near-monochrome palette, heavy fringe covering one eye, thin limbs, pale skin fill
- Background townsfolk: the most forgiving, wider body oval, ordinary clothes, low-contrast palette, designed to read at distance
If you are making a south park oc maker style original character rather than a self-portrait, the archetype choice is where the personality actually lives. A goth build with a bright yellow jacket already tells a joke. Pick the archetype that matches the story you want the model to tell, then let the photo supply the face.
Generate the First Pass With Threedium's Photo-to-3D AI
Upload your reference set and prompt through Threedium's photo-to-3D workflow and run the first generation. The Julian NXT generator reconstructs a mesh with PBR texture maps, applies polygon optimization, and returns a model you can orbit immediately in the browser. For a cutout character the first pass typically lands somewhere between 3,000 and 9,000 triangles before you do any manual reduction.
Expect the first result to be too round. Photo-to-3D systems are trained overwhelmingly on volumetric subjects, so their default instinct is to give a head depth. That is normal and correctable. What you are checking in pass one is whether the identity traits survived: is the hair shape yours, is the hair color right, did the glasses come through, is the outfit color correct.
Check the Head: It Should Read as a Flat Circle, Not a Sphere
This is the single most important check in the entire workflow, and it is the one people skip. Orbit the model to a pure front view and confirm the head silhouette is a true circle, not an egg, not a rounded square, and not a sphere with cartoon shading. Then orbit to profile and check the depth.
The target is a flattened disc, not a ball and not a sheet of paper. A workable ratio is a head depth of roughly 35 to 55 percent of head diameter, with the front face nearly planar and the sides rolling off quickly. Fully flat geometry disappears at ninety degrees and looks broken in any orbiting shot. Fully spherical geometry kills the paper illusion the moment light touches it.
If the returned head is too spherical, regenerate with explicit numbers in the prompt: "head is a flattened disc, depth equal to 45 percent of diameter, front face flat and planar, edges rolled with a small bevel." Numeric constraints get respected far more reliably than "flat" on its own, and this one instruction fixes more failed south park 3d model attempts than any other.
Fix the Proportions: Two-and-a-Half Heads Tall With No Visible Neck
Realistic human proportion is roughly 7.5 head-heights. Cutout kids run at about 2.5. That is not a stylistic nudge, it is a different construction system, and if your model comes back at 4 or 5 heads tall it will read as generic cartoon rather than paper cutout no matter how flat the shading is.
| Element | Child archetype | Adult archetype | Why it matters |
|---|---|---|---|
| Total height in head-units | 2.5 | 3.0 to 3.25 | Defines the whole silhouette read |
| Head width vs body width | 1.5x to 1.7x | 1.2x to 1.4x | Keeps the head dominant |
| Neck length | 0 | 0 | Head sits directly on the torso |
| Arm length vs torso height | 0.8x | 0.9x | Stub arms, no elbow definition |
| Foot depth vs head diameter | 0.25x | 0.3x | Tiny feet, oval from above |
| Eye diameter vs head diameter | 0.28x to 0.34x | 0.26x to 0.32x | Large white ovals with small pupils |
The neck is the giveaway. There is no neck at all: the base of the head intersects the top of the torso oval directly, with a small overlap of 3 to 6 percent of head diameter so no gap can appear during rotation. If your generated model has even a short cylinder between head and body, ask for a regeneration with "no neck, head base intersects torso top directly" in the prompt.
Flatten the Palette to Solid Construction-Paper Color Fills
Cutout characters are built from a tiny number of solid colors. A typical character uses five to nine flat fills total: skin, hair, two or three garment colors, shoe color, eye white, and black for line work and pupils. There are no gradients, no ambient occlusion baked into the diffuse, and no rim light.
Take whatever the generator returned and quantize it. Pull the texture into any image editor, run a posterize or indexed-color pass down to your target count, then hand-correct the resulting swatches to the flat construction-paper values you want. Keep saturation moderately high and value mid-range: real construction paper is not neon and it is not pastel, it sits in the 55 to 80 percent saturation band with values around 60 to 80 percent.
Then strip the PBR channels. Set metallic to 0, roughness to 1.0, remove or neutralize the normal map, and delete any baked specular. The material should be effectively unlit. If your target engine supports it, switch to an unlit material outright rather than trying to fake it with a rough dielectric, which will still pick up light direction and give away the trick.
Add the Details That Sell the Parody: Dot Eyes, Mitten Hands, Tiny Feet
Three details do most of the work of making a flat character read as this particular style rather than as any low-poly cartoon. Get these right and viewers recognize the language immediately, even on an original design nobody has seen before.
- Dot eyes: two large white ovals with small solid black pupils, spaced about 0.4 head-diameters apart centre to centre, sitting slightly above the vertical midline of the head
- Mitten hands: a single rounded shape with no separated fingers, roughly 0.3x head diameter, attached directly to the arm with no wrist
- Tiny feet: small ovals or half-capsules, barely wider than the leg stub, often drawn as a single dark shape rather than a shoe with detail
- Line mouth: a thin dark curve that lives on the surface, replaced entirely rather than deformed when the expression changes
Eyebrows are the highest-value optional detail. Two short strokes above the eyes carry almost all of the emotional range this style has, and their thickness and angle are also a strong identity cue. If you have heavy or distinctive brows in real life, keep them thick and keep them separate from the hair shape.
Refine Iterations Without Drifting Into Generic Chibi Territory
The most common failure mode across refinement passes is drift. Each iteration nudges the model a little rounder, a little cuter, a little more like a mass-market vinyl figure, until three passes later you have a chibi character with dot eyes rather than a cutout character. The cause is that "cute stylized character" is a much denser region of training data than "flat paper cutout."
Guard against it with anchors. Keep your first acceptable pass saved as a reference and compare every new generation against it in silhouette-only view, filled solid black. If the black shape is getting curvier, softer, or taller, you are drifting. Re-state the hard numbers in every refinement prompt rather than saying "same as before but fix the hair."
Change one variable per iteration. Fix proportion, then fix palette, then fix face placement, then fix outfit. Bundled requests produce bundled regressions, and you lose the ability to tell which instruction caused the problem. Most people land a usable south park character maker result in three to six controlled iterations rather than twenty scattered ones.
Chibi warning signs: eyes drifting below the head midline, a visible chin, cheeks with rounded highlights, a head that has become taller than it is wide, and any hint of a neck. Any one of those means roll back to your saved anchor.
Export Your Cutout Character as GLB, USDZ, or FBX
Once the model is on-style, export to the format that matches the destination rather than exporting everything by default. Threedium outputs GLB, USDZ, and FBX, and for avatar-oriented pipelines VRM is the relevant target. Each has a different relationship with the flat unlit look you just built.
| Format | Best for | Unlit support | Practical note |
|---|---|---|---|
| GLB | Web viewers, three.js, model-viewer, Godot | Native via the KHR_materials_unlit extension | Single self-contained binary file, textures embedded |
| USDZ | iOS AR Quick Look, Apple Vision devices | Approximated by driving emissive and zeroing diffuse | AR placement is fine but real-world lighting will try to shade it |
| FBX | Blender, Maya, Unity, Unreal, animation work | None: materials are rebuilt in the target app | Best skeleton and animation fidelity, expect to reauthor shaders |
| VRM | VTuber apps, social VR, streaming avatars | Via MToon toon shading | Needs a humanoid rig mapping and spring bones for hair |
Set your export scale explicitly. A child-archetype cutout character at 1.0 to 1.1 metres tall in scene units sits believably next to standard 1.7 m human references, and an adult archetype around 1.35 to 1.5 metres. Getting this wrong is the reason imported characters sometimes appear as either dust motes or skyscrapers.
Preview the Model Under Flat Lighting Before You Share It
Every viewer you post to has its own default lighting environment, and most of them ship with a studio HDRI that will absolutely wreck a paper-cutout character. Before you publish anything, test the model under the conditions your audience will actually see it in.
Run three checks. First, a pure white flat environment with no directional light: this is your ground truth and the model should look exactly as intended. Second, a default studio HDRI, which is what most web viewers and marketplaces use: if you see specular hits on the head, your materials are not properly unlit. Third, a strong single directional light from 45 degrees: this exposes any leftover normal map and any geometry that is rounder than you thought.
- Orbit a full 360 degrees and watch for the head disc thinning out or the mouth sliding off the face
- Check the model at 64 px, 128 px, and 512 px tall, since profile pictures crop hard
- Confirm no z-fighting flicker on layered pieces when the camera moves slowly
- Verify the silhouette still reads as a single recognizable shape against both black and white backgrounds
How Do You Build Construction-Paper Cutouts as Real 3D Geometry?
You build them by treating every body part as a flattened solid rather than a volumetric form, layering those solids in shallow depth slices, and shading everything with an unlit material so the geometry never announces itself. The tricky part is not modelling, it is the contradiction at the heart of the style: the design is a 2D illustration, but the deliverable is a 3D object that has to survive being rotated. Below are the specific technical problems that creates and how practitioners solve each one.
South Park Is Secretly Already 3D: The Show Has Run on Maya Since the Early 2000s
The famous origin story is real: the very first shorts were literal construction paper stop motion, physically cut and moved frame by frame. That lasted about as long as you would expect for a weekly television schedule. The series moved to computer animation almost immediately, and for the great majority of its run the production has been built in Autodesk Maya, with a custom pipeline layered on top of it.
That matters enormously for anyone trying to recreate the look. You are not converting a 2D drawing into 3D against the grain of the design. You are doing what the production itself does: building flat pieces as actual geometry, arranging them in shallow depth, and rendering them so they look like paper. The style was engineered for exactly this workflow.
Recreating a paper cutout animation style character in 3D is therefore a faithful approach rather than a workaround, and it is why the look stays perfectly consistent across thousands of shots: every character is an asset built from swappable parts.
Modeling a Flat Circular Head That Still Reads From Every Camera Angle
A perfect circle is trivial to draw and surprisingly awkward to model, because the moment you rotate a flat disc away from camera it collapses into a line. The solution used across cutout-style 3D work is a flattened lathe: revolve a shallow profile curve so you get a disc with real thickness and softly rounded edges, keeping depth at roughly 40 to 50 percent of diameter.
Resolution matters at the silhouette. A disc with 12 or 16 radial segments shows visible faceting on the outline, which reads as cheap rather than stylized. Use 32 to 48 radial segments and you get a clean circular silhouette at any render size for only a few hundred triangles.
The front face should be genuinely planar, or very nearly so, because that plane is where all the facial features live. A common approach is a flat front cap, a short beveled rim of two or three edge loops, and a slightly domed back. That combination survives a full orbit, keeps the front read absolutely flat, and gives you clean UV space for the face texture without distortion around the eyes.
Paper-Cutout Shading: Unlit and Toon Shaders Instead of Realistic Lighting
Realistic shading is the enemy here. Any diffuse falloff across the head immediately turns your paper circle into a ball, which is exactly the effect the style exists to avoid. The fix is to remove lighting response from the material entirely rather than to fight it with light placement.
In glTF and GLB, use the KHR_materials_unlit extension, which tells compliant viewers to output base color directly with no lighting calculation. In Blender, wire the base color into an Emission shader, or use Shader to RGB with a hard two-step color ramp if you want a single crisp shadow band. In Unity, the URP Unlit shader; in Unreal, set the material shading model to Unlit and plug your color into emissive.
- Unlit: the purest option, absolutely flat, best for stylistic accuracy and cheapest to render
- Two-step toon: one flat base plus a single hard shadow band, useful when characters need to sit inside a lit environment
- Emissive at 1.0: a workaround for engines without an unlit path, but watch that bloom post-processing does not make the character glow
Recreating Construction-Paper Grain Without Breaking the Flat Look
The grain is what separates a convincing cutout from a plain flat-shaded blob. Real construction paper has a fibrous speckle, slightly uneven dye coverage, and a soft edge where it was cut. All three can be faked with texture alone, and none of them should be faked with geometry or normal maps.
Build the grain as a tiling overlay texture: a greyscale fiber noise at 1024x1024 or 2048x2048, blended over your flat fills at low strength. The key number is opacity: keep the grain contribution to roughly 4 to 10 percent. Push it past about 15 percent and it starts reading as dirt or as a photographic texture instead of paper, and it fights the flat color fills you worked to establish.
Apply the grain in triplanar or world-space projection rather than UV space if you can. Real paper grain does not stretch and rotate with the shape it is printed on when different pieces are cut from the same sheet, and world-space projection reproduces that shared-sheet feeling across all the parts of a character. Critically, do not convert the grain into a normal map: the moment it catches a light it stops being flat paper and becomes textured plastic.
Layered 2D Pieces in 3D Space: Avoiding Z-Fighting Between Cutout Planes
This is the defining technical headache of the whole style, and it is the reason so many first attempts flicker. A cutout character is a stack of near-coplanar shapes: face on head, eyes on face, pupils on eyes, mouth on face, hair over the skull, shirt over torso. If any two of those sit at the same depth, the depth buffer cannot decide which is in front and you get z-fighting: a shimmering, tearing flicker as the camera moves.
The reliable fix is explicit depth separation. Give every layer its own depth slot with a consistent gap. At real-world character scale, gaps of 0.5 mm to 2 mm between successive layers are enough to be unambiguous and small enough to be invisible in silhouette.
- Head base disc, 0.0 mm: the reference plane every face feature is measured from
- Eye whites, +0.8 mm: slightly domed so they still read from three-quarter angles
- Pupils, +1.4 mm: parented to the eye whites so the pair slides together
- Mouth and eyebrows, +0.8 mm: swappable shape sets, never deforming geometry
- Hair front pieces, +1.6 mm: sits over the face edge and never intersects the eye layer
- Glasses frame, +2.4 mm: the outermost face layer, always in front of everything
If you cannot separate layers physically, use polygon offset or a depth bias in your material, or set explicit render queue ordering with depth write disabled on the decal layers. Physical separation is more portable across engines and exporters, so prefer it whenever the model will leave your own pipeline.
Dot Eyes and Detached Features: Floating Geometry That Follows the Face
In this style features are not part of the face mesh, they are objects sitting on top of it. That is a genuine structural difference from most character work, where eyes and mouth are modelled into a single continuous head. Here, each feature is a separate piece of geometry with its own transform, and that separation is what makes the animation approach possible.
Parent every feature to a face-local transform so the whole set moves as one when the head turns. Then give each feature a small amount of independent range: eyes that slide 5 to 10 percent of head width laterally for a look direction, eyebrows that translate vertically and rotate a few degrees, a mouth that swaps between shapes rather than deforming. This is how the production gets expressive performance from geometry that never actually deforms.
You have two implementation choices for feature swapping. Either build a shape library of separate meshes and toggle visibility, which is exactly how the paper original worked, or use a UV-offset atlas where a single quad slides across a sheet of mouth and eye variants. The atlas approach is far more efficient at runtime, typically packing 12 to 20 mouth shapes into one 1024x1024 texture, and it plays nicely with game engines.
The No-Neck Problem: Rigging a Head That Sits Directly on the Torso
Standard humanoid rigs assume a neck joint between chest and head, and standard skinning assumes a gradient of weights across that neck so the deformation is smooth. A cutout character has neither. The head base contacts the torso top directly, and any attempt to blend weights across that boundary produces a horrible pinch where the head appears to melt into the shoulders.
Use rigid binding instead. Weight every vertex of the head to the head joint at exactly 1.0, weight the torso to the chest joint at 1.0, and allow no blending across the seam. Because the head is a solid disc rotating against an oval, the intersection stays hidden as long as you maintain that 3 to 6 percent overlap and keep the head rotation within about 30 degrees of yaw and 20 degrees of pitch.
If your export target requires a humanoid skeleton, as VRM and most engine retargeting systems do, include a neck joint anyway but give it zero length and zero weights. It exists purely to satisfy the schema. The same logic applies to facial rigging: Threedium can produce a full 52-blendshape ARKit facial rig for characters that need it, but a cutout character does not deform its face at all, so for this style you generally want the mouth and eye shape swaps instead, and you keep the ARKit set only if you specifically need standard face-tracking input to drive those swaps.
Mitten Hands and Stub Arms: Keeping the Rig Simple but Expressive
The arms in this style are tubes with no elbow definition and hands with no fingers. That sounds limiting and is actually liberating, because it removes the two hardest problems in character rigging: elbow twist and finger articulation. A complete cutout character rig usually comes in at 14 to 22 joints total, against 60 or more for a conventional humanoid.
A workable joint list is: root, hips, chest, head, plus shoulder, elbow, and hand on each side, and hip, knee, and foot on each side. That is 16. You can drop the elbows entirely and drive the arm as a single bone if your character never bends its arms, which many background characters never do.
- Keep hand geometry rigid and weighted 1.0 to the hand joint: mitten shapes never deform
- Rotate the whole arm from the shoulder for gestures rather than trying to pose fingers that do not exist
- Allow a small amount of arm-length scaling: paper arms can stretch a little without breaking the illusion
- Keep feet as separate rigid ovals with no ankle roll, since the shoes are essentially stamps under the legs
The Canadian Head Rule: Why Flip-Top Heads Are the Show's Inside Joke
One of the show's longest-running visual gags is that Canadian characters are drawn with heads split horizontally into two halves that flap open and shut when they speak, plus beady dot eyes and a bobbing walk. It is a deliberate signal that these characters are drawn to a different, even more reduced standard than everyone else, and it is one of the most recognizable inside jokes in the series.
Mechanically it is a lovely thing to build in 3D, because it is one of the few places where the style permits actual animated geometry rather than a texture swap. Split the head disc into an upper and lower half along a horizontal plane, add a hinge joint at the back edge, and drive the lower half with a rotation of roughly 10 to 25 degrees for open-mouth speech.
If you build this, cap the internal faces so you never see through the head when it opens, and add a darker interior fill so the gap reads as a shadowed paper edge. A flip-top head is a very specific reference to that gag, so use it knowingly as parody rather than as a default self-portrait construction.
Hopping Walk Cycles: Animating Movement the South Park Way
Movement in this style is intentionally cheap and intentionally bouncy. Legs do not stride realistically because there is nothing to stride with: they are short stubs with a rigid foot. What you get instead is a shuffle with a pronounced vertical bob, and it is the bob that reads as walking, not the leg motion.
Build the cycle on a small number of poses. A workable loop is 8 to 12 frames at 24 fps, or 6 to 8 poses held on twos, with the body translating vertically by about 4 to 7 percent of total character height per step. The arms swing as rigid units from the shoulder, opposite to the legs, with a swing arc of roughly 20 to 30 degrees.
Resist secondary animation entirely: no follow-through on the hair, no squash on the head, no overlapping arm drag. The paper illusion depends on pieces behaving like rigid cut shapes, and the moment something jiggles organically your viewer stops reading it as paper.
Choosing Between True 3D Geometry and 2.5D Billboard Cutouts
There are two legitimate ways to build this style, and picking the wrong one for your use case costs you a lot of rework. True 3D geometry gives each piece real thickness and lets the camera go anywhere. 2.5D billboards keep every piece as a flat plane, usually with a script that rotates them to face the camera, which is closer to how the physical paper original actually worked.
- Camera freedom: true 3D orbits to any angle, billboards break at steep angles unless scripted to face camera
- Triangle cost: 3,000 to 9,000 for true geometry against under 500, often under 200, for billboards
- 3D printing: only true geometry is printable, billboards have no thickness to print
- Best for: true geometry suits games, AR, printing, and orbiting shots; billboards suit locked-camera skits and 2D compositing
For most people the answer is true 3D geometry with deliberately flattened forms, which is what a photo-to-3D generator produces anyway. Choose billboards only if you are recreating a locked-camera skit format and want the absolute purity of the flat look with the lowest possible cost.
Keeping Poly Counts Low: A Style That Rewards Minimal Geometry
This is one of the few character styles where the aesthetically correct answer and the technically cheap answer are the same. There is no anatomy to preserve, no muscle deformation, no cloth simulation, and no subsurface detail. A finished cutout character is one of the lightest character assets you can ship.
Sensible budgets: a hero character for close-up rendering at 6,000 to 12,000 triangles, a game character at 2,000 to 5,000, a background crowd member at 600 to 1,500, and a web or AR viewer target under 10,000 triangles with a single 1024x1024 texture atlas. Threedium applies polygon optimization automatically, and for this style you can usually decimate significantly further by hand without any visible loss.
Spend your triangle budget where the silhouette lives. The circular head outline deserves dense segmentation; the back of the head and the insides of the legs can be brutally reduced. One texture atlas is almost always enough: with five to nine flat colors plus a mouth variant sheet, a single 1024x1024 map covers a whole character.
How Do You Render, Animate, and Print a Flat-Shaded Cutout?
Once you have an exported model, the flat-shaded cutout is unusually versatile because it is so lightweight and so forgiving. It renders instantly, animates with almost no rig, drops into engines at negligible cost, and prints well as a chunky figure. Here are the five things people actually do with a finished south park 3d model and the specific settings each one needs.
Render Flat-Shaded Profile Pictures and Stream Panels
Profile pictures are the most common destination, and the cutout style is genuinely excellent at this because it survives aggressive downscaling. A design built from five flat colors and a strong silhouette still reads perfectly at 64x64 pixels, which is more than most detailed character art can claim.
Render with an orthographic camera rather than a perspective one. Orthographic projection removes the subtle perspective distortion that makes flat pieces look slightly wrong, and it matches how the style is drawn. Use a square framing, put the head in the upper 60 percent of the frame, and output at 1024x1024 with transparency so you can drop the character on any background color later.
For stream panels and banners, render at 3x your final display size and downsample, which keeps the circular head edge perfectly smooth. Because feature swapping is just visibility toggles or UV offsets, generating a dozen expression variants from one model takes minutes.
Animate Cutout Skits in Blender or After Effects
Short skits are where this style earns its reputation, because it was designed from the start for fast turnaround. In Blender, import the FBX, rebuild the materials as Emission shaders, and animate on a simple rig with pose-to-pose keys. Hold poses on twos or even threes: this style looks correct with limited animation and looks strangely slick with smooth interpolation.
Lip sync is a swap problem, not a deformation problem. Build a set of 8 to 12 mouth shapes covering the standard phoneme groups plus a neutral and a wide open, then key visibility or UV offset per syllable. You can key a full minute of dialogue in well under an hour once the shapes exist, and it will look more authentic than any blendshape-driven approach.
If you would rather stay in After Effects, render orthographic passes of each body part with alpha and rebuild the character as a layered composition with a parenting hierarchy. You lose camera freedom and gain a genuinely 2D pipeline, which suits locked-camera dialogue scenes. Either route benefits from rendering a separate matte pass so you can composite the character over painted backgrounds cleanly.
Render your animation at a fixed 24 fps with motion blur disabled. Motion blur on rigid paper shapes reads as a rendering error, not as speed. If you want emphasis on a fast action, use a smear-shaped swap frame instead.
Drop Your Character Into Unity or Unreal as a Low-Poly Game Asset
At two to five thousand triangles with one texture and a sixteen-joint rig, a cutout character is close to free in engine terms. You can populate a crowd scene with hundreds of them on modest hardware, which is exactly why this style is popular for jam games and small indie projects.
In Unity, import the FBX, set the rig to Humanoid only if you need retargeting from a standard animation library, and assign a URP Unlit material. Turn off shadow casting and receiving in the mesh renderer, and disable any post-processing bloom that will make your flat fills glow. In Unreal, import with skeletal mesh enabled, create a material with the shading model set to Unlit, and plug your base color into the emissive input.
- Batch aggressively: identical materials across a cast of characters means one draw call for the whole crowd
- Skip LODs unless your crowd runs into the hundreds; the base mesh is already at LOD-2 density
- Watch your near clip plane: layered face pieces separated by a millimetre can flicker if the clip range is set badly
- Use a flat ambient light setup so unlit characters and lit environment props do not clash tonally
3D Print a Standing Cutout Figure With a Flat Base
A cutout character prints beautifully because it is essentially a stack of simple solids with no thin protrusions and no undercuts worth worrying about. The main structural issue is that the design is top-heavy: a head that is 1.5 times the body width on top of two thin leg stubs will tip over instantly without help.
Solve it with an integrated base. Add a disc 3 to 5 mm thick and roughly 1.2 times the character's widest point in diameter, fused to the feet. For a print height of 80 to 150 mm, which is the sweet spot for a desk figure, that base gives you a stable footprint and a natural place to emboss a name. Thicken the leg stubs to at least 4 mm diameter so they can carry the head mass.
Before slicing, run a manifold check: separate face pieces floating 0.8 mm above the head will simply fall off in a print. Boolean-union every layer into a single watertight solid, or increase layer offsets so features become embossed relief of at least 0.6 mm rather than free-floating decals. On FDM, print at 0.15 to 0.2 mm layer height with 15 percent infill; on resin, orient the figure tilted 20 degrees and support the base rather than the body.
Turn Your Whole Friend Group Into a Matching Cutout Cast
The style rewards ensembles more than almost any other, because the characters are deliberately near-identical in construction and differentiated only by color and hair. A group of six friends rendered as a matching cutout cast looks like a title card, and the shared construction is what makes it work.
Standardize first. Lock your head diameter, body proportions, eye spacing, and color palette rules before you generate anyone, and use identical prompt scaffolding for every person so the only variables are hair, skin tone, and outfit. If you generate people one at a time with drifting prompts, you end up with six characters that are each fine and that do not belong in the same frame.
Then differentiate deliberately. Assign each person one saturated signature garment color, with no two adjacent on the color wheel, vary height by half a head-unit at most, and keep at least two characters in a hat or hood so the group silhouette has rhythm. Casts built this way make excellent matching profile pictures for a team page or a Discord server.
How Does an AI South Park Character Creator Compare to SP-Studio, the Official Avatar Creator, and Manual Modeling?
There are four realistic routes to a cutout-style character of yourself, and they produce genuinely different objects. Two give you a 2D image built from presets, one gives you a hand-built 3D asset at the cost of many hours or several hundred dollars, and one gives you a photo-derived 3D mesh in minutes. Which is right depends entirely on whether you need a picture or a model.
| Route | Output | Photo likeness | Typical time | Typical cost |
|---|---|---|---|---|
| Official avatar creator | 2D image, preset parts | Manual approximation | 5 to 15 minutes | Free |
| SP-Studio | 2D image, large part library | Manual approximation | 15 to 45 minutes | Free |
| Manual modeling in Blender | Full 3D mesh, rigged | Whatever you can sculpt | 6 to 30 hours | Your time |
| Commissioned artist | 2D art or 3D model | Very high, human judgment | 3 to 21 days | 50 to 1,500 USD |
| AI photo-to-3D generation | Textured 3D mesh, exportable | Derived from your photo | Minutes per iteration | Subscription tier |
The Official South Park Avatar Creator: Fun but Locked to 2D Presets
The show's official website has long hosted a free avatar creation tool that lets you assemble a character from officially drawn parts: face shapes, hairstyles, eyes, clothing, and accessories, all in the authentic house style. It is genuinely excellent at what it does, it is free, and because the parts are official artwork the result is always perfectly on-model.
The limits are exactly the limits of any preset system. You get the hairstyles that exist in the library and not the one you actually have, the outfit options are drawn from the show's wardrobe rather than yours, and the output is a flat image at web resolution. There is no mesh, no rig, no export, and no way to take the result into Blender, a game engine, or a 3D printer.
It is also worth being clear about what an official south park avatar creator is for. It is a promotional toy tied to the show's own site and its own terms of use, and the parts it produces are the rights holder's artwork. That is fine for a forum avatar and it is not a foundation for anything you plan to build on or distribute.
SP-Studio: The Fan-Made Classic and Where It Stops Short of 3D
SP-Studio is the long-running fan-made web character maker created by German illustrator Doro Ottermann, and it has been online in some form since the early 2000s. Its part library is enormous, far deeper than the official tool: hundreds of hairstyles, an extensive wardrobe, props, accessories, backgrounds, and a huge range of skin tones and body variations. For pure 2D flexibility it remains the reference point.
What it cannot do is leave two dimensions. The output is a PNG. There is no depth, no camera, no animation, no export to any 3D format, and no way to derive the character from a photograph: you build it by eye, part by part, which takes real time and real judgment if you want a good likeness.
So looking for an sp-studio alternative generally means one of two things. Either you want a bigger 2D part library, in which case there is not really a better option, or you want the same character as an actual object you can rotate, animate, or print. Only the second need pushes you toward 3D generation, and it is worth being honest with yourself about which one you have before you start.
Modeling the Cutout Style by Hand in Blender: Hours of Curve Work
Building this style manually is very achievable and is a great learning project, but it is slower than it looks. The geometry is simple; the tedium is in the curve work. Every hair shape, every garment edge, every eyebrow is a bezier or polygon outline you draw by hand, and getting each one to feel like a cut piece of paper rather than a vector clip-art shape takes iteration.
A realistic breakdown for a first character: 1 to 2 hours on the head disc, torso, limbs, and proportions; 2 to 6 hours on hair, clothing outlines, and accessory shapes; 1 to 2 hours on UVs, flat materials, and the grain overlay; 2 to 4 hours on rigging, weighting, and testing rotation ranges; and another few hours on the mouth and eye shape library. Six to fifteen hours is typical for someone comfortable in Blender, considerably more for a beginner.
The payoff is total control and a reusable template: your second character takes a fraction of the time. If you plan to build a cast of ten, hand modelling starts to look reasonable. If you want one character of yourself this afternoon, it does not.
Commissioning a Custom Cutout Portrait: Typical Prices and Turnaround
Commissioning is the right answer when likeness judgment matters more than speed or control. A human artist will catch the one thing about your face that makes you recognizable and will exaggerate it correctly, which is a genuinely hard thing to specify in a prompt.
- 2D cutout-style portrait, single character: roughly 25 to 120 USD, delivered in 2 to 7 days as a flat image
- 2D group scene, three to six characters: roughly 90 to 400 USD, 5 to 14 days
- Stylized 3D character model, unrigged: roughly 250 to 800 USD, 5 to 14 days
- Stylized 3D character, rigged and game-ready: roughly 600 to 1,500 USD, 10 to 21 days
Those ranges track general freelance character work rather than anything specific to this style, and they vary widely by artist experience and region. Budget extra for commercial usage rights, usually quoted separately. Confirm up front what files you receive: many 3D commissions deliver renders plus a mesh, but not the source file or texture layers.
Where AI Generation Fits: Photo Likeness Plus an Exportable 3D Mesh
AI photo-to-3D sits in the gap none of the other routes cover: it starts from your actual face rather than from a preset library, and it ends with a mesh rather than an image. That combination is the entire reason to use it. If you only want a picture, the free 2D tools are excellent and you should use them. If you want to turn yourself into a south park character that can be rotated, rigged, dropped into an engine, or printed, generation is the fastest route by a wide margin.
The practical workflow through Threedium's 3D model generation tools is upload, prompt, generate, evaluate, refine, export. Each iteration takes minutes, which changes how you work: instead of committing to one design and grinding it to completion, you generate four archetype variations and pick the one that reads best. On enterprise tiers, human 3D artists refine the output, which is the honest answer to the likeness problem: a person makes the final judgment call about which of your features to exaggerate.
Neighbouring adult-cartoon styles carry different technical demands. A Rick and Morty conversion fights wobbly line weight and bulging eyes, a Family Guy conversion fights rounded sitcom proportions, and a generic cartoon brief covers original designs rather than photo likeness. Every photo-to-character style sits under Threedium's turn-yourself-into-a-character tools, so switching styles means swapping the prompt, not restarting the pipeline. To make your own south park character as an original rather than a self-portrait, start from a generic cartoon prompt.
Frequently Asked Questions About South Park-Style Character Creation
Is There an Official South Park Character Creator?
Yes. The show's own website has hosted a free official avatar creation tool for years, letting you assemble a character from officially drawn parts and use the result as a site avatar. It produces a 2D image only, built entirely from preset components, with no export to any 3D format and no photo input.
Alongside it, the fan-made SP-Studio has been running independently since the early 2000s with a much larger part library, and it is also free and also strictly 2D. Neither is a substitute for a 3D pipeline. If your end goal involves rotation, rigging, engine import, AR, or printing, you need a mesh, and that means either hand modelling, a commission, or AI generation from a photo.
Are South Park Characters 2D or 3D?
They look 2D and they are made in 3D. The earliest shorts were literal construction-paper stop motion, but the series moved to computer animation very early in its run and has been produced in Autodesk Maya for the large majority of its history, using flat pieces arranged in shallow depth and shaded to look like paper.
That is a genuinely important fact if you are recreating the style, because it means building it as 3D geometry is faithful to how the look is actually made rather than a conversion away from its native form. The flatness is a shading and construction decision, not an absence of dimension.
Can I Use a South Park-Style Character of Myself Commercially?
Be careful here, and get proper advice before you monetize anything. In general terms, a broad visual style is not itself owned by anyone, but specific character designs, names, logos, and trademarks absolutely are, and the line between "inspired by a style" and "derivative of protected characters" is a legal judgment rather than an artistic one.
Practical guidance: build an original character that is clearly you, never reproduce or closely imitate existing characters from the show, do not use the show's name, logo, title treatment, or character names in your branding or listings, and do not present your work as official or licensed in any way. Personal use, profile pictures, and private prints are a very different risk profile from selling merchandise.
If money is involved, talk to an intellectual property lawyer in your jurisdiction. Nothing on this page is legal advice, and the answer genuinely depends on what you make, how closely it resembles protected material, and where you are selling it.
What Photo Works Best for a South Park-Style Conversion?
A straight-on headshot at 2048 px or larger, evenly lit with no hard shadows, plain background, hair fully visible including the top of the silhouette, neutral closed-mouth expression, and no filters or beauty smoothing. Add a three-quarter view and a full-body shot if you want the outfit reconstructed accurately.
The counterintuitive part is that flattering photos are usually bad inputs. Dramatic lighting bakes shadow into what should be flat color, a tilted head hides your hair silhouette, and shallow depth of field softens exactly the edges the generator needs to read. A plain, well-lit, slightly boring photo beats a great portrait every time.
Can I 3D Print My South Park-Style Character?
Yes, and it is one of the easier character styles to print. There are no thin protrusions, no complex undercuts, and no delicate anatomy. Print at 80 to 150 mm tall for a desk figure, at 0.15 to 0.2 mm layer height on FDM with around 15 percent infill, or on resin tilted about 20 degrees with supports on the base.
Two preparation steps are mandatory. First, add a flat integrated base 3 to 5 mm thick and about 1.2 times the character's widest dimension, because the oversized head makes the figure top-heavy and it will tip without one. Second, boolean-union all your floating face layers into the head so nothing is a separate unattached solid, or convert them into embossed relief of at least 0.6 mm.
How Does South Park Animate a Whole Episode in Six Days?
The famously short production schedule, roughly six days from script to broadcast, works because every part of the style was engineered for speed. Characters are libraries of reusable swappable parts rather than sculpted performances, faces are replaced rather than deformed, and shading is flat so there is essentially no lighting or rendering time to speak of.
Movement follows the same logic. Limited animation on held poses, rigid pieces with no secondary motion, no cloth or hair simulation, and mouth shapes keyed as swaps rather than as blendshape curves. A dialogue-heavy scene can be animated at a pace that would be impossible in almost any other 3D style.
What's the Difference Between a South Park Avatar and a South Park-Style 3D Model?
An avatar is a flat image assembled from preset parts in a web tool, sized for a profile picture and finished at that. A south park 3d model is an actual mesh with geometry, UVs, materials, and usually a skeleton, exported as GLB, USDZ, or FBX and usable in any 3D application.
The practical difference is everything you can do afterwards. An avatar is one fixed pose from one fixed angle. A model can be rotated to any angle, relit, animated, posed, dropped into a game engine or an AR scene, driven by face tracking, rendered at any resolution, and printed as a physical object. You can also generate an unlimited number of images from a model, which means the model is a superset of the avatar.
The cost is effort and specificity: a model needs decisions about proportions, materials, layer depths, and export targets. Choose the avatar if you want a picture today, and the model if you want an asset you will keep using.