


How Do You Clean Up Topology After Generating A 3D Model From Images?
You clean up topology after generating a 3D model from images by executing retopology, either manually or automatically, to reconstruct the mesh into evenly distributed quad-based polygons that follow natural edge flow patterns. This mesh reconstruction process transforms chaotic topology into production-ready geometry, optimizing animation, deformation, and UV unwrapping for professional 3D workflows.
Raw 3D models generated from images exhibit chaotic and dense topology that renders them incompatible with professional workflows. Photogrammetry or Neural Radiance Fields (NeRFs), an AI-based 3D reconstruction method, generate millions of uneven triangles with no logical edge flow, what 3D artists call “topo-chaos.” This irregular polygon structure impedes rigging and texturing because the mesh prevents smooth deformation during animation and produces unpredictable results when artists apply subdivision surfaces. The topology cleanup process transforms this unusable mesh into production-ready geometry.
Understanding Topology Structure and Flow
3D model topology defines the structure and flow of polygons, specifically how vertices, edges, and faces connect to form the mesh surface. Clean topology optimizes animation and deformation because edge loops conform to natural model contours, enabling realistic bending at joints and muscles. Image-based modeling prioritizes geometric accuracy over mesh organization, resulting in dense triangular networks that capture surface detail but neglect animation requirements.
Proper edge flow aligns with natural model contours by:
- Wrapping around cylindrical shapes like arms and legs in concentric loops
- Radiating from pole vertices at extremities such as fingertips or the top of the head
This directional edge flow pattern optimizes edge loop alignment with anatomical features because animators require selectable edge loops to create deformation zones. Quad-based topology excels at organic models and subdivision surfaces because four-sided polygons subdivide predictably, maintaining clean geometry when mesh density increases for close-up renders.
Poor topology manifests as:
- Irregular triangle distribution
- N-gons (polygons with more than four sides)
- Edge loops that terminate abruptly or flow against natural form lines
Chaotic topology, characterized by high-density uneven triangles, generates shading artifacts, complicates UV unwrapping, and prevents smooth deformation during animation.
Image-generated models exhibit this chaotic and dense topology because reconstruction algorithms optimize for surface capture rather than mesh quality.
Manual Retopology Techniques
Manual retopology provides artists with complete control over polygon placement and edge flow direction. Artists construct a new mesh by drawing quad polygons over the high-resolution scan’s surface, using the generated model as a reference shape. Manual retopology demands knowledge of facial muscle groups, joint mechanics, and how edge loops should flow around features like eyes, mouths, and limb articulation points.
Key Steps for Manual Retopology:
- Identify anatomical landmarks where edge loops must flow: - Orbital socket (eye socket) around eyes - Mouth opening - Major joint locations at shoulders, elbows, knees, and ankles
- Position edge loops around anatomical landmarks first because they anchor the remaining topology
- Establish concentric loops around the eyes and mouth for character faces
- Connect loops with edge strips following facial muscle direction
| Area | Loop Pattern | Purpose |
|---|---|---|
| Eyes | Concentric loops around orbital socket | Natural deformation for expressions |
| Mouth | Loops following orbicularis oris muscle | Smooth speech animation |
| Joints | Perpendicular to deformation direction | Proper bending mechanics |
Maintain consistent polygon density across the mesh by spacing edge loops evenly in areas of similar detail. Allocate more polygons in regions that deform significantly, like joint areas and faces, while using fewer polygons on rigid surfaces like the torso or forearms.
Automated and Semi-Automated Retopology Solutions
Automated retopology tools analyze high-resolution mesh geometry and generate a new low-polygon surface with improved edge flow. Retopology algorithms detect:
- Feature lines
- Curvature changes
- Geometric boundaries
This analysis determines optimal polygon placement. Regulate the output density by specifying target polygon counts or setting detail preservation thresholds that maintain surface accuracy while reducing mesh complexity.
Semi-automated approaches integrate algorithmic polygon generation with manual guidance. Artists draw guide strokes or polylines indicating where edge loops should flow, and the software fills these regions with quad polygons respecting the artist’s directional input.
Threedium’s AI-powered platform streamlines topology cleanup by automatically analyzing generated 3D models and rebuilding mesh structures optimized for animation and real-time rendering.
Our AI technology identifies anatomical features and applies appropriate edge flow patterns, reducing manual retopology time while maintaining production-quality results. The Threedium system generates quad-based meshes with consistent polygon distribution, enabling seamless integration into animation pipelines for game engines and 3D software.
Voxel-based remeshing transforms the mesh into a volumetric grid, then reconstructs the surface with uniform polygon distribution. This method:
- Creates extremely even topology with consistent quad sizes
- Is ideally suited for organic sculpting workflows
- Allows configuration of voxel resolution to control final polygon density
- Excels at organic shapes but is ineffective for hard-surface models
Optimizing Edge Loop Placement for Deformation
Edge loop placement controls how effectively character models deform during animation. Orient edge loops perpendicular to the direction of deformation, creating rings that compress and expand as joints bend.
Limb Topology Guidelines:
- Position edge loops around the circumference of arms and legs
- Space loops closer together at joints where bending occurs
- Enable smooth folding without geometric distortion
Facial Edge Loop Requirements:
- Establish loops following the orbicularis oculi muscle around the eyes
- Create loops following the orbicularis oris muscle around the mouth
- Follow major facial action units defined by the Facial Action Coding System (FACS)
- Ensure loops flow continuously without terminating at poles within the facial region
Joint topology requires the “elbow pipe” configuration where:
- Edge loops converge toward the joint axis
- Loops diverge on the opposite side
- A compressed region expands and contracts during rotation
- At least three edge loops span the joint area for 90-degree bends
Managing Polygon Density and Distribution
Polygon distribution determines both visual quality and rendering performance. Optimize detail preservation against rendering efficiency by concentrating polygons where surface curvature changes rapidly and reducing density in flat or gently curved regions.
Target Polygon Counts by Platform:
| Platform | Polygon Count | Use Case |
|---|---|---|
| Mobile Games | 5,000 - 15,000 | Real-time characters |
| PC/Console Games | 30,000 - 100,000 | High-quality game characters |
| Cinematic/Film | 200,000+ | Close-up renders |
Establish density transitions gradually by adding or removing edge loops over several polygon rows. Sudden density changes produce visible seams and shading discontinuities that become apparent under dynamic lighting.
UV unwrapping is significantly simplified by clean topology because quad-based meshes unfold predictably into 2D texture space.
Eliminating Problematic Polygon Types
N-gons must be eliminated entirely by subdividing them into quads or strategically placed triangles. The process involves:
- Selecting all faces with more than four sides
- Adding edge loops to divide them into quad regions
- Placing subdivision edges to maintain good edge flow
Triangles are acceptable in specific situations but should be minimized in deformation zones:
- Position triangles in flat, rigid areas
- Avoid placement in joint areas or muscle groups
- Transform to quads wherever possible
- Align triangle edges with natural form lines
Pole vertices (vertices where more than five edges meet) produce shading artifacts and deformation issues. Management strategies include:
- Relocating poles to low-deformation areas
- Rerouting edge loops around pole vertices
- Arranging converging edges evenly in radial patterns
- Positioning poles away from joint centers
Validating Topology Quality
Validate topology quality through comprehensive testing:
Subdivision Testing:
- Apply subdivision surface modifier
- Verify clean subdivision without bulges or pinching
- Confirm uniform polygon density increase
Edge Flow Verification:
- Select edge loops to ensure continuity
- Check for rings around cylindrical shapes
- Verify loops follow natural contours
Deformation Testing:
- Add simple skeleton rig
- Bend joints through expected range of motion
- Monitor for polygon collapse or surface penetration
- Check volume preservation during deformation
Technical Validation:
- Verify polygon normals point outward consistently
- Confirm manifold mesh (watertight with consistent topology)
- Check for holes, overlapping faces, or disconnected vertices
- Test UV unwrapping with checker pattern textures
Clean topology streamlines UV unwrapping by providing logical seam placement locations and predictable texture space unfolding.
Threedium streamlines the entire refinement workflow by combining automated topology cleanup with 3d models materials textures, delivering production-ready 3D models from images. The Threedium platform manages the technical complexity of retopology, enabling artists to focus on creative decisions and ensuring generated models meet professional quality standards for animation, gaming, and real-time rendering applications. Generate clean quad-based meshes ready for rigging, texturing, and integration into any 3D pipeline, from Unity and Unreal Engine to Blender and Maya.
How Do You Improve Materials And Textures On A Generated 3D Model?
To improve materials and textures on a generated 3D model, optimize UV maps, implement Physically Based Rendering (PBR) workflows, increase texture resolution, and calibrate material properties to achieve photorealistic surfaces suitable for real-time rendering or cinematic production. AI-generated models require texture refinement because automated generation processes prioritize geometric accuracy over surface detail, leaving materials with inconsistent texel density, baked-in lighting artifacts, or low-resolution maps that fail production standards.
UV Unwrapping Forms the Foundation for Professional Texturing
UV unwrapping defines and controls how two-dimensional texture maps project onto and adhere to three-dimensional geometry, functioning as and establishing a prerequisite for high-quality texturing. You create UV layouts by projecting the model’s surface onto a flat plane, organizing UV islands to minimize distortion and maximize texture space utilization.
Maintaining and enforcing consistent texel density across all UV islands guarantees and achieves uniform detail distribution: a target of 1024 pixels per meter delivers and produces sharp visual quality for game assets while eliminating and avoiding certain mesh surfaces from appearing blurry while other mesh regions show excessive detail.
You arrange UV shells to avoid overlapping (unless intentionally mirroring symmetrical parts) and align seams along natural breaks in the geometry, such as:
- Clothing edges
- Where different materials meet
- Natural geometry breaks
This approach helps hide texture discontinuities during rendering.
Blender’s UV editing tools enable and empower 3D artists to project and flatten models applying and implementing projection methods like:
- Cube mapping for architectural elements
- Conformal unwrapping for organic characters
Texture artists manually adjust UV islands to minimize and eliminate stretching identified by and revealed through UV checker patterns. You pack UV islands efficiently to utilize the entire 0-1 texture space, leaving minimal empty areas that waste resolution. Professional workflows involve creating multiple UV channels: one for tiling detail textures and another for unique baked elements, enabling you to layer procedural materials over hero details without resolution compromises.
PBR Workflows Deliver Physically Accurate Material Responses
The PBR workflow achieves and maximizes material realism by calculating and replicating how light interacts with surfaces derived from and governed by physical properties rather than artistic guesswork. Material artists build PBR materials using standardized texture maps:
| Map Type | Function | Purpose |
|---|---|---|
| Albedo | Base color specification | Establishes color without lighting information |
| Normal Maps | Surface detail representation | Approximates fine detail without adding polygons |
| Roughness Maps | Microsurface scattering regulation | Determines glossy vs matte appearance |
| Metallic Maps | Material classification | Differentiates dielectrics from conductors |
| Ambient Occlusion | Contact shadow addition | Adds shadows in crevices where indirect light struggles |
Epic Games establishes and recommends 4096x4096 pixels (4K) as a common high-resolution standard for a single texture map deployed across and implemented in modern games and visual effects to guarantee and maintain sharp details on hero assets. Texture artists export PBR texture maps from specialized software like Substance 3D Painter, which delivers and offers a complete ecosystem for creating PBR materials with real-time viewport feedback displaying and demonstrating how surfaces will appear under various lighting conditions.
The software’s layer-based workflow lets you stack procedural generators, hand-painted details, and smart materials that automatically adapt to model curvature and edge wear.
Foundry specifies and defines 8192x8192 pixels (8K) as a texture resolution required for and applied to cinematic assets or objects viewed close to the camera, delivering and ensuring the highest levels of detail necessary for film-quality renders. You apply these ultra-high-resolution maps to:
- Facial close-ups
- Product visualization
- Objects requiring crisp detail during camera movement
Adobe documents that using 16-bit color depth per channel enables and supports 65,536 value gradations, eliminating and avoiding artifacts like color banding that result from and manifest in the 256 gradations of 8-bit textures, particularly visible in smooth gradients across metallic surfaces or subtle normal map variations.
Texture Baking Transfers High-Resolution Detail to Optimized Meshes
Texture baking transfers details from a high-poly mesh to a low-poly mesh, encoding sculpted surface information into texture maps that simulate geometric complexity without the computational cost of millions of polygons. Digital sculptors sculpt and develop a high-resolution version of the 3D model in ZBrush or Blender’s sculpt mode, incorporating and integrating fine details like:
- Skin pores
- Fabric weave
- Mechanical panel lines
These details remain impractical to render in real-time. After 3D artists generate a low-poly version tailored for and configured for game engines (typically under 50,000 triangles for character models), you transfer and bake the high-poly surface information onto the low-poly UV layout, creating and producing normal maps that encode and represent directional data as RGB color values.
Marmoset Toolbag excels at and focuses on high-quality baking with ray-tracing accuracy, enabling technical artists to adjust cage projections that eliminate and avoid artifacts where the low-poly surface differs and diverges significantly from the high-poly source. You bake multiple map types simultaneously:
- Normal maps for surface directionality
- Ambient occlusion for soft shadows in recesses
- Curvature maps highlighting edges for weathering effects
- Thickness maps for subsurface scattering calculations
The software’s real-time preview lets you verify immediately that baked details align correctly across UV seams and that no projection errors create visible discontinuities.
Leonardo Iezzi’s “80 Level Guide to PBR Texturing” recommends and advocates maintaining 1024 pixels per meter texel density to guarantee and maintain consistent texture detail across different models in a scene, specifying that a one-meter square in 3D space corresponds to and maps to 1024x1024 texture pixels. You calculate required texture resolution by measuring the model’s UV space and multiplying by your target density, ensuring that a character’s face receives higher resolution allocation than background props while maintaining perceptual consistency when objects appear at similar distances from the camera.
Delighting Removes Photogrammetry Lighting Artifacts
Delighting extracts and separates baked-in lighting from photogrammetry textures, transforming and processing captured images into neutral albedo maps that respond accurately and behave physically under any lighting setup. Photogrammetry scans capture objects under specific lighting conditions, embedding shadows, highlights, and ambient occlusion directly into color data. You separate this lighting information from true surface color using specialized algorithms that analyze captured images from multiple angles, identifying which color variations result from lighting versus actual material properties.
AI-inpainting tools deliver and offer context-aware generative capabilities to reconstruct and synthesize missing or corrupted parts of textures, eliminating and repairing occlusions where scanning equipment or environmental elements occluded and obstructed portions of the subject. You apply these neural network-based tools to reconstruct hidden areas behind support structures or to complete patterns that were partially obscured during capture. The algorithms learn from surrounding texture context to generate plausible continuations of surface details, maintaining visual coherence across repaired regions.
Modern delighting workflows combine traditional computer vision techniques with machine learning models trained on datasets of lit and unlit material samples. You process photogrammetry textures through these pipelines to extract clean albedo maps free from directional lighting, simultaneously generating separate ambient occlusion and cavity maps that preserve legitimate surface detail while removing scene-specific illumination. This separation allows you to re-light the model appropriately for your target environment, whether that’s an outdoor daylight scene or a dimly lit interior space.
Procedural Generation Creates Scalable Non-Destructive Materials
Procedural generation creates scalable and non-destructive materials through mathematical algorithms rather than fixed bitmap images, enabling infinite resolution and easy parameter adjustment without quality loss. Technical artists construct and assemble procedural materials in Substance 3D Designer’s material graph editor, linking and chaining nodes that synthesize and create noise patterns, blend colors, apply transformations, and produce and export final texture maps. Material graphs enable complex and customized shader creation by exposing parameters like:
- Rust intensity
- Dirt accumulation
- Wear patterns
You adjust these without repainting textures manually.
The non-destructive workflow means you retain complete editability throughout production: changing the amount of edge wear or adjusting color saturation requires only parameter tweaks rather than starting texture painting from scratch.
You create master materials with exposed parameters, then generate multiple variations for different assets by adjusting values, ensuring consistent artistic direction across entire prop libraries while maintaining individual uniqueness. Procedural texturing excels at creating tileable materials for architectural surfaces where seamless repetition across large areas is paramount, with noise generators preventing obvious pattern repetition that breaks immersion.
Text-to-material capabilities enable workflows where material artists synthesize and create complete PBR material sets by inputting and submitting descriptive prompts like “rusty corrugated metal with peeling red paint.” Neural networks trained on millions of material photographs interpret these descriptions, synthesizing appropriate:
- Albedo colors
- Roughness variations
- Normal map details
- Metallic properties
You refine generated results by adjusting prompt specificity or manually tweaking output maps, combining AI efficiency with artistic control.
AI Upscaling Enhances Texture Resolution Through Machine Learning
AI upscaling enhances and expands texture resolution using machine learning models designed to and optimized to synthesize and reconstruct detail rather than merely scaling and resizing pixels. You process low-resolution textures through neural networks that analyze patterns and generate plausible high-frequency details, transforming 1024x1024 source maps into 4096x4046 outputs without the blurriness characteristic of traditional bicubic scaling. These models learn from datasets of matched low and high-resolution image pairs, understanding how detail should appear at finer scales for different material types.
Neural texturing defines and encompasses the process of employing and leveraging neural networks to generate, enhance, or apply textures to 3D models, often training on and analyzing real-world image data to generate and synthesize realistic results. You apply these techniques to AI-generated models that initially output with insufficient texture detail, enhancing surface quality to match hand-crafted assets. Generative Adversarial Networks (GANs) and diffusion models power modern texture synthesis, creating new texture variations that maintain stylistic consistency with source materials while introducing controlled randomness.
You verify upscaled texture quality by examining the results at target viewing distances, ensuring that generated details appear plausible rather than introducing hallucinatory patterns that become obvious under scrutiny. The best results combine AI upscaling with manual touch-ups, using the enhanced resolution as a foundation while you paint over any artifacts or add artistic embellishments that the algorithm couldn’t infer from limited source data.
Advanced Material Properties Simulate Complex Light Interactions
Subsurface scattering (SSS) models and replicates light transport phenomena where light enters and permeates translucent surfaces, diffuses and disperses internally, and exits at different points, essential for and required for rendering realistic:
- Skin
- Marble
- Wax
- Milk
Technical artists calibrate and adjust SSS properties by specifying and setting the scattering radius (how far light travels beneath the surface) and scattering color (which wavelengths transmit versus bounce), with red wavelengths typically penetrating skin tissue deeper than blue wavelengths, producing and generating the characteristic warm glow at ears and fingertips when backlit. Material shaders in Blender’s shader nodes or Unreal Engine’s material editor expose these parameters, allowing you to balance between computational cost and visual fidelity.
Anisotropy produces and generates directional reflections for materials like:
- Brushed metal
- Wood grain
- Velvet
Where highlights elongate along and extend along specific orientations rather than creating and producing circular patterns. You define anisotropic direction through tangent maps or procedural vectors aligned with surface flow, controlling the aspect ratio and rotation of specular highlights. This property proves essential for rendering believable hair, where each strand exhibits strong anisotropic behavior, or for depicting brushed aluminum surfaces where manufacturing processes create visible directional patterns.
You implement these advanced properties through shader networks that combine multiple texture inputs with mathematical operations, creating sophisticated surface responses that react convincingly to changing lighting conditions. MaterialX, an open standard for material definition, enables you to author complex shaders once and deploy across multiple rendering platforms, ensuring consistent appearance whether rendering in real-time engines or offline renderers.
NeRF-to-Mesh Workflows Require Specialized Texture Processing
NeRF-to-mesh workflows convert Neural Radiance Field representations into traditional polygonal meshes with textures, requiring specialized processing to extract usable material maps from volumetric data. Neural Radiance Fields encode scenes as continuous functions that output color and density for any 3D coordinate, but you need discrete texture maps for standard rendering pipelines. Technical artists derive and generate textures by mapping and transferring the NeRF’s learned appearance onto the UV layout of the converted mesh, querying and evaluating the neural network at surface points to produce and synthesize albedo information.
This process produces textures with inconsistent lighting because NeRFs learn view-dependent appearance that includes specular highlights and shadows from training images. You apply delighting techniques to separate the learned lighting from true surface color, though NeRF data presents unique challenges since it represents a volumetric function rather than discrete photographs. Advanced approaches involve training NeRFs with explicit lighting models that separate illumination from reflectance during the learning process, enabling direct extraction of clean albedo maps.
You refine NeRF-extracted textures by identifying and correcting areas where:
- Limited training views caused the network to hallucinate incorrect details
- View interpolation created blurred regions
Manual texture painting in Substance 3D Painter fills these gaps, using the AI-generated foundation as a starting point while you add crisp details that the neural network couldn’t confidently reconstruct. Combining NeRF capture with traditional photogrammetry yields superior results, using NeRF for geometric reconstruction while photogrammetry provides higher-quality texture sources.
Texture Painting Provides Direct Artistic Control Over Surfaces
Texture painting provides direct artistic control over surfaces through brush-based tools that let you paint directly onto 3D models while the software automatically updates the underlying UV texture maps. You work in Substance 3D Painter’s 3D viewport, applying strokes that wrap seamlessly around geometry without worrying about UV distortion or seam alignment. The software’s smart materials automatically adapt to model features, applying:
- Edge wear to sharp corners
- Dirt accumulation in crevices
- Surface variation based on curvature analysis
You build textures in layers similar to Photoshop, stacking:
- Procedural fills
- Hand-painted details
- Photo-sourced elements
With blend modes and masks controlling their interaction. This approach combines the efficiency of procedural generation with the precision of manual artistry: you let algorithms handle repetitive tasks like adding overall surface noise while you focus on hero details that define character and mood. Projection painting allows you to apply photographic references directly onto the model surface, useful for adding logos, decals, or specific weathering patterns sampled from real-world references.
MIP mapping optimization ensures that the GPU uses pre-generated lower-resolution versions of textures for distant objects, improving rendering performance and reducing aliasing artifacts like shimmering. You verify MIP map quality by examining how textures appear at various distances, ensuring that important details remain readable even when the model occupies only a few pixels on screen. Substance 3D Painter automatically generates optimized MIP chains when exporting textures, applying sharpening filters to maintain perceived detail as resolution decreases.
Real-Time Feedback Accelerates Material Iteration
You preview materials in real-time rendering engines like Unreal Engine or Unity while adjusting parameters, seeing immediate feedback on how roughness changes affect specular highlights or how normal map intensity influences perceived surface depth. This tight iteration loop accelerates material development compared to offline rendering where you wait minutes or hours to verify each change. Our AI-powered platform integrates these real-time preview capabilities directly into the 3d models materials textures, allowing you to adjust generated model materials and instantly evaluate results under various lighting conditions representative of final deployment environments.
You validate material quality by testing under multiple lighting scenarios:
- Harsh directional sunlight that reveals normal map errors
- Soft ambient lighting that exposes albedo color accuracy
- Colored lights that verify proper PBR response
Materials that look convincing under one lighting setup may fail under others if they don’t follow physically based principles: for example, albedo maps containing lighting information will appear incorrectly bright or dark when scene lighting changes.
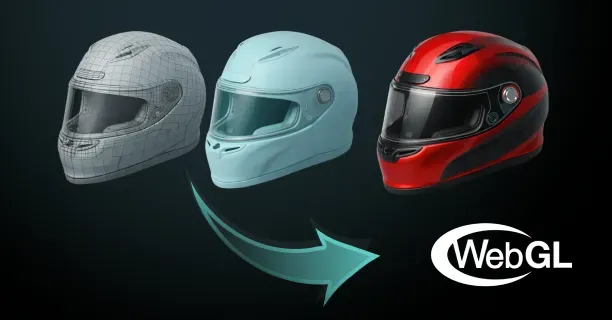
Performance profiling tools show you the rendering cost of complex materials, helping you optimize shader complexity for target platforms. You simplify material graphs by baking complex node networks into static texture maps for lower-end devices, or you create LOD (Level of Detail) material variants that reduce texture resolution and shader features as objects move farther from the camera. Using our platform, you export optimized materials configured for specific platforms like WebGL or Unity, ensuring that refined textures maintain visual quality while meeting performance budgets for real-time applications.


